SpringBoot+MyBatis-plus实现CRUD (踩坑总结!!!)
一、创建项目,引入相应的依赖 (项目源码在文末)
(不要选Module !!!!)
      com.baomidou
      mybatis-plus-boot-starter
      3.4.2
二、创建表和对应的实体类
CREATE TABLE `user` (
  `id` bigint(20) NOT NULL AUTO_INCREMENT,
  `user_name` varchar(255) DEFAULT NULL COMMENT '用户名',
  `user_password` varchar(255) DEFAULT NULL COMMENT '密码',
  `email` varchar(255) DEFAULT NULL COMMENT '邮箱',
  `phone` varchar(255) DEFAULT NULL COMMENT '手机号',
  `create_time` datetime DEFAULT NULL COMMENT '创建时间',
  PRIMARY KEY (`id`)
) ENGINE=InnoDB DEFAULT CHARSET=utf8mb4 COMMENT='用户表';
import com.baomidou.mybatisplus.annotation.IdType;
import com.baomidou.mybatisplus.annotation.TableId;
import lombok.AllArgsConstructor;
import lombok.Data;
import lombok.NoArgsConstructor;
import java.util.Date;
@Data
@AllArgsConstructor
@NoArgsConstructor
public class User {
@TableId(value = "id", type = IdType.AUTO)
private Long id;
//用户名
private String userName;
//密码
private String userPassword;
//邮箱
private String email;
//手机号
private String phone;
//创建时间
private Date createTime;
// private String createTime;
}三、创建对应的实现层和控制层
import com.example.registerdemo.entity.User;
import com.example.registerdemo.param.UserRegisterParam;
import com.example.registerdemo.pojo.UserDTO;
import com.example.registerdemo.service.UserService;
import org.springframework.beans.BeanUtils;
import org.springframework.validation.annotation.Validated;
import org.springframework.web.bind.annotation.*;
import javax.annotation.Resource;
import javax.validation.constraints.NotNull;
import java.util.List;
@RestController
@RequestMapping("/user")

public class UserController {
    @Resource
    private UserService userService;

    //用户注册,用于处理用户注册请求
    @PostMapping("/register")
    public String userRegister(@Validated @RequestBody UserRegisterParam param) {
        User user = new User();
        BeanUtils.copyProperties(param,user);
        if(userService.userRegister(user)) {
            return "注册成功";
        }
        return "注册失败";
    }

    //获取用户的所有信息,用于处理查询所有用户的信息的请求
    @PostMapping("/getAllUser")
    public List getAllUserInfo() {
        return userService.getAllUserInfo();
    }

    @PostMapping("/getUserByName")
    @Validated
    public List getUser(@RequestParam("username") @NotNull(message = "用户名不能为空") String name){
        return userService.getUsersByName(name);
    }

    /**
     * 更新用户信息
     */
    @PostMapping("/getUpdateUser/{id}")
    public List getUpdateUser(@RequestBody UserDTO userDTO){
        return userService.updateUser(userDTO);
    }

    /**
     * 删除用户
     */
    @PostMapping("/deleteUser/{id}")
    public void deleteUser(@PathVariable Long id) {
        userService.deleteUser(id);
    }
}
import com.baomidou.mybatisplus.core.conditions.query.QueryWrapper;
import com.example.registerdemo.entity.User;
import com.example.registerdemo.mapper.UserMapper;
import com.example.registerdemo.pojo.UserDTO;
import com.example.registerdemo.service.UserService;
import org.springframework.beans.BeanUtils;
import org.springframework.stereotype.Service;
import org.springframework.util.DigestUtils;
import org.springframework.util.StringUtils;
import javax.annotation.Resource;
import java.util.Date;
import java.util.List;
@Service
public class RegisterUserServiceImpl implements UserService {
@Resource
private UserMapper userMapper;
@Override
/**
* 用户注册功能(插入)
*
* 通过当前日期时间获取格式为 "yyyy-MM-dd HH:mm:ss" 的字符串 createTime。
* 设置用户对象的 createTime 属性为 createTime。
* 插入用户对象到数据库表中,如果受影响的行数大于0,则返回 true,否则返回 false。
*/
public boolean userRegister(User user) {
user.setCreateTime(new Date());
if(userMapper.insert(user)>0) {
return true;
}
return false;
}
/**
* 查询全部
* @return
*/
@Override
public List getAllUserInfo() {
return userMapper.selectList(null);
}
/**
* 按照姓名进行查询
* @param name
* @return
*/
@Override
public List getUsersByName(String name) {
QueryWrapper queryWrapper = new QueryWrapper<>();
queryWrapper.eq("name", name);
return userMapper.selectList(queryWrapper);
}
/**
* 按照id进行更新
*
* @param userDTO
* StringUtils.isBlank和StringUtils.isEmpty主要区别就是
* StringUtils.isBlank会认为全是空格的字符串为空,而StringUtils.isEmpty则将空格字符串认为不是空
*/
@Override
public List updateUser( UserDTO userDTO) {
User user = new User();
BeanUtils.copyProperties(userDTO, user);
user.setId(userDTO.getId());
if (!StringUtils.isEmpty(userDTO.getUserPassword())) {
user.setUserPassword(userDTO.getUserPassword());
}
userMapper.updateById(user);
return null;
}
/**
* 按照id进行删除
* @param id
*/
@Override
public void deleteUser(Long id) {
userMapper.deleteById(id);
}
}
四、踩坑总结
当然我没有单纯的从这个CRUD的内容上讨论踩坑,但是在这个过程中,遇到了一点相关的问题相信后面可能也会遇到,就在此进行一个总结吧。
踩坑①、
我在写 “用户注册功能(其实就是简单的插入)”的时候,使用了BeanUtils工具类中的copyProperties的方法(当然,这是一种浅拷贝的方法,这只能拷贝同类型的数据,
先来说一下什么是浅拷贝,深拷贝。这两者最主要的区别就在于是否是复制了对象的真实实体还是说只是使用了一个指针,两者指向的是内存中的同一个对象。
浅拷贝(shallowCopy)只是增加了一个指针指向已存在的内存地址;
深拷贝(deepCopy)是增加了一个指针并且申请了一个新的内存,使这个增加的指针指向这个新的内存;同时如果一个类中包含有引用类型变量,则该类拷贝以后引用类型也会被拷贝。)
这里面还有一个易错点就是,谁拷贝谁,不要弄反了!
点进方法的源码进行查看,可以发现:
方法中第一个元素的位置是,原始数据,即传进来的数据,第二位置放的数据是目标对象的数据,即复制后的数据,后面要使用的也就是第二个方法的数据,这两个位置的顺序一定不能反。
踩坑②、
在进行用户注册的时候,还加入了“参数校验”的功能,然而我第一次引用的依赖是这个,导致我参数校验的时候,发现 @Validated注解根本没有起作用。
     javax.validation
     validation-api
     1.1.0.Final
后来修改成下面引用的依赖后,注解正常有效果了 。
     org.springframework.boot
     spring-boot-starter-validation
踩坑③、
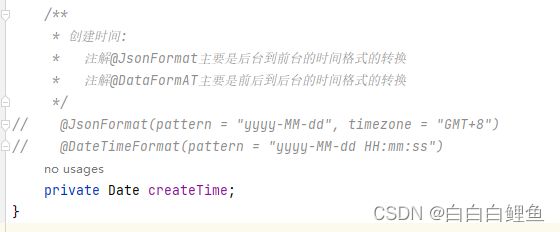
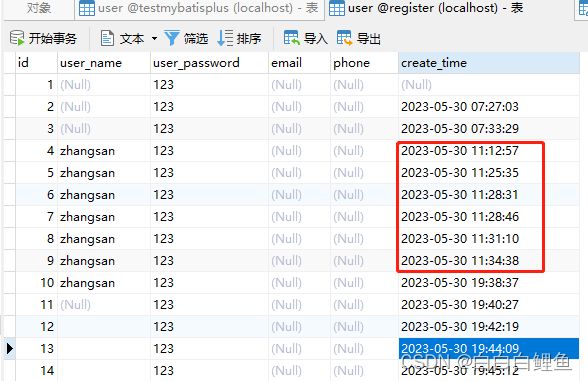
在创建时间属性时,发现生成的时间,总是和真实的时间没有对应上(其实就是时间的时区没有对应上!!),后面在时间的属性上,加入了注解@DateTimeFormat,@JsonFormat 好像也没有生效。
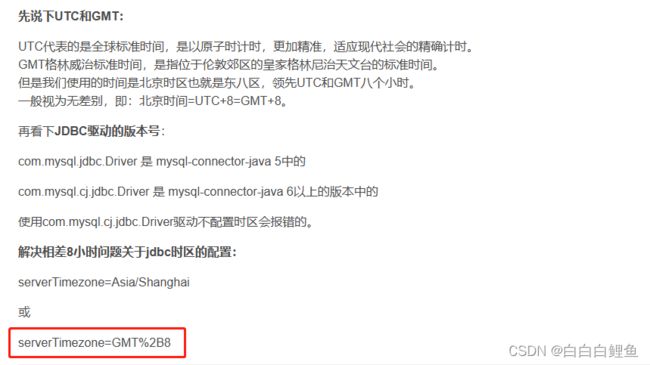
这个尝试了很多方法也没有效果,后面换了一个思路,尝试在yml文件里面配置看看,然后发现了这篇文章:
搜索的关键词有的时候也挺重要的
spring:
  application:
    name: registerdemo
  datasource:
    driver-class-name: com.mysql.cj.jdbc.Driver
    url: jdbc:mysql://localhost/register?useUnicode=true&characterEncoding=utf-8&useSSL=true&serverTimezone=GMT%2b8&allowMultiQueries=true
这样配置好在运行就好了,那个时间格式化的注解也不用加了。
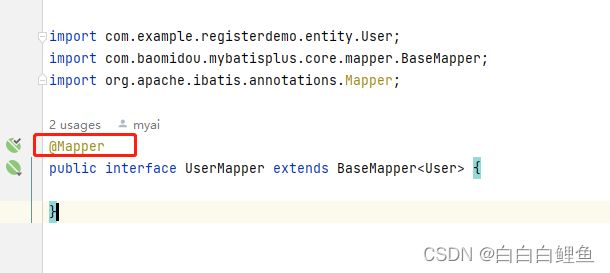
最后还要注意的一个小点就是 @Mapper 不要忘记加了。


