Framework篇 - 一文搞懂 Activity、View、Window、ViewRootImpl

本文源代码基于 Android 7.0。
前面的文章讲解了 startActivity 的过程:Framework篇 - startActivity 启动过程,那么 Activity、Window、View 和 ViewRootImpl 它们之间到底是一个怎么样的关系呢?
目录:
- Window 的创建过程
- 关系图
- getWindowManager().addView() 和 addContentView() 的区别
- Dialog 和 PopupWindow 的区别
- 一个 Activity 有多少个 ViewRootImpl
- Window 的分类
- 理解 Window 的作用
1. Window 的创建过程
Framework篇 - startActivity 启动过程 完整解释了 Activity 的启动过程,在 ActivityThread.performLaunchActivity() 中,创建Activity 的实例,接着会调用 Activity.attach() 来初始化一些内容,而 Window 对象就是在 attach 里进行创建初始化赋值的。
- 1.1 ActivityThread
/base/core/java/android/app/ActivityThread.java
system_server 进程的 ApplicationThreadProxy 处理 attach application,然后 ActivityThread 的 H 收到创建 Activity 的消息:
public final class ActivityThread {

    private class H extends Handler {
        public void handleMessage(Message msg) {
            switch (msg.what) {
                case LAUNCH_ACTIVITY: {
                    final ActivityClientRecord r = (ActivityClientRecord) msg.obj;
                    r.packageInfo = getPackageInfoNoCheck(
                            r.activityInfo.applicationInfo, r.compatInfo);
                    handleLaunchActivity(r, null, "LAUNCH_ACTIVITY");
                } break;
        }
    }
}
里面会执行 handleLauchActivity():
private void handleLaunchActivity(ActivityClientRecord r, Intent customIntent, String reason) {
        //...
        WindowManagerGlobal.initialize();
        // 加载 Activity
        Activity a = performLaunchActivity(r, customIntent);
        // Activity 不为 null
        if (a != null) {
            r.createdConfig = new Configuration(mConfiguration);
            reportSizeConfigurations(r);
            Bundle oldState = r.state;
            // 执行 onResume
            handleResumeActivity(r.token, false, r.isForward,
                    !r.activity.mFinished && !r.startsNotResumed, r.lastProcessedSeq, reason);
            // 因为一些原因需要执行 onPause
            if (!r.activity.mFinished && r.startsNotResumed) {
                performPauseActivityIfNeeded(r, reason);
                if (r.isPreHoneycomb()) {
                    r.state = oldState;
                }
            }
        } else {
            // 如果 Activity 为 null,则 finish
            try {
                ActivityManagerNative.getDefault()
                    .finishActivity(r.token, Activity.RESULT_CANCELED, null,
                            Activity.DONT_FINISH_TASK_WITH_ACTIVITY);
            } catch (RemoteException ex) {
                throw ex.rethrowFromSystemServer();
            }
        }
    }
我们再来看看 performLaunchActivity():
/**
     * 该方法主要功能:
     *
     * 创建LoadedApk对象;
     * 创建ComponentName对象;
     * 获取ClassLoader;
     * 创建目标Activity对象;
     * 创建Application对象;
     * 回调onCreate(),一般地该方法内执行setContentView()操作;
     */
    private Activity performLaunchActivity(ActivityClientRecord r, Intent customIntent) {
        ActivityInfo aInfo = r.activityInfo;
        if (r.packageInfo == null) {
            // 创建LoadedApk对象
            r.packageInfo = getPackageInfo(aInfo.applicationInfo, r.compatInfo,
                    Context.CONTEXT_INCLUDE_CODE);
        }

        ComponentName component = r.intent.getComponent();
        if (component == null) {
            component = r.intent.resolveActivity(
                mInitialApplication.getPackageManager());
            r.intent.setComponent(component);
        }

        if (r.activityInfo.targetActivity != null) {
            // 创建ComponentName对象
            component = new ComponentName(r.activityInfo.packageName,
                    r.activityInfo.targetActivity);
        }

        Activity activity = null;
        try {
            // 获取ClassLoader
            java.lang.ClassLoader cl = r.packageInfo.getClassLoader();

            // 创建目标Activity对象,反射调用
            activity = mInstrumentation.newActivity(
                    cl, component.getClassName(), r.intent);
            StrictMode.incrementExpectedActivityCount(activity.getClass());
            r.intent.setExtrasClassLoader(cl);
            r.intent.prepareToEnterProcess();
            if (r.state != null) {
                r.state.setClassLoader(cl);
            }
        } catch (Exception e) {
            // ...
        }

        try {
            // 创建Application对象
            Application app = r.packageInfo.makeApplication(false, mInstrumentation);
            if (activity != null) {
                // 创建 context 对象
                Context appContext = createBaseContextForActivity(r, activity);
                CharSequence title = r.activityInfo.loadLabel(appContext.getPackageManager());
                Configuration config = new Configuration(mCompatConfiguration);
                if (r.overrideConfig != null) {
                    config.updateFrom(r.overrideConfig);
                }
                Window window = null;
                if (r.mPendingRemoveWindow != null && r.mPreserveWindow) {
                    window = r.mPendingRemoveWindow;
                    r.mPendingRemoveWindow = null;
                    r.mPendingRemoveWindowManager = null;
                }

                // 执行 Activity 的 attach()
                activity.attach(appContext, this, getInstrumentation(), r.token,
                        r.ident, app, r.intent, r.activityInfo, title, r.parent,
                        r.embeddedID, r.lastNonConfigurationInstances, config,
                        r.referrer, r.voiceInteractor, window);

                if (customIntent != null) {
                    activity.mIntent = customIntent;
                }
                r.lastNonConfigurationInstances = null;
                activity.mStartedActivity = false;
                // 设置主题
                int theme = r.activityInfo.getThemeResource();
                if (theme != 0) {
                    activity.setTheme(theme);
                }
                // ...
        } catch (SuperNotCalledException e) {
            throw e;
        } catch (Exception e) {
            // ...
        }

        return activity;
    }
这个方法所做的事注释里都写了,主要来看看 activity.attach() 这个方法。
- 1.2 Activity
/base/core/java/android/app/Activity.java
/**
     * ActivityThread的performLaunchActivity,会调用attach函数.
     *
     * 该方法主要功能是完成以下成员变量的赋值:
     *
     * mWindow:数据类型为PhoneWindow,继承于Window对象;
     * mWindowManager:数据类型为WindowManagerImpl,实现WindowManager接口;
     * mMainThread:当前线程的ActivityThread对象;
     * mApplication:当前Activity所属的Application;
     * mHandler:当前主线程的handler;
     * mUiThread: 当前activity所在的主线程;
     * mToken:远程ActivityRecord的appToken的代理端
     * mDecor: Activity执行完resume之后创建的View对象;
     * WindowManagerImpl.mParentWindowWindow指向Window对象,Window.mWindowManager指向WindowManagerImpl对象,这两个对象相互保存对方的信息。
     */
    final void attach(Context context, ActivityThread aThread,
            Instrumentation instr, IBinder token, int ident,
            Application application, Intent intent, ActivityInfo info,
            CharSequence title, Activity parent, String id,
            NonConfigurationInstances lastNonConfigurationInstances,
            Configuration config, String referrer, IVoiceInteractor voiceInteractor,
            Window window) {
        attachBaseContext(context);

        mFragments.attachHost(null /*parent*/);

        // Window为PhoneWindow类型,创建PhoneWindow
        mWindow = new PhoneWindow(this, window);
        mWindow.setWindowControllerCallback(this);
        mWindow.setCallback(this);
        mWindow.setOnWindowDismissedCallback(this);
        mWindow.getLayoutInflater().setPrivateFactory(this);
        if (info.softInputMode != WindowManager.LayoutParams.SOFT_INPUT_STATE_UNSPECIFIED) {
            mWindow.setSoftInputMode(info.softInputMode);
        }
        if (info.uiOptions != 0) {
            mWindow.setUiOptions(info.uiOptions);
        }
        // 获取UI线程
        mUiThread = Thread.currentThread();

        mMainThread = aThread;
        mInstrumentation = instr;

        // 远程ActivityRecord的appToken的代理端
        mToken = token;
        mIdent = ident;
        // Application赋值
        mApplication = application;
        mIntent = intent;
        mReferrer = referrer;
        mComponent = intent.getComponent();
        mActivityInfo = info;
        mTitle = title;
        mParent = parent;
        mEmbeddedID = id;
        mLastNonConfigurationInstances = lastNonConfigurationInstances;
        if (voiceInteractor != null) {
            if (lastNonConfigurationInstances != null) {
                mVoiceInteractor = lastNonConfigurationInstances.voiceInteractor;
            } else {
                mVoiceInteractor = new VoiceInteractor(voiceInteractor, this, this,
                        Looper.myLooper());
            }
        }

        // 设置并获取WindowManagerImpl对象
        mWindow.setWindowManager(
                (WindowManager)context.getSystemService(Context.WINDOW_SERVICE),
                mToken, mComponent.flattenToString(),
                (info.flags & ActivityInfo.FLAG_HARDWARE_ACCELERATED) != 0);
        if (mParent != null) {
            mWindow.setContainer(mParent.getWindow());
        }
        // 设置WindowManager
        mWindowManager = mWindow.getWindowManager();
        mCurrentConfig = config;
    }
这个方法里面会创建 PhoneWindow,在 Android 中,Window 是个抽象的概念,Android 中 Window 的具体实现类是PhoneWindow,Activity 和 Dialog 中的 Window 对象都是 PhoneWindow。
然后设置这个 window 的 WindowManager 对象,设置完毕后,再获取 WindowManager 对象。
- 1.3 Window
/base/core/java/android/view/Window.java
public abstract class Window {

	public void setWindowManager(WindowManager wm, IBinder appToken, String appName) {
    		setWindowManager(wm, appToken, appName, false);
	}

	public void setWindowManager(WindowManager wm, IBinder appToken, String appName, boolean hardwareAccelerated) {
    		mAppToken = appToken;
    		mAppName = appName;
    		mHardwareAccelerated = hardwareAccelerated || SystemProperties.getBoolean(PROPERTY_HARDWARE_UI, false);
    		if (wm == null) {
        			wm = (WindowManager)mContext.getSystemService(Context.WINDOW_SERVICE);
    		}
    		mWindowManager = ((WindowManagerImpl)wm).createLocalWindowManager(this);
	}
}
WindowManager 是一个抽象类,它的具体实现是在 WindowManagerImpl 中。每个 Activity 会有一个 WindowManager 对象,这个 mWindowManager 就是和 WindowManagerService(WMS) 进行通信的,也是 WMS 识别 View 具体属于那个 Activity 的关键。创建时传入 IBinder 类型的 mToken,WMS 就是通过这个 IBinder 来管理 Activity 里的 View。
- 1.4 Activity.setContentView()
/base/core/java/android/app/Activity.java
    public void setContentView(@LayoutRes int layoutResID) {
        getWindow().setContentView(layoutResID);
        initWindowDecorActionBar();
    }

   // 当前的window
    public Window getWindow() {
        return mWindow;
    }
这个 Window 就是 attach() 时创建的 PhoneWindow。
/base/core/java/com/android/internal/policy/PhoneWindow.java
    @Override
    public void setContentView(int layoutResID) {
        // mContentParent 为 null 时 installDecor
        if (mContentParent == null) {
            installDecor();
        } else if (!hasFeature(FEATURE_CONTENT_TRANSITIONS)) {
            mContentParent.removeAllViews();
        }

        if (hasFeature(FEATURE_CONTENT_TRANSITIONS)) {
            final Scene newScene = Scene.getSceneForLayout(mContentParent, layoutResID,
                    getContext());
            transitionTo(newScene);
        } else {
            // 将 layoutResID 填充到 mContentParent
            mLayoutInflater.inflate(layoutResID, mContentParent);
        }
        // ...
    }

    @Override
    public void setContentView(View view) {
        setContentView(view, new ViewGroup.LayoutParams(MATCH_PARENT, MATCH_PARENT));
    }

    @Override
    public void setContentView(View view, ViewGroup.LayoutParams params) {
        // mContentParent 为 null 时 installDecor
        if (mContentParent == null) {
            installDecor();
        } else if (!hasFeature(FEATURE_CONTENT_TRANSITIONS)) {
            mContentParent.removeAllViews();
        }

        if (hasFeature(FEATURE_CONTENT_TRANSITIONS)) {
            view.setLayoutParams(params);
            final Scene newScene = new Scene(mContentParent, view);
            transitionTo(newScene);
        } else {
            // mContentParent 添加 View
            mContentParent.addView(view, params);
        }
        // ...
    }
来看看 installDecor() 是如何实现的:
    private void installDecor() {
        // mDecor 为 DecorView 类型,如果 mDecor 为 null,则生成 Decor View
        if (mDecor == null) {
            mDecor = generateDecor(-1);
            // ...
        } else {
            // mDecor 不为 null,则设置 window 为当前对象
            mDecor.setWindow(this);
        }
        // 如果 mContentParent 为 null,则通过 mDecor 生成
        if (mContentParent == null) {
            mContentParent = generateLayout(mDecor);
            // ...
        }
    }

    protected DecorView generateDecor(int featureId) {
        Context context;
        if (mUseDecorContext) {
            Context applicationContext = getContext().getApplicationContext();
            if (applicationContext == null) {
                context = getContext();
            } else {
                context = new DecorContext(applicationContext, getContext().getResources());
                if (mTheme != -1) {
                    context.setTheme(mTheme);
                }
            }
        } else {
            context = getContext();
        }
        return new DecorView(context, featureId, this, getAttributes());
    }
根据不同的 Theme,创建不同的 DecorView,DecorView 是一个 FrameLayout:
public class DecorView extends FrameLayout implements RootViewSurfaceTaker, WindowCallbacks {
}
这时只是创建了 PhoneWindow 和 DecorView,但目前二者也没有任何关系,产生联系的时刻是在ActivityThread.handleResumeActivity() 中。
- 1.5 ActivityThread.handleResumeActivity()
/base/core/java/android/app/ActivityThread.java
前面写的是 ActivityThread.handleLauchActivity() 的 performLaunchActivity() 过程,如果成功,则继续执行 handleResumeActivity()。
/**
     * 该过程的执行顺序:
     *
     * performResumeActivity:最终会调用到onResume()方法;
     * makeVisible:一直调用到WMS,来进行添加视图;
     */
    final void handleResumeActivity(IBinder token,
            boolean clearHide, boolean isForward, boolean reallyResume, int seq, String reason) {
        // ...
        // 执行到onResume方法()
        r = performResumeActivity(token, clearHide, reason);

        if (r != null) {
            final Activity a = r.activity;
            // ...
            boolean willBeVisible = !a.mStartedActivity;
            if (!willBeVisible) {
                try {
                    willBeVisible = ActivityManagerNative.getDefault().willActivityBeVisible(
                            a.getActivityToken());
                } catch (RemoteException e) {
                    throw e.rethrowFromSystemServer();
                }
            }
            if (r.window == null && !a.mFinished && willBeVisible) {
                // 获取window
                r.window = r.activity.getWindow();
                // 获取decorView
                View decor = r.window.getDecorView();
                // 设置不可见
                decor.setVisibility(View.INVISIBLE);
                ViewManager wm = a.getWindowManager();
                WindowManager.LayoutParams l = r.window.getAttributes();
                a.mDecor = decor;
                l.type = WindowManager.LayoutParams.TYPE_BASE_APPLICATION;
                l.softInputMode |= forwardBit;
                if (r.mPreserveWindow) {
                    a.mWindowAdded = true;
                    r.mPreserveWindow = false;
                    ViewRootImpl impl = decor.getViewRootImpl();
                    if (impl != null) {
                        impl.notifyChildRebuilt();
                    }
                }
                if (a.mVisibleFromClient && !a.mWindowAdded) {
                    a.mWindowAdded = true;
                    wm.addView(decor, l);
                }
                // ...
                r.activity.mVisibleFromServer = true;
                mNumVisibleActivities++;
                if (r.activity.mVisibleFromClient) {
                    // 添加视图
                    r.activity.makeVisible();
                }
            }
            // ...
            // resume完成
            if (reallyResume) {
                try {
                    ActivityManagerNative.getDefault().activityResumed(token);
                } catch (RemoteException ex) {
                    throw ex.rethrowFromSystemServer();
                }
            }
        } else {
            try {
                ActivityManagerNative.getDefault()
                    .finishActivity(token, Activity.RESULT_CANCELED, null,
                            Activity.DONT_FINISH_TASK_WITH_ACTIVITY);
            } catch (RemoteException ex) {
                throw ex.rethrowFromSystemServer();
            }
        }
    }
可以看到里面调用了 Activity.makeVisible()。
- 1.6 Activity.makeVisible()
/base/core/java/android/app/ActivityThread.java
   void makeVisible() {
        // 如果Window没有被添加,则 addView 添加decorView
        if (!mWindowAdded) {
            ViewManager wm = getWindowManager();
            // 进入WindowManagerGlobal.addView,这边是添加DecorView,根view
            wm.addView(mDecor, getWindow().getAttributes());
            mWindowAdded = true;
        }
        // 设置decorView可见
        mDecor.setVisibility(View.VISIBLE);
    }
将 DecorView 添加到当前的 Window 上,这就将 DecorView 和 PhoneWindow 关联起来了。WindowManager 的 addView() 的具体实现在 WindowManagerImpl 中,而 WindowManagerImpl 的 addView() 又会调用 WindowManagerGlobal.addView()。
- 1.7 WindowManagerGlobal.addView()
/base/core/java/android/view/WindowManagerGlobal.java
    // 添加View
    public void addView(View view, ViewGroup.LayoutParams params,
            Display display, Window parentWindow) {
        // view不能为空
        if (view == null) {
            throw new IllegalArgumentException("view must not be null");
        }
        // display不能为空
        if (display == null) {
            throw new IllegalArgumentException("display must not be null");
        }
        // LayoutParams必须为 WindowManager.LayoutParams类型
        if (!(params instanceof WindowManager.LayoutParams)) {
            throw new IllegalArgumentException("Params must be WindowManager.LayoutParams");
        }

        final WindowManager.LayoutParams wparams = (WindowManager.LayoutParams) params;
        // ...

        ViewRootImpl root;
        View panelParentView = null;

        synchronized (mLock) {
            // ...
            // 每次调用global.addView()都会创建一个ViewRootImpl,它是decorView与WMS沟通的桥梁
            root = new ViewRootImpl(view.getContext(), display);

            // 设置LayoutParams
            view.setLayoutParams(wparams);

            // 加到mViews, mRoots, mParams集合中
            mViews.add(view);
            mRoots.add(root);
            mParams.add(wparams);
        }

        try {
            // ViewRootImpl设置View
            root.setView(view, wparams, panelParentView);
        } catch (RuntimeException e) {
            // ...
            throw e;
        }
    }
这个过程创建一个 ViewRootImpl,并将之前创建的 DecoView 作为参数传入,以后 DecoView 的事件都由 ViewRootImpl 来管理了,比如 DecoView 上添加 View,删除 View。ViewRootImpl 实现了 ViewParent 这个接口,这个接口最常见的一个方法是requestLayout()。
ViewRootImpl 是个 ViewParent,在 DecoView 添加的 View 时,就会将 View 中的 ViewParent 设为 DecoView 所在的ViewRootImpl,View 的 ViewParent 相同时,理解为这些 View 在一个 View 链上。所以每当调用 View 的 requestLayout() 时,其实是调用到 ViewRootImpl,ViewRootImpl 会控制整个事件的流程。可以看出一个 ViewRootImpl 对添加到 DecoView 的所有View 进行事件管理。
2. 关系图

ViewRootImpl 负责处理 View 的事件和逻辑,上图中 DecorView (实际上是一个 FrameLayout) 和 mView 是属于同一层级,不是包含关系,它们由不同的 ViewRootImpl 来管理,不在同一个 View 链上 (mView 类似于 PopupWindow)。Activity 中展示视图元素通过 window 来实现,window 可以理解为一个容器,盛放着一个个的 view,用来执行具体的展示工作。
3. getWindowManager().addView() 和 addContentView() 的区别
    @Override
    public void addContentView(View view, ViewGroup.LayoutParams params) {
        if (mContentParent == null) {
            installDecor();
        }
        mContentParent.addView(view, params);
        mContentParent.requestApplyInsets();
        final Callback cb = getCallback();
        if (cb != null && !isDestroyed()) {
            cb.onContentChanged();
        }
    }
Activity 通过 getWindowManager().addView(),最终会调用到 WindowManagerGlobal.addView(),这时会创建一个新的ViewRootImpl 对象,和原来的 DecoView 不在一条 View 链上,所以它们之间的任何一个调用 requestLayout() 都不会影响到另一个。而 addContentView() 是直接将 view 添加到 DecoView 中,会使 ViewRootImpl 链下的所有 View 重绘。
4. Dialog 和 PopupWindow 的区别
Dialog 在创建时会新建一个 PhoneWindow,同时也会使用 DecoView 作为这个 PhoneWindow 的根 View,相当于走了一遍Activity 里创建 PhoneWindow 和 DecoView 的流程。而调用 Dialog 的 show() 方法,类似于ActivityThread.performResumeActivity(),将 DecoView 添加到 Window,同时创建 DecoView 链的 RootViewImpl 来管理DecoView。
PopupWindow 就和第一个问题中 getWindowManager().addView() 类似了,只是创建一条新的 View 链和 ViewRootImpl,并没有创建新的 Window。
而 Dialog 通过非 Activity 的 Context,如 Application 和 Service,这是因为 Dialog 通过传入的 Context 来得到 context 里的 mWindowManager (也就是 WindowManagerImpl) 与 mToken,这是为了表明 Dialog 所属的 Activity。在Window.addView() 时,需要这个 mToken(IBinder 对象),而 Application 和 Service 传入的情况下 Token 是 null。
PopupWindow:
 private void invokePopup(WindowManager.LayoutParams p) {
        if (mContext != null) {
            p.packageName = mContext.getPackageName();
        }

        final PopupDecorView decorView = mDecorView;
        decorView.setFitsSystemWindows(mLayoutInsetDecor);

        setLayoutDirectionFromAnchor();

        mWindowManager.addView(decorView, p);

        if (mEnterTransition != null) {
            decorView.requestEnterTransition(mEnterTransition);
        }
    }
5. 一个 Activity 有多少个 ViewRootImpl
ViewRootImpl 是实际管理 Window 中所有 View 的类,每个 Activity 中 ViewRootImpl 数量取决于调用mWindowManager.addView() 的次数。
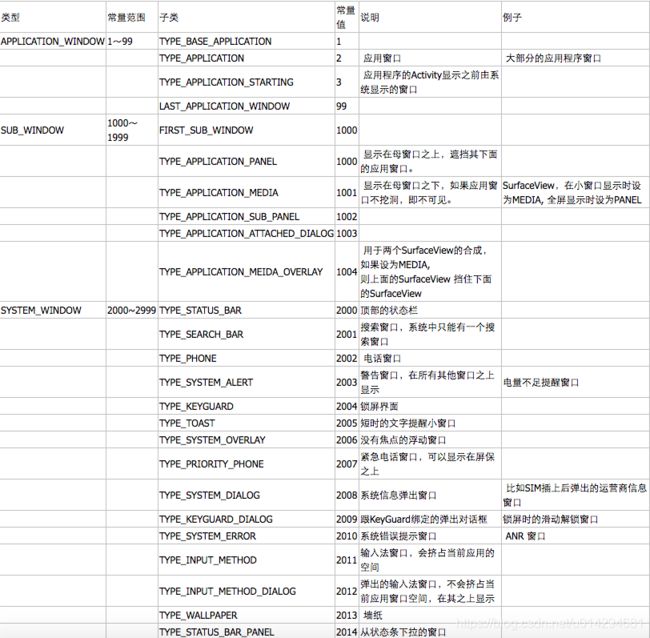
6. Window 的分类
Window 分为系统级 Window, 应用级 Window, 子 Window, 其中子 Window 必须附属在其他两类 Window 上。

7. 理解 Window 的作用
Activity 提供和 WMS 通信的 Token (IBinder 对象),DecoView 结合 ViewRootImpl 来管理同一 View 链 (有相同的 ParentView 的View,ViewRootImpl 也就是 ParentView) 的所有 View 的事件,绘制等。那 Window 的意义在哪? 虽然 Window 也就是PhoneWindow 没有具体做什么,但 Window 把 Activity 从 View 的一些创建,管理以及和 ViewRootImpl 的交互中脱离出来,让Activity 与 View 尽量解耦,要不然这些工作都要放在 Activity 中处理,Activity 的任务就会变得更杂更重。为什么不能用一个ViewGroup 比如 DecoView 来管理所有的 View 呢,因为一个 Activity 可能有不止一条 View 链,总要有一个进行管理的地方。Window 的意义就是将 Activity 和 View 从繁琐工作中脱离出来。
总结: Activity 提供与 AMS 通信的 Token (IBinder 对象),创建 Window 为 View 提供显示的地方,而具体的 View 管理任务由 ViewRootImpl 来完成。