Vue3+TS+Vite开发组件库并发布到npm
Vue2开发插件并发布到npm
使用VitePress静态网站生成器创建组件库文档网站并部署到GitHub
目标:创建 vue-amazing-ui 组件库 ,并发布到npm
该组件库已发布到 npm,直接安装即可使用:
pnpm i vue-amazing-ui
#or
yarn add vue-amazing-ui
#or
npm install vue-amazing-ui
Vue Amazing UI 在线预览
目前拥有的 Components 组件:
| Component name | Descriptions | Component name | Descriptions |
|---|---|---|---|
| Breadcrumb | 面包屑 | Button | 按钮 |
| Carousel | 走马灯 | Cascader | 级联选择 |
| Checkbox | 多选框 | Collapse | 折叠面板 |
| Countdown | 倒计时 | DatePicker | 日期选择 |
| Dialog | 对话框 | Divider | 分割线 |
| Empty | 空状态 | Image | 图片 |
| InputNumber | 数字输入框 | Message | 全局提示 |
| Modal | 信息提示 | Notification | 通知提醒框 |
| Pagination | 分页器 | Progress | 进度条 |
| QRCode | 二维码 | Radio | 单选框 |
| Rate | 评分 | Select | 选择器 |
| Slider | 滑动输入条 | Spin | 加载中 |
| Steps | 步骤条 | Swiper | 触摸滑动插件 |
| Switch | 开关 | Table | 表格 |
| Tabs | 标签页 | TextScroll | 文字滚动 |
| Timeline | 时间轴 | Tooltip | 文字提示 |
| Upload | 上传 | Video | 播放器 |
| Waterfall | 瀑布流 |
目前拥有的 Functions 工具函数:
| Function name | Descriptions | Arguments |
|---|---|---|
| dateFormat | 简单易用的日期格式化函数! | (timestamp: number|string|Date, format = ‘YYYY-MM-DD HH:mm:ss’) => string |
| requestAnimationFrame | 针对不同浏览器进行兼容处理! | 使用方式不变 |
| cancelAnimationFrame | 针对不同浏览器进行兼容处理! | 使用方式不变 |
| rafTimeout | 使用 requestAnimationFrame 实现的定时器函数,等效替代 (setTimeout 和 setInterval)! | (func: Function, delay = 0, interval = false) => object |
| cancelRaf | 用于取消 rafTimeout 函数! | (raf: { id: number }) => void |
| throttle | 使用 rafTimeout 实现的节流函数! | (fn: Function, delay = 300) => any |
| debounce | 使用 rafTimeout 实现的防抖函数! | (fn: Function, delay = 300) => any |
| add | 消除js加减精度问题的加法函数! | (num1: number, num2: number) => number |
| downloadFile | 下载文件并自定义文件名! | (url: string, name: string) => void |
创建 vue3+ts+vite 项目:
输入项目名称,并依次选择需要安装的依赖项
pnpm create vue@latest
项目目录结构截图如下:

③在项目根目录新建
packages/文件夹用于存放组件 (以Breadcrumb为例,其他类似)

在项目根目录中的 vite.config.ts 中写入相关配置项:
import { fileURLToPath, URL } from 'node:url'

import { resolve } from 'path'
import { defineConfig } from 'vite'
import vue from '@vitejs/plugin-vue'

// ant-desing按需引入
import Components from 'unplugin-vue-components/vite'
import { AntDesignVueResolver } from 'unplugin-vue-components/resolvers'

// 打包体积可视化插件
// import { visualizer } from 'rollup-plugin-visualizer'

// https://vitejs.dev/config/
export default defineConfig({
  plugins: [
    vue(),
    // visualizer({ // 生成的分析图文件名,默认stats.html
    //   file: 'stats.html',
    //   open: true // 打包后自动打开分析图
    // }),
    Components({
      resolvers: [AntDesignVueResolver()]
    })
  ],
  resolve: {
    alias: {
      '@': fileURLToPath(new URL('./src', import.meta.url)),
      'images': fileURLToPath(new URL('./src/assets/images', import.meta.url))
    }
  },
  css: {
    preprocessorOptions: {
      less: {
        modifyVars: { // 或者globalVars
          // `themeColor` is global variables fields name
          themeColor: '#1677FF' // #1890FF
        },
        javascriptEnabled: true
      },
    },
  },
  // 构建为库
  build: {
    lib: { // 构建为库。如果指定了 build.lib,build.cssCodeSplit 会默认为 false。
      // __dirname的值是vite.config.ts文件所在目录
      entry: resolve(__dirname, 'packages/index.ts'),  // entry是必需的,因为库不能使用HTML作为入口。
      name: 'VueAmazingUI', // 暴露的全局变量
      fileName: 'vue-amazing-ui' // 输出的包文件名,默认是package.json的name选项
    },
    rollupOptions: { // 自定义底层的Rollup打包配置
      // https://rollupjs.org/configuration-options/
      // 确保外部化处理那些你不想打包进库的依赖
      external: ['vue', 'swiper', '@vuepic/vue-datepicker', 'qrcode'],
      output: {
        // format: 'es', // 默认es,可选 'amd' 'cjs' 'es' 'iife' 'umd' 'system'
        exports: 'named', // https://rollupjs.org/configuration-options/#output-exports
      //   // 在 UMD 构建模式下为这些外部化的依赖提供一个全局变量
        globals: {
          vue: 'Vue',
          // 'vue-router': 'VueRouter', // 引入vue-router全局变量,否则router.push将无法使用
          swiper: 'Swiper',
          '@vuepic/vue-datepicker': 'VueDatePicker',
          qrcode: 'qrcode'
        }
      }
    },
    /** 设置为 false 可以禁用最小化混淆,或是用来指定使用哪种混淆器。
        默认为 Esbuild,它比 terser 快 20-40 倍,压缩率只差 1%-2%。
        注意,在 lib 模式下使用 'es' 时,build.minify 选项不会缩减空格,因为会移除掉 pure 标注,导致破坏 tree-shaking。
        当设置为 'terser' 时必须先安装 Terser。(yarn add terser -D)
    */
    minify: 'terser', // Vite 2.6.x 以上需要配置 minify: "terser", terserOptions 才能生效
    terserOptions: { // 在打包代码时移除 console、debugger 和 注释
      compress: {
        /* (default: false) -- Pass true to discard calls to console.* functions.
          If you wish to drop a specific function call such as console.info and/or
          retain side effects from function arguments after dropping the function
          call then use pure_funcs instead
        */
        drop_console: true, // 生产环境时移除console
        drop_debugger: true
      },
      format: {
        comments: false // 删除注释comments
      }
    }
  }
})
在 packages/ 目录下创建 UI 组件
例如:新建
breadcrumb/和pagination/文件夹,截图如下:

在
breadcrumb/文件夹下新建Breadcrumb.vue组件文件和index.ts文件,截图如下:

在
Breadcrumb.vue中编写组件代码:
在
breadcrumb/index.ts中导出组件
import type { App } from 'vue'
import Breadcrumb from './Breadcrumb.vue'

// 使用install方法,在app.use挂载
Breadcrumb.install = (app: App) => {
  app.component(Breadcrumb.__name as string, Breadcrumb)
}

export default Breadcrumb
在 packages/index.ts 文件中对整个组件库进行导出:
import type { App } from 'vue'
import Breadcrumb from './breadcrumb'
import Pagination from './pagination'

// 所有组件列表
const components = [
  Breadcrumb,
  Pagination
]

// 定义 install 方法
const install = (app: App): void => {
  // 遍历注册所有组件
  /*
    component.__name ts报错
    Argument of type 'string | undefined' is not assignable to parameter of type 'string'.

    Type 'undefined' is not assignable to type 'string'.ts(2345)
    解决方式一:使用// @ts-ignore
    解决方式二:使用类型断言 尖括号语法(component.__name) 或 as语法(component.__name as string)
  */
  components.forEach(component => app.component(component.__name as string, component))
}

export {
  Breadcrumb,
  Pagination
}

const VueAmazingUI = {
  install
}

export default VueAmazingUI
打包组件库
pnpm build
在
src/main.ts中导入刚创建的组件,检测是否正常可用
// import VueAmazingUI from '../packages'
import VueAmazingUI from '../dist/vue-amazing-ui.js'
import '../dist/style.css'
// import { Breadcrumb } from '../dist/vue-amazing-ui.js'

const app = createApp(App)

app.use(VueAmazingUI)
// app.use(Breadcrumb)

app.mount('#app')
⑪在终端执行
pnpm init初始化包,选填并配置package.json:
{
  "name": "vue-amazing-ui",
  "version": "0.0.30",
  "private": false,
  "type": "module", // 如果 package.json 不包含 "type": "module",Vite 会生成不同的文件后缀名以兼容 Node.js。.js 会变为 .mjs 而 .cjs 会变为 .js
  "files": ["dist"], // 检测dist打包目录的所有文件
  "main": "./dist/vue-amazing-ui.umd.cjs",
  "module": "./dist/vue-amazing-ui.js",
  "exports": {
    "./dist/style.css": "./dist/style.css", // 子目录别名,方便样式引入
    "./css": "./dist/style.css",
    ".": { // 模块的主入口,优先级高于main字段,利用.这个别名,为 ES6 模块(import)和 CommonJS (require)指定不同的入口
      "import": "./dist/vue-amazing-ui.js",
      "require": "./dist/vue-amazing-ui.umd.cjs"
    }
  },
  "scripts": {
    "dev": "vite --port 9000 --open --force",
    "build": "run-p type-check build-only",
    "docs:dev": "vitepress dev docs --port 8000 --open",
    "docs:build": "vitepress build docs",
    "docs:deploy": "sh script/deploy.sh",
    "pub": "sh script/publish.sh",
    "preview": "vite preview",
    "build-only": "vite build",
    "type-check": "vue-tsc --noEmit",
    "lint": "eslint . --ext .vue,.js,.jsx,.cjs,.mjs,.ts,.tsx,.cts,.mts --fix --ignore-path .gitignore"
  },
  "dependencies": {
    "@vuepic/vue-datepicker": "^4.5.1",
    "@vueuse/core": "^10.1.2",
    "@vueuse/integrations": "^10.1.2",
    "ant-design-vue": "^3.2.20",
    "core-js": "^3.30.2",
    "date-fns": "^2.30.0",
    "qrcode": "^1.5.3",
    "swiper": "^9.3.2",
    "vue": "^3.3.4",
    "vue-amazing-ui": "^0.0.30",
    "vue-router": "^4.2.1"
  },
  "devDependencies": {
    "@rushstack/eslint-patch": "^1.3.0",
    "@types/node": "^18.16.14",
    "@vitejs/plugin-vue": "^4.2.3",
    "@vue/eslint-config-typescript": "^11.0.3",
    "@vue/tsconfig": "^0.1.3",
    "eslint": "^8.41.0",
    "eslint-plugin-vue": "^9.14.0",
    "less": "^4.1.3",
    "npm-run-all": "^4.1.5",
    "prettier": "^2.8.8",
    "rollup-plugin-visualizer": "^5.9.0",
    "terser": "^5.17.6",
    "typescript": "~4.7.4",
    "unplugin-vue-components": "^0.25.0",
    "vite": "^4.3.8",
    "vitepress": "1.0.0-beta.1",
    "vue-tsc": "^1.6.5"
  },
  "description": "This template should help get you started developing with Vue Amazing UI in Vue 3.",
  "repository": {
    "type": "git",
    "url": "git+https://github.com/themusecatcher/vue-amazing-ui.git"
  },
  "keywords": [
    "Vue3",
    "TS",
    "Vite",
    "Amazing",
    "UI",
    "Components"
  ],
  "author": "theMuseCatcher",
  "license": "ISC",
  "bugs": {
    "url": "https://github.com/themusecatcher/vue-amazing-ui/issues"
  },
  "homepage": "https://github.com/themusecatcher/vue-amazing-ui#readme"
}
name : 包名,该名字是唯一的。可在 npm 官网搜索名字,不可重复。
version: 版本号,每次发布至 npm 需要修改版本号,不能和历史版本号相同。
private:是否私有,需要修改为 false 才能发布到 npm
description: 关于包的描述。
main: 入口文件,需指向最终编译后的包文件。
keywords:关键字,以空格分离希望用户最终搜索的词。
author:作者
license: 开源协议
vite build --watch:当启用 --watch 标志时(启用 rollup 的监听器),对 vite.config.ts 的改动,以及任何要打包的文件,都将触发重新构建
vite --port 9000 --open --force:指定端口9000,启动时打开浏览器,强制优化器忽略缓存并重新构建。
编译打包
执行打包命令
pnpm build
执行结果如下图:

在项目根目录创建
.npmignore文件,设置忽略发布的文件,类似.gitignore文件
# 只有编译后的 dist 目录、package.json、README.md是需要被发布的
# 忽略目录
.DS_Store
.vscode/
node_modules
packages/
public/
src/

# 忽略指定文件
.eslintrc.cjs
.gitignore
.npmignore
.npmrc
.prettierrc.json
components.d.ts
env.d.ts
index.html
pnpm-lock.yaml
stats.html
tsconfig.config.json
tsconfig.json
vite.config.ts
编写 README.md 文件
# vue-amazing-ui
## Document & Online preview
[Vue Amazing UI](https://themusecatcher.github.io/vue-amazing-ui/)
## Install & Use
```bash
pnpm i vue-amazing-ui
# or
npm install vue-amazing-ui
# or
yarn add vue-amazing-ui
```
Import and register component
**Global**
```ts
import { createApp } from 'vue'
import App from './App.vue'
import VueAmazingUI from 'vue-amazing-ui'
import 'vue-amazing-ui/css'
const app = createApp(App)
app.use(VueAmazingUI)
```
**Local**
```vue
```
## Project
- Get the project code
```sh
git clone https://github.com/themusecatcher/vue-amazing-ui.git
```
- Install dependencies
```sh
cd vue-amazing-ui
pnpm i
```
- Run project
```sh
pnpm dev
```
## Components
Component name | Descriptions | Component name | Descriptions
-- | -- | -- | --
Breadcrumb | 面包屑 | Button | 按钮
Carousel | 走马灯 | Cascader | 级联选择
Checkbox | 多选框 | Collapse | 折叠面板
Countdown | 倒计时 | DatePicker | 日期选择
Dialog | 对话框 | Divider | 分割线
Empty | 空状态 | Image | 图片
InputNumber | 数字输入框 | Message | 全局提示
Modal | 信息提示 | Notification | 通知提醒框
Pagination | 分页器 | Progress | 进度条
QRCode | 二维码 | Radio | 单选框
Rate | 评分 | Select | 选择器
Slider | 滑动输入条 | Spin | 加载中
Steps | 步骤条 | Swiper | 触摸滑动插件
Switch | 开关 | Table | 表格
Tabs | 标签页 | TextScroll | 文字滚动
Timeline | 时间轴 | Tooltip | 文字提示
Upload | 上传 | Video | 播放器
Waterfall | 瀑布流
## Details
[My CSDN Blogs](https://blog.csdn.net/Dandrose)
## Functions
Function name | Descriptions | Arguments
-- | -- | --
dateFormat | 简单易用的日期格式化函数! | (timestamp: number|string|Date, format = 'YYYY-MM-DD HH:mm:ss') => string
requestAnimationFrame | 针对不同浏览器进行兼容处理! | 使用方式不变
cancelAnimationFrame | 针对不同浏览器进行兼容处理! | 使用方式不变
rafTimeout | 使用 requestAnimationFrame 实现的定时器函数,等效替代 (setTimeout 和 setInterval)! | (func: Function, delay = 0, interval = false) => object
cancelRaf | 用于取消 rafTimeout 函数! | (raf: { id: number }) => void
throttle | 使用 rafTimeout 实现的节流函数! | (fn: Function, delay = 300) => any
debounce | 使用 rafTimeout 实现的防抖函数! | (fn: Function, delay = 300) => any
add | 消除js加减精度问题的加法函数! | (num1: number, num2: number) => number
downloadFile | 下载文件并自定义文件名! | (url: string, name: string) => void
登录 npm
如果没有 npm 账号,可以去 npm官网 注册一个账号
注册成功后在本地查看
pnpm / npm镜像:
pnpm/npm config get registry
输出:http://registry.npmjs.org 即可
如果不是则需要设置为npm镜像:
pnpm/npm config set registry https://registry.npmjs.org
然后在终端执行:
pnpm/npm login
依次输入用户名,密码,邮箱,输出Logged in as…即可
pnpm/npm whoami // 查看当前用户是否已登录
发布组件到 npm
在终端执行:
pnpm/npm publish
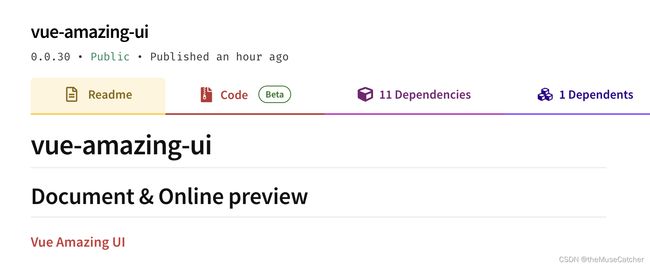
发布成功后即可在npm官网搜索到该组件,如下图
并可以通过 pnpm/npm install vue-amazing-ui(或 yarn add vue-amazing-ui )进行安装

为方便打包构建、发布、提交代码到github等操作,可以通过脚步一次性执行以上操作:
在项目中新建 script/ 文件夹,并创建 publish.sh 脚本文件,如下图:

在
publish.sh中创建以下脚本:
# /bin/bash

# 确保脚本抛出遇到的错误
set -e

 # 读取package.json中的version
version=`jq -r .version package.json`

 # 打包构建
pnpm build

 # 提交代码到github
git add .
git commit -m "update $version"
git push

 # 发布到npm,pnpm(高性能的npm)
pnpm publish

# 升级 vue-amazing-ui 依赖版本
pnpm up vue-amazing-ui@$version

# 提交版本更新代码到github
git add .
git cm -m "update $version"
git push
之后打包构建、发布、提交代码到github 只需新增 version 版本号之后执行:sh publish.sh 即可!
在要使用的项目中安装并注册插件:
pnpm i vue-amazing-ui
#or
yarn add vue-amazing-ui
# or
npm install vue-amazing-ui
然后在
main.ts文件中引入并注册:
import VueAmazingUI from 'vue-amazing-ui'
// import { Pagination, Breadcrumb } from 'vue-amazing-ui'
import 'vue-amazing-ui/css'

app.use(VueAmazingUI)
// app.use(Pagination).use(Breadcrumb)
在要使用组件的页面直接使用即可: