RocketMq的集群的搭建(2主2从异步复制集群模式)
一 RocketMq集群搭建
1.1 说明
本案例采用2m-2s-async的方式搭建集群。
实际项目中,为了达到高可用,一般会使用dleger。
https://blog.csdn.net/wssc63262/article/details/126003507
1.2 集群规划说明
集群规划说明:
nameserver是一个轻量级的注册中心,broker把自己的信息注册到nameserver上,而且nameserver是无状态的,直接启动即可。3台nameserver之间不需要通信,而是被请求方来关联3台nameserver的地址。
| 机器 |
角色 |
配置 |
| 192.168.152.141 |
Nameserver 9876 |
|
| 192.168.152.180 |
Nameserver 9877 |
Broker-a-m, broker-b-s |
| 192.168.152.140 |
Nameserver 9878 |
Broker-b-m, broker-a-s |
1.3 常见集群模式
在rocketmq的config目录下可以看到rocketmq建议的各种配置方式:
2m-2s-async: 2主2从异步刷盘(吞吐量较大,但是消息可能丢失),
2m-2s-sync:2主2从同步刷盘(吞吐量会下降,但是消息更安全),
2m-noslave:2主无从(单点故障),然后还可以直接配置broker.conf,进行单点环境配置。
而dleger就是用来实现主从切换的。集群中的节点会基于Raft协议随机选举出一个leader,其他的就都是follower。通常正式环境都会采用这种方式来搭建集群。
二 RocketMq机器搭建
2.1 上传jar包并解压
2.1.1 节点141
解压:
| [root@localhost export]# unzip rocketmq-all-4.9.6-bin-release.zip |
2.1.2 节点180
解压:
| [root@localhost export]# unzip rocketmq-all-4.9.6-bin-release.zip |
2.1.3 节点140
解压:
| [root@localhost export]# unzip rocketmq-all-4.9.6-bin-release.zip |
2.2 修改占用内存配置
2.2.1 节点141,180,140分别做如下操作
使用vim命令打开 bin/runserver.sh 文件。现将这些值修改为如下:
[root@localhost bin]# vi runserver.sh
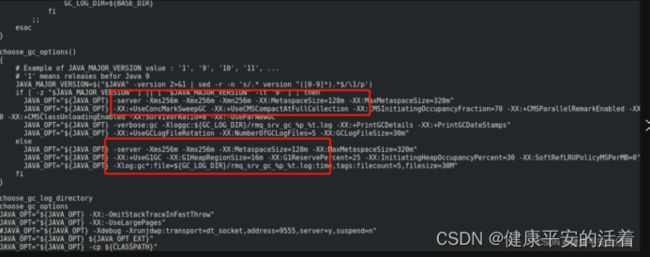
使用vim命令打开 bin/runbroker.sh文件。现将这些值修改为如下:
2.4 nameserver的配置
nameserver是无状态的,直接启动即可。3台nameserver之间不需要通信,而是被请求方来关联3台nameserver的地址。
无需配置。
2.5 broker的配置
2.5.1 节点180
在节点180上先配置borker-a的master节点。先配置2m-2s-async/broker-a.properties
进入目录: /root/export/rocketmq-all-4.9.6-bin-release/conf/2m-2s-async
第一组配置:vim broker-a.properties
修改配置文件: vim broker-a.properties
| #所属集群名字,名字一样的节点就在同一个集群内 brokerClusterName=rocketmq-cluster #broker名字,名字一样的节点就是一组主从节点。 brokerName=broker-a-m #brokerid,0就表示是Master,>0的都是表示 Slave brokerId=0 #nameServer地址,分号分割 namesrvAddr=192.168.152.141:9876;192.168.152.180:9877;192.168.152.140:9878 #在发送消息时,自动创建服务器不存在的topic,默认创建的队列数 defaultTopicQueueNums=4 #是否允许 Broker 自动创建Topic,建议线下开启,线上关闭 autoCreateTopicEnable=true #是否允许 Broker 自动创建订阅组,建议线下开启,线上关闭 autoCreateSubscriptionGroup=true #Broker 对外服务的监听端口 listenPort=11912 #删除文件时间点,默认凌晨 4点 deleteWhen=04 #文件保留时间,默认 48 小时 fileReservedTime=120 #commitLog每个文件的大小默认1G mapedFileSizeCommitLog=1073741824 #ConsumeQueue每个文件默认存30W条,根据业务情况调整 mapedFileSizeConsumeQueue=300000 #destroyMapedFileIntervalForcibly=120000 #redeleteHangedFileInterval=120000 #检测物理文件磁盘空间 diskMaxUsedSpaceRatio=88 #存储路径 storePathRootDir=/root/export/master-store #commitLog 存储路径 storePathCommitLog=/root/export/master-store/commitlog #消费队列存储路径存储路径 storePathConsumeQueue=/root/export/master-store/consumequeue #消息索引存储路径 storePathIndex=/root/export/master-store/index #checkpoint 文件存储路径 storeCheckpoint=/root/export/master-store/checkpoint #abort 文件存储路径 abortFile=/root/export/master-store/abort #限制的消息大小 maxMessageSize=65536 #flushCommitLogLeastPages=4 #flushConsumeQueueLeastPages=2 #flushCommitLogThoroughInterval=10000 #flushConsumeQueueThoroughInterval=60000 #Broker 的角色 #- ASYNC_MASTER 异步复制Master #- SYNC_MASTER 同步双写Master #- SLAVE brokerRole=ASYNC_MASTER #刷盘方式 #- ASYNC_FLUSH 异步刷盘 #- SYNC_FLUSH 同步刷盘 flushDiskType=ASYNC_FLUSH #checkTransactionMessageEnable=false #发消息线程池数量 #sendMessageThreadPoolNums=128 #拉消息线程池数量 #pullMessageThreadPoolNums=128 |
2.在节点180上先配置borker-b的slaver节点。先配置2m-2s-async/broker-b-s.properties
修改配置文件 vim broker-b-s.properties
| #所属集群名字,名字一样的节点就在同一个集群内 brokerClusterName=rocketmq-cluster #broker名字,名字一样的节点就是一组主从节点。 brokerName=broker-b-s #brokerid,0就表示是Master,>0的都是表示 Slave brokerId=1 #nameServer地址,分号分割 namesrvAddr=192.168.152.141:9876;192.168.152.180:9877;192.168.152.140:9878 #在发送消息时,自动创建服务器不存在的topic,默认创建的队列数 defaultTopicQueueNums=4 #是否允许 Broker 自动创建Topic,建议线下开启,线上关闭 autoCreateTopicEnable=true #是否允许 Broker 自动创建订阅组,建议线下开启,线上关闭 autoCreateSubscriptionGroup=true #Broker 对外服务的监听端口 listenPort=21012 #删除文件时间点,默认凌晨 4点 deleteWhen=04 #文件保留时间,默认 48 小时 fileReservedTime=120 #commitLog每个文件的大小默认1G mapedFileSizeCommitLog=1073741824 #ConsumeQueue每个文件默认存30W条,根据业务情况调整 mapedFileSizeConsumeQueue=300000 #destroyMapedFileIntervalForcibly=120000 #redeleteHangedFileInterval=120000 #检测物理文件磁盘空间 diskMaxUsedSpaceRatio=88 #存储路径 storePathRootDir=/root/export/slaver-store #commitLog 存储路径 storePathCommitLog=/root/export/slaver-store/commitlog #消费队列存储路径存储路径 storePathConsumeQueue=/root/export/slaver-store/consumequeue #消息索引存储路径 storePathIndex=/root/export/slaver-store/index #checkpoint 文件存储路径 storeCheckpoint=/root/export/slaver-store/checkpoint #abort 文件存储路径 abortFile=/root/export/slaver-store/abort #限制的消息大小 maxMessageSize=65536 #flushCommitLogLeastPages=4 #flushConsumeQueueLeastPages=2 #flushCommitLogThoroughInterval=10000 #flushConsumeQueueThoroughInterval=60000 #Broker 的角色 #- ASYNC_MASTER 异步复制Master #- SYNC_MASTER 同步双写Master #- SLAVE brokerRole=SLAVE #刷盘方式 #- ASYNC_FLUSH 异步刷盘 #- SYNC_FLUSH 同步刷盘 flushDiskType=ASYNC_FLUSH #checkTransactionMessageEnable=false #发消息线程池数量 #sendMessageThreadPoolNums=128 #拉消息线程池数量 #pullMessageThreadPoolNums=128 |
2.5.2 节点140
在节点140上先配置borker-b的master节点。先配置2m-2s-async/broker-b.properties
进入目录: /root/export/rocketmq-all-4.9.6-bin-release/conf/2m-2s-async
第2组配置:vim broker-b.properties
修改配置文件: vim broker-b.properties
| #所属集群名字,名字一样的节点就在同一个集群内 brokerClusterName=rocketmq-cluster #broker名字,名字一样的节点就是一组主从节点。 brokerName=broker-b-m #brokerid,0就表示是Master,>0的都是表示 Slave brokerId=0 #nameServer地址,分号分割 namesrvAddr=192.168.152.141:9876;192.168.152.180:9877;192.168.152.140:9878 #在发送消息时,自动创建服务器不存在的topic,默认创建的队列数 defaultTopicQueueNums=4 #是否允许 Broker 自动创建Topic,建议线下开启,线上关闭 autoCreateTopicEnable=true #是否允许 Broker 自动创建订阅组,建议线下开启,线上关闭 autoCreateSubscriptionGroup=true #Broker 对外服务的监听端口 listenPort=20913 #删除文件时间点,默认凌晨 4点 deleteWhen=04 #文件保留时间,默认 48 小时 fileReservedTime=120 #commitLog每个文件的大小默认1G mapedFileSizeCommitLog=1073741824 #ConsumeQueue每个文件默认存30W条,根据业务情况调整 mapedFileSizeConsumeQueue=300000 #destroyMapedFileIntervalForcibly=120000 #redeleteHangedFileInterval=120000 #检测物理文件磁盘空间 diskMaxUsedSpaceRatio=88 #存储路径 storePathRootDir=/root/export/master-store #commitLog 存储路径 storePathCommitLog=/root/export/master-store/commitlog #消费队列存储路径存储路径 storePathConsumeQueue=/root/export/master-store/consumequeue #消息索引存储路径 storePathIndex=/root/export/master-store/index #checkpoint 文件存储路径 storeCheckpoint=/root/export/master-store/checkpoint #abort 文件存储路径 abortFile=/root/export/master-store/abort #限制的消息大小 maxMessageSize=65536 #flushCommitLogLeastPages=4 #flushConsumeQueueLeastPages=2 #flushCommitLogThoroughInterval=10000 #flushConsumeQueueThoroughInterval=60000 #Broker 的角色 #- ASYNC_MASTER 异步复制Master #- SYNC_MASTER 同步双写Master #- SLAVE brokerRole=ASYNC_MASTER #刷盘方式 #- ASYNC_FLUSH 异步刷盘 #- SYNC_FLUSH 同步刷盘 flushDiskType=ASYNC_FLUSH #checkTransactionMessageEnable=false #发消息线程池数量 #sendMessageThreadPoolNums=128 #拉消息线程池数量 #pullMessageThreadPoolNums=128 |
2.在节点140上先配置borker-a的slaver节点。先配置2m-2s-async/broker-a-s.properties
修改配置文件 vim broker-a-s.properties
| #所属集群名字,名字一样的节点就在同一个集群内 brokerClusterName=rocketmq-cluster #broker名字,名字一样的节点就是一组主从节点。 brokerName=broker-a-s #brokerid,0就表示是Master,>0的都是表示 Slave brokerId=1 #nameServer地址,分号分割 namesrvAddr=192.168.152.141:9876;192.168.152.180:9877;192.168.152.140:9878 #在发送消息时,自动创建服务器不存在的topic,默认创建的队列数 defaultTopicQueueNums=4 #是否允许 Broker 自动创建Topic,建议线下开启,线上关闭 autoCreateTopicEnable=true #是否允许 Broker 自动创建订阅组,建议线下开启,线上关闭 autoCreateSubscriptionGroup=true #Broker 对外服务的监听端口 listenPort=21013 #删除文件时间点,默认凌晨 4点 deleteWhen=04 #文件保留时间,默认 48 小时 fileReservedTime=120 #commitLog每个文件的大小默认1G mapedFileSizeCommitLog=1073741824 #ConsumeQueue每个文件默认存30W条,根据业务情况调整 mapedFileSizeConsumeQueue=300000 #destroyMapedFileIntervalForcibly=120000 #redeleteHangedFileInterval=120000 #检测物理文件磁盘空间 diskMaxUsedSpaceRatio=88 #存储路径 storePathRootDir=/root/export/slaver-store #commitLog 存储路径 storePathCommitLog=/root/export/slaver-store/commitlog #消费队列存储路径存储路径 storePathConsumeQueue=/root/export/slaver-store/consumequeue #消息索引存储路径 storePathIndex=/root/export/slaver-store/index #checkpoint 文件存储路径 storeCheckpoint=/root/export/slaver-store/checkpoint #abort 文件存储路径 abortFile=/root/export/slaver-store/abort #限制的消息大小 maxMessageSize=65536 #flushCommitLogLeastPages=4 #flushConsumeQueueLeastPages=2 #flushCommitLogThoroughInterval=10000 #flushConsumeQueueThoroughInterval=60000 #Broker 的角色 #- ASYNC_MASTER 异步复制Master #- SYNC_MASTER 同步双写Master #- SLAVE brokerRole=SLAVE #刷盘方式 #- ASYNC_FLUSH 异步刷盘 #- SYNC_FLUSH 同步刷盘 flushDiskType=ASYNC_FLUSH #checkTransactionMessageEnable=false #发消息线程池数量 #sendMessageThreadPoolNums=128 #拉消息线程池数量 #pullMessageThreadPoolNums=128 |
2.6 创建制定的目录文件
2.6.1 节点180
mkdir -p /root/export/master-store/{commitlog,consumequeue,index}
mkdir -p /root/export/slaver-store/{commitlog,consumequeue,index}
2.6.2 节点140
mkdir -p /root/export/master-store/{commitlog,consumequeue,index}
mkdir -p /root/export/slaver-store/{commitlog,consumequeue,index}
2.7 修改端口
2.7.1 节点180上
由于180和140上的nameserver和broker在同一台机器,这里将这两台的nameserver修改端口分别为9877,和9878。
1.进入目录:/root/export/rocketmq-all-4.9.6-bin-release/conf
新建namesrv.properties 文件
| [root@localhost conf]# pwd /root/export/rocketmq-all-4.9.6-bin-release/conf [root@localhost conf]# touch namesrv.properties |
2.配置端口
| listenPort=9877 |
2.7.2 节点140上
由于180和140上的nameserver和broker在同一台机器,这里将这两台的nameserver修改端口分别为9877,和9878。
1.进入目录:/root/export/rocketmq-all-4.9.6-bin-release/conf
新建namesrv.properties 文件
| [root@localhost conf]# pwd /root/export/rocketmq-all-4.9.6-bin-release/conf [root@localhost conf]# touch namesrv.properties |
2.配置端口
| listenPort=9878 |
2.8 启动nameserver服务
2.8.1 节点141上
第一个nameserver节点
进入到bin目录下: /root/export/rocketmq-all-4.9.6-bin-release/bin
输入命令:
nohup sh mqnamesrv &
查看日志:tail -f ~/logs/rocketmqlogs/namesrv.log
2.8.2 节点180上
第一个nameserver节点
进入到bin目录下: /root/export/rocketmq-all-4.9.6-bin-release/bin
输入命令:
nohup sh mqnamesrv -c /root/export/rocketmq-all-4.9.6-bin-release/conf/namesrv.properties &
日志输出:tail -f ~/logs/rocketmqlogs/namesrv.log
2.8.3 节点140上
第一个nameserver节点
进入到bin目录下: /root/export/rocketmq-all-4.9.6-bin-release/bin
输入命令:
nohup sh mqnamesrv -c /root/export/rocketmq-all-4.9.6-bin-release/conf/namesrv.properties &
日志输出:tail -f ~/logs/rocketmqlogs/namesrv.log
2.9 启动broker并查看broker服务状态
2.9.1 节点141上
141节点只作为nameserver角色,没有broker,只能查看nameserver的信息。
注意141节点上默认防火墙是打开着的需要关闭,输入命令:
| systemctl stop firewalld |
查看
2.9.2 节点180上
启动命令:
| nohup sh mqbroker -c /root/export/rocketmq-all-4.9.6-bin-release/conf/2m-2s-async/broker-a.properties & nohup sh mqbroker -c /root/export/rocketmq-all-4.9.6-bin-release/conf/2m-2s-async/broker-b-s.properties & |
root@localhost bin]# tail -f ~/logs/rocketmqlogs/broker.log
2.9.3 节点140上
启动命令:
| nohup sh mqbroker -c /root/export/rocketmq-all-4.9.6-bin-release/conf/2m-2s-async/broker-b.properties & nohup sh mqbroker -c /root/export/rocketmq-all-4.9.6-bin-release/conf/2m-2s-async/broker-a-s.properties & |
root@localhost bin]# tail -f ~/logs/rocketmqlogs/broker.log


