yolo-pose标注
目录
- 前言
- 支持的操作
-
- 普通标注下
- 关键点标注下
- 缺点
- 优点
- 标注 YOLO格式的数据集
-
- 加载本地标签,并标注
-
- 运行程序
- 切换到下一张图片
- 显示类别的框的颜色
- 显示类别的文本
- 对已有标签的修改
- 删除已有标签
- 新增标签
- 从0标注(本地没有标签)
- 标注 YOLO关键点检测格式的数据集
-
- 加载本地标签
- 从0标注(本地没有标签)
- 一个图中标注多个框和关键点
- 最终代码
前言
本篇文章介绍的标注工具是本人自己编写,针对YOLO系列的数据标注以及关键点标注应该是能满足需求的。
- 整体比较乱,但是可以更改的地方已经全放到代码的开头了。
- 代码放到了文章末尾,以及百度云下载链接
- 首先放一段实际操作的视频展示
yolov5数据集标注,yolo-pose数据集标注
支持的操作
这里先简单说明下支持的操作
普通标注下
- 按Q切换到下一张图像
- 按T总退出(完成标注后先按下Q切换到下一张图再按T总的退出,不会丢失数据)
- 按R将已有内容隐藏,继续标注,标注完成和原来的内容合并
- 双击框上的点切换到删除状态,按下E不做操作,按下W删除
- 鼠标左键点击框上的点,拖拽会移动框
关键点标注下
- 按Q切换到下一张图像
- 按T总退出
- 按R将已有内容隐藏,继续标注,标注完成和原来的内容合并
- 双击关键点切换关键点的可见状态(0 1 2)
- 鼠标左键点击框或者关键点移动
- 双击空白区域,从键盘输入两次0-9数字,索引对应关键点,例如0和8索引为8,将8对应的点移动到鼠标左键双击的位置
缺点
- 不支持滚轮放大图片操作
- 不支持随意切换要标注的图片
- 只支持yolo格式的标注
- 当物体较小,或者较为密集的时候,不方便操作
优点
- 使用简单,安装opencv即可
- 操作逻辑简单
- 对关键点格式的标注支持友好
标注 YOLO格式的数据集
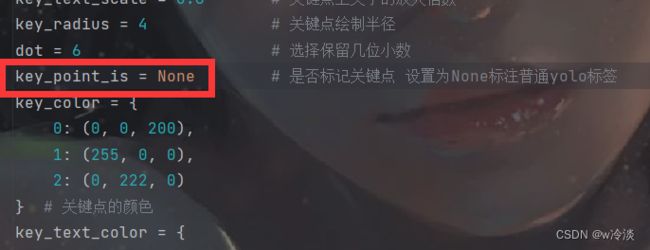
- 首先需要把22行的代码的初始值从True改为None,表示不标注关键点
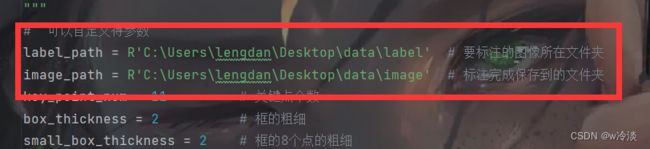
- 更换图像所在的路径和保存路径,保存路径中可以不放任何内容
然后这里说一下,如果本地已经存在标签了,如果除了后缀前缀都是相同的,则优先加载本地文件夹到图像上,这里分别展示
加载本地标签,并标注
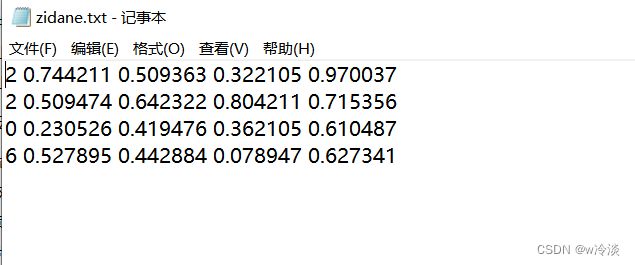
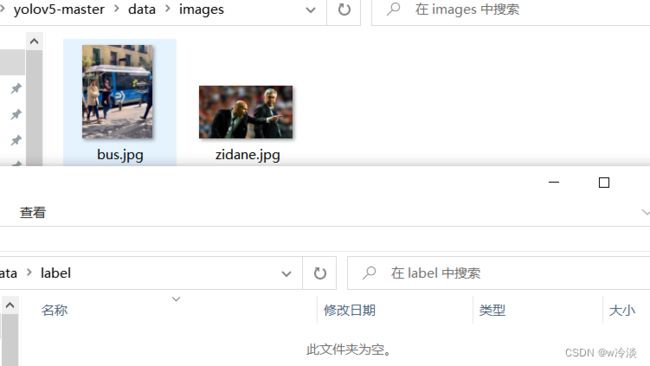
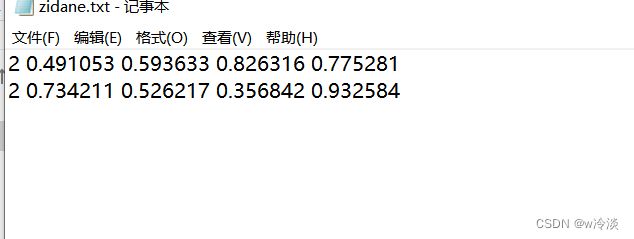
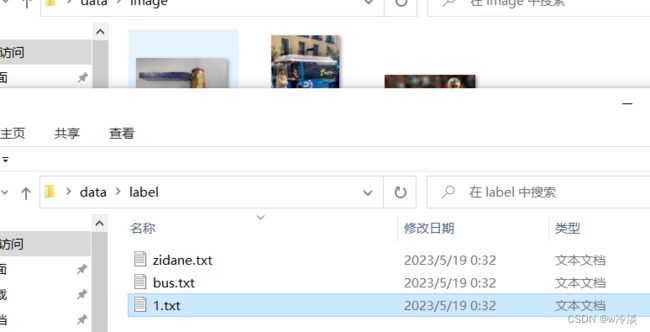
- 本地存放了三张测试图像和测试标签,设置路径为这两个文件夹

运行程序
切换到下一张图片
- 可以看到本地标签已经加载到图像上面了,可以把键盘切换为字母大写的状态,然后点击Q切换到下一张图像
显示类别的框的颜色
不同类别展示用的颜色也不相同,如果需要更改颜色需要更改的是这段代码,这里预先设置好了10种类别的颜色,是因为opencv可以从键盘获取的数字中0-9最容易。也可以设置其他类别,只是需要用到字母
box_color = {
    0: (0, 0, 0),
    1: (0, 0, 0),
    2: (0, 255, 0),
    3: (255, 0, 0),
    4: (0, 255, 255),
    5: (255, 255, 0),
    6: (255, 0, 255),
    7: (0, 125, 125),
    8: (125, 125, 125),
    9: (125, 0, 125)
}  # 每个不同类别框的颜色
显示类别的文本
- 每个框上面都存在一个名字,因为YOLO的标签格式就是数字表示的,所以这里就用数字了,如何想要展示成英文单词,需要更改下下面的代码
扩充字典,把value替换为自己的类别名
my_cls = {
    0: '0',
    1: 'other',
    2: 'person'
}  # 添加自己的框的标签,如果没有就用i:'i'替代
- 然后显示的就是对应的类别名字了,这里的文本颜色我没有提供修改方式,有兴趣再label_show函数中修改
对已有标签的修改
应该容易发现再矩形框的四个顶点以及四条边的中心处显示了9个点,这里是参照make-sense做的,当鼠标放置于这9个点附近时
就会在鼠标周围显示绿色的空心圈,提示可以对已经存在的框做一些操作了
按下鼠标的左键,不松手,移动即可使标签位置发生移动
当松开鼠标的左键的时候即可完成本次修改,本地标签也会同时完成修改
删除已有标签
当鼠标放置于9个点附近时,显示绿色空心圈的时候,双击鼠标左键,可以发现框从实线转为虚线,并且提示W和E,从键盘按下E即可退出该状态
按下E不会进行任何操作
如何按下W则会删除该标签
新增标签
当鼠标不放在已有标签的9个点附近时,按住左键,一直移动即可看到一个变化的矩形框,当松下左键的时候即完成一次框的增加操作
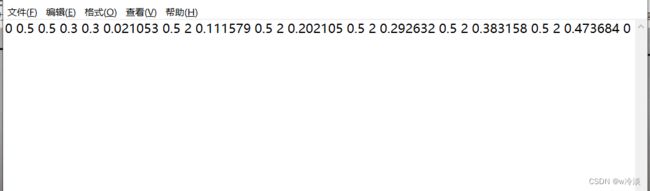
- 此时会提示选择自己的类别,这里显示的只是自己设置的名字,0-9都是可以选择的,这里新增两个框,分别选择为0和6
选则0和6
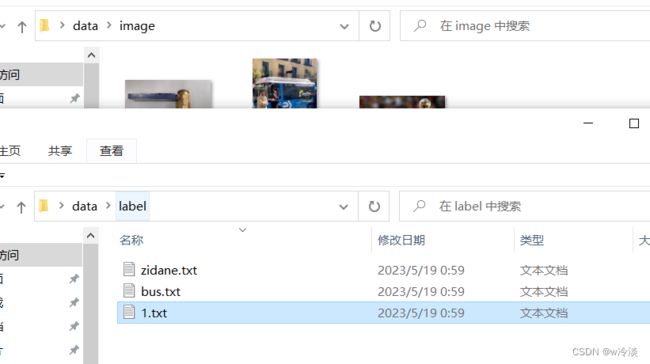
然后本地标签就会同时保存
从0标注(本地没有标签)
如果本地没有标签
直接运行
开始标注
同时本地会生成对应的标签
到这里基础的标注功能展示完毕
标注 YOLO关键点检测格式的数据集
首先需要把22行的代码的初始值改为True,表示标注关键点,并且设置好相应的key_point_num # 关键点个数,要和本地标签中关键点数目相同,一般关键点标注也只需要一类,所以这里也只要求可以出现一个框,不能增删,关键点个数也不能增删,因为键盘能输入的数字只有0-9,所以做了这样的限制。

加载本地标签
本地已经存放了三个标签
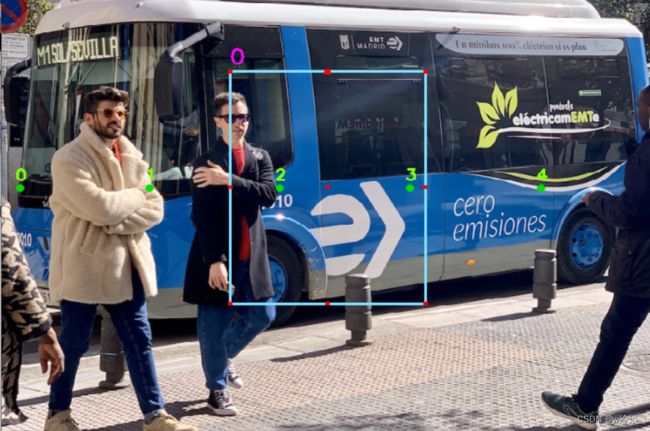
直接运行程序,可以正确加载本地的标签,和普通标注一样,鼠标放矩形框的8个点以及关键点附近鼠标周围都会出现绿色空心圈

当出现空心圈之后就可以拖动关键点和框了
和普通标注不同的是这里双击矩形框不会出现任何操作,表示你不可以删除矩形框,只能移动,也不可以删除关键点,也只能移动,但是关键点除了拖动也可以通过双击和键盘输入移动
- 可以鼠标左键双击关键点
因为关键点有0 1 2三种状态,可见等状态
然后从键盘输入0或者1或者2
- 设为1仅仅是标志位从2->1,显示颜色发生改变,设置为2因为之前的状态就是2,所以看起来没有变化,设置为0,除了把状态变为0,还要把相应的坐标(x ,y)设置为0 0
- 如果只是想要把状态设置为0,坐标不变,需要注释掉481和482行的代码
        elif key_insert is not None and key == ord('0'):
            with open(label_path, 'r') as f:
                label_temp = f.read()
                str_temp = label_temp.split(' ')
                str_temp[3 * int(key_insert) + 7] = '0'
                #str_temp[3 * int(key_insert) + 7 - 1] = '0'
                #str_temp[3 * int(key_insert) + 7 - 2] = '0'
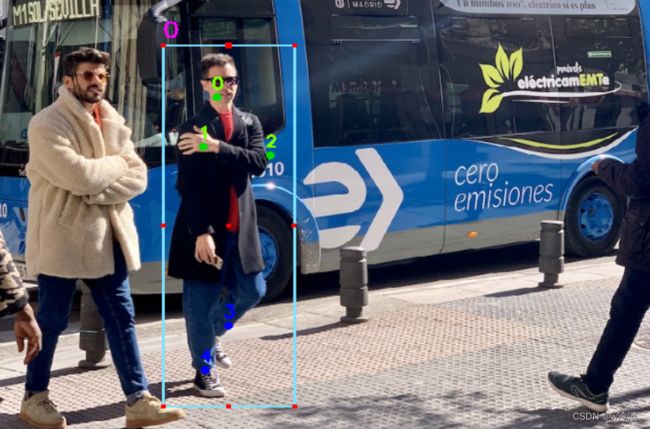
如果想把状态为0的点改回来需要把鼠标放到左上角,双击,或者先拖拽到其他显眼区域

接下来选择前三个点展示起始标签和更改完后的标签
- 初始标签
0 0.477661 0.495117 0.895264 0.702474 0.69458 0.65625 2.0 0.895019 0.810872 2.0 0.572509 0.643229 2.0 0.745117 0.577473 2.0 0.642822 0.57194 2.0 0.74707 0.429361 2.0 0.641601 0.431315 2.0 0.748535 0.267252 2.0 0.64624 0.260742 2.0 0.279296 0.255859 2.0 0.050292 0.253906 2.0
前三个关键点标志位都是2

分别将0 1 2对应的关键点状态设置为0 1 2
本地状态也分别为0 1 2以及0对应坐标设置为0

从0标注(本地没有标签)

- 然后直接运行,可以发现已经生成好了一个框和key_point_num个关键点,本地同时生成了相应的标签
- 这是因为如果不预先生成一个框和key_point_num个关键点,处理起来会相当复杂,而且当关键点数量多余10个也不好处理,因此预先生成关键点和框,关键点的状态为2,可以自行修改
- 标注的时候把框和点拖拽到相应的位置,把关键点状态设为所需的即可

- 拖动关键点和框的位置,对于关键点也可以采用另一种标注方式
双击不存在关键点和框的9个点的区域
双击完成后会提示选则本0-10,因为这里关键点一共11个,从键盘输入两次,都要输入0-9的数字才行,如果像选中个位关键点例如0-9则第一次输入0,第二次输入关键点索引
例如要操作8号关键点,第一次输入0第二次输入8,可以看到关键点跑到了鼠标双击的位置
当该图标注完成,点击Q切换,都完成后可以看到本地相应的生成了对应的关键点标签,按T就是总退出
标注的时候也可以拉伸窗口,不影响标注结果,总之注意不要叉掉窗口或者强制退出,尽量还是按Q退出
一个图中标注多个框和关键点
虽然预先生成了一个框和n个关键点,但是比如一个图里面有多个人,比如有两个人,那就需要把两个人都标注在图像中,为了处理这种情况
首先先正常标注
然后这时候不要按Q退出,如果你想标注第二个人,这时候按住R
然后继续标注即可
如果你还想要继续标注就继续按住W,直到你所有的都完成后按住Q切换到下一个图,当所有的都完成之后,可以 看到本地中的标签文件中,已经成功的添加了两个标注物体

此时我们再重新运行程序,可以看到已经成功标注了
但是需要注意的是,这种一个图中含有多个框的,就不要做任何操作了,比如点击,移动之类的,就是只可以看,如果你操作了,只会保留标签中第一行,其余的都会被删掉
最终代码
import math
import os
import cv2
"""
标注关键点只能存在一个框和多个点,并且不能删除点和删除框,读取本地文件的关键点要保证其中的关键点
数和key_point_num的值是一样的,本地标签中如果只存在框的信息就不要使用该脚本标注,不然会出错,
本地文件夹中可以有标签,如果有会优先加载本地标签,没有才会创建一个
"""
draw_line_circle = True # True/None 是否在框上绘制点(8个点)
key_point_is = None # 是否标记关键点 设置为None标注普通yolo标签
# 可以自定义得参数
label_path = R'C:\Users\lengdan\Desktop\data\2' # 标注完成保存到的文件夹
image_path = R'C:\Users\lengdan\Desktop\data\1' # 要标注的图像所在文件夹
circle_distance = 10 # 半径范围:鼠标进入点的半径范围内会出现光圈
key_point_num = 5 # 关键点个数
box_thickness = 1 # 框的粗细
small_box_thickness = 1 # 框的8个点的粗细
label_thickness = 1 # 框上面的类别字体的粗细
label_fontScale = 0.4 # 框上面的类别字体的倍数
key_thick = -1 # 关键点的粗细
key_text_thick = 2 # 关键点上文字粗细
key_text_scale = 0.6 # 关键点上文字的放大倍数
key_radius = 4 # 关键点绘制半径
dot = 6 # 选择保留几位小数
key_color = {
0: (0, 0, 200),
1: (255, 0, 0),
2: (0, 222, 0)
} # 关键点的颜色
key_text_color = {
0: (0, 100, 200),
1: (255, 0, 0),
2: (0, 255, 125)
} # 关键点上文本的颜色
box_color = {
0: (255, 225, 125),
1: (0, 0, 0),
2: (0, 255, 0),
3: (255, 0, 0),
4: (0, 255, 255),
5: (255, 255, 0),
6: (255, 0, 255),
7: (0, 125, 125),
8: (125, 125, 125),
9: (125, 0, 125)
} # 每个不同类别框的颜色
my_cls = {
0: '0',
1: 'other',
2: 'person'
} # 添加自己的框的标签,如果没有就用i:'i'替代
final_class = {
i: my_cls[i] if i in my_cls else str(i) for i in range(10)
} # 框的默认名字
# 不要修改的参数
position = None # 这里判断鼠标放到了哪个点上,方便后面移动的时候做计算
label = None # 操作图像对应的标签
img = None # 操作的图像
Mouse_move = None # 选择移动框的标志位
label_index = None # 鼠标选中的框在标签中的位置
label_index_pos = None # 记录选中了框的8个点位的哪一个
Mouse_insert = None # 用来记录是否进入删除状态
draw_rectangle = None # 用来记录开始添加新框
end_draw_rectangle = None # 用来记录结束绘制新框
append_str_temp = None # 用来保存新增加的框的信息
empty_label = None # 本地是否存在标签文件标志
# 关键点相关的参数
key_points = None
key_points_move = None
key_x = None # 移动关键点的时候记录其每个关键点的x
key_y = None # 移动关键点的时候记录其每个关键点的y
key_v = None # 移动关键点的时候记录其每个关键点的状态
key_box = None
box_move = None # 移动的是框的时候的标志位
key_insert = None # 对某个关键点双击,切换其状态
move_key_point = None # 把其他位置的关键点移动到这个地方
la_path = None
key_point_one = None # 使用双击移动关键点的时候,记录第一个按下的键
key_point_two = None # 使用双击移动关键点的时候,记录第二个按下的键
append_new_key_point = None # 增加第二个关键点
append_new_key_point_index = 0 # 增加第二个关键点
window_w = None # 获取创建窗口的宽度
window_h = None # 获取创建窗口的高度
def flag_init():
# 初始化下参数
global position, label, img, Mouse_insert, Mouse_move, label_index, draw_rectangle, end_draw_rectangle, append_str_temp, empty_label, \
label_index_pos, key_v, key_x, key_y, key_x, key_box, key_points_move, key_points, box_move, move_key_point, window_w, window_h
position = None
Mouse_move = None
label_index = None
label_index_pos = None
Mouse_insert = None
draw_rectangle = None
end_draw_rectangle = None
append_str_temp = None
empty_label = None
key_points = None
key_points_move = None
key_x = None
key_y = None
key_v = None
key_box = None
box_move = None
move_key_point = None
window_w = None
window_h = None
# 用来绘制小的填充矩形框
def draw_rect_box(img, center, length_1, color=(0, 0, 255)):
x1, y1 = center[0] - length_1, center[1] - length_1
x2, y2 = center[0] + length_1, center[1] + length_1
cv2.rectangle(img, (x1, y1), (x2, y2), color, thickness=-1)
# 用来读取本地图像
def img_read(img_path, scale_):
global window_w, window_h
# scale_填写屏幕的最小尺寸
image = cv2.imread(img_path)
scale_x, scale_y, _ = image.shape
if max(scale_x, scale_y) > scale_ and window_w is None:
scale = max(scale_x, scale_y) / scale_
image = cv2.resize(image, (int(image.shape[1] / scale), int(image.shape[0] / scale)))
if window_w is not None:
image = cv2.resize(image, (window_w, window_h))
return image
# 判断两点的间距,用来判断鼠标所在位置是否进入了8个点所在的区域
def distance(p1, p2):
global circle_distance
if math.sqrt((p2[0] - p1[0]) ** 2 + (p2[1] - p1[1]) ** 2) < circle_distance:
return True
else:
return False
# 绘制虚线矩形框,当切换到删除时,由实线框转为虚线框
def draw_dotted_rectangle(img, pt1, pt2, length_1=5, gap=6, thick=2, color=(100, 254, 100)):
(x1, y1), (x2, y2) = pt1, pt2
temp1, temp2 = x1, y1
while x1 + length_1 < x2:
cv2.line(img, (x1, y1), (x1 + length_1, y1), color, thickness=thick)
cv2.line(img, (x1, y2), (x1 + length_1, y2), color, thickness=thick)
x1 += length_1 + gap
while y1 + length_1 < y2:
cv2.line(img, (temp1, y1), (temp1, y1 + length_1), color, thickness=thick)
cv2.line(img, (x1, y1), (x1, y1 + length_1), color, thickness=thick)
y1 += length_1 + gap
# 把本地标签展示到图像中
def label_show(img1, label_path, index):
global small_box_thickness, box_thickness, label_fontScale, label_thickness, key_point_is, key_points, \
key_radius, key_color, key_thick, key_text_scale, key_text_thick, key_text_color, label, draw_line_circle
with open(la_path) as f:
label = f.readlines()
if len(label) == 0:
return
for i, points in enumerate(label):
if key_point_is:
# 获取关键点参数
key_points = points.split(' ')[5:]
points = points.split(' ')[0:5]
classify = int(float(points[0]))
points.pop(0)
point = [float(s.strip('\n')) for s in points]
# point = list(map(float, points))
scale_y, scale_x, _ = img1.shape
x, y, w, h = int((point[0] - point[2] / 2) * scale_x), int(
(point[1] - point[3] / 2) * scale_y), int(
point[2] * scale_x), int(point[3] * scale_y)
if i == index:
draw_dotted_rectangle(img1, (x, y), (x + w, y + h), box_thickness)
else:
cv2.rectangle(img1, (x, y), (x + w, y + h), box_color[classify], thickness=box_thickness)
if draw_line_circle:
# 绘制边上中心点,与四个顶点,矩形框中心点
draw_rect_box(img1, (x, int(0.5 * (y + y + h))), length_1=small_box_thickness)
draw_rect_box(img1, (x + w - 1, int(0.5 * (y + y + h))), length_1=small_box_thickness)
draw_rect_box(img1, (int(0.5 * (x + x + w)), y), length_1=small_box_thickness)
draw_rect_box(img1, (int(0.5 * (x + x + w)), y + h), length_1=small_box_thickness)
draw_rect_box(img1, (x, y), length_1=small_box_thickness)
draw_rect_box(img1, (x + w, y), length_1=small_box_thickness)
draw_rect_box(img1, (x + w, y + h), length_1=small_box_thickness)
draw_rect_box(img1, (x, y + h), length_1=small_box_thickness)
draw_rect_box(img1, (int(x + 0.5 * w), int(y + 0.5 * h)), length_1=small_box_thickness)
cv2.putText(img1, str(final_class[classify]), (x, y - 10), cv2.FONT_HERSHEY_SIMPLEX, label_fontScale,
(255, 0, 255), label_thickness)
if key_point_is:
# 依次获取每个关键点
key_x = [float(i) for i in key_points[::3]]
key_y = [float(i) for i in key_points[1::3]]
key_v = [int(float(i)) for i in key_points[2::3]]
index = 0
key_point = zip(key_x, key_y)
for p in key_point:
cv2.circle(img, (int(p[0] * scale_x), int(p[1] * scale_y)), key_radius, key_color[key_v[index]],
thickness=key_thick,
lineType=cv2.LINE_AA)
cv2.putText(img, str(index), (int(p[0] * scale_x - 5), int(p[1] * scale_y - 10)),
cv2.FONT_HERSHEY_SIMPLEX,
key_text_scale, key_text_color[key_v[index]], key_text_thick)
index += 1
key_points = None
# 回调函数,用于记录鼠标操作
def mouse_event(event, x, y, flag, param):
global label, img, position, Mouse_move, label_index, label_index_pos, dot, Mouse_insert, draw_rectangle, \
end_draw_rectangle, key_points, key_v, key_x, key_y, key_x, key_box, key_points_move, box_move, \
key_insert, label_path, move_key_point
scale_y, scale_x, _ = img.shape
# 鼠标如果位于8个点左右,即通过position记录当前位置,通过主函数在鼠标附近绘制空心圈
# 通过label_index记录鼠标选择了第几个框,通过label_index_pos记录该框第几个点被选中了
with open(la_path) as f:
label = f.readlines()
if move_key_point is None and key_insert is None and Mouse_insert is None and empty_label is None and event == cv2.EVENT_MOUSEMOVE and img is not None and label is not None and \
Mouse_move is None:
for i, la in enumerate(label):
la = la.strip('\n').split(' ')
if key_point_is:
key_points = list(map(float, la))[5:]
la = list(map(float, la))[0:5]
x1, y1 = int((la[1] - la[3] / 2) * scale_x), int((la[2] - la[4] / 2) * scale_y)
x2, y2 = x1 + int(la[3] * scale_x), y1 + int(la[4] * scale_y)
# 这里判断鼠标放到了哪个点上,方便后面移动的时候做计算
if distance((x, y), (x1, y1)):
label_index_pos = 0
position = (x, y)
label_index = i
box_move = True
key_points_move = None
break
elif distance((x, y), (x2, y2)):
label_index_pos = 1
position = (x, y)
label_index = i
box_move = True
key_points_move = None
break
elif distance((x, y), (x1, int(0.5 * y1 + 0.5 * y2))):
label_index_pos = 2
position = (x, y)
label_index = i
box_move = True
key_points_move = None
break
elif distance((x, y), (int((x1 + x2) / 2), y2)):
label_index_pos = 3
position = (x, y)
label_index = i
box_move = True
key_points_move = None
break
elif distance((x, y), (int((x1 + x2) / 2), y1)):
label_index_pos = 4
position = (x, y)
label_index = i
box_move = True
key_points_move = None
break
elif distance((x, y), (x2, int(0.5 * y1 + 0.5 * y2))):
label_index_pos = 5
position = (x, y)
label_index = i
box_move = True
key_points_move = None
break
elif distance((x, y), (x1, y2)):
label_index_pos = 6
position = (x, y)
label_index = i
box_move = True
key_points_move = None
break
elif distance((x, y), (x2, y1)):
label_index_pos = 7
position = (x, y)
label_index = i
box_move = True
key_points_move = None
break
elif distance((x, y), ((x1 + x2) / 2, (y1 + y2) / 2)):
# 框中心
label_index_pos = 8
position = (x, y)
label_index = i
box_move = True
key_points_move = None
break
else:
label_index_pos = None
position = None
label_index = None
if key_point_is:
# 判断鼠标是不是放到了关键点上
key_x = [float(i) for i in key_points[::3]]
key_y = [float(i) for i in key_points[1::3]]
key_v = [float(i) for i in key_points[2::3]] # 能见度
if len(key_x) == len(key_v) and len(key_x) == len(key_y):
for index, key_ in enumerate(key_x):
if distance((x, y), (int(key_ * scale_x), int(key_y[index] * scale_y))):
position = (x, y)
label_index, label_index_pos = i, index
key_box = la
key_points_move = True
box_move = None
break
# 这里到下一个注释都是为了移动已有的框做准备
if position is not None and event == cv2.EVENT_LBUTTONDOWN:
Mouse_move = True
position = None
# 首先判断鼠标选择了该框的第几个点,然后移动鼠标的时候只负责移动该点
if Mouse_move and box_move:
# 先把要移动的框的标签记录下来,然后删除,添加到末尾,不断修改末尾标签来达到移动框的目的
# temp_label用来记录标签
temp_label = label[label_index]
label.pop(label_index)
temp_label = temp_label.strip('\n').split(' ')
temp_label = [float(i) for i in temp_label]
x_1, y_1 = (temp_label[1] - 0.5 * temp_label[3]), (temp_label[2] - 0.5 * temp_label[4])
x_2, y_2 = x_1 + temp_label[3], y_1 + temp_label[4]
# 判断移动的是8个点中的哪个
if label_index_pos == 0:
x_1, y_1 = x / scale_x, y / scale_y
elif label_index_pos == 1:
x_2, y_2 = x / scale_x, y / scale_y
elif label_index_pos == 2:
x_1 = x / scale_x
elif label_index_pos == 3:
y_2 = y / scale_y
elif label_index_pos == 4:
y_1 = y / scale_y
elif label_index_pos == 5:
x_2 = x / scale_x
elif label_index_pos == 6:
x_1, y_2 = x / scale_x, y / scale_y
elif label_index_pos == 7:
y_1, x_2 = y / scale_y, x / scale_x
elif label_index_pos == 8:
x_1, y_1 = x / scale_x - (abs(temp_label[3]) / 2), y / scale_y - (abs(temp_label[4]) / 2)
x_2, y_2 = x / scale_x + (abs(temp_label[3]) / 2), y / scale_y + (abs(temp_label[4]) / 2)
# 把移动后的点信息保存下来添加到标签中,以此形成动态绘制一个框的效果
temp_label[0], temp_label[1], temp_label[2], temp_label[3], temp_label[4] = str(
round((int(temp_label[0])), dot)), \
str(round(((x_1 + x_2) * 0.5), dot)), str(round(((y_1 + y_2) * 0.5), dot)), str(
round((abs(x_1 - x_2)), dot)), str(round((abs(y_1 - y_2)), dot))
temp_label = [str(i) for i in temp_label]
str_temp = ' '.join(temp_label) + '\n'
label.append(str_temp)
label_index = len(label) - 1
elif Mouse_move and key_points_move:
label.pop(label_index)
key_x[label_index_pos] = round(x / scale_x, dot)
key_y[label_index_pos] = round(y / scale_y, dot)
key_box[0] = int(key_box[0])
str_temp = ' '.join([str(j) for j in key_box])
for index, kx in enumerate(key_x):
str_temp += ' ' + str(kx) + ' ' + str(key_y[index]) + ' ' + str(int(key_v[index]))
label.append(str_temp)
label_index = len(label) - 1
if Mouse_move and event == cv2.EVENT_LBUTTONUP:
flag_init()
# 这里是为了删除框
if key_point_is is None and Mouse_insert is None and position is not None and event == cv2.EVENT_LBUTTONDBLCLK and Mouse_move is None:
Mouse_insert = label_index
if key_point_is and event == cv2.EVENT_LBUTTONDBLCLK and Mouse_move is None and key_points_move and box_move is None:
key_insert = label_index_pos
if key_point_is and event == cv2.EVENT_LBUTTONDBLCLK and Mouse_insert is None and key_insert is None and position is None:
move_key_point = (x, y)
# 这里是为了增加新的框
if key_point_is is None and Mouse_insert is None and position is None and Mouse_move is None and event == cv2.EVENT_LBUTTONDOWN and end_draw_rectangle is None:
draw_rectangle = [(x, y), (x, y)]
# 如果鼠标左键一直没有松开,则不断更新第二个点的位置
elif Mouse_insert is None and draw_rectangle is not None and event == cv2.EVENT_MOUSEMOVE and end_draw_rectangle is None:
draw_rectangle[1] = (x, y)
# 鼠标松开了,最后记录松开时鼠标的位置,现在则记录了开始和松开鼠标的两个位置
# 如果两个位置太近,则不添加
elif Mouse_insert is None and draw_rectangle is not None and event == cv2.EVENT_LBUTTONUP:
if end_draw_rectangle is None:
draw_rectangle[1] = (x, y)
if not distance(draw_rectangle[0], draw_rectangle[1]):
end_draw_rectangle = True
else:
draw_rectangle = None
def create_file_key(img_path, label_path):
empty_la = None
if not os.path.exists(label_path):
with open(label_path, 'w') as f:
pass
empty_la = True
with open(label_path) as f:
label_ = f.readlines()
if len(label_) == 0 or label_[0] == '\n':
empty_la = True
img_s = img_read(img_path, 950) # 950调整图像的大小
if key_point_is and empty_la:
box_create = '0 0.5 0.5 0.3 0.3 '
len_t = img_s.shape[1] // key_point_num
key_num_x = [str(round((i * len_t + 20) / img_s.shape[1], dot)) + ' ' + str(0.5) + ' ' + '2' for i in
range(key_point_num)]
with open(label_path, 'w') as f:
f.write(box_create + ' '.join(key_num_x))
def main(img_path, label_path):
global img, position, label, Mouse_insert, draw_rectangle, end_draw_rectangle, append_str_temp, empty_label, \
Mouse_move, dot, box_move, key_insert, key_point_one, key_point_two, key_x, key_y, key_v, \
move_key_point, append_new_key_point, append_new_key_point_index, window_w, window_h
# 判断本地是否存在文件,或者文件中是否为空或者存在一个换行符,就先把标签删除,添加'0 0 0 0 0\n'
# 如果不预先添加一个处理起来有点麻烦,这里就先加一个,然后后面删掉就行了
if not os.path.exists(label_path):
empty_label = True
with open(label_path, 'w') as f:
pass
with open(label_path) as f:
label = f.readlines()
if len(label) == 0 or label[0] == '\n':
empty_label = True
# 这里的2是将原图缩小为2分之一
img_s = img_read(img_path, 900)
if key_point_is and empty_label:
box_create = '0 0.5 0.5 0.3 0.3 '
len_t = img_s.shape[1] // key_point_num
key_num_x = [str(round((i * len_t + 20) / img_s.shape[1], dot)) + ' ' + str(0.5) + ' ' + '2' for i in
range(key_point_num)]
with open(label_path, 'w') as f:
f.write(box_create + ' '.join(key_num_x))
label = box_create + ' '.join(key_num_x)
# 创建回调函数,绑定窗口
cv2.namedWindow('image', cv2.WINDOW_NORMAL)
_, _, window_w, window_h = cv2.getWindowImageRect('image')
cv2.resizeWindow('image', img_s.shape[1], img_s.shape[0])
cv2.setMouseCallback('image', mouse_event)
# 刷新图像的地方
while True:
# 首先读取下标签,用来初始化显示
with open(label_path, 'w') as f:
for i in label:
f.write(i)
# 如果鼠标选中了框的8个点之一,就在鼠标周围绘制空心圈
if Mouse_insert is None and draw_rectangle is None and position is not None and key_insert is None:
img = img_s.copy()
label_show(img, label_path, Mouse_insert)
cv2.circle(img, position, 10, (0, 255, 100), 2)
# 如果选择开始增加新的框,则不断绘制鼠标起始点和移动过程之间形成的框
elif draw_rectangle is not None and end_draw_rectangle is None:
img = img_s.copy()
label_show(img, label_path, Mouse_insert)
cv2.rectangle(img, draw_rectangle[0], draw_rectangle[1], color=box_color[1], thickness=2)
# 当松开鼠标后,记录两点位置,并提示选择类别
elif draw_rectangle is not None and end_draw_rectangle:
scale_y, scale_x, _ = img.shape
x1, y1 = draw_rectangle[0]
x2, y2 = draw_rectangle[1]
w1, h1 = abs(x2 - x1), abs(y2 - y1)
append_str_temp = str(round((x1 + x2) / 2 / scale_x, dot)) + ' ' + str(
round((y1 + y2) / 2 / scale_y, dot)) + ' ' + \
str(round((w1 / scale_x), dot)) + ' ' + str(round((h1 / scale_y), dot)) + '\n'
cv2.putText(img, 'choose your classify', (0, img.shape[0] // 2 - 30),
cv2.FONT_HERSHEY_SIMPLEX,
0.7, (255, 0, 255), 2)
cv2.putText(img, ' '.join([str(i) + ':' + my_cls[i] for i in my_cls]), (0, img.shape[0] // 2 + 30),
cv2.FONT_HERSHEY_SIMPLEX,
0.7, (100, 255, 255), 2)
elif key_insert is not None:
position, Mouse_move, box_move = None, None, None # 禁用其他操作
cv2.putText(img, 'Switching visibility: 0 1 2', (0, img.shape[0] // 2 - 30),
cv2.FONT_HERSHEY_SIMPLEX,
1, (100, 255, 255), 2,
lineType=cv2.LINE_AA)
elif move_key_point is not None:
position, Mouse_move, box_move = None, None, None # 禁用其他操作
cv2.putText(img, 'choose point: 0 - {}'.format(key_point_num - 1), (0, img.shape[0] // 2 - 30),
cv2.FONT_HERSHEY_SIMPLEX,
1, (100, 255, 255), 2,
lineType=cv2.LINE_AA)
# 如果什么标志都没有,就正常显示一个图
else:
img = img_s.copy()
if Mouse_insert is not None:
position, Mouse_move = None, None
cv2.putText(img, 'delete: W, exit: E', (0, img.shape[0] // 2 - 30),
cv2.FONT_HERSHEY_SIMPLEX,
1, (100, 255, 255), 2,
lineType=cv2.LINE_AA)
label_show(img, label_path, Mouse_insert)
cv2.imshow('image', img)
# key用来获取键盘输入
key = cv2.waitKey(10)
# 输入为Q则退出
if key == ord('Q'):
append_new_key_point = None
# 退出按键
break
if move_key_point is not None and key_point_one is None and 48 <= key <= 57:
key_point_one = int(chr(key))
key = 0
if move_key_point is not None and key_point_two is None and 48 <= key <= 57:
key_point_two = int(chr(key))
key = 0
if (move_key_point is not None) and (key_point_one is not None) and (key_point_two is not None):
with open(la_path) as f:
label = f.readlines()
for i, la in enumerate(label):
la = la.strip('\n').split(' ')
key_points_ = list(map(float, la))[5:]
key_box_ = list(map(float, la))[0:5]
key_x_ = [float(i) for i in key_points_[::3]]
key_y_ = [float(i) for i in key_points_[1::3]]
key_v_ = [float(i) for i in key_points_[2::3]] # 能见度
key_box_[0] = int(key_box_[0])
index_ = key_point_one * 10 + key_point_two
if index_ >= key_point_num:
break
key_x_[index_] = round(move_key_point[0] / img.shape[1], dot)
key_y_[index_] = round(move_key_point[1] / img.shape[0], dot)
str_temp = ' '.join([str(j) for j in key_box_])
for index, kx in enumerate(key_x_):
str_temp += ' ' + str(kx) + ' ' + str(key_y_[index]) + ' ' + str(int(key_v_[index]))
label = str_temp
with open(la_path, 'w') as f:
f.write(str_temp)
move_key_point, key_point_one, key_point_two = None, None, None
break
move_key_point, key_point_one, key_point_two = None, None, None
# 如果按键输入为W则删除选中的框
if Mouse_insert is not None and key == ord('W'):
label.pop(Mouse_insert)
Mouse_insert = None
elif key_insert is not None and key == ord('0'):
with open(label_path, 'r') as f:
label_temp = f.read()
str_temp = label_temp.split(' ')
str_temp[3 * int(key_insert) + 7] = '0'
str_temp[3 * int(key_insert) + 7 - 1] = '0'
str_temp[3 * int(key_insert) + 7 - 2] = '0'
with open(label_path, 'w') as f:
f.write(' '.join(str_temp))
label = ' '.join(str_temp)
key_insert = None
elif key_insert is not None and key == ord('1'):
with open(label_path, 'r') as f:
label_temp = f.read()
str_temp = label_temp.split(' ')
str_temp[3 * int(key_insert) + 7] = '1'
with open(label_path, 'w') as f:
f.write(' '.join(str_temp))
label = ' '.join(str_temp)
key_insert = None
elif key_insert is not None and key == ord('2'):
with open(label_path, 'r') as f:
label_temp = f.read()
str_temp = label_temp.split(' ')
str_temp[3 * int(key_insert) + 7] = '2'
with open(label_path, 'w') as f:
f.write(' '.join(str_temp))
label = ' '.join(str_temp)
key_insert = None
# 如果输入为E则从选中框的状态退出
elif key == ord('E'):
Mouse_insert = None
# 通过键盘获取输入的类别
elif Mouse_move is None and Mouse_insert is None and draw_rectangle is not None and end_draw_rectangle is not None \
and 48 <= key <= 57:
str_temp = str(chr(key)) + ' ' + append_str_temp
label.append(str_temp)
append_str_temp, draw_rectangle, end_draw_rectangle, empty_label = None, None, None, None
elif key == ord('R'):
flag_init()
append_new_key_point = True
break
elif key == ord('T'):
exit(0)
def delete_line_feed(label_path):
# 去掉最后一行的换行符'\n',保存的时候需要
if os.path.exists(label_path):
with open(label_path) as f:
label_ = f.read()
label_ = label_.rstrip('\n')
with open(label_path, 'w') as f:
f.write(label_)
def append__line_feed(label_path):
# 加上最后一行的换行符'\n',标注的时候增加新的框的时候需要
with open(label_path) as f:
label_ = f.read()
if len(label_) < 4:
with open(label_path, 'w') as f:
pass
return
label_ = label_.rstrip('\n') + '\n'
with open(label_path, 'w') as f:
f.write(label_)
def key_check(label_path):
# 检查开启关键点之后本地标签是否满足要求, 如果本地标签中和预设关键点数不等以及关键点数量不是3的倍数都会将原有标签重置
if os.path.exists(label_path):
with open(label_path) as f:
label_ = f.readlines()
for label_ in label_:
label_ = label_.strip('\n').split(' ')
if ((len(label_) - 5) % 3) or ((len(label_) - 5) // 3 - key_point_num):
with open(label_path, 'w') as f:
pass
def label_check(label_path):
# 检查普通标签,判断每行是包含5个数值
if os.path.exists(label_path):
with open(label_path) as f:
label_ = f.readlines()
for i in label_:
i = i.strip('\n').split(' ')
if len(i) - 5 != 0:
with open(label_path, 'w') as f:
pass
def merge_file_key(la_path, index):
with open(la_path) as f:
text = f.read().strip('\n')
for i in range(index):
with open(la_path.split('.')[0] + str(i) + '.txt') as f:
text += '\n' + f.read().strip('\n')
os.remove(la_path.split('.')[0] + str(i) + '.txt')
with open(la_path, 'w') as f:
f.write(text)
if __name__ == '__main__':
image_ = os.listdir(image_path)
for im in image_:
flag_init()
im_path = os.path.join(image_path, im)
la_path = os.path.join(label_path, im.split('.')[0] + '.txt')
if key_point_is:
key_check(la_path) # 检查本地标签的关键点数量是否和预设的关键点数量相等,以及去除框的5点后点数是否满足为3的倍数
create_file_key(im_path, la_path)
else:
delete_line_feed(la_path)
label_check(la_path)
if os.path.exists(la_path):
# 先增加一个换行符为了后面的增加框的操作
append__line_feed(la_path)
while True:
main(im_path, la_path)
if append_new_key_point is None:
break
else:
la_path = os.path.join(label_path, im.split('.')[0] + str(append_new_key_point_index) + '.txt')
with open(la_path, 'w') as f:
pass
if key_point_is:
key_check(la_path) # 检查本地标签的关键点数量是否和预设的关键点数量相等,以及去除框的5点后点数是否满足为3的倍数
create_file_key(im_path, la_path)
else:
delete_line_feed(la_path)
label_check(la_path)
append_new_key_point_index += 1
if append_new_key_point_index != 0:
merge_file_key(os.path.join(label_path, im.split('.')[0] + '.txt'), append_new_key_point_index)
append_new_key_point_index = 0
if os.path.exists(la_path):
# 去掉最后一行的换行符
delete_line_feed(la_path)