android实现tabbar(导航栏切换)效果
一、实现的效果图
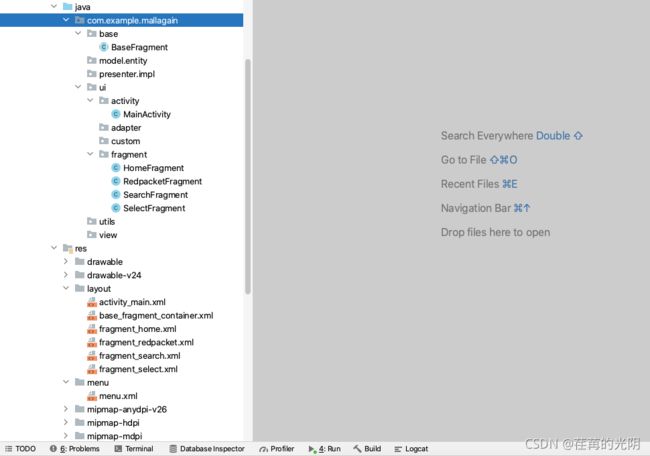
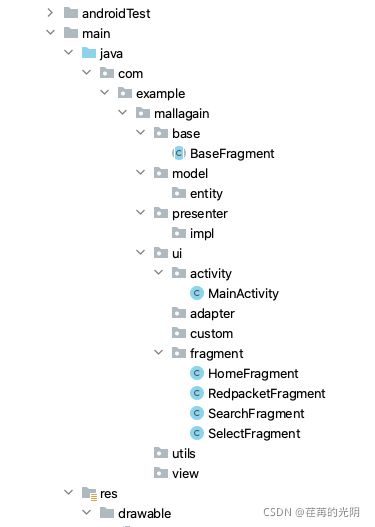
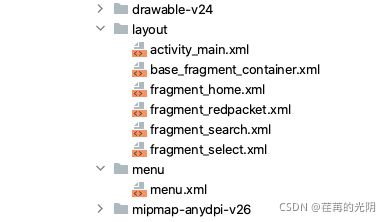
二、总体的目录结构
三、编码前的部分思路
四、进行编码
4.1 创建一个空Activity项目,这个就不赘述了
4.2 在build.gradle中导入相关的依赖(后续可能会用到的我也添加了)
    implementation fileTree(dir: 'libs', include: ['*.jar'])
    implementation 'androidx.constraintlayout:constraintlayout:2.0.1'
    implementation 'androidx.work:work-runtime:2.4.0'
    testImplementation 'junit:junit:4.+'
    implementation("com.squareup.okhttp3:okhttp:4.9.1")
    implementation('com.squareup.retrofit2:retrofit:2.9.0')
    androidTestImplementation 'androidx.test.ext:junit:1.1.2'
    androidTestImplementation 'androidx.test.espresso:espresso-core:3.3.0'
    implementation 'androidx.appcompat:appcompat:1.2.0'
    implementation 'com.google.android.material:material:1.2.1'
    implementation 'com.jakewharton:butterknife:10.2.3'
    annotationProcessor 'com.jakewharton:butterknife-compiler:10.2.3'
    implementation 'com.squareup.retrofit2:converter-gson:2.7.0'
    implementation 'com.blankj:utilcodex:1.30.6'
    implementation 'com.github.bumptech.glide:glide:4.12.0'
    annotationProcessor 'com.github.bumptech.glide:compiler:4.12.0'
    implementation 'com.google.zxing:android-core:3.3.0'
    implementation 'com.google.zxing:core:3.3.2'
    implementation 'com.scwang.smartrefresh:SmartRefreshLayout:1.1.3'
    implementation 'com.scwang.smartrefresh:SmartRefreshHeader:1.1.3'
4.3编写activity_main.xml文件以及menu.xml文件
以下是activity_main.xml文件
<RelativeLayout xmlns:android="http://schemas.android.com/apk/res/android"
    xmlns:app="http://schemas.android.com/apk/res-auto"
    xmlns:tools="http://schemas.android.com/tools"
    android:layout_width="match_parent"
    android:layout_height="match_parent"
    tools:context=".ui.activity.MainActivity">

    <FrameLayout
        android:id="@+id/main_page_container"
        android:layout_width="match_parent"
        android:layout_height="match_parent"/>
    <com.google.android.material.bottomnavigation.BottomNavigationView
        android:layout_width="match_parent"
        android:layout_height="50dp"
        android:background="@color/white"
        android:layout_alignParentBottom="true"
        android:id="@+id/tabbar"
        app:menu="@menu/menu"
        app:itemIconTint="@drawable/navigation_bar_color"
        app:itemTextColor="@drawable/navigation_bar_color"/>

RelativeLayout>
以下是menu,xml文件(其中的图片素材可以用系统自带的或者去阿里的矢量图标库)
<menu xmlns:android="http://schemas.android.com/apk/res/android">
    <item android:id="@+id/home"
        android:icon="@mipmap/home_normal"
        android:title="首页"/>

    <item android:id="@+id/selected"
        android:icon="@mipmap/select_normal"
        android:title="精选"/>

    <item android:id="@+id/red_packet"
        android:icon="@mipmap/red_packet_normal"
        android:title="特惠"/>

    <item android:id="@+id/search"
        android:icon="@mipmap/search_normal"
        android:title="搜索"/>
menu>
4.4 建包(mvp架构的包结构)
4.5 编写BaseFragment(本来不是这样想的,后来代码优化抽取出了BaseFragment)
这是一个抽象类,其中有一个返回id的抽象方法,子类继承它,就必须实现这个抽象方法,返回不同的页面id
package com.example.mallagain.base;

import android.os.Bundle;
import android.view.LayoutInflater;
import android.view.View;
import android.view.ViewGroup;
import android.widget.FrameLayout;

import com.example.mallagain.R;

import androidx.fragment.app.Fragment;
import butterknife.ButterKnife;
import butterknife.Unbinder;

public abstract class BaseFragment extends Fragment {

    private FrameLayout mBaseContainer;
    private Unbinder bind;
    private View successView;

    @Override
    public View onCreateView(LayoutInflater inflater, ViewGroup container, Bundle savedInstanceState) {

        View rootView = loadRootView(inflater, container);
        mBaseContainer = rootView.findViewById(R.id.base_container);
        //绑定的是一个binder
        bind = ButterKnife.bind(this, rootView);
        //加载状态的view
        loadStateView(inflater,container);
        //初始化presenter
        initPresenter();
        //初始化根页面
        initView(rootView);
        //初始化事件监听器
        initListener();
        //加载数据
        loadData();
        return rootView;
    }

    protected void loadData() {

    }

    protected void initListener() {

    }

    protected void initView(View rootView) {

    }

    protected void initPresenter() {

    }

    protected void loadStateView(LayoutInflater inflater, ViewGroup container) {
        successView = loadSuccessView(inflater, container);
        mBaseContainer.addView(successView);
    }

    protected View loadSuccessView(LayoutInflater inflater, ViewGroup container) {
        int id = getSubId();
        return inflater.inflate(id,container,false);
    }
    //子类进行复写,来具体决定页面
    protected abstract int getSubId();

    protected View loadRootView(LayoutInflater inflater, ViewGroup container) {
        View view = inflater.inflate(R.layout.base_fragment_container, container, false);
        return view;
    }
    @Override
    public void onDestroyView() {
        super.onDestroyView();
        release();
        if (bind != null) {
            bind.unbind();
        }
    }

    protected void release() {
    }
}
BaseFragment中布局文件是base_fragment_container.xml,如下
<FrameLayout xmlns:android="http://schemas.android.com/apk/res/android"
    android:id="@+id/base_container"
    android:layout_width="match_parent"
    android:layout_height="match_parent">

FrameLayout>
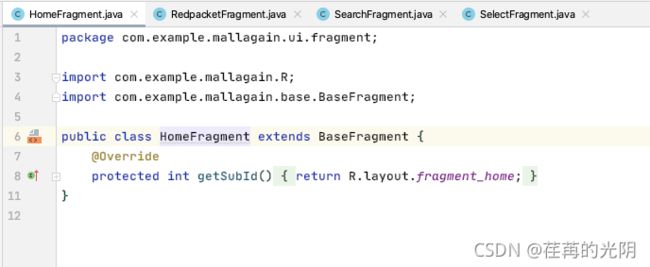
4.6 编写子Fragment,比如HomeFragment,其他Fragment类似
package com.example.mallagain.ui.fragment;

import com.example.mallagain.R;
import com.example.mallagain.base.BaseFragment;

public class HomeFragment extends BaseFragment {
    @Override
    protected int getSubId() {
        return R.layout.fragment_home;
    }
}
4.7 编写每个Fragment对应的布局文件
<LinearLayout xmlns:android="http://schemas.android.com/apk/res/android"
    android:orientation="vertical"
    android:gravity="center"
    android:layout_width="match_parent"
    android:layout_height="match_parent">
    <TextView
        android:layout_width="wrap_content"
        android:layout_height="wrap_content"
        android:text="首页"
        android:textSize="20sp"/>
LinearLayout>
4.8 编写MainActivity,编写tabbar的点击事件,创建不同的Fragment进行页面的渲染
package com.example.mallagain.ui.activity;

import androidx.annotation.NonNull;
import androidx.appcompat.app.AppCompatActivity;
import androidx.fragment.app.FragmentManager;
import androidx.fragment.app.FragmentTransaction;
import butterknife.BindView;
import butterknife.ButterKnife;

import android.os.Bundle;
import android.view.MenuItem;

import com.example.mallagain.R;
import com.example.mallagain.base.BaseFragment;
import com.example.mallagain.ui.fragment.HomeFragment;
import com.example.mallagain.ui.fragment.RedpacketFragment;
import com.example.mallagain.ui.fragment.SearchFragment;
import com.example.mallagain.ui.fragment.SelectFragment;
import com.google.android.material.bottomnavigation.BottomNavigationView;

import org.jetbrains.annotations.NotNull;

public class MainActivity extends AppCompatActivity {
    @BindView(R.id.tabbar)
    BottomNavigationView tabbar;
    private BaseFragment fragment;
    private FragmentManager fragmentManager;

    @Override
    protected void onCreate(Bundle savedInstanceState) {
        super.onCreate(savedInstanceState);
        setContentView(R.layout.activity_main);
        ButterKnife.bind(this);
        initView(0);
        initEvent();
    }

    private void initEvent() {
        tabbar.setOnNavigationItemSelectedListener(item -> {
            switch (item.getItemId()) {
                case R.id.home:
                    initView(0);
                    break;
                case R.id.selected:
                    initView(1);
                    break;
                case R.id.red_packet:
                    initView(2);
                    break;
                case R.id.search:
                    initView(3);
                    break;
                default:
                    break;
            }
            return true;
        });
    }

    private void initView(int i) {
        switch (i) {
            case 0:
                fragment = new HomeFragment();
                break;
            case 1:
                fragment = new SelectFragment();
                break;
            case 2:
                fragment = new RedpacketFragment();
                break;
            case 3:
                fragment = new SearchFragment();
                break;
            default:
                break;
        }
        //定义一个切换fragment的方法
        checkFragment(fragment);
    }

    private void checkFragment(BaseFragment fragment) {
        //获取fragment管理器
        fragmentManager = getSupportFragmentManager();
        //开启事务
        FragmentTransaction fragmentTransaction = fragmentManager.beginTransaction();
        fragmentTransaction.replace(R.id.main_page_container,fragment);
        fragmentTransaction.commit();
    }
}
4.9 不出意外的话,应该已经实现了,点击tabbar进行页面的切换了不过我们还可以做一些细节上的调整
<selector xmlns:android="http://schemas.android.com/apk/res/android">
    <item android:color="#FF8C00" android:state_checked="true"/>
    <item android:color="@color/colorPrimaryDark" />
selector>
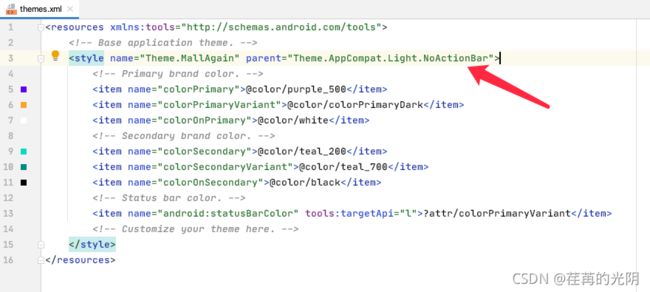
去除文件创建时自带的头部
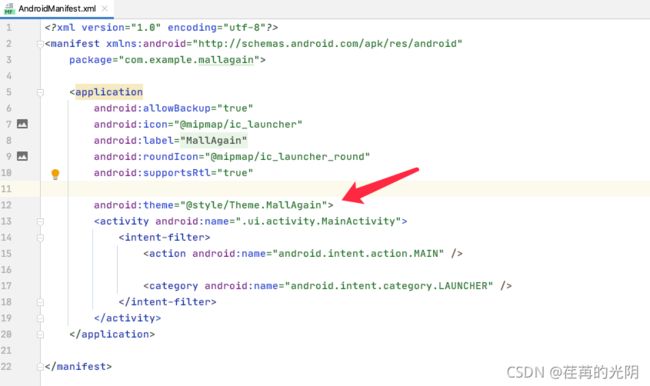
按住command键点击进去进行设置
