图像数据处理
文章目录
- 1:TFRecords
-
- 1-1 将MNIST数据集转换成TFRecord格式
- 1-2 读取TFRecord文件中的数据
- 2:图像数据的预处理
-
- 2-1 处理图像编码
- 2-2 调整图像大小
- 2-3 剪裁和填充
- 2-4 按比例剪裁
- 2-5 图像翻转
- 2-6 图像亮度调整
- 2-7 图像对比度调整
- 2-8 图像色相调整
- 2-9 图像饱和度调整
- 2-10 标注框调整(随机图像截取)
- 实例
- 3:多线程输入数据处理框架
-
- 3-1 队列与多线程
- 3-2 通过tf.Coordinator实现多线程协同
- 3-3 管理多线程队列
- 3-4 输入文件队列164
- 3-5 通过tf.train.match_filenames_once()函数和tf.train.string_input_producer()函数来操作文件
- 3-6 组合训练数据
- 4:将数据输入模型
1:TFRecords
1-1 将MNIST数据集转换成TFRecord格式
import tensorflow as tf
from tensorflow.examples.tutorials.mnist import input_data
import numpy as np

# 将输入转化成TFRecord格式并保存
# 定义函数转化变量类型。
def _int64_feature(value):
    return tf.train.Feature(int64_list=tf.train.Int64List(value=[value]))

def _bytes_feature(value):
    return tf.train.Feature(bytes_list=tf.train.BytesList(value=[value]))

# 读取mnist数据。
mnist = input_data.read_data_sets(r"./mnist", one_hot=True)
images = mnist.train.images
labels = mnist.train.labels
pixels = images.shape[1]
num_examples = mnist.train.num_examples

# 输出TFRecord文件的地址。
filename = "./mnist/output.tfrecords" # 需要存在Records目录
writer = tf.io.TFRecordWriter(filename)
for index in range(num_examples):
    image_raw = images[index].tostring()

    example = tf.train.Example(features=tf.train.Features(feature={
        'pixels': _int64_feature(pixels),
        'label': _int64_feature(np.argmax(labels[index])),
        'image_raw': _bytes_feature(image_raw)
    }))
    writer.write(example.SerializeToString())
writer.close()
print("TFRecord文件已保存。")

1-2 读取TFRecord文件中的数据
import tensorflow as tf
reader = tf.TFRecordReader()
filename_queue = tf.train.string_input_producer(["mnist/output.tfrecords"],)
_,serialized_example = reader.read(filename_queue) #返回文件名和文件
# 解析读取的样例。
features = tf.parse_single_example(
    serialized_example,
    features={
        'image_raw':tf.FixedLenFeature([],tf.string),
        'pixels':tf.FixedLenFeature([],tf.int64),
        'label':tf.FixedLenFeature([],tf.int64)
    })  #取出包含image、pixels和label的feature对象

images = tf.decode_raw(features['image_raw'],tf.uint8)
labels = tf.cast(features['label'],tf.int32)
pixels = tf.cast(features['pixels'],tf.int32)
#创建会话
sess = tf.Session()

# 启动多线程处理输入数据。
coord = tf.train.Coordinator()
threads = tf.train.start_queue_runners(sess=sess,coord=coord)

for i in range(10):
    image, label, pixel = sess.run([images, labels, pixels])
print("读取完成。")

2:图像数据的预处理
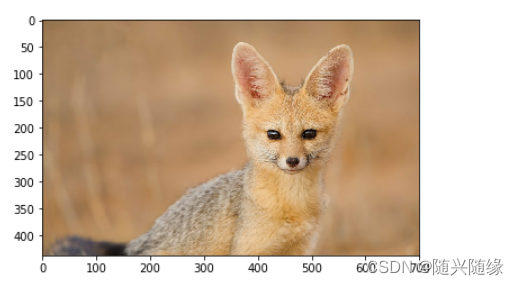
2-1 处理图像编码
import matplotlib.pyplot as plt
import tensorflow as tf
tf.compat.v1.disable_eager_execution()
#import numpy as np

# 读取图像的原始数据
image_raw_data=tf.gfile.FastGFile("./fox.jpg",'rb').read()

with tf.Session() as sess:
    # 将图像使用的jpg的格式解码从而得到图像对应的三维矩阵
    # TensorFlow还提供了tf.image.decode_png函数对png格式的图像进行解码
    # 解码之后的结果为一个张量,在使用它的取值之前需要明确调用运行的过程
    img_data=tf.image.decode_jpeg(image_raw_data)

    print(img_data.eval())
    # 使用pyplot得到图像
    plt.imshow(img_data.eval())
    plt.show()
    img_data=tf.image.convert_image_dtype(img_data,dtype=tf.uint8)
    encode_image=tf.image.encode_jpeg(img_data)
    with tf.gfile.GFile("./an.jpg",'wb') as f:
         f.write(encode_image.eval())
2-2 调整图像大小
import matplotlib.pyplot as plt
import tensorflow as tf
tf.compat.v1.disable_eager_execution()
import numpy as np

# 读取图像的原始数据
image_raw_data=tf.gfile.FastGFile("./fox.jpg",'rb').read()

with tf.Session() as sess:
    # 将图像使用的jpg的格式解码从而得到图像对应的三维矩阵
    # TensorFlow还提供了tf.image.decode_png函数对png格式的图像进行解码
    # 解码之后的结果为一个张量,在使用它的取值之前需要明确调用运行的过程
    img_data=tf.image.decode_jpeg(image_raw_data)

    print(img_data.eval())
    # 使用pyplot得到图像
    # plt.imshow(img_data.eval())
    # plt.show()

    # 将数据的类型转化成实数方便后续处理
    img_data=tf.image.convert_image_dtype(img_data,dtype=tf.uint8)

    # 将表示一张图像的三维矩阵重新按照jpeg个数编码并存到文件中
    # 打开该图,可以得到和原图一样的图像

    with tf.Session() as sess:
        resized = tf.image.resize_images(img_data, [300, 300], method=3)
        print(img_data.get_shape())
        # TensorFlow的函数处理图片后存储的数据是float32格式的,需要转换成uint8才能正确打印图片。
        print( "Digital type: ", resized.dtype)
        angelababy2 = np.asarray(resized.eval(), dtype='uint8')
        # tf.image.convert_image_dtype(rgb_image, tf.float32)
        plt.imshow(angelababy2)
        plt.show()

2-3 剪裁和填充
import matplotlib.pyplot as plt
import tensorflow as tf

# 读取图像的原始数据
image_raw_data=tf.compat.v1.gfile.FastGFile("./fox.jpg",'rb').read()

with tf.compat.v1.Session() as sess:
    img_data=tf.image.decode_jpeg(image_raw_data)
    print(img_data.eval())
    # 将数据的类型转化成实数方便后续处理
    img_data=tf.image.convert_image_dtype(img_data,dtype=tf.uint8)
with tf.compat.v1.Session() as sess:
    cropped = tf.image.resize_with_crop_or_pad(img_data,800,800)
    padded = tf.image.resize_with_crop_or_pad(img_data,500,500)
    plt.imshow(cropped.eval())
    plt.show()

    plt.imshow(padded.eval())
    plt.show()

2-4 按比例剪裁
import matplotlib.pyplot as plt
import tensorflow as tf

# 读取图像的原始数据
image_raw_data=tf.compat.v1.gfile.FastGFile("./fox.jpg",'rb').read()

with tf.compat.v1.Session() as sess:
    img_data=tf.image.decode_jpeg(image_raw_data)
    print(img_data.eval())
    # 将数据的类型转化成实数方便后续处理
    img_data=tf.image.convert_image_dtype(img_data,dtype=tf.uint8)

# 截取中间50%的图片
with tf.compat.v1.Session() as sess:
    central_cropped = tf.image.central_crop(img_data, 0.5)
    plt.imshow(central_cropped.eval())
    plt.show()

2-5 图像翻转
import matplotlib.pyplot as plt
import tensorflow as tf

# 读取图像的原始数据
image_raw_data=tf.compat.v1.gfile.FastGFile("./fox.jpg",'rb').read()

with tf.compat.v1.Session() as sess:
    img_data=tf.image.decode_jpeg(image_raw_data)
    print(img_data.eval())
    # 将数据的类型转化成实数方便后续处理
    img_data=tf.image.convert_image_dtype(img_data,dtype=tf.uint8)

# 翻转图片
with tf.compat.v1.Session() as sess:
    # 上下翻转
    flipped1 = tf.image.flip_up_down(img_data)
    plt.imshow(flipped1.eval())

    # 左右翻转
    #flipped2 = tf.image.flip_left_right(img_data)
    #plt.imshow(flipped2.eval())

    # 对角线翻转
    #transposed = tf.image.transpose(img_data)
    #plt.imshow(transposed.eval())
    plt.show()

    # 以一定概率上下翻转图片。
    # flipped = tf.image.random_flip_up_down(img_data)

    # 以一定概率左右翻转图片。
    # flipped = tf.image.random_flip_left_right(img_data)
    # plt.imshow(flipped.eval())
    # plt.show()

2-6 图像亮度调整
import matplotlib.pyplot as plt
import tensorflow as tf

# 读取图像的原始数据
image_raw_data=tf.compat.v1.gfile.FastGFile("./fox.jpg",'rb').read()

with tf.compat.v1.Session() as sess:
    img_data=tf.image.decode_jpeg(image_raw_data)
    print(img_data.eval())
    # 将数据的类型转化成实数方便后续处理
    img_data=tf.image.convert_image_dtype(img_data,dtype=tf.uint8)

    plt.imshow(img_data.eval())
    plt.show()
    # 将图片的亮度-0.5。
    # adjusted = tf.image.adjust_brightness(img_data, -0.5)

    # 将图片的亮度+0.5
    adjusted = tf.image.adjust_brightness(img_data, 0.5)

    # 在[-max_delta, max_delta)的范围随机调整图片的亮度。
    # adjusted = tf.image.random_brightness(img_data, max_delta=0.6)

    plt.imshow(adjusted.eval())
    plt.show()

2-7 图像对比度调整
import matplotlib.pyplot as plt
import tensorflow as tf

# 读取图像的原始数据
image_raw_data=tf.compat.v1.gfile.FastGFile("./fox.jpg",'rb').read()

with tf.compat.v1.Session() as sess:
    img_data=tf.image.decode_jpeg(image_raw_data)
    print(img_data.eval())
    # 将数据的类型转化成实数方便后续处理
    img_data=tf.image.convert_image_dtype(img_data,dtype=tf.uint8)

    plt.imshow(img_data.eval())
    plt.show()

    # 将图片的对比度-5
    # adjusted = tf.image.adjust_contrast(img_data, -5)

    # 将图片的对比度+5
    adjusted = tf.image.adjust_contrast(img_data, 5)

    # 在[lower, upper]的范围随机调整图的对比度。
    # adjusted = tf.image.random_contrast(img_data, lower, upper)

    plt.imshow(adjusted.eval())
    plt.show()

2-8 图像色相调整
import matplotlib.pyplot as plt
import tensorflow as tf

# 读取图像的原始数据
image_raw_data=tf.compat.v1.gfile.FastGFile("./fox.jpg",'rb').read()

with tf.compat.v1.Session() as sess:
    img_data=tf.image.decode_jpeg(image_raw_data)
    print(img_data.eval())
    # 将数据的类型转化成实数方便后续处理
    img_data=tf.image.convert_image_dtype(img_data,dtype=tf.uint8)

    adjusted = tf.image.adjust_hue(img_data, 0.1)
    # adjusted = tf.image.adjust_hue(img_data, 0.3)
    # adjusted = tf.image.adjust_hue(img_data, 0.6)
    # adjusted = tf.image.adjust_hue(img_data, 0.9)

    # 在[-max_delta, max_delta]的范围随机调整图片的色相。max_delta的取值在[0, 0.5]之间。
    # adjusted = tf.image.random_hue(image, max_delta)

    plt.imshow(adjusted.eval())
    plt.show()

2-9 图像饱和度调整
import matplotlib.pyplot as plt
import tensorflow as tf

# 读取图像的原始数据
image_raw_data=tf.compat.v1.gfile.FastGFile("./fox.jpg",'rb').read()

with tf.compat.v1.Session() as sess:
    img_data=tf.image.decode_jpeg(image_raw_data)
    print(img_data.eval())
    # 将数据的类型转化成实数方便后续处理
    img_data=tf.image.convert_image_dtype(img_data,dtype=tf.uint8)

    # 将图片的饱和度-5。
    adjusted = tf.image.adjust_saturation(img_data, -5)
    # 将图片的饱和度+5。
    # adjusted = tf.image.adjust_saturation(img_data, 5)
    # 在[lower, upper]的范围随机调整图的饱和度。
    # adjusted = tf.image.random_saturation(img_data, lower, upper)

    # 将代表一张图片的三维矩阵中的数字均值变为0,方差变为1。
    # adjusted = tf.image.per_image_standardization(img_data)

    plt.imshow(adjusted.eval())
    plt.show()

2-10 标注框调整(随机图像截取)
import matplotlib.pyplot as plt
import tensorflow as tf
tf.disable_eager_execution()

# 读取图像的原始数据
image_raw_data = tf.gfile.FastGFile("./fox.jpg", 'rb').read()

with tf.Session() as sess:
    img_data = tf.image.decode_jpeg(image_raw_data)
    print(img_data.eval())

    img_data = tf.image.resize_images(img_data, (330, 200), method=1)

    boxes = tf.constant([[[0.01, 0.2, 0.5, 0.7], [0.25, 0.4, 0.32, 0.55]]])

    # 随机图像截取
    begin, size, bbox_for_draw = tf.image.sample_distorted_bounding_box(
        tf.shape(img_data), bounding_boxes=boxes,min_object_covered=0.1)

    batched = tf.expand_dims(tf.image.convert_image_dtype(img_data, tf.float32), 0)
    image_with_box = tf.image.draw_bounding_boxes(batched, bbox_for_draw)
    distorted_image = tf.slice(img_data, begin, size)
    plt.imshow(distorted_image.eval())
    plt.show()

实例
import tensorflow as tf
tf.compat.v1.disable_eager_execution()
import numpy as np
import matplotlib.pyplot as plt
# 1. 随机调整图片的色彩,定义两种顺序
def distort_color(image, color_ordering=0):
    if color_ordering == 0:
        image = tf.image.random_brightness(image, max_delta=32./255.)
        image = tf.image.random_saturation(image, lower=0.5, upper=1.5)
        image = tf.image.random_hue(image, max_delta=0.2)
        image = tf.image.random_contrast(image, lower=0.5, upper=1.5)
    else:
        image = tf.image.random_saturation(image, lower=0.5, upper=1.5)
        image = tf.image.random_brightness(image, max_delta=32./255.)
        image = tf.image.random_contrast(image, lower=0.5, upper=1.5)
        image = tf.image.random_hue(image, max_delta=0.2)

    return tf.clip_by_value(image, 0.0, 1.0)

# 2. 对图片进行预处理,将图片转化成神经网络的输入层数据
# 给定一张解码的图像、目标尺寸、及图像上的标注图,此函数可以对给出的图像进行预处理
# 输入:原始训练图像
# 输出:神经网络模型的输入层
# 注意:此处只处理模型的训练数据集,对预测数据集无需进行随机变换
def preprocess_for_train(image, height, width, bbox):
    # 查看是否存在标注框,如果没有标注框,则认为图像就是整个需要关注的部分
    if bbox is None:
        bbox = tf.constant([0.0, 0.0, 1.0, 1.0], dtype=tf.float32, shape=[1, 1, 4])
    # 转换图像的张量类型
    if image.dtype != tf.float32:
        image = tf.image.convert_image_dtype(image, dtype=tf.float32)

    # 随机的截取图片中一个块,减小物体大小对图像识别算法的影响
    bbox_begin, bbox_size, _ = tf.image.sample_distorted_bounding_box(
        tf.shape(image), bounding_boxes=bbox, min_object_covered=0.1)
    bbox_begin, bbox_size, _ = tf.image.sample_distorted_bounding_box(
        tf.shape(image), bounding_boxes=bbox, min_object_covered=0.1)
    distorted_image = tf.slice(image, bbox_begin, bbox_size)

    # 将随机截取的图片调整为神经网络输入层的大小,大小调整的算法是随机选择的
    distorted_image = tf.image.resize_images(distorted_image, [height, width], method=np.random.randint(4))
    # 随机左右翻转图像
    distorted_image = tf.image.random_flip_left_right(distorted_image)
    # 使用一种随机的顺序调整图像的色彩
    distorted_image = distort_color(distorted_image, np.random.randint(2))
    return distorted_image

# 3. 从指定位置读取图片
image_raw_data = tf.gfile.FastGFile("./fox.jpg", "rb").read()
with tf.Session() as sess:
    img_data = tf.image.decode_jpeg(image_raw_data)
    boxes = tf.constant([[[0.05, 0.05, 0.9, 0.7], [0.35, 0.47, 0.5, 0.56]]])
    # 运行6次获得6种不同的图像
    for i in range(6):
        result = preprocess_for_train(img_data, 299, 299, boxes)
        plt.imshow(result.eval())
        plt.show()

3:多线程输入数据处理框架
3-1 队列与多线程
import tensorflow.compat.v1 as tf
tf.disable_eager_execution()

q=tf.queue.FIFOQueue(2,"int32")
init=q.enqueue_many(([0,10],))
x=q.dequeue()
y=x+1
q_inc=q.enqueue([y])
with tf.Session() as sess:
    init.run()
    for _ in range(5):
        v,_=sess.run([x,q_inc])
        print(v)

3-2 通过tf.Coordinator实现多线程协同
import tensorflow as tf
import numpy as np
import threading
import time
# 线程中运行的程序,这个程序每隔1s判断是否需要停止并打印自己的ID
def MyLoop(coord,worker_id):
    # 使用tf.Coordinator类提供的协同工具判断当前线程是否需要停止
    while not coord.should_stop():
        # 随机停止所有线程
        if np.random.rand()<0.1:
            print("stop from id: %d\n" % worker_id)
            # 调用coord.request_stop()函数来通知其他线程停止
            coord.request_stop()
        else:
            # 打印当前线程的ID
            print("working on id: %d" % worker_id)
        # 暂停1s
        time.sleep(1)

# 声明一个tf.train.Coordinator类来协同多个线程
coord=tf.train.Coordinator()
# 声明创建5个线程
threads=[threading.Thread(target=MyLoop,args=(coord,i,)) for i in range(5)]
#启动所有的线程
for t in threads:t.start()
#等待所有线程退出
coord.join(threads)

3-3 管理多线程队列
import tensorflow as tf
tf.compat.v1.disable_eager_execution()
# 声明一个先进先出的队列,队列中最多100个元素,类型为实数
queue = tf.FIFOQueue(100,"float")
# 定义队列的入队操作
enqueue_op = queue.enqueue([tf.random_normal([1])])
# 使用tf.train.QueueRunner来创建多个线程运行队列的入队操作
# tf.train.QueueRunner的第一个参数给出了被操作的队列
# [enqueue_op] * 5表示需要启动5个线程,每个线程中运行的是enqueue_op的操作
qr = tf.train.QueueRunner(queue, [enqueue_op] * 5)
# 将定义过的QueueRunner加入TensorFlow计算图上指定的集合
# tf.train.QueueRunner函数没有指定集合,则加入默认集合tf.GraphKeys.QUEUE_RUNNERS
# 下面的函数就是刚刚定义的qr加入默认的集合tf.GraphKeys.QUEUE_RUNNERS
tf.train.add_queue_runner(qr)
# 定义出队操作
out_tensor = queue.dequeue()
with tf.Session() as sess:
    # 使用tf.train.Coordinator来协同启动的线程
    coord = tf.train.Coordinator()
    # 使用tf.train.QueueRunner()时,需要明确调用tf.train.start_queue_runners来启动所有线程
    # 否则因为没有线程运行入队操作
    # 当调用出队操作时,程序会一直等待入队操作被运行
    # tf.train.start_queue_runners函数会默认启动tf.GraphKeys.QUEUE_RUNNERS集合中所有的QueueRunner
    # 因为该函数只支持启动指定集合中的QueueRunner
    # 所以一般来说tf.train.add_queue_runner函数和
    # tf.train.start_queue_runners函数会指定同一个集合
    threads = tf.train.start_queue_runners(sess=sess, coord=coord)
    # 获取队列中的取值
    for _ in range(3):
        print(sess.run(out_tensor)[0])
    # 使用tf.train.Coordinator来停止所有线程
    coord.request_stop()
    coord.join(threads)

3-4 输入文件队列164
import tensorflow.compat.v1 as tf
tf.disable_v2_behavior()
def _int64_feature(value):
    return tf.train.Feature(int64_list=tf.train.Int64List(value=[value]))
num_shards=2
instances_per_shard=2
for i in range(num_shards):
    filename = ("./data.tfrecords- %.5d - of - %.5d" % (i,num_shards))
    writer=tf.python_io.TFRecordWriter(filename)
    for j in range(instances_per_shard):
        example=tf.train.Example(features=tf.train.Features(feature={
            'i':_int64_feature(i),
            'j':_int64_feature(j)}))
        writer.write(example.SerializeToString())
    writer.close()

3-5 通过tf.train.match_filenames_once()函数和tf.train.string_input_producer()函数来操作文件
import tensorflow as tf
# 通过tf.train.match_filenames_once函数获取文件列表
files = tf.train.match_filenames_once("./data.tfrecords-*")
filename_queue = tf.train.string_input_producer(files, shuffle=False)
reader = tf.TFRecordReader()
_, serialized_example = reader.read(filename_queue)
features = tf.parse_single_example(
      serialized_example,
      features={
          'i': tf.FixedLenFeature([], tf.int64),
          'j': tf.FixedLenFeature([], tf.int64),
      })
with tf.Session() as sess:
    # # tf.global_variables_initializer().run()  #报错
    sess.run([tf.global_variables_initializer(),tf.local_variables_initializer()])
    print(sess.run(files))

    # 声明tf.train.Coordinator类来协同不同线程,并启动线程
    coord = tf.train.Coordinator()
    threads = tf.train.start_queue_runners(sess=sess, coord=coord)

    # 多次执行获取数据的操作
    for i in range(6):
        print(sess.run([features['i'], features['j']]))
    coord.request_stop()
    coord.join(threads)

3-6 组合训练数据
# -*- coding: utf-8 -*-
"""
Created on Wed Apr 22 22:43:01 2020

@author: Harry
"""

import tensorflow as tf
# 获取文件列表
files = tf.train.match_filenames_once("./data.tfrecords-*")

# 创建文件输入队列
filename_queue = tf.train.string_input_producer(files, shuffle=False)

# 读取并解析Example
reader = tf.TFRecordReader()
_, serialized_example = reader.read(filename_queue)
features = tf.parse_single_example(
    serialized_example,
    features={
        'i': tf.FixedLenFeature([], tf.int64),
        'j': tf.FixedLenFeature([], tf.int64)
    })

# i代表特征向量,j代表标签
example, label = features['i'], features['j']

# 一个batch中的样例数
batch_size = 3

# 文件队列中最多可以存储的样例个数
capacity = 1000 + 3 * batch_size

# 组合样例
#  `min_after_dequeue` 是该函数特有的参数,参数限制了出队时队列中元素的最少个数,
#   但当队列元素个数太少时,随机的意义就不大了
example_batch,label_batch = tf.train.shuffle_batch(
    [example,label],batch_size=batch_size,
    capacity=capacity,min_after_dequeue=30)

with tf.Session() as sess:
    # 使用match_filenames_once需要用local_variables_initializer初始化一些变量
    sess.run( [tf.global_variables_initializer(),tf.local_variables_initializer()])

    # 用Coordinator协同线程,并启动线程
    coord = tf.train.Coordinator()
    threads = tf.train.start_queue_runners(coord=coord)

    # 获取并打印组合之后的样例。真实问题中一般作为神经网路的输入
    for i in range(2):
        cur_example_batch, cur_label_batch = sess.run(
            [example_batch, label_batch])
        print(cur_example_batch, cur_label_batch)

    coord.request_stop()
    coord.join(threads)

4:将数据输入模型
import tensorflow.compat.v1 as tf
tf.disable_eager_execution()
import numpy as np
EPOCHS = 10
BATCH_SIZE = 16
# 假设有一个含有两个numpy数组的数据集
features, labels = (np.array([np.random.sample((100,2))]),
                    np.array([np.random.sample((100,1))]))
dataset = tf.data.Dataset.from_tensor_slices((features,labels)).repeat().batch(BATCH_SIZE)
iter = dataset.make_one_shot_iterator()
x, y = iter.get_next()
# 建立一个简单的神经网络模型
net = tf.layers.dense(x, 8, activation=tf.tanh) # pass the first value from iter.get_next() as input
net = tf.layers.dense(net, 8, activation=tf.tanh)
prediction = tf.layers.dense(net, 1, activation=tf.tanh)
loss = tf.losses.mean_squared_error(prediction, y) # pass the second value from iter.get_net() as label
train_op = tf.train.AdamOptimizer().minimize(loss)
with tf.Session() as sess:
    sess.run(tf.global_variables_initializer())
    for i in range(EPOCHS):
        _, loss_value = sess.run([train_op, loss])
        print("Iter: {}, Loss: {:.4f}".format(i, loss_value))
