React + Antd实现动态切换主题功能之二(默认主题与暗黑色主题切换)
前言
ps. 文中方案仅适用于antd 4.x,不适用于最新的antd 5.x,如需要适用于antd 5.x版本的方案,请移步至:https://blog.csdn.net/m0_58016522/article/details/131168634
在前一篇文章中(https://blog.csdn.net/m0_58016522/article/details/121751043)初略的讲解了通过ConfigProvider全局化配置prefixCls的方式来动态切换部分主题样式配置,文章中只是通过修改部分颜色(如primary颜色)来初步展示了效果,可能效果不甚理想。
对于实际项目开发中,其中有一类需求比较多的就是动态切换默认(亮色)主题与暗黑色主题,在ant-design官网有一个官方的demo可以参考:https://github.com/gzgogo/antd-theme 。下面我通过一个小demo,来展示一下默认主题与暗黑色主题切换功能的开发步骤。
实现思路
首先我的思路还是通过ConfigProvider全局化配置prefixCls的方式来修改ant design样式的prefix,即默认主题通过类名前缀custom-default来控制样式,而暗色主题通过类名前缀custom-dark来控制样式。
1. 编译默认主题css文件
# 指定prefix为custom-default
# 源文件为antd.less
$ lessc --js --modify-var="ant-prefix=custom-default" node_modules/antd/dist/antd.less custom-default.css
按照上述步骤的命令会生成一个custom-default.css的文件,该文件为默认主题的样式文件,在该文件内容中有一段如下样式:
	body {
	  margin: 0;
	  color: rgba(0, 0, 0, 0.85);
	  font-size: 14px;
	  font-family: -apple-system, BlinkMacSystemFont, 'Segoe UI', Roboto, 'Helvetica Neue', Arial, 'Noto Sans', sans-serif, 'Apple Color Emoji', 'Segoe UI Emoji', 'Segoe UI Symbol', 'Noto Color Emoji';
	  font-variant: tabular-nums;
	  line-height: 1.5715;
	  background-color: #fff;
	  font-feature-settings: 'tnum';
	}
这段内容主要是控制body区块的样式,我们将这段样式做如下修改
	body .custom-default { /*添加.custom-default子样式,作用我们在下文中会说明*/
	  margin: 0;
	  color: rgba(0, 0, 0, 0.85);
	  font-size: 14px;
	  font-family: -apple-system, BlinkMacSystemFont, 'Segoe UI', Roboto, 'Helvetica Neue', Arial, 'Noto Sans', sans-serif, 'Apple Color Emoji', 'Segoe UI Emoji', 'Segoe UI Symbol', 'Noto Color Emoji';
	  font-variant: tabular-nums;
	  line-height: 1.5715;
	  background-color: #fff;
	  font-feature-settings: 'tnum';
	}
2. 同上述步骤1的处理,编译暗黑色主题css文件
	# 指定prefix为custom-dark
	# 源文件为antd.dark.less
	$ lessc --js --modify-var="ant-prefix=custom-dark" node_modules/antd/dist/antd.dark.less custom-dark.css
同样的,生成的暗黑色样式文件custom-dark.css中有这么一段:
	body {
	  margin: 0;
	  color: rgba(255, 255, 255, 0.85);
	  font-size: 14px;
	  font-family: -apple-system, BlinkMacSystemFont, 'Segoe UI', Roboto, 'Helvetica Neue', Arial, 'Noto Sans', sans-serif, 'Apple Color Emoji', 'Segoe UI Emoji', 'Segoe UI Symbol', 'Noto Color Emoji';
	  font-variant: tabular-nums;
	  line-height: 1.5715;
	  background-color: #000;
	  font-feature-settings: 'tnum';
	}
我们也做类似的修改:
	body .custom-dark { /*添加.custom-dark 子样式,作用我们在下文中会说明*/
	  margin: 0;
	  color: rgba(255, 255, 255, 0.85);
	  font-size: 14px;
	  font-family: -apple-system, BlinkMacSystemFont, 'Segoe UI', Roboto, 'Helvetica Neue', Arial, 'Noto Sans', sans-serif, 'Apple Color Emoji', 'Segoe UI Emoji', 'Segoe UI Symbol', 'Noto Color Emoji';
	  font-variant: tabular-nums;
	  line-height: 1.5715;
	  background-color: #000;
	  font-feature-settings: 'tnum';
	}
3. index.js中引入上述两个步骤生成的css文件
index.js完整代码如下:
import React, { useState } from "react";
import ReactDOM from "react-dom";
import {
  Button,
  Calendar,
  Card,
  DatePicker,
  Empty,
  Layout,
  Radio,
  Space
} from "antd";
import { DownloadOutlined } from "@ant-design/icons";
import { ConfigProvider } from "antd";

// import "antd/dist/antd.css";
import "./custom-default.css";    // 引入custom-default.css 以及 custom-dark.css
import "./custom-dark.css";

import "./index.css";

const TestComponent = () => {
  const [prefix, setPrefix] = useState("custom-default");

  const handlePrefixChange = (e) => {
    setPrefix(e.target.value);
  };

  return (
    <ConfigProvider prefixCls={prefix}>
      <div className={`App ${prefix}`} style={{ height: "100%" }}>
        <Layout style={{ height: "100%" }}>
          <Layout.Content>
            <Space>
              Change Theme:
              <Radio.Group onChange={handlePrefixChange} value={prefix}>
                <Radio value="custom-default">default Style</Radio>
                <Radio value="custom-dark">dark Style</Radio>
              </Radio.Group>
            </Space>
            <br />
            <Space>
              <DatePicker />
              <Empty />
              <Card
                title="Default size card"
                extra={<a href="#">More</a>}
                style={{ width: 300 }}
              >
                <p>Card content</p>
                <p>Card content</p>
                <p>Card content</p>
              </Card>
            </Space>
            <br />
            <Space>
              <Radio.Group>
                <Radio.Button value="large">Large</Radio.Button>
                <Radio.Button value="default">Default</Radio.Button>
                <Radio.Button value="small">Small</Radio.Button>
              </Radio.Group>
              <br />
              <br />
              <Button type="primary">Primary</Button>
              <Button>Default</Button>
              <Button type="dashed">Dashed</Button>
              <br />
              <Button type="link">Link</Button>
              <br />
              <Button type="primary" icon={<DownloadOutlined />} />
              <Button
                type="primary"
                shape="circle"
                icon={<DownloadOutlined />}
              />
              <Button
                type="primary"
                shape="round"
                icon={<DownloadOutlined />}
              />
              <Button type="primary" shape="round" icon={<DownloadOutlined />}>
                Download
              </Button>
              <Button type="primary" icon={<DownloadOutlined />}>
                Download
              </Button>
            </Space>
            <br />
            <Space>
              <Calendar fullscreen={false} />
            </Space>
          </Layout.Content>
        </Layout>
      </div>
    </ConfigProvider>
  );
};

ReactDOM.render(<TestComponent />, document.getElementById("root"));
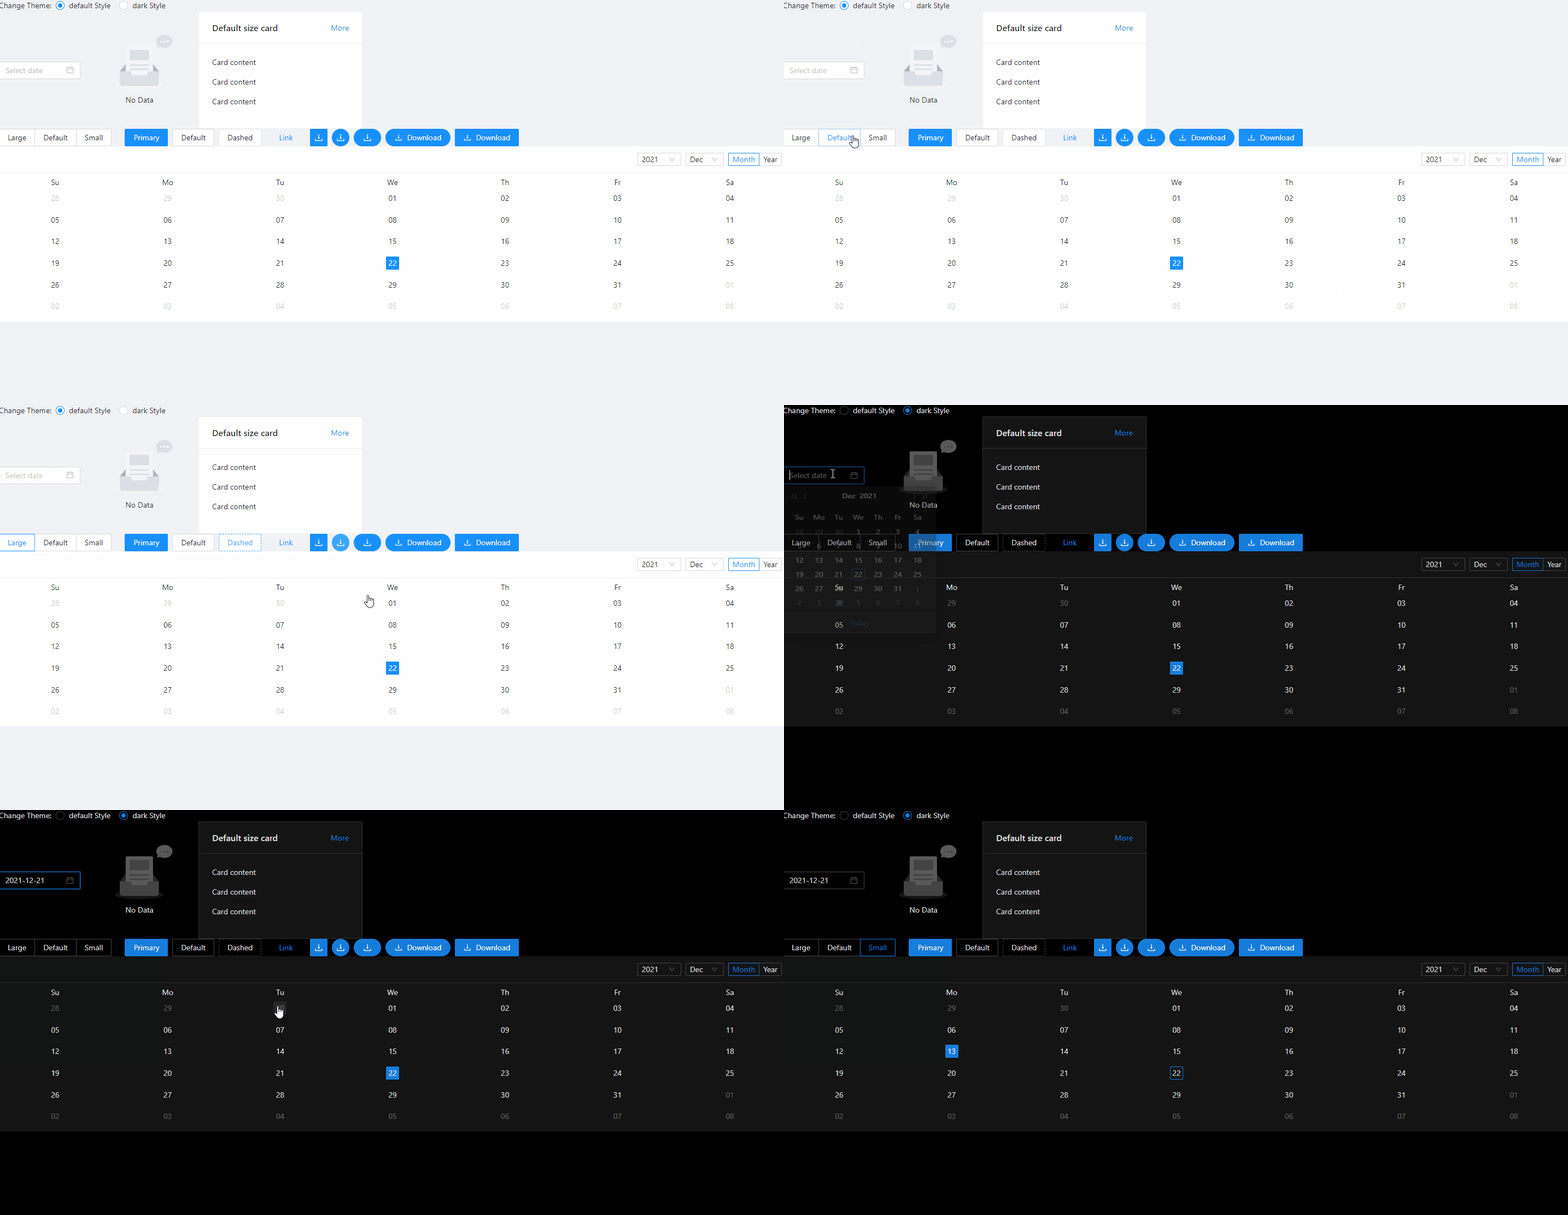
其中比较关键的一点是31行左右的 动态切换默认主题和暗黑色主题主要原理和前篇文章类似:(https://blog.csdn.net/m0_58016522/article/details/121751043),有需要的可以参考。 参考链接:div渲染的样式类名为App custom-default,切换至暗黑色主题时,div渲染的样式类名为App custom-dark,其中custom-default及custom-dark分别由上述步骤1及步骤2中编译生成的css文件对应的 body .custom-default及body .custom-dark控制样式。此两段样式主要控制背景色以及字体颜色,分别由两段样式控制的,原因是避免样式污染,即如果不做修改,后引入的css文件中的body样式,会覆盖前引入的css文件中的body样式。
另外部分原理可以参考文章:https://blog.csdn.net/m0_58016522/article/details/121751043
最终效果
写在最后
上述文章中,对于一些前端知识方面的解释,可能不是很专业。(其实我是个后端o(∩_∩)o )
完整代码可以点击这里查看:https://codesandbox.io/s/antd-change-style-dark-gjurt?file=/index.js
https://ant-design.gitee.io/docs/react/customize-theme-cn
https://blog.csdn.net/m0_58016522/article/details/121751043
