Open Chat Video Editor - 小记
文章目录
-
- 关于 Open Chat Video Editor
-
- 整体技术框架
- 特点
- 文本生成
- 视觉信息生成
- 数据来源
- 安装
- 简单实用
- 短句转短视频(Text2Video)实现
-
- 1、基于图像检索生成图像
- 2、基于stable diffusion进行图像生成
- 3、基于stable diffusion进行图像生成
- 网页链接转短视频(Url2Video)实现
关于 Open Chat Video Editor
- SCUTlihaoyu / open-chat-video-editor
https://github.com/SCUTlihaoyu/open-chat-video-editor - 刘焕勇 : 也看文本生成短视频开源项目Open Chat Video Editor:从依赖数据集到具体实现逻辑解析
https://mp.weixin.qq.com/s/cmGS6H1EGOxjiEZtuk0qvQ
github 的 readme 是中文撰写的,写的比较丰富清晰,可以仔细读读。
本文在此基础上,从自己的阅读习惯角度,删改重新编排。
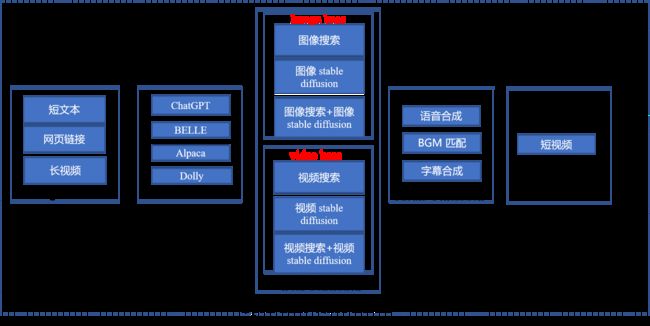
整体技术框架
特点
- 一键生成可用的短视频,包括:配音、背景音乐、字幕等。
- 算法和数据均基于开源项目,方便技术交流和学习
- 支持多种输入数据,方便对各种各样的数据,一键转短视频,目前支持:
- 短句转短视频(Text2Video)
根据输入的简短文字,生成短视频文案,并合成短视频 - 网页链接转短视频(Url2Video)
自动对网页的内容进行提取,生成视频文案,并生成短视频 - 长视频转短视频(Long Video to Short Video)
对输入的长视频进行分析和摘要,并生成短视频
- 涵盖生成模型和多模态检索模型等多种主流算法和模型,如: Chatgpt,Stable Diffusion,CLIP 等
文本生成
支持:
- ChatGPT
- BELLE
- Alpaca
- Dolly 等多种模型
视觉信息生成
支持模态:
- 图像
- 视频
生成方式 支持两种模型
- 检索
- 生成,
目前共有6种模式:
- 图像检索
- 图像生成(stable diffusion)
- 先图像检索,再基于stable diffusion 进行图像生成
- 视频检索
- 视频生成(stable diffusion)
- 视频检索后,再基于stable diffusion 进行视频生成
数据来源
- 图像检索数据来源于: LAION-5B
https://laion.ai/blog/laion-5b/
LAION-5B 由58.5亿个图像文本组合组成,通过CLIP过滤的图像分类模型。
其中23亿是图像-英文文本对,22亿是图像,超过100个是非英语文本对,其余10亿对是不限于特定语言的图像和文本对,例如名称。 - 视频检索数据来源于:webvid-10m
https://m-bain.github.io/webvid-dataset/
webvid-10m 是一个大规模的短视频数据集,其文本描述来自于素材网站。
视频种类繁多,内容丰富,包括10.7M的视频-说明对,总共52K个视频小时。
安装
1、安装pytorch
详见:https://pytorch.org/get-started/locally/
# GPU 版本
pip3 install torch torchvision torchaudio --index-url https://download.pytorch.org/whl/cu117

# CPU版本
pip3 install torch torchvision torchaudio
2、安装其他依赖环境
下载repo
pip install -r requirements.txt
3、安装clip
pip install git+https://github.com/openai/CLIP.git
4、安装faiss
conda install -c pytorch faiss-cpu
简单实用
1、下载数据索引和meta信息
https://pan.quark.cn/s/19fa46ceb2cb#/list/share
下载完成后,解压到 data/index 目录下
2、根据实际需要,选择不同的配置文件
需要注意:如果要采用ChatGPT来生成文案,需要在配置文件里面,添加 organization 和 api_key
| 配置文件 | 说明 |
|---|---|
| configs/text2video/image_by_retrieval_text_by_chatgpt_zh.yaml | 短文本转视频,视频文案采用chatgpt生成,视觉部分采用图像检索来生成 |
| configs\text2video\image_by_diffusion_text_by_chatgpt_zh.yaml | 短文本转视频,视频文案采用chatgpt生成, 视觉部分采用图像stable diffusion 来生成 |
| configs\text2video\image_by_retrieval_then_diffusion_chatgpt_zh.yaml | 短文本转视频,视频文案采用chatgpt生成,视觉部分采用先图像检索,然后再基于图像的stable diffusion 来生成 |
| configs\text2video\video_by_retrieval_text_by_chatgpt_zh.yaml | 短文本转视频, 视频文案采用chatgpt生成,视觉部分采用视频检索来生成 |
| configs\url2video\image_by_retrieval_text_by_chatgpt.yaml | url转视频,视频文案采用chatgpt生成,视觉部分采用图像检索来生成 |
| configs\url2video\image_by_diffusion_text_by_chatgpt.yaml | url转视频,视频文案采用chatgpt生成, 视觉部分采用图像stable diffusion 来生成 |
| configs\url2video\image_by_retrieval_then_diffusion_chatgpt.yaml | url转视频,视频文案采用chatgpt生成,视觉部分采用先图像检索,然后再基于图像的stable diffusion 来生成 |
| configs\url2video\video_by_retrieval_text_by_chatgpt.yaml | url转视频,视频文案采用chatgpt生成,视觉部分采用视频检索来生成 |
3、执行脚本
# Text to video
python  app/app.py --func Text2VideoEditor  --cfg ${cfg_file}


# URL to video
python  app/app.py --func URL2VideoEditor  --cfg ${cfg_file}
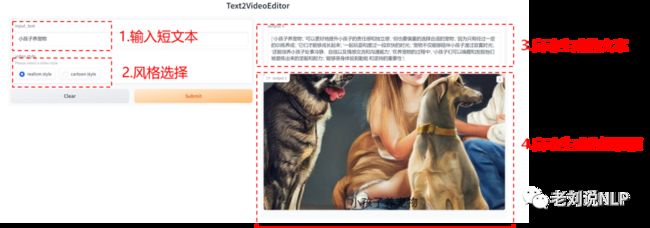
短句转短视频(Text2Video)实现
短句转短视频,指的是根据输入的简短文字,生成短视频文案,并合成短视频;
在具体实现上,以输入文案:【小孩子养宠物】为例,
首先,利用文本模型(如:chatgpt等),可以自动生成一个较长的短视频文案:
class ChatGPTModel(object):
    def __init__(self,cfg,
                 organization,
                 api_key,
                 ) -> None:
        self.cfg = cfg
        openai.organization = organization
        openai.api_key = api_key
        # ch_prompt = ''
    def run(self, input_text):
        contain_ch = False
        if is_contains_chinese(input_text):
            prompt = "请以{}为内容,生成100字的短视频文案".format(input_text)
            contain_ch = True
        else:
            prompt = "Please use {} as the content to generate a 50-word short video copy".format(input_text)

        response = openai.Completion.create(
        model="text-davinci-003",
        prompt=prompt,
        max_tokens=400,
        stream=False,
        echo=False,)
        text = response.choices[0].text
        logger.info("chatgpt response: {}".format(text))
        text = text.replace('\n','')

        # split text
        sentences = re.split("[,|,|!|.|?|!|。]",text)
        sentences = [s for s in sentences if len(s) > 0]
        logger.info('sentences: {}'.format(sentences))
        out_info = []
        resp = {}
        # 生成的文案是中文文案
        if contain_ch:
            resp['lang'] = 'zh'
            for s in sentences:
                en_s = self._translate(s)
                info = {
                    'zh':s,
                    'en':en_s,
                }
                out_info.append(info)
        # 生成的文案是英文文案
        else:
            resp["lang"] = 'en'
            for s in sentences:
                info = {
                    'en':s,
                }
                out_info.append(info)
        resp["out_text"] = out_info
        return resp


    def _translate(self,text):
        prompt = "将以下句子翻译成英文:\n\n" + text +'\n\n1'
        response = openai.Completion.create(
        model="text-davinci-003",
        prompt=prompt,
        max_tokens=400,
        stream=False,
        echo=False,)
        out_text = response.choices[0].text
        logger.info('_translate out_text: {}'.format(out_text))


***
        out_text = out_text.replace('\n','').replace('. ','')

        return out_text
可以看到,文案被切分成了多个句子,后面会根据每个句子都检索或者生成一个图片,然后讲图片进行拼接,转换成一个视频。
[
'小孩子养宠物',
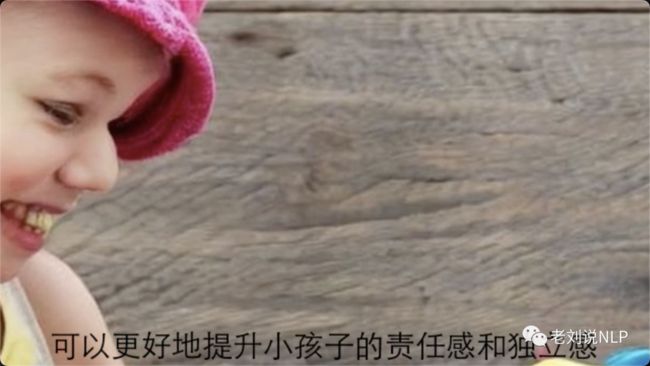
'可以更好地提升小孩子的责任感和独立感',
'但也要慎重的选择合适的宠物',
'因为只有经过一定的训练养成',
'它们才能够成长起来',
'一起玩耍和度过一段欢快的时光',
'宠物不仅能够陪伴小孩子渡过寂寞时光',
'还能培养小孩子处事冷静、自信以及情感交流和沟通能力',
'在养宠物的过程中',
'小孩子们可以唤醒和发掘他们被磨练出来的坚毅和耐力',
'能够亲身体验到勤勉 和坚持的重要性'
]
其次,根据不同的视频生成模式,可以生成不同的视频:
1、基于图像检索生成图像
在具体实现上,首先使用M-CLIP进行对图片的文本embedding,实现如下:
def test_mclip():
    model = MClip("M-CLIP/XLM-Roberta-Large-Vit-L-14","cpu")
    text = ["hello world","你好"]
    embed = model.get_text_embed(text)
    print(embed.shape)
使用faiss-knn将query进行向量化,然后返回topk张最相似图片。
class FiassKnnServer(object):
    def __init__(self,
                 index_path,
                 ):
        # loading faiss index
        # self.top_k = 10
        self.nprobe = 1024
        self.index_path = index_path

        self.index = faiss.read_index(index_path)
        if isinstance(self.index,faiss.swigfaiss.IndexPreTransform):
            faiss.ParameterSpace().set_index_parameter(self.index, "nprobe", self.nprobe)
        else:
            self.index.nprobe = self.nprobe

    def search(self,query_emebed,top_k=50):
        '''
        query_emebed: numpy array
        '''
        query_emebed = query_emebed.astype('float32')
        distances, indices = self.index.search(query_emebed, top_k)
        return  distances, indices

    def batch_run(self, query:List,**kwargs):
        '''
        run image generator by retrieval
        support multi query
        '''
        assert type(query) == list
        prompt = 'a picture without text'
        query = [ val + prompt for val in query]
        # get query embed
        query_embed = self.query_embed_server.get_query_embed(query)

        # knn search, indices: [batch_size, top_k]
        distances, indices = self.index_server.search(query_embed)


***
        # get meta
        resp = []
        for batch_idx,topk_ids in  enumerate(indices):
            # one_info = {}
            # one query topk urls
            urls = self.meta_server.batch_get_meta(topk_ids)
            # logging.error('urls: {}'.format(urls))
            # download one of the topk images
            for url_id,url in enumerate(urls):
                try:
                    img_stream = download_image(url)
                    # try to open
                    url_md5 = self.get_url_md5(url)
                    img_tmp_name = os.path.join(self.tmp_dir, "{}_{}_{}.jpg".format(batch_idx,url_id, url_md5))
                    logger.info('tmp img name: {}'.format(img_tmp_name))
                    img = Image.open(img_stream).convert('RGB')
                    img.save(img_tmp_name)
                    one_info = {'url':url,'topk_ids':url_id,'img_local_path':img_tmp_name,'data_type':self.data_type}
                    resp.append(one_info)
                    break

                except Exception as e:
                    logger.error(e)
                    logger.error(traceback.format_exc())

                    continue
        return resp
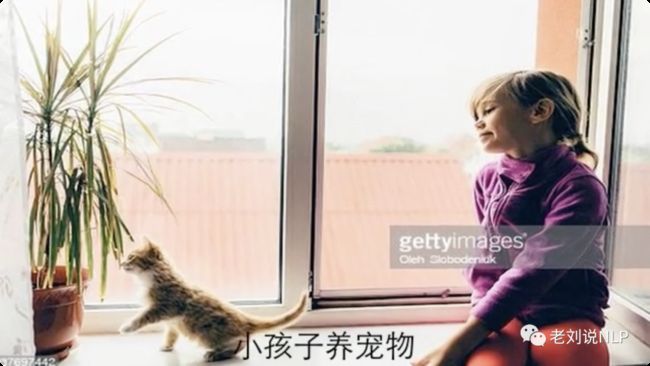
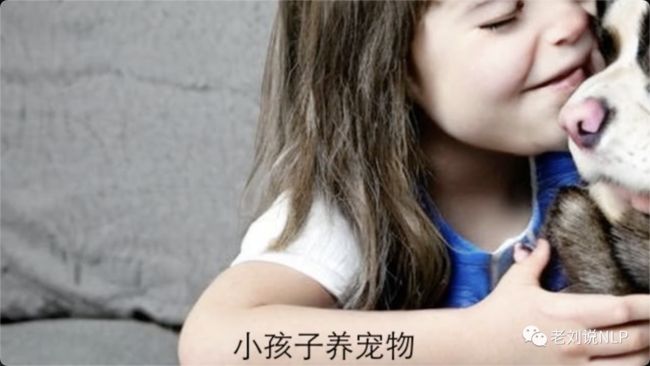
效果如下:
1) 小孩子养宠物
2) 可以更好地提升小孩子的责任感和独立感
2、基于stable diffusion进行图像生成
具体实现上,加载StableDiffusion模型(stable-diffusion-2-1),然后根据传入的prompt进行图像生成。
## 加载StableDiffusion模型
class StableDiffusionImgModel(object):
    def __init__(self,model_id="stabilityai/stable-diffusion-2-1") -> None:
        self.model_id = model_id
        self.pipe = StableDiffusionPipeline.from_pretrained(self.model_id, torch_dtype=torch.float16)
        self.pipe.scheduler = DPMSolverMultistepScheduler.from_config(self.pipe.scheduler.config)
        self.pipe = self.pipe.to("cuda")

    def run(self,prompt):
        image = self.pipe(prompt).images[0]
        width, height = image.size
        new_width = 640
        new_height = 360
        left = (width - new_width)/2
        top = (height - new_height)/2
        right = (width + new_width)/2
        bottom = (height + new_height)/2
        # Crop the center of the image
        image = image.crop((left, top, right, bottom))

        return image
***
## 基于StableDiffusion生成图片
class ImageGenByDiffusion(MediaGeneratorBase):
    '''
    generate image by stable diffusion
    '''
    def __init__(self, config,
                 img_gen_model,
                 ):
        super(ImageGenByDiffusion, self).__init__(config)
        self.config = config
        self.img_gen_model = img_gen_model
        self.tmp_dir = "./tmp/image"
        self.data_type = "image"
        if not os.path.exists(self.tmp_dir):
            os.makedirs(self.tmp_dir)

    def batch_run(self, query:List,**kwargs):
        assert type(query) == list
        resp = []
        for idx,text in enumerate(query):
            img = self.img_gen_model.run(text)
            pil_md5 = self.get_pil_md5(img)
            img_tmp_name = os.path.join(self.tmp_dir, "{}_{}.jpg".format(idx,pil_md5))
            img.save(img_tmp_name)
            one_info = {'img_local_path':img_tmp_name,'data_type':self.data_type}
            resp.append(one_info)
        return resp
生成的效果如下:
2) 小孩子养宠物
2) 可以更好地提升小孩子的责任感和独立感
3、基于stable diffusion进行图像生成
在具体实现上,相当于是先基于图像检索生成图像,然后再将该图像利用stable diffusion进行图像生成。
## 构建img2img模型,传入参数包括文本text以及预先定义的图片【在这里是检索的图片】

class StableDiffusionImg2ImgModel(object):
    def __init__(self,model_id="stabilityai/stable-diffusion-2-1") -> None:
        self.model_id = model_id
        self.pipe = StableDiffusionImg2ImgPipeline.from_pretrained(model_id, torch_dtype=torch.float16)
        self.pipe = self.pipe.to("cuda")


***
    def run(self,prompt,init_image_path):
        init_image = Image.open(init_image_path).convert('RGB')
        init_image = init_image.resize((768, 768))
        image = self.pipe(prompt=prompt, image=init_image, strength=0.75, guidance_scale=7.5,num_inference_steps=100).images[0]
        width, height = image.size
        new_width = 640
        new_height = 360
        left = (width - new_width)/2
        top = (height - new_height)/2
        right = (width + new_width)/2
        bottom = (height + new_height)/2
        # Crop the center of the image
        image = image.crop((left, top, right, bottom))
        return image

## 先检索相应图片,然后再将图片基于StableDiffusion进行生成

class ImageGenByRetrievalThenDiffusion(MediaGeneratorBase):
    '''
    generate image by retrieval then stable diffusion
    '''
    def __init__(self, config,
                    img_gen_by_retrieval_server,
                    img_gen_model,
                    ):
        super(ImageGenByRetrievalThenDiffusion, self).__init__(config)
        self.config = config
        self.img_gen_by_retrieval_server = img_gen_by_retrieval_server
        self.img_gen_model = img_gen_model

    def batch_run(self, query, **kwargs):
        '''
        run image generator by retrieval the diffusion
        '''
        assert type(query) == list
        # (1) img retrieval
        retrieval_resp_list = self.img_gen_by_retrieval_server.batch_run(query)
        # (2) img2img by diffusion
        for text,item in  zip(query,retrieval_resp_list):
            local_img_path = item["img_local_path"]
            img = self.img_gen_model.run(text,local_img_path)
            # save back
            img.save(local_img_path)
        return retrieval_resp_list
4)设置空格时长,对图片组合成视频
from moviepy.editor import ImageClip,VideoFileClip,TextClip

def test_image_clip():
    fname = "data/10012.jpg"
    img = cv2.imread(fname)
    img = cv2.resize(img, (640, 480))
    # img = Image.open(fname)
    clip = ImageClip(img,duration=1)
    clip.write_videofile("test.mp4",fps=24)
网页链接转短视频(Url2Video)实现
网页链接转短视频,指的是自动对网页的内容进行提取,生成视频文案,并生成短视频;
这个部分的实现思想在于:
首先,对于给定的网址,通过请求网站,解析得到其中的网页正文
from bs4 import BeautifulSoup
import requests
import json

def get_paragraph_texts(url: str):
    html: str = requests.get(url).text
    soup = BeautifulSoup(html, "html.parser")
    pes = soup.findAll('p')
    texts: list[str] = []
    for e in pes:
        texts.append(e.get_text())
    return texts
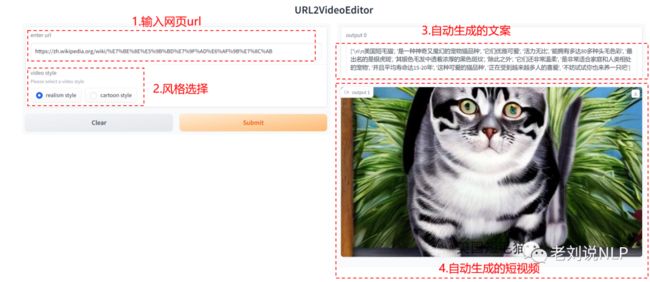
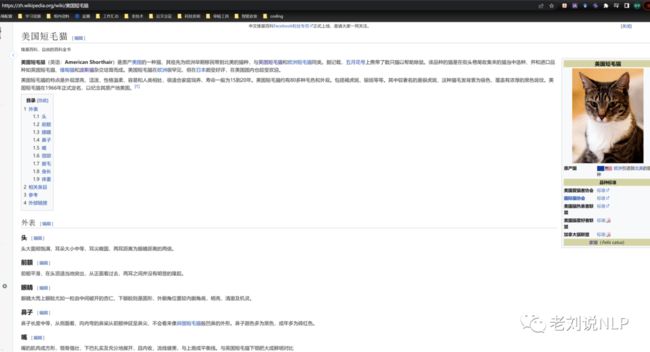
例如,输入一个url, 例如:https://zh.wikipedia.org/wiki/美国短毛猫
其内容是:美国短毛猫的维基百科
解析网页并自动摘要成短视频文案,如下:
['\n\n美国短毛猫',
'是一种神奇又魔幻的宠物猫品种',
'它们优雅可爱',
'活力无比',
'能拥有多达80多种头毛色彩',
'最出名的是银虎斑',
'其银色毛发中透着浓厚的黑色斑纹',
'除此之外',
'它们还非常温柔',
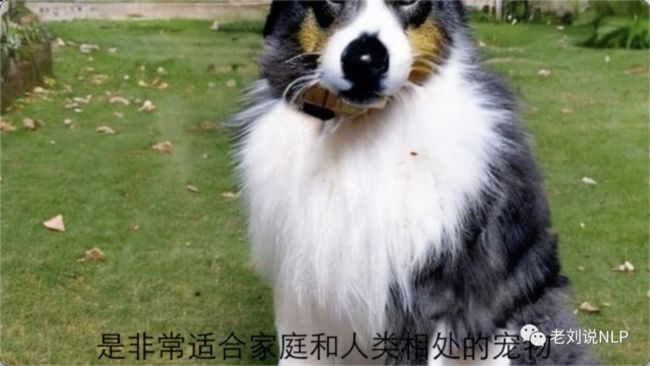
'是非常适合家庭和人类相处的宠物',
'并且平均寿命达15-20年',
'这种可爱的猫品种',
'正在受到越来越多人的喜爱',
'不妨试试你也来养一只吧']
其次,以该text,接上基于检索和stablediffusion的图片生成、视频合并流程,生成对应的短视频文案。
最终效果:
a) 美国短毛猫
b)是非常适合家庭和人类相处的宠物
2023-05-08
