- 在 Conda 中删除环境及所有安装的库
Studying 开龙wu
conda
注意事项1.删除环境前确保你没有在该环境中运行任何程序。2.删除操作是不可逆的,所有该环境中的包和配置都会被永久删除。3.如果你想保留环境的配置信息,可以在删除前使用condaenvexport>environment.yml导出环境配置。关于requirements.txt和environment.yaml文件使用介绍详情可参考以往文章,争对机器学习和深度学习里Python项目开发管理项目依赖的
- 计算机毕业设计Python+uniapp校园兼职系统小程序(小程序+源码+LW)
Python毕设源码程序高学长
python课程设计uni-app
计算机毕业设计Python+uniapp校园兼职系统小程序(小程序+源码+LW)该项目含有源码、文档、程序、数据库、配套开发软件、软件安装教程项目运行环境配置:Pychram社区版+python3.7.7+Mysql5.7+uni+HBuilderX+listpip+Navicat11+Django+nodejs。项目技术:django+python+UNI等等组成,B/S模式+pychram管理
- Python-Django毕业设计养老院老人日常生活管理系统(程序+Lw)
Python计算机毕设程序源码_
pythondjango课程设计
该项目含有源码、文档、程序、数据库、配套开发软件、软件安装教程项目运行环境配置:Pychram社区版+python3.7.7+Mysql5.7+HBuilderX+listpip+Navicat11+Django+nodejs。项目技术:django+python+Vue等等组成,B/S模式+pychram管理等等。环境需要1.运行环境:最好是python3.7.7,我们在这个版本上开发的。其他版
- 自己开发FT4222上位机软件 - USB转SPI
EE工程师
嵌入式系统python单片机模块测试
写作背景 最近公司有个项目,让开发一个能够同时进行千兆网接收和SPI配置的上位机软件,开发语言不限,所以作者选择Python+PyQt作开发,做嵌入式固件开发的读者可能知道还需要一块USB转SPI的模块才能进行上下位机正常SPI读写,项目团队成员建议模块从淘宝网购买就好,作者经过调研对比,感觉从芯片质量到开发配套上来讲,FTDI的FT4222模块是最优选择。但令作者感到不快的是淘宝商家不提供模块
- 深度学习方法生成抓取位姿与6D姿态估计的完整实现
ZPC8210
ROS深度学习人工智能
如何将GraspNet等深度学习模型与6D姿态估计集成到ROS2和MoveIt中,实现高精度的机器人抓取系统。1.系统架构text[RGB-D传感器]→[物体检测与6D姿态估计]→[GraspNet抓取位姿生成]→[MoveIt运动规划]→[执行抓取]2.环境配置2.1安装依赖bash#安装PyTorch(根据CUDA版本选择)pip3installtorchtorchvisiontorchaud
- 3D Gaussian Splatting (3DGS) 从入门到精通:安装、训练与常见问题全解析
3DGaussianSplatting(3DGS)从入门:安装、训练与常见问题全解析3DGaussianSplatting(3DGS)作为一种新兴的实时神经渲染技术,以其惊人的渲染速度和高质量的视觉效果迅速获得了社区的关注。然而,从环境配置到数据准备,再到模型训练和结果导出,整个流程中充满了各种可能令人困惑的“坑”。本文旨在为您提供一份全面的3DGS安装与使用指南,汇总了从环境搭建到最终结果产出的
- Github 2024-06-07开源项目日报 Top10
根据GithubTrendings的统计,今日(2024-06-07统计)共有10个项目上榜。根据开发语言中项目的数量,汇总情况如下:开发语言项目数量Python项目3C++项目3JavaScript项目2JupyterNotebook项目1TypeScript项目1Vue项目1比特币核心:开源比特币软件创建周期:4919天开发语言:C++协议类型:MITLicenseStar数量:76760个F
- Python批量爬取谷歌原图,2021年最新可用版
文章目录前言一、环境配置1.安装selenium2.使用正确的谷歌浏览器驱动二、使用步骤1.加载chromedriver.exe2.设置是否开启可视化界面3.输入关键词、下载图片数、图片保存路径三、爬取效果四、完整代码前言作为一名CVer,数据集获取少不了用到数据、图片爬虫技术,谷歌作为全球最大的数据搜索网站,如何从中快速获取大量有用图片数据尤为重要,但是技术更新,很多代码大多就会失效,爬与反爬永
- Python 中 sys 库的全面解析与实战应用
二向箔reverse
服务器python
在Python的众多标准库中,sys库占据着举足轻重的地位。它与Python解释器紧密交互,为开发者提供了访问解释器内部信息和控制解释器行为的强大能力。无论是命令行参数处理、系统环境配置,还是程序退出控制,sys库都能大显身手。本文将带您深入探索sys库的常用功能,通过丰富的实例讲解,助您轻松掌握其使用技巧。sys库的基础认知sys库是Python的内置标准库,无需额外安装,只需通过imports
- 某水利信息化项目人员组织矩阵识别与问题分析
静默空禅
项目管理大数据目标跟踪团队开发业界资讯职场和发展笔记经验分享
近期参与的华北某水利信息化类型项目,该项目不仅仅是软件设计开发,还涉及模型算法、硬件安装、环境配置、数据采集制作等诸多方面的工作;项目人员方面不仅是单一团队,涉及到多方团队的合作,项目推动工作较为复杂,各类影响因素繁多。以我个人视角和观察,进行一些记录和总结:一、人员分工基本框架项目整体分为三方人员,项目需求方、项目代建方、项目承建方。需求方为当地行业管理单位,项目建设需求来自他们;项目代建方为当
- 自学软件测试需要学什么?
AIZHINAN
软件测试软件测试面试自学软件测试软件测试培训转行软件测试
软件测试是一个系统化的领域,需要掌握测试理论、工具、编程、环境配置、业务流程等多方面知识。以下是系统化的学习路径,涵盖从入门到进阶的核心内容:软件测试视频教程,从入门到精通(完整版)零基础小白也可学!一、测试理论基础1.测试基础概念软件测试的定义、目的(质量保障、缺陷预防)。测试流程:需求分析→测试计划→用例设计→执行→缺陷管理→报告。常见术语:黑盒/白盒测试、回归测试、冒烟测试、Alpha/Be
- Python+Selenium自动化
1,什么是seleniumselenium是一个开源的自动化测试框架,主要适用WEB测试,可以支持多种语言(Java,C#,Python,php等),既然支持多语言开发,那跨平台自然就不用多说啦,selenium有几个版本,一个是seleniumIDE(是一个安装在火狐浏览器上的一个插件,可以用来录制脚本,然后导出自动生成对应的开发语言文件),seleniumGrid(自动化辅助工具,楼主还没深入
- Anaconda 、Pytorch下载教程(保姆级)
湲绘
pytorchopencv人工智能condapython深度学习
#因为每次都自己去搜教程太麻烦,索性写个博客记录一下#一、Anaconda的下载与安装进入Anaconda官网官网:Anaconda|TheWorld’sMostPopularDataSciencePlatform下载地址:FreeDownload|Anaconda直接点击Download即可版本对应表如下,选择自己想要的python版本下载就好[环境配置]anaconda3的base环境与pyt
- Django母婴商城项目实践(二)- 商城项目环境配置
ITB业生
Djangodjango数据库python
2、母婴商城项目环境配置环境配置:Python3.12解释器PycharmProfessional2025.1编辑器Django4.2(或Django5.x)MySQL8.0.28数据库1、Django框架介绍Django是一个高级的PythonWeb应用框架,可以快速开发安全和可维护的网站。由经验丰富的开发者构建,Django负责处理网站开发中麻烦的部分,可以专注于编写应用程序,而无需重新开发。
- 大前端几种开发语言对比
Fighting Horse
开发语言flutterswiftkotlin
项目概述语言特性备注基本类型BasicOperators整数、浮点数C++整数类型宽度不固定,如int,自动数值类型转换Java没有无符号整数,存在装箱Box类型C#Swift基本tuple类型KotlinT?是Box的支持原生类型数组IntArray等无符号整数是Beta的,通过内联类实现Dart运算符BasicOperators赋值、流程、算术、位、逻辑、关系运算符下标、后缀、前缀运算符三元条
- STM32之TB6612电机驱动模块
如愿小李单片机设计
stm32嵌入式硬件单片机
目录一、模块概述二、模块简介2.1模块特点2.2电气特性2.3模块接口说明2.4结构与工作原理2.5原理图设计2.6实际应用注意事项三、硬件设计3.1硬件组成3.2硬件连接四、软件设计4.1开发环境配置4.2关键代码实现4.2.1PWM初始化(PWM_Init)4.2.2GPIO初始化4.2.3电机控制函数4.2.4主函数五、功能实现与优化5.1基础功能实现5.2高级功能扩展5.3性能优化建议六、
- 什么是高防 IP?从技术原理到实战部署的深度解析
快快网络-三七
业务安全服务器ip快快网络高防IP快快云弹性云云计算
目录前言一、高防IP的定义与核心价值二、高防IP的技术原理与架构2.1流量牵引技术2.2流量清洗引擎2.3回源机制三、高防IP的核心防护技术详解3.1DDoS攻击防御技术3.2高防IP的弹性带宽设计四、实战:基于Linux的高防IP环境配置4.1配置高防IP回源白名单4.2配置TCP抗攻击参数4.3高防IP与Nginx的配合配置五、高防IP的选型与部署建议总结前言在网络攻击日益频繁的今天,DDoS
- Frida使用指南(三)- Objection
象野VH
Android逆向进阶逆向
1.什么是objectionobjection是基于frida的命令行hook集合工具,可以让你不写代码,敲几句命令就可以对java函数的高颗粒度hook,还支持RPC调用。可以实现诸如内存搜索、类和模块搜索、方法hook打印参数返回值调用栈等常用功能,是一个非常方便的,逆向必备、内存漫游神器。项目地址2.objection环境配置已不更新,要和frida的版本匹配python使用的版本建议大于3
- 查看环境配置
井底蛙蛙呱呱呱
忘了转自哪里了。。。系统#uname-a#查看内核/操作系统/CPU信息#head-n1/etc/issue#查看操作系统版本#cat/proc/cpuinfo#查看CPU信息#hostname#查看计算机名#lspci-tv#列出所有PCI设备#lsusb-tv#列出所有USB设备#lsmod#列出加载的内核模块#env#查看环境变量资源#free-m#查看内存使用量和交换区使用量#df-h#查
- 全栈Todo应用实战:从零到一的本地部署与深度解析
全栈Todo应用实战:从零到一的本地部署与深度解析前言在现代Web开发中,全栈应用已成为主流。本文将以一个经典的Todo(待办事项)应用为例,详细记录从项目下载、环境配置、后端启动、数据库交互到前端运行的完整流程。我们将深入探讨在此过程中遇到的一个典型问题——CORS与API请求失败,并提供从“快速修复”到“最佳实践”的解决方案。这不仅是一份操作指南,更是一次宝贵的实战经验总结。你将从本博客中学到
- React 项目环境变量使用指南
啃火龙果的兔子
开发DEMOreact.js前端前端框架
在React项目中正确使用环境变量是管理不同环境配置的关键技术。以下是完整的解决方案:1.创建环境变量文件React项目支持以下环境变量文件(按优先级从高到低):.env.development.local(本地开发环境).env.development(开发环境).env.production.local(生产环境本地覆盖).env.production(生产环境).env(所有环境)示例文件内
- Java开发:从入门到精通
目录第一部分:基石篇——筑基与心法(Java核心基础)第一章:缘起与开示——Java世界观1.1万物皆对象:面向对象思想的起源与哲学1.2Java的“前世今生”:发展史、技术体系与生态圈1.3工欲善其事:搭建你的第一个“道场”(JDK环境配置与IDE详解)1.4“Hello,World!”:从第一行代码看Java程序的结构与生命周期1.5编译与运行:JVM如何成为Java跨平台的“金刚不坏之身”第
- IntelliJ IDEA 与 Java 开发的自动化部署方案
Java技术栈实战
javaintellij-idea自动化ai
IntelliJIDEA与Java开发的自动化部署方案关键词:IntelliJIDEA、Java开发、自动化部署、CI/CD、Docker、Jenkins、Maven/Gradle摘要:本文深入探讨了如何利用IntelliJIDEA这一强大的JavaIDE与现代化工具链实现Java应用的自动化部署。我们将从开发环境配置开始,逐步介绍构建工具集成、持续集成/持续部署(CI/CD)流程搭建、容器化部署
- AIGC工具与软件开发流程的深度集成方案
Irene-HQ
软件开发测试AIGC测试工具githubAIGC程序人生面试
一、代码开发环节集成路径环境配置标准化安装AIGC工具包并配置环境变量(如设置AIGC_TOOL_PATH),确保团队开发环境一致。在IDE插件市场安装Copilot等工具,实现编码时实时建议调用。人机协作新模式需求解析:上传PRD文档,AI自动提取业务规则生成类结构(如支付模块的PaymentService雏形)。代码补全:输入注释//JWT验证中间件,生成OAuth2.0
- 个人日记本小程序开发方案(使用IntelliJ IDEA)
HH予
嵌入式驱动工程项目开发intellij-ideajavaide
个人日记本小程序开发方案(使用IntelliJIDEA)一、项目创建与环境配置1.新建项目打开IDEA→NewProject→JavaFX选择JDK11+版本添加必要依赖:<groupId
- 2.4 基于dpdk的用户态协议栈的实现
百亿苍狗
高性能网络设计专栏开发语言网络
操作系统PosixAPI所提供的网络接口,数据收发是基于用户态与内核态的频繁切换实现。而dpdk实现了绕过内核监管,直接在用户态访问网络硬件,避免频繁状态切换。DPDK安装与配置虚拟机环境配置检查是否支持多队列网卡cat/proc/interrupts|grepens33(获取整个机器的终端),结果19:4202120IO-APIC19-fasteoiens33,不支持多队列网卡。虚拟机关机,修改
- jetson agx orin 刷机、cuda、pytorch配置指南【亲测有效】
jetsonagxorin刷机指南注意事项刷机具体指南cuda环境配置指南Anconda、Pytorch配置注意事项1.使用设备自带usbtoc的传输线时,注意c口插到orin左侧的口,右侧的口不支持数据传输;2.刷机时需准备ubuntu系统,可以是虚拟机,注意安装SDKManager刷机时,JetPack版本要选对,JetPack6.0的对应ubuntu22,cuda12版本,对应pytorch
- 国产替代Spring Boot框架的最佳之选——Solon
遇码
开发工具springboot后端javasolon
Java很好。SpringBoot也很好。有没有可以与SpringBoot对标的国产框架?请你记住,它叫Solon。本文推荐Solon,是因为我自己的一段经历。我主要使用的开发语言是Python,本着技多不压身的伟大指导思想,很早就想要征服SpringBoot,无奈尝试多次始终不得其要领,也就草草收场。前段时间因为项目需要,偶然了解到Solon,不仅可以平替SpringBoot,还是国产,还有我喜
- Rust 安装与环境配置(超详细教程,零基础向)
人才程序员
杂谈rust开发语言后端爬虫swooleflaskmysql
文章目录Rust安装与环境配置(超详细教程,零基础向)一、Rust安装前的准备Rust支持的系统平台:二、安装Rust(不同平台)✅1.Windows系统1.1安装Rustup1.2等待安装完成✅2.macOS系统2.1安装Homebrew(如果尚未安装)2.2使用Homebrew安装rustup:✅3.Linux系统三、Rust工具介绍1.`rustc`:Rust编译器2.`cargo`:Rus
- Github 2025-01-07Python开源项目日报 Top10
老孙正经胡说
github开源Github趋势分析开源项目PythonGolang
根据GithubTrendings的统计,今日(2025-01-07统计)共有10个项目上榜。根据开发语言中项目的数量,汇总情况如下:开发语言项目数量Python项目10TypeScript项目1C++项目1OpenHands:人工智能驱动的软件开发代理平台创建周期:195天开发语言:Python协议类型:MITLicenseStar数量:31753个Fork数量:3660次关注人数:31753人
- redis学习笔记——不仅仅是存取数据
Everyday都不同
returnSourceexpire/delincr/lpush数据库分区redis
最近项目中用到比较多redis,感觉之前对它一直局限于get/set数据的层面。其实作为一个强大的NoSql数据库产品,如果好好利用它,会带来很多意想不到的效果。(因为我搞java,所以就从jedis的角度来补充一点东西吧。PS:不一定全,只是个人理解,不喜勿喷)
1、关于JedisPool.returnSource(Jedis jeids)
这个方法是从red
- SQL性能优化-持续更新中。。。。。。
atongyeye
oraclesql
1 通过ROWID访问表--索引
你可以采用基于ROWID的访问方式情况,提高访问表的效率, , ROWID包含了表中记录的物理位置信息..ORACLE采用索引(INDEX)实现了数据和存放数据的物理位置(ROWID)之间的联系. 通常索引提供了快速访问ROWID的方法,因此那些基于索引列的查询就可以得到性能上的提高.
2 共享SQL语句--相同的sql放入缓存
3 选择最有效率的表
- [JAVA语言]JAVA虚拟机对底层硬件的操控还不完善
comsci
JAVA虚拟机
如果我们用汇编语言编写一个直接读写CPU寄存器的代码段,然后利用这个代码段去控制被操作系统屏蔽的硬件资源,这对于JVM虚拟机显然是不合法的,对操作系统来讲,这样也是不合法的,但是如果是一个工程项目的确需要这样做,合同已经签了,我们又不能够这样做,怎么办呢? 那么一个精通汇编语言的那种X客,是否在这个时候就会发生某种至关重要的作用呢?
&n
- lvs- real
男人50
LVS
#!/bin/bash
#
# Script to start LVS DR real server.
# description: LVS DR real server
#
#. /etc/rc.d/init.d/functions
VIP=10.10.6.252
host='/bin/hostname'
case "$1" in
sta
- 生成公钥和私钥
oloz
DSA安全加密
package com.msserver.core.util;
import java.security.KeyPair;
import java.security.PrivateKey;
import java.security.PublicKey;
import java.security.SecureRandom;
public class SecurityUtil {
- UIView 中加入的cocos2d,背景透明
374016526
cocos2dglClearColor
要点是首先pixelFormat:kEAGLColorFormatRGBA8,必须有alpha层才能透明。然后view设置为透明glView.opaque = NO;[director setOpenGLView:glView];[self.viewController.view setBackgroundColor:[UIColor clearColor]];[self.viewControll
- mysql常用命令
香水浓
mysql
连接数据库
mysql -u troy -ptroy
备份表
mysqldump -u troy -ptroy mm_database mm_user_tbl > user.sql
恢复表(与恢复数据库命令相同)
mysql -u troy -ptroy mm_database < user.sql
备份数据库
mysqldump -u troy -ptroy
- 我的架构经验系列文章 - 后端架构 - 系统层面
agevs
JavaScriptjquerycsshtml5
系统层面:
高可用性
所谓高可用性也就是通过避免单独故障加上快速故障转移实现一旦某台物理服务器出现故障能实现故障快速恢复。一般来说,可以采用两种方式,如果可以做业务可以做负载均衡则通过负载均衡实现集群,然后针对每一台服务器进行监控,一旦发生故障则从集群中移除;如果业务只能有单点入口那么可以通过实现Standby机加上虚拟IP机制,实现Active机在出现故障之后虚拟IP转移到Standby的快速
- 利用ant进行远程tomcat部署
aijuans
tomcat
在javaEE项目中,需要将工程部署到远程服务器上,如果部署的频率比较高,手动部署的方式就比较麻烦,可以利用Ant工具实现快捷的部署。这篇博文详细介绍了ant配置的步骤(http://www.cnblogs.com/GloriousOnion/archive/2012/12/18/2822817.html),但是在tomcat7以上不适用,需要修改配置,具体如下:
1.配置tomcat的用户角色
- 获取复利总收入
baalwolf
获取
public static void main(String args[]){
int money=200;
int year=1;
double rate=0.1;
&
- eclipse.ini解释
BigBird2012
eclipse
大多数java开发者使用的都是eclipse,今天感兴趣去eclipse官网搜了一下eclipse.ini的配置,供大家参考,我会把关键的部分给大家用中文解释一下。还是推荐有问题不会直接搜谷歌,看官方文档,这样我们会知道问题的真面目是什么,对问题也有一个全面清晰的认识。
Overview
1、Eclipse.ini的作用
Eclipse startup is controlled by th
- AngularJS实现分页功能
bijian1013
JavaScriptAngularJS分页
对于大多数web应用来说显示项目列表是一种很常见的任务。通常情况下,我们的数据会比较多,无法很好地显示在单个页面中。在这种情况下,我们需要把数据以页的方式来展示,同时带有转到上一页和下一页的功能。既然在整个应用中这是一种很常见的需求,那么把这一功能抽象成一个通用的、可复用的分页(Paginator)服务是很有意义的。
&nbs
- [Maven学习笔记三]Maven archetype
bit1129
ArcheType
archetype的英文意思是原型,Maven archetype表示创建Maven模块的模版,比如创建web项目,创建Spring项目等等.
mvn archetype提供了一种命令行交互式创建Maven项目或者模块的方式,
mvn archetype
1.在LearnMaven-ch03目录下,执行命令mvn archetype:gener
- 【Java命令三】jps
bit1129
Java命令
jps很简单,用于显示当前运行的Java进程,也可以连接到远程服务器去查看
[hadoop@hadoop bin]$ jps -help
usage: jps [-help]
jps [-q] [-mlvV] [<hostid>]
Definitions:
<hostid>: <hostname>[:
- ZABBIX2.2 2.4 等各版本之间的兼容性
ronin47
zabbix更新很快,从2009年到现在已经更新多个版本,为了使用更多zabbix的新特性,随之而来的便是升级版本,zabbix版本兼容性是必须优先考虑的一点 客户端AGENT兼容
zabbix1.x到zabbix2.x的所有agent都兼容zabbix server2.4:如果你升级zabbix server,客户端是可以不做任何改变,除非你想使用agent的一些新特性。 Zabbix代理(p
- unity 3d还是cocos2dx哪个适合游戏?
brotherlamp
unity自学unity教程unity视频unity资料unity
unity 3d还是cocos2dx哪个适合游戏?
问:unity 3d还是cocos2dx哪个适合游戏?
答:首先目前来看unity视频教程因为是3d引擎,目前对2d支持并不完善,unity 3d 目前做2d普遍两种思路,一种是正交相机,3d画面2d视角,另一种是通过一些插件,动态创建mesh来绘制图形单元目前用的较多的是2d toolkit,ex2d,smooth moves,sm2,
- 百度笔试题:一个已经排序好的很大的数组,现在给它划分成m段,每段长度不定,段长最长为k,然后段内打乱顺序,请设计一个算法对其进行重新排序
bylijinnan
java算法面试百度招聘
import java.util.Arrays;
/**
* 最早是在陈利人老师的微博看到这道题:
* #面试题#An array with n elements which is K most sorted,就是每个element的初始位置和它最终的排序后的位置的距离不超过常数K
* 设计一个排序算法。It should be faster than O(n*lgn)。
- 获取checkbox复选框的值
chiangfai
checkbox
<title>CheckBox</title>
<script type = "text/javascript">
doGetVal: function doGetVal()
{
//var fruitName = document.getElementById("apple").value;//根据
- MySQLdb用户指南
chenchao051
mysqldb
原网页被墙,放这里备用。 MySQLdb User's Guide
Contents
Introduction
Installation
_mysql
MySQL C API translation
MySQL C API function mapping
Some _mysql examples
MySQLdb
- HIVE 窗口及分析函数
daizj
hive窗口函数分析函数
窗口函数应用场景:
(1)用于分区排序
(2)动态Group By
(3)Top N
(4)累计计算
(5)层次查询
一、分析函数
用于等级、百分点、n分片等。
函数 说明
RANK() &nbs
- PHP ZipArchive 实现压缩解压Zip文件
dcj3sjt126com
PHPzip
PHP ZipArchive 是PHP自带的扩展类,可以轻松实现ZIP文件的压缩和解压,使用前首先要确保PHP ZIP 扩展已经开启,具体开启方法就不说了,不同的平台开启PHP扩增的方法网上都有,如有疑问欢迎交流。这里整理一下常用的示例供参考。
一、解压缩zip文件 01 02 03 04 05 06 07 08 09 10 11
- 精彩英语贺词
dcj3sjt126com
英语
I'm always here
我会一直在这里支持你
&nb
- 基于Java注解的Spring的IoC功能
e200702084
javaspringbeanIOCOffice
- java模拟post请求
geeksun
java
一般API接收客户端(比如网页、APP或其他应用服务)的请求,但在测试时需要模拟来自外界的请求,经探索,使用HttpComponentshttpClient可模拟Post提交请求。 此处用HttpComponents的httpclient来完成使命。
import org.apache.http.HttpEntity ;
import org.apache.http.HttpRespon
- Swift语法之 ---- ?和!区别
hongtoushizi
?swift!
转载自: http://blog.sina.com.cn/s/blog_71715bf80102ux3v.html
Swift语言使用var定义变量,但和别的语言不同,Swift里不会自动给变量赋初始值,也就是说变量不会有默认值,所以要求使用变量之前必须要对其初始化。如果在使用变量之前不进行初始化就会报错:
var stringValue : String
//
- centos7安装jdk1.7
jisonami
jdkcentos
安装JDK1.7
步骤1、解压tar包在当前目录
[root@localhost usr]#tar -xzvf jdk-7u75-linux-x64.tar.gz
步骤2:配置环境变量
在etc/profile文件下添加
export JAVA_HOME=/usr/java/jdk1.7.0_75
export CLASSPATH=/usr/java/jdk1.7.0_75/lib
- 数据源架构模式之数据映射器
home198979
PHP架构数据映射器datamapper
前面分别介绍了数据源架构模式之表数据入口、数据源架构模式之行和数据入口数据源架构模式之活动记录,相较于这三种数据源架构模式,数据映射器显得更加“高大上”。
一、概念
数据映射器(Data Mapper):在保持对象和数据库(以及映射器本身)彼此独立的情况下,在二者之间移动数据的一个映射器层。概念永远都是抽象的,简单的说,数据映射器就是一个负责将数据映射到对象的类数据。
&nb
- 在Python中使用MYSQL
pda158
mysqlpython
缘由 近期在折腾一个小东西须要抓取网上的页面。然后进行解析。将结果放到
数据库中。 了解到
Python在这方面有优势,便选用之。 由于我有台
server上面安装有
mysql,自然使用之。在进行数据库的这个操作过程中遇到了不少问题,这里
记录一下,大家共勉。
python中mysql的调用
百度之后能够通过MySQLdb进行数据库操作。
- 单例模式
hxl1988_0311
java单例设计模式单件
package com.sosop.designpattern.singleton;
/*
* 单件模式:保证一个类必须只有一个实例,并提供全局的访问点
*
* 所以单例模式必须有私有的构造器,没有私有构造器根本不用谈单件
*
* 必须考虑到并发情况下创建了多个实例对象
* */
/**
* 虽然有锁,但是只在第一次创建对象的时候加锁,并发时不会存在效率
- 27种迹象显示你应该辞掉程序员的工作
vipshichg
工作
1、你仍然在等待老板在2010年答应的要提拔你的暗示。 2、你的上级近10年没有开发过任何代码。 3、老板假装懂你说的这些技术,但实际上他完全不知道你在说什么。 4、你干完的项目6个月后才部署到现场服务器上。 5、时不时的,老板在检查你刚刚完成的工作时,要求按新想法重新开发。 6、而最终这个软件只有12个用户。 7、时间全浪费在办公室政治中,而不是用在开发好的软件上。 8、部署前5分钟才开始测试。
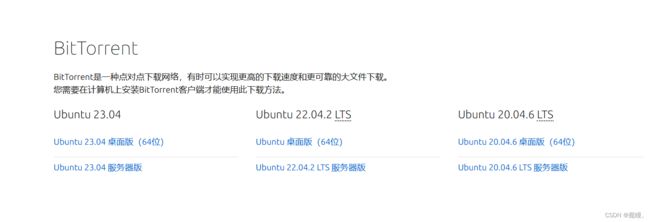
 下载ubuntu20.04 桌面版


