人脸识别对齐,向量搜索
人脸对齐的概念
1 查找人脸
我们可以使用dlib来查找人脸,也就是所谓的侦测人脸,可以从下面github的地址去拿到models:人脸查找的models
dnnFaceDetector = dlib.cnn_face_detection_model_v1("./mmod_human_face_detector.dat")
faceRects = dnnFaceDetector(frameDlibHogSmall, 0)
for faceRect in faceRects:
    x1 = faceRect.rect.left()
    y1 = faceRect.rect.top()
    x2 = faceRect.rect.right()
    y2 = faceRect.rect.bottom()
dlib c++ 的代码如下所示:
String mmodModelPath = "./mmod_human_face_detector.dat";
net_type mmodFaceDetector;
deserialize(mmodModelPath) >> mmodFaceDetector;

// Convert OpenCV image format to Dlib's image format
cv_image<bgr_pixel> dlibIm(frameDlibMmodSmall);
matrix<rgb_pixel> dlibMatrix;
assign_image(dlibMatrix, dlibIm);

// Detect faces in the image
std::vector<dlib::mmod_rect> faceRects = mmodFaceDetector(dlibMatrix);

for ( size_t i = 0; i < faceRects.size(); i++ )
{
  int x1 = faceRects[i].rect.left();
  int y1 = faceRects[i].rect.top();
  int x2 = faceRects[i].rect.right();
  int y2 = faceRects[i].rect.bottom();
  cv::rectangle(frameDlibMmod, Point(x1, y1), Point(x2, y2), Scalar(0,255,0), (int)(frameHeight/150.0), 4);
}
当然我们也可以用opencv的人脸检测模块来做,如果我们有GPU, 可以使用dlib的mmod来做,如果我们只有cpu,那就简单使用opencv的级联检测,不过,对于侧脸等等,检测得不是很多,不要紧,我们假定可以检测到。
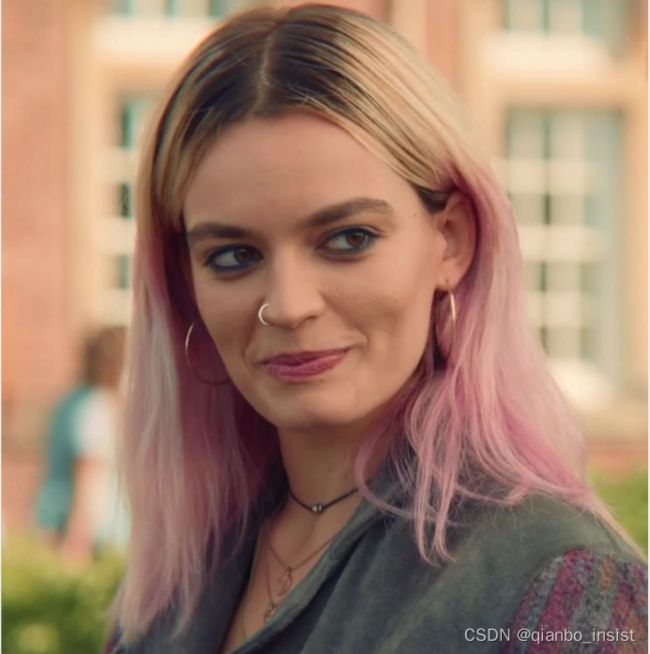
假定我们已经检测到多张人脸,把图片存起来,然后去调用对齐是比较好的,以下是一个女演员图片,我们只示例来对齐

对齐的代码如下所示:
import align.detector as dt
import align.align_trans as at
import cv2
from PIL import Image
import numpy as np
#path = "./0.jpg"
path = "./b.png"
image = cv2.imread(path)
#cv2.convert

crop_size = 112
scale = crop_size / 112.0
reference = at.get_reference_facial_points(default_square=True) * scale


#img = Image.open(path)
img = Image.open(path).convert('RGB')
try:  # Handle exception
    _, landmarks = dt.detect_faces(img)
except Exception:
   print("{} is discarded due to exception!".format(path))
if (len(landmarks) == 0):  # If the landmarks cannot be detected, the img will be discarded
    print("{} is discarded due to non-detected landmarks!".format(path))

else:
    facial5points = [[landmarks[0][j], landmarks[0][j + 5]] for j in range(5)]
    warped_face = at.warp_and_crop_face(
                    np.array(img),
                    facial5points,
                    reference,
                    crop_size=(crop_size, crop_size),
                )
    cv2.imshow("test",cv2.cvtColor(warped_face,cv2.COLOR_RGB2BGR))
    #cv2.imshow("test",)
    img_warped = Image.fromarray(warped_face)
    img_warped.save("test.jpg")
    cv2.waitKey(0)
可以看到结果是把人脸旋转了到了正脸,这个对于人脸识别是有作用得,也可以用在跨境追踪得reid上面,以图搜图上面。
向量搜索
向量搜索可以将多个点得向量从图中抽取出来,这个和reid 抽取特张向量一样,我们可以使用向量数据库来存储这些数据,也可以直接在内存中查找
下面我们假定所有图片已经被我们截取,例如使用1400协议截取得图片,我们使用上面得方法进行人脸截取,对齐,再从网络中抽取向量,我们可以使用任何一种arc face, 去建立网络训练数据,并抽取向量出来。
import os
import cv2
import numpy as np
import torch
import torch.utils.data as data
import torchvision.datasets as datasets
import torch.nn.functional as F
import torchvision.transforms as transforms
from backbone import Backbone
from tqdm import tqdm


def get_feature(data_root, model_root, input_size=[112, 112], embedding_size=512):

    device = torch.device("cuda:0" if torch.cuda.is_available() else "cpu")

    # check data and model paths
    assert os.path.exists(data_root)
    assert os.path.exists(model_root)
    print(f"Data root: {data_root}")

    # define image preprocessing
    transform = transforms.Compose(
        [
            transforms.Resize(
                [int(128 * input_size[0] / 112), int(128 * input_size[0] / 112)],
            ),  # smaller side resized
            transforms.CenterCrop([input_size[0], input_size[1]]),
            transforms.ToTensor(),
            transforms.Normalize(mean=[0.5, 0.5, 0.5], std=[0.5, 0.5, 0.5]),
        ],
    )

    # define data loader
    dataset = datasets.ImageFolder(data_root, transform)
    loader = data.DataLoader(
        dataset, batch_size=1, shuffle=False, pin_memory=True, num_workers=0,
    )
    print(f"Number of classes: {len(loader.dataset.classes)}")

    # load backbone weigths from a checkpoint
    backbone = Backbone(input_size)
    backbone.load_state_dict(torch.load(model_root, map_location=torch.device("cpu")))
    backbone.to(device)
    backbone.eval()

    # get embedding for each face
    embeddings = np.zeros([len(loader.dataset), embedding_size])
    with torch.no_grad():
        for idx, (image, _) in enumerate(
            tqdm(loader, desc="Create embeddings matrix", total=len(loader)),
        ):
            embeddings[idx, :] = F.normalize(backbone(image.to(device))).cpu()

    # get all original images
    images = []
    for img_path, _ in dataset.samples:
        img = cv2.imread(img_path)
        images.append(img)

    return images, embeddings
抽取完了以后,我们可以再使用比较排序等方法进行搜索,当然,可以使用向量数据库等等方法,这里假定都在内存里面,我们使用一下函数来搜索相似度,也可以使用各种排序方法。这里只是示例。
def visualize_similarity(tag, input_size=[112, 112]):
    images, embeddings = get_feature(
        data_root=f"data/{tag}_aligned",
        model_root="checkpoint/backbone_ir50_ms1m_epoch120.pth",
        input_size=input_size,
    )

    # calculate cosine similarity matrix
    cos_similarity = np.dot(embeddings, embeddings.T)
    cos_similarity = cos_similarity.clip(min=0, max=1)
    # plot colorful grid from pair distance values in similarity matrix
    similarity_grid = plot_similarity_grid(cos_similarity, input_size)

    # pad similarity grid with images of faces
    horizontal_grid = np.hstack(images)
    vertical_grid = np.vstack(images)
    zeros = np.zeros((*input_size, 3))
    vertical_grid = np.vstack((zeros, vertical_grid))
    result = np.vstack((horizontal_grid, similarity_grid))
    result = np.hstack((vertical_grid, result))

    if not os.path.isdir("images"):
        os.mkdir("images")

    cv2.imwrite(f"images/{tag}.jpg", result)


def plot_similarity_grid(cos_similarity, input_size):
    n = len(cos_similarity)
    rows = []
    for i in range(n):
        row = []
        for j in range(n):
            # create small colorful image from value in distance matrix
            value = cos_similarity[i][j]
            cell = np.empty(input_size)
            cell.fill(value)
            cell = (cell * 255).astype(np.uint8)
            # color depends on value: blue is closer to 0, green is closer to 1
            img = cv2.applyColorMap(cell, cv2.COLORMAP_WINTER)

            # add distance value as text centered on image
            font = cv2.FONT_HERSHEY_SIMPLEX
            text = f"{value:.2f}"
            textsize = cv2.getTextSize(text, font, 1, 2)[0]
            text_x = (img.shape[1] - textsize[0]) // 2
            text_y = (img.shape[0] + textsize[1]) // 2
            cv2.putText(
                img, text, (text_x, text_y), font, 1, (255, 255, 255), 2, cv2.LINE_AA,
            )
            row.append(img)
        rows.append(np.concatenate(row, axis=1))
    grid = np.concatenate(rows)
    return grid


if __name__ == "__main__":
    parser = argparse.ArgumentParser()
    parser.add_argument(
        "--tags",
        help="specify your tags for aligned faces datasets",
        default="test",
        nargs='+',
        required=True
    )
    args = parser.parse_args()
    tags = args.tags

    for tag in tags:
        visualize_similarity(tag)
其他小伙伴如果有需要,我可以把代码发一下,给我留言即可。