SpringBoot Redis 使用Lettuce和Jedis配置哨兵模式
Redis 从入门到精通【应用篇】之SpringBoot Redis 配置哨兵模式 Lettuce 和Jedis
文章目录
- Redis 从入门到精通【应用篇】之SpringBoot Redis 配置哨兵模式 Lettuce 和Jedis
- 前言
-
- Lettuce和Jedis区别
-
- 1. 连接方式
- 2. 线程安全性
- 教程如下
- 1. Lettuce 方式配置
-
- 1.1. 添加 Redis 和 Lettuce 依赖
- 1.2. 配置 Redis 哨兵模式
- 1.3. 创建自定义 RedisConnectionFactory以及RedisTemplate
- 2. Jedis 方式配置
-
- 2.1. 添加 Redis 和 Jedis 依赖
- 2.2. 配置 Redis 哨兵模式
- 2.3. 创建自定义 RedisTemplate
- 3. 总结
- 3. Redis从入门到精通系列文章

前言
在Spring Boot 中配置Redis哨兵模式,可以使用 Lettuce 或 Jedis 配置 Redis 哨兵模式,实现高可用的 Redis 集群。
因为在Spring Boot中spring-boot-starter-data-redis已经实现了两种客户端链接方式,我们选择其中一种就可以。
Lettuce和Jedis区别
Lettuce 和 Jedis 都是 Redis 客户端库,可以与 Redis 服务器进行通信。它们的区别在于:
1. 连接方式
- Lettuce 采用 Netty 底层网络框架,使用异步非阻塞式 IO 模型,支持多个 Redis 节点的连接池复用,适合高并发场景。
- Jedis 采用传统的阻塞 IO 模型,每个 Redis 节点需要维护一个连接池,适合低并发场景。
2. 线程安全性
- Lettuce 是线程安全的,可以在多线程环境下共享连接,而 Jedis 不是线程安全的,需要使用连接池进行连接复用。
在 Spring Boot 中配置 Redis 哨兵模式使用 Lettuce 和Jedis 作为 Redis 客户端的步骤分别如下。
推荐使用Lettuce 方式配置。
教程如下
1. Lettuce 方式配置
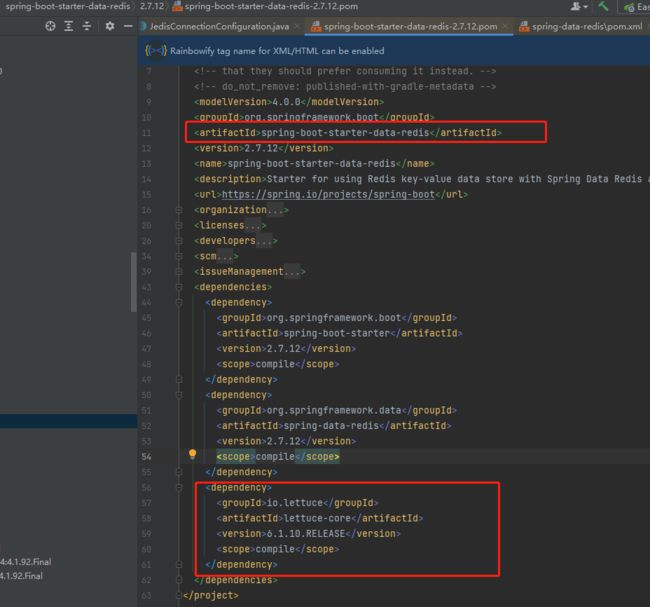
1.1. 添加 Redis 和 Lettuce 依赖
在 pom.xml 文件中添加 Redis 和 Lettuce 依赖:
<dependency>
    <groupId>org.springframework.bootgroupId>
    <artifactId>spring-boot-starter-data-redisartifactId>
dependency>
因为默认情况下Spring-boot-starter-data-redis 已经引入了lettuce 所以我们不需要再引入客户端lettuce。只需要引入上面的Starter就OK。
1.2. 配置 Redis 哨兵模式
在 application.properties 或 application.yml 文件中添加 Redis 的配置信息:
两种配置方式我都罗列出来
# Redis 主节点的名称
spring.redis.sentinel.master=your-master-name
# Redis 哨兵节点的地址,多个节点之间使用逗号分隔
spring.redis.sentinel.nodes=127.0.0.1:26379,127.0.0.1:26380,127.0.0.1:26381
# Redis 访问密码
spring.redis.password=your-redis-password
# Lettuce 连接池最大连接数
spring.redis.lettuce.pool.max-active=8
# Lettuce 连接池最大空闲连接数
spring.redis.lettuce.pool.max-idle=8
# Lettuce 连接池最小空闲连接数
spring.redis.lettuce.pool.min-idle=0
# Lettuce 连接池最大等待时间
spring.redis.lettuce.pool.max-wait=5000ms
或者使用yaml配置方式,要看大家已有项目的配置方式,保持一致。
spring:
  redis:
    sentinel:
      master: your-master-name
      nodes: 127.0.0.1:26379,127.0.0.1:26380,127.0.0.1:26381
    password: your-redis-password
    lettuce:
      pool:
        max-active: 8
        max-idle: 8
        min-idle: 0
        max-wait: 5000ms
配置解释一下 此处的配置中带Lettuce 的事SpringBoot 配置Redis 使用Lettuce 的专项配置。不带的事公共配置。
spring.redis.sentinel.master:Redis 主节点的名称,用于访问 Redis 哨兵获取主节点的信息。spring.redis.sentinel.nodes:Redis 哨兵节点的地址,多个节点之间使用逗号分隔。spring.redis.password:Redis 访问密码,用于连接 Redis 时进行认证。spring.redis.lettuce.pool.max-active:Lettuce 连接池最大连接数,用于限制连接池中的最大连接数。spring.redis.lettuce.pool.max-idle:Lettuce 连接池最大空闲连接数,用于限制连接池中的最大空闲连接数。spring.redis.lettuce.pool.min-idle:Lettuce 连接池最小空闲连接数,用于限制连接池中的最小空闲连接数。spring.redis.lettuce.pool.max-wait:Lettuce 连接池最大等待时间,用于限制获取连接的最大等待时间。
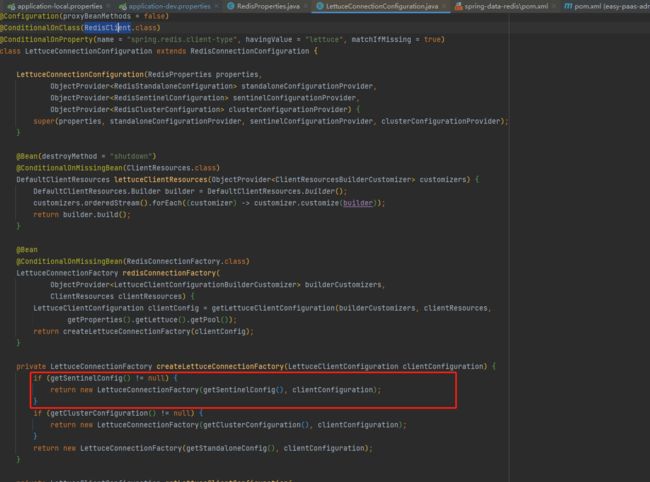
其实配置完上面的配置基本上就是可以使用了,因为Spring Boot的实例化Redis客户端的顺序是先判断是否哨兵Sentinel模式,再接下来Cluster模式,接下来才是单机模式Standalone.
1.3. 创建自定义 RedisConnectionFactory以及RedisTemplate
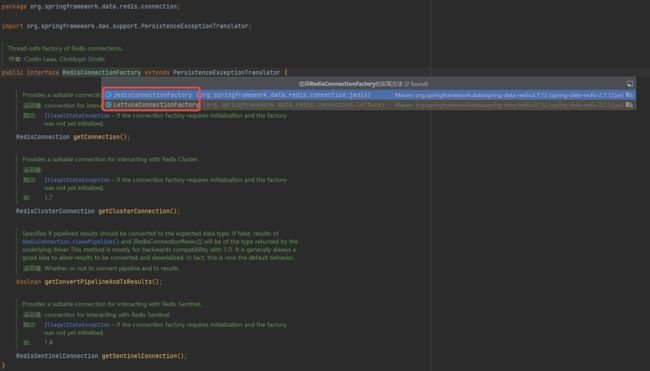
在 Spring Boot 中,可以通过 RedisConnectionFactory 来连接 Redis。在配置文件中配置 RedisConnectionFactory 的相关信息后,可以通过在代码中注入 RedisConnectionFactory Bean 来使用 Redis。其实也可以直接使用默认的Bean。默认的在LettuceConnectionConfiguration 中已经配置,如果需要自定义配置可以使用以下方式。
我们定义了一个 RedisConfig 类,并创建了一个 RedisTemplate 的 Bean。在 RedisConfig 类中,我们注入了 RedisProperties 类,并将 Redis 的配置信息通过 RedisSentinelConfiguration的方式配置到 LettuceConnectionFactory 中,然后再将 LettuceConnectionFactory 注入到 RedisTemplate 中。
@Configuration
public class RedisConfig {

    @Autowired
    private RedisProperties redisProperties;

    @Bean
    public LettuceConnectionFactory lettuceConnectionFactory() {
        RedisSentinelConfiguration sentinelConfiguration = new RedisSentinelConfiguration()
                .master(redisProperties.getSentinel().getMaster())
                .sentinel(redisProperties.getSentinel().getNodes());

        LettuceClientConfiguration clientConfiguration = LettuceClientConfiguration.builder()
                .commandTimeout(Duration.ofMillis(redisProperties.getTimeout()))
                .poolConfig(new GenericObjectPoolConfig<>())
                .build();

        return new LettuceConnectionFactory(sentinelConfiguration, clientConfiguration);
    }

    @Bean
    public RedisTemplate<String, Object> redisTemplate() {
        RedisTemplate<String, Object> redisTemplate = new RedisTemplate<>();
        redisTemplate.setConnectionFactory(lettuceConnectionFactory());
        redisTemplate.setKeySerializer(new StringRedisSerializer());
        redisTemplate.setValueSerializer(new GenericJackson2JsonRedisSerializer());
        redisTemplate.afterPropertiesSet();
        return redisTemplate;
    }
}
2. Jedis 方式配置
2.1. 添加 Redis 和 Jedis 依赖
Jedis 和Lettuce 的方式的区别,Lettuce 是在Redis Spring Boot Redis依赖中内置了Lettuce 的依赖,但jedis 方式虽Maven然引入了,但是可选项。所以需要手动引入
在 pom.xml 文件中添加 Redis 和 Jedis 依赖:
<dependency>
    <groupId>org.springframework.bootgroupId>
    <artifactId>spring-boot-starter-data-redisartifactId>
dependency>
<dependency>
    <groupId>redis.clientsgroupId>
    <artifactId>jedisartifactId>
dependency>
2.2. 配置 Redis 哨兵模式
在 application.properties 或 application.yml 文件中添加 Redis 的配置信息:
spring.redis.sentinel.master=your-master-name
spring.redis.sentinel.nodes=redis-host1:port,redis-host2:port,redis-host3:port
spring.redis.password=your-redis-password
spring:
  redis:
    sentinel:
      master: your-master-name
      nodes: 127.0.0.1:26379,127.0.0.1:26380,127.0.0.1:26381
    password: your-redis-password
其中,your-master-name 是 Redis 主节点的名称,redis-host1:port,redis-host2:port,redis-host3:port 是 Redis 哨兵节点的地址,多个节点之间使用逗号分隔。
2.3. 创建自定义 RedisTemplate
此处为可选项,也可以使用Spring Boot 默认的RedisTemplate 。
和上面Lettuce的方式类似。我们注入了 RedisProperties 类,并将 Redis 的配置信息通过 RedisSentinelConfiguration 的方式配置到 JedisConnectionFactory 中,然后再将 JedisConnectionFactory 注入到 RedisTemplate 中。
@Configuration
public class RedisConfig {

    @Autowired
    private RedisProperties redisProperties;

    @Bean
    public JedisConnectionFactory jedisConnectionFactory() {
        RedisSentinelConfiguration sentinelConfig = new RedisSentinelConfiguration()
                .master(redisProperties.getSentinel().getMaster())
                .sentinel(redisProperties.getSentinel().getNodes());

        JedisConnectionFactory connectionFactory = new JedisConnectionFactory(sentinelConfig);
        connectionFactory.setPassword(redisProperties.getPassword());
        connectionFactory.setUsePool(true);
        return connectionFactory;
    }

    @Bean
    public RedisTemplate<String, Object> redisTemplate() {
        RedisTemplate<String, Object> redisTemplate = new RedisTemplate<>();
        redisTemplate.setConnectionFactory(jedisConnectionFactory());
        redisTemplate.setKeySerializer(new StringRedisSerializer());
        redisTemplate.setValueSerializer(new GenericJackson2JsonRedisSerializer());
        redisTemplate.afterPropertiesSet();
        return redisTemplate;
    }
}
上面这两种方式基本上就配置好了,具体如何使用,可参考 《Redis【应用篇】之RedisTemplate基本操作》。
3. 总结
使用 Lettuce 或 Jedis 配置 Redis 哨兵模式的配置方法类似,都需要在配置文件中指定 Redis 哨兵的主节点名称和地址端口号等参数,然后创建相应的 RedisConnectionFactory Bean,并使用 RedisTemplate 进行 Redis 操作。Lettuce 适合高并发、多线程的场景,具有更好的性能和稳定性;Jedis 适合低并发、单线程的场景,使用起来更加简单、方便。根据实际需求和场景,可以选择使用 Lettuce 或 Jedis 来配置 Redis 哨兵模式。
3. Redis从入门到精通系列文章
- 《Redis【应用篇】之RedisTemplate基本操作》
- 《Redis 从入门到精通【实践篇】之SpringBoot配置Redis多数据源》
- 《Redis 从入门到精通【进阶篇】之三分钟了解Redis HyperLogLog 数据结构》
- 《Redis 从入门到精通【进阶篇】之三分钟了解Redis地理位置数据结构GeoHash》
- 《Redis 从入门到精通【进阶篇】之高可用哨兵机制(Redis Sentinel)详解》
- 《Redis 从入门到精通【进阶篇】之redis主从复制详解》
- 《Redis 从入门到精通【进阶篇】之Redis事务详解》
- 《Redis从入门到精通【进阶篇】之对象机制详解》
- 《Redis从入门到精通【进阶篇】之消息传递发布订阅模式详解》
- 《Redis从入门到精通【进阶篇】之持久化 AOF详解》
- 《Redis从入门到精通【进阶篇】之持久化RDB详解》
- 《Redis从入门到精通【高阶篇】之底层数据结构字典(Dictionary)详解》
- 《Redis从入门到精通【高阶篇】之底层数据结构快表QuickList详解》
- 《Redis从入门到精通【高阶篇】之底层数据结构简单动态字符串(SDS)详解》
- 《Redis从入门到精通【高阶篇】之底层数据结构压缩列表(ZipList)详解》
- 《Redis从入门到精通【进阶篇】之数据类型Stream详解和使用示例》
 大家好,我是冰点,今天的Redis【实践篇】之SpringBoot Redis 配置多数据源,全部内容就是这些。如果你有疑问或见解可以在评论区留言。