阿里云服务器CentOS8 搭建javaweb环境及mysql数据库安装
阿里云服务器CentOS8
搭建javaweb环境及mysql数据库安装
一. JavaWeb环境搭建
步骤1:登录 Linux 实例
1.使用标准方式登录 Linux 实例(推荐)
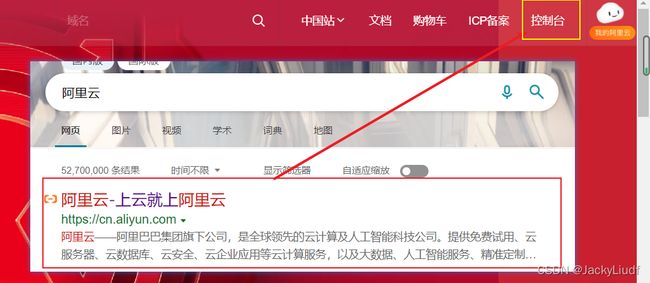
浏览器直接搜索阿里云, 进入你的ESC控制台, 找到你的实例连接即可
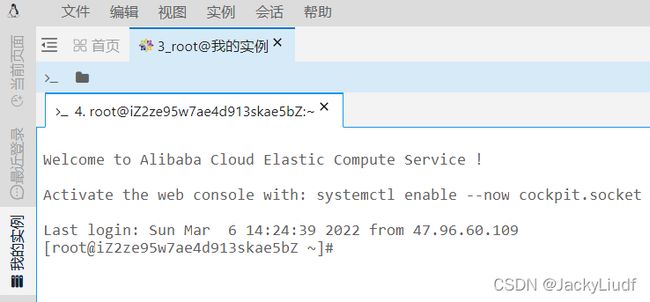
输入密码登录后就看到一下这个样子了, 界面颜色不重要
2.使用远程登录软件登录 Linux 实例
3.使用 SSH 登录 Linux 实例
其实上面这两种就可以使用一个软件来进行远程登录(Putty)
这样就登陆成功了
阿里云服务器 访问公网IP地址需要在实例安全组白名单中增加Workbench的服务器白名单 的解决办法
发表于2020 年 6 月 30 日
登录阿里云网站,鼠标悬浮在右上角头像那一栏,点击安全管控,在左侧IP白名单进行添加源代码:
对象类型 云服务器ECS 源IP:0.0.0.0
勾上选择所有,或者单独选择服务器,确定即可。
步骤2:安装 JDK
下载地址: https://www.oracle.com/java/technologies/downloads/#java8-windows
下载 JDK 源码包,您可前往 Java SE 下载 页面选择需要的版本
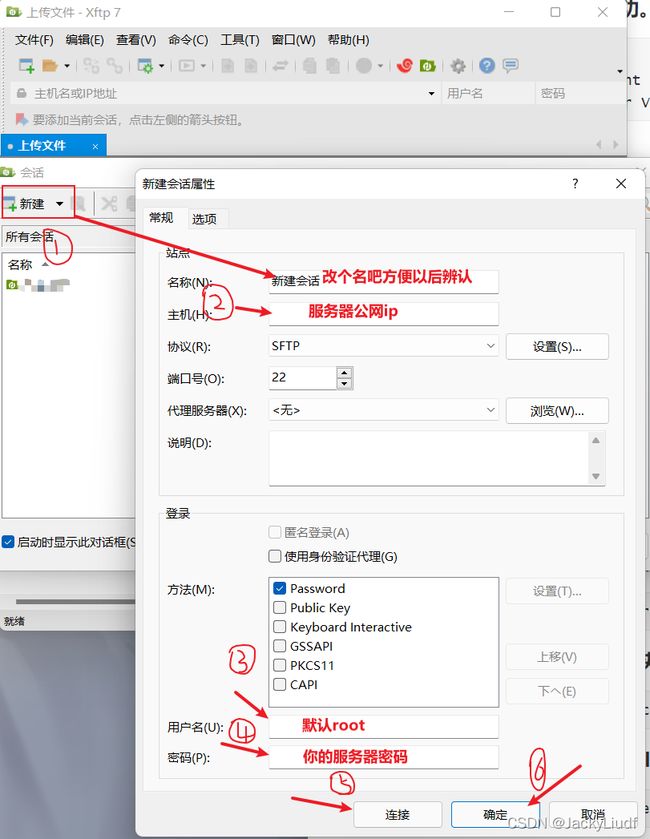
可以下载xftp和putty进行远程登陆和传输文件操作
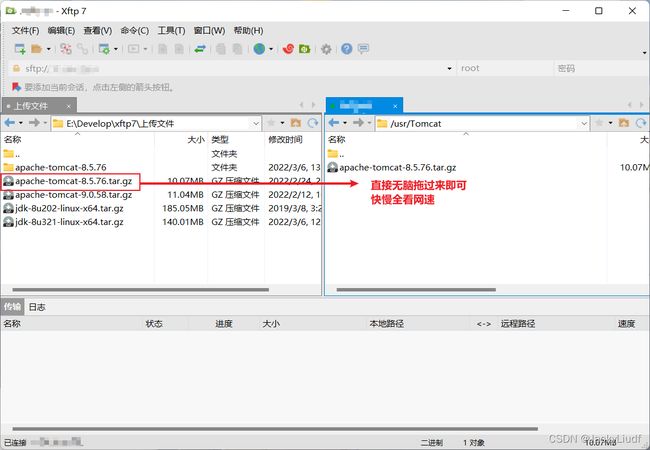
用xftp登录你的远程服务器, 就可以无脑传输文件

这一过程挺顺利的, 一般不会出现什么问题
执行以下命令,新建 JDK 安装目录。
mkdir /usr/java
执行以下命令,将 JDK 源码包解压到指定位置。
tar xzf jdk-8u321-linux-x64.tar.gz -C /usr/java
执行以下命令,打开 profile 文件。
vim /etc/profile
按 i 切换至编辑模式,在 export PATH USER … 后另起一行,根据您实际使用的 JDK 版本添加以下内容。
export JAVA_HOME=/usr/java/jdk1.8.0_321
export CLASSPATH=$JAVA_HOME/lib/tools.jar:$JAVA_HOME/lib/dt.jar:$JAVA_HOME/lib
export PATH=$JAVA_HOME/bin:$PATH
按 Esc,输入 :wq,保存文件并返回。执行以下命令,读取环境变量。
source /etc/profile
执行以下命令,查看 JDK 是否已经安装成功。
java -version
返回如下信息,则表示安装成功。
java version "1.8.0_321"
Java(TM) SE Runtime Environment (build 1.8.0_321-b07)
Java HotSpot(TM) 64-Bit Server VM (build 25.321-b07, mixed mode)
步骤3:安装 Tomcat
下载Tomcat: https://tomcat.apache.org/download-80.cgi
方法一: 执行以下命令,下载 Tomcat 源码包,您可根据实际需求下载不同版本 Tomcat。
mkdir /usr/tomcat
cd /usr/tomcat
wget https://mirrors.tuna.tsinghua.edu.cn/apache/tomcat/tomcat-8/v8.5.55/bin/apache-tomcat-8.5.55.tar.gz
方法二: 使用工具上传到远程服务器中
可以直接从tomcat官网下载下载所需要的版本的压缩包(以.gz结尾)到自己电脑的文件夹下, 使用软件xftp在usr目录下新建文件夹tomcat, 将该压缩包上传到服务器中该文件夹中, 直接拖拽即可
执行以下命令,解压 Tomcat 源码包。
tar xzf apache-tomcat-8.5.76.tar.gz
执行以下命令,将解压后的文件夹下的文件移动到 /usr/local/tomcat/ 目录下。
mv apache-tomcat-8.5.76 /usr/local/tomcat/
执行以下命令,打开 server.xml 文件。
vim /usr/local/tomcat/conf/server.xml
找到 ,按 i 切换至编辑模式,将 appBase="webapps" 替换为以下内容:
appBase="/usr/local/tomcat/webapps"
按 Esc,输入 :wq,保存文件并返回。
执行以下命令,新建 setenv.sh 文件。
vi /usr/local/tomcat/bin/setenv.sh
按 i 切换至编辑模式,输入以下内容,设置 JVM 的内存参数
JAVA_OPTS='-Djava.security.egd=file:/dev/./urandom -server -Xms256m -Xmx496m -Dfile.encoding=UTF-8'
按 Esc,输入 :wq,保存文件并返回。
执行以下命令,启动 Tomcat。
/usr/local/tomcat/bin/startup.sh
显示结果如下,则成功启动。
步骤4: 验证环境配置
执行以下命令,创建测试文件。
echo Hello World! > /usr/local/tomcat/webapps/ROOT/index.jsp
在本地浏览器中访问如下地址,查看环境配置是否成功。
http://云服务器实例的公网 IP:8080
显示结果如下,则说明环境配置成功。
hello world
二. 服务器上安装Mysql8.0
步骤1: 准备:
移除 默认的 mariadb数据库:
yum remove mariadb-libs.x86_64
这里显示没有默认包,有的会有,反正保险起见,执行一遍
步骤2: 下载安装包
然后 创建目录mysql,我一般软件放在 /usr/local 下,
cd 到/usr/local 下mkdir mysql 然后进入目录,下载 mysql8.0安装包
cd /usr/local
mkdir mysql
cd mysql
wget https://dev.mysql.com/get/mysql80-community-release-el7-3.noarch.rpm
步骤3: 本地安装
注意下图红框内(安装包名称)一致
yum localinstall mysql80-community-release-el7-3.noarch.rpm
我的阿里云服务器 Centos8, 使用 yum 命令时报错 404, 报错为:
Status code: 404 for http://mirrors.cloud.aliyuncs.com/centos/8/AppStream/x86_64/os/repodata/repomd.xml (IP: 100.100.2.148)
通过一下这个方法就可以解决
进入 yum 源目录
cd /etc/yum.repos.d/
替换新的地址
for i in `ls`;do sed -i 's/mirrors.cloud.aliyuncs.com/mirrors.aliyun.com/g' $i;done
for i in `ls`;do sed -i 's/$releasever/$releasever-stream/g' $i;done
添加缓存
yum clean all
yum makecache
再进行刚才的步骤即可
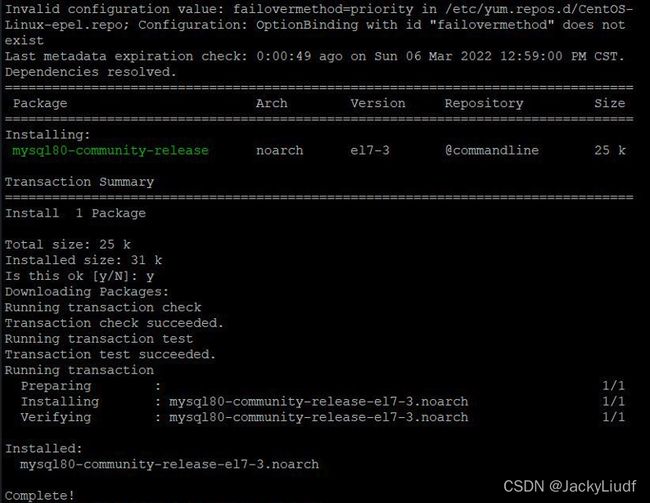
yum localinstall mysql80-community-release-el7-3.noarch.rpm
会出现这种选项,输入 y即可
这样就安装上了
步骤4: 安装 mysql-community-server
#先运行
yum module disable mysql
Package           Architecture     Version             Repository         Size
Disabling modules:
 mysql
Transaction Summary
Is this ok [y/N]: y
Complete!
#然后再运行
yum install mysql-community-server
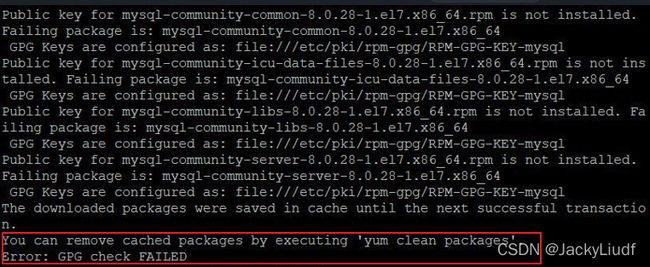
阿里云安装MySQL时,使用 yum 的方式, 又报错了,报错为:
这由于源key错误导致的dnf或者yum(软件包管理器)安装软件失败。
在指令后面加一个命令–nogpgcheck 就解决了
yum install mysql-community-server --nogpgcheck
完美解决!
步骤5: 登陆验证
然后启动mysql服务
service mysqld start
查看状态
service mysqld status
查看初始密码
cat /var/log/mysqld.log | grep password
![]()
使用上面的初始密码登录mysql
mysql -u root -p

# 刚刚获得的初始密码
配置MySQL的安全性
需要先退出mysql进入系统环境
exit;
mysql安全配置命令
mysql_secure_installation
#i 重置root账号密码
Enter password for user root: #输入上一步获取的root用户初始密码
The 'validate_password' plugin is installed on the server.
The subsequent steps will run with the existing configuration of the plugin.
Using existing password for root.
Estimated strength of the password: 100
Change the password for root ? (Press y|Y for Yes, any other key for No) : Y #是否更改root用户密码,输入Y
New password: #输入新密码,长度为8至30个字符,必须同时包含大小写英文字母、数字和特殊符号。特殊符号可以是()` ~!@#$%^&*-+=|{}[]:;‘<>,.?/
Re-enter new password: #再次输入新密码
Estimated strength of the password: 100
Do you wish to continue with the password provided?(Press y|Y for Yes, any other key for No) : Y

#  后面一直输y即可,指导all done 自动退出

#ii 输入Y删除匿名用户账号
By default, a MySQL installation has an anonymous user, allowing anyone to log into MySQL without having to have a user account created for them. This is intended only for testing, and to make the installation go a bit smoother. You should remove them before moving into a production environment.
Remove anonymous users? (Press y|Y for Yes, any other key for No) : Y  #是否删除匿名用户,输入Y
Success.

# iii 输入Y禁止root账号远程登录

Disallow root login remotely? (Press y|Y for Yes, any other key for No) : Y #禁止root远程登录,输入Y
Success.

# iv 输入Y删除test库以及对test库的访问权限

Remove test database and access to it? (Press y|Y for Yes, any other key for No) : Y #是否删除test库和对它的访问权限,输入Y

- Dropping test database...
  Success.

# v 输入Y重新加载授权表

Reload privilege tables now? (Press y|Y for Yes, any other key for No) : Y #是否重新加载授权表,输入Y
Success.
All done!
到这里登陆一下
mysql -uroot -p

设置的新密码
就可以登录啦
下面这个问题我遇到了, 你们遇到的话也可以参考一下
这时候我访问tomcat发现无法访问不知道为何, 就查了半天试了以下这个方法就解决了tomca访问不了的问题
1. 我们就需要先启动防火墙:
service firewalld start
2. 启动完成之后我们将Tomcat的8080端口开启
firewall-cmd --zone=public --permanent --add-port=8080/tcp
3. 将端口开放之后我们需要将该效果重新刷新,通过以下命令就可以实现:
firewall-cmd --reload
4. 重新刷新之后我们通过下面的命令查看已经开通的端口号:
firewall-cmd --list-all
5. 如果看到下面的界面,就说明防火墙已经将下面的端口开放出来了
public (active)
  target: default
  icmp-block-inversion: no
  interfaces: eth0
  sources:
  services: cockpit dhcpv6-client ssh
  ports: 8080/tcp
  protocols:
  forward: no
  masquerade: no
  forward-ports:
  source-ports:
  icmp-blocks:
  rich rules:
6. 在阿里云控制台配置安全组
这样我们就又可以访问到之前的测试界面了hello world了
但是这样由于之前的测试文件覆盖了初始的index.jsp, 汤姆猫的界面就没了, 解决方法就是:
1. 先关闭tomcat服务, 在bin目录下
cd /usr/local/tomcat/bin
./shutdown.sh
2. 关闭后, 删除webapp目录下root中的index.jsp文件
3. 在xftp中找到自己电脑中tomcat的压缩包, 解压后,
4. 将wabapp下root中的index.jsp文件拖拽至远程服务器中的相同目录下, 再次重启tomcat服务
5. 就可以看到可爱的汤姆猫啦
注意: 还有就是tomcat服务关闭一次后再执行关闭命令会报错, 看着厌烦的话, 就多开几次服务
天翼云盘: https://cloud.189.cn/t/QrAbiyrYNNja
百度云盘: 链接:https://pan.baidu.com/s/1s2Dr6qYcK3KEzVx-fn97bA?pwd=gfso
提取码:gfso
参考文档
腾讯云 手动搭建 Java Web 环境
https://cloud.tencent.com/document/product/213/38234
腾讯云 服务器上安装Mysql8.0
https://cloud.tencent.com/developer/article/1719216
阿里云 Centos8 yum 镜像 404
https://blog.csdn.net/fan63182830/article/details/122808633
Error: GPG check FAILED
https://blog.csdn.net/qq_20265015/article/details/122612166
