xxl-job分布式任务调度器的学习
先看一下原生的任务调度器
package com.xxl.job.executor.service.jobhandler;

import org.springframework.scheduling.annotation.EnableScheduling;
import org.springframework.scheduling.annotation.Scheduled;
import org.springframework.stereotype.Component;

@Component
@EnableScheduling
public class SpringBootScheduled {

    @Scheduled(cron = "*/5 * * * * *")
    public void test(){
        System.out.println("hello Scheduled");
    }
}
定时任务调度器在什么场景下使用呢?
房贷车贷的还款,花呗借呗白条的还款等等这种参加定时活动的场景。
原生的任务调度器有什么弊端呢?
1.在分布式环境下,每个应用都配一个任务调度器的话那么执行多次;
2.如果任务执行失败了,不能重试;执行异常了,不能报警;
3.重新配置了任务的话,必须要重启应用 等等。
所以需要选择一种机制进行定时调度,那就选择xxl-job,是中国人开发,完整的中文文档,低门槛,易于管理。
分布式任务调度平台XXL-JOB
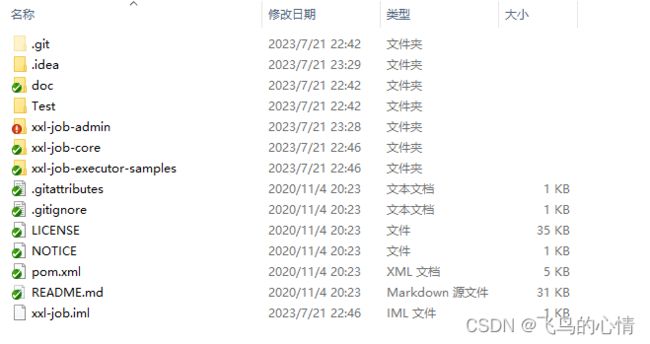
这里选择GITEE下载,下载到本地的代码中有sql,doc,源码等等,
将sql执行到本地数据库
其中xxl-job-admin属于调度中心,给的sample中的3个例子属于调度器
1.调度中心的配置
Idea导入项目,配置中心要配好数据库访问地址和token(token为空也可以)
### web
server.port=8080
server.servlet.context-path=/xxl-job-admin

### actuator
management.server.servlet.context-path=/actuator
management.health.mail.enabled=false

### resources
spring.mvc.servlet.load-on-startup=0
spring.mvc.static-path-pattern=/static/**
spring.resources.static-locations=classpath:/static/

### freemarker
spring.freemarker.templateLoaderPath=classpath:/templates/
spring.freemarker.suffix=.ftl
spring.freemarker.charset=UTF-8
spring.freemarker.request-context-attribute=request
spring.freemarker.settings.number_format=0.##########

### mybatis
mybatis.mapper-locations=classpath:/mybatis-mapper/*Mapper.xml
#mybatis.type-aliases-package=com.xxl.job.admin.core.model

### xxl-job, datasource
spring.datasource.url=jdbc:mysql://127.0.0.1:3306/xxl_job?useUnicode=true&characterEncoding=UTF-8&autoReconnect=true&serverTimezone=Asia/Shanghai
spring.datasource.username=root
spring.datasource.password=root
spring.datasource.driver-class-name=com.mysql.cj.jdbc.Driver

### datasource-pool
spring.datasource.type=com.zaxxer.hikari.HikariDataSource
spring.datasource.hikari.minimum-idle=10
spring.datasource.hikari.maximum-pool-size=30
spring.datasource.hikari.auto-commit=true
spring.datasource.hikari.idle-timeout=30000
spring.datasource.hikari.pool-name=HikariCP
spring.datasource.hikari.max-lifetime=900000
spring.datasource.hikari.connection-timeout=10000
spring.datasource.hikari.connection-test-query=SELECT 1
spring.datasource.hikari.validation-timeout=1000

### xxl-job, email
spring.mail.host=smtp.qq.com
spring.mail.port=25
[email protected]
[email protected]
spring.mail.password=5tgb^YHNn
spring.mail.properties.mail.smtp.auth=true
spring.mail.properties.mail.smtp.starttls.enable=true
spring.mail.properties.mail.smtp.starttls.required=true
spring.mail.properties.mail.smtp.socketFactory.class=javax.net.ssl.SSLSocketFactory

### xxl-job, access token
xxl.job.accessToken=default_token

### xxl-job, i18n (default is zh_CN, and you can choose "zh_CN", "zh_TC" and "en")
xxl.job.i18n=zh_CN

## xxl-job, triggerpool max size
xxl.job.triggerpool.fast.max=200
xxl.job.triggerpool.slow.max=100

### xxl-job, log retention days
xxl.job.logretentiondays=30
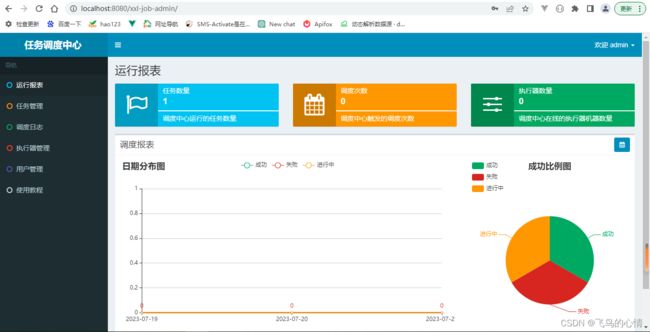
运行xxl-job-admin(运行项目之前执行sql,而且一定要mvn-->clean一下)
默认的用户名密码是admin/123456
2.调度器的配置:
1,引入core依赖包
2.配置application.properties
# web port
server.port=8081
# no web
#spring.main.web-environment=false

# log config
logging.config=classpath:logback.xml


### xxl-job admin address list, such as "http://address" or "http://address01,http://address02"
xxl.job.admin.addresses=http://127.0.0.1:8080/xxl-job-admin

### xxl-job, access token
xxl.job.accessToken=default_token

### xxl-job executor appname
xxl.job.executor.appname=xxl-job-executor-sample
### xxl-job executor registry-address: default use address to registry , otherwise use ip:port if address is null
xxl.job.executor.address=
### xxl-job executor server-info
xxl.job.executor.ip=127.0.0.1
xxl.job.executor.port=9999
### xxl-job executor log-path
xxl.job.executor.logpath=/data/applogs/xxl-job/jobhandler
### xxl-job executor log-retention-days
xxl.job.executor.logretentiondays=30
xxl.job.admin.addresses=http://127.0.0.1:8080/xxl-job-admin 要写配置中心的地址
xxl.job.accessToken=default_token要和调度中心中的token对应
xxl.job.executor.ip=127.0.0.1 配置注册器所在的地址
xxl.job.executor.port=9999 注册中心向注册器发送信息的端口
3.配置config类
package com.xxl.job.executor.core.config;

import com.xxl.job.core.executor.impl.XxlJobSpringExecutor;
import org.slf4j.Logger;
import org.slf4j.LoggerFactory;
import org.springframework.beans.factory.annotation.Value;
import org.springframework.context.annotation.Bean;
import org.springframework.context.annotation.Configuration;

/**
 * xxl-job config
 *
 * @author xuxueli 2017-04-28
 */
@Configuration
public class XxlJobConfig {
    private Logger logger = LoggerFactory.getLogger(XxlJobConfig.class);

    @Value("${xxl.job.admin.addresses}")
    private String adminAddresses;

    @Value("${xxl.job.accessToken}")
    private String accessToken;

    @Value("${xxl.job.executor.appname}")
    private String appname;

    @Value("${xxl.job.executor.address}")
    private String address;

    @Value("${xxl.job.executor.ip}")
    private String ip;

    @Value("${xxl.job.executor.port}")
    private int port;

    @Value("${xxl.job.executor.logpath}")
    private String logPath;

    @Value("${xxl.job.executor.logretentiondays}")
    private int logRetentionDays;


    @Bean
    public XxlJobSpringExecutor xxlJobExecutor() {
        logger.info(">>>>>>>>>>> xxl-job config init.");
        XxlJobSpringExecutor xxlJobSpringExecutor = new XxlJobSpringExecutor();
        xxlJobSpringExecutor.setAdminAddresses(adminAddresses);
        xxlJobSpringExecutor.setAppname(appname);
        xxlJobSpringExecutor.setAddress(address);
        xxlJobSpringExecutor.setIp(ip);
        xxlJobSpringExecutor.setPort(port);
        xxlJobSpringExecutor.setAccessToken(accessToken);
        xxlJobSpringExecutor.setLogPath(logPath);
        xxlJobSpringExecutor.setLogRetentionDays(logRetentionDays);

        return xxlJobSpringExecutor;
    }

    /**
     * 针对多网卡、容器内部署等情况,可借助 "spring-cloud-commons" 提供的 "InetUtils" 组件灵活定制注册IP;
     *
     *      1、引入依赖:
     *
     *             org.springframework.cloud
     *             spring-cloud-commons
     *             ${version}
     *
     *
     *      2、配置文件,或者容器启动变量
     *          spring.cloud.inetutils.preferred-networks: 'xxx.xxx.xxx.'
     *
     *      3、获取IP
     *          String ip_ = inetUtils.findFirstNonLoopbackHostInfo().getIpAddress();
     */


}
4. Component类,
@Component
public class SampleXxlJob {
    private static Logger logger = LoggerFactory.getLogger(SampleXxlJob.class);


    /**
     * 1、简单任务示例(Bean模式)
     */
    @XxlJob("demoJobHandler")
    public ReturnT demoJobHandler(String param) throws Exception {
        XxlJobLogger.log("XXL-JOB, Hello World.");

        System.out.println("XXL-JOB, Hello World. a");
        for (int i = 0; i < 5; i++) {
            XxlJobLogger.log("beat at:" + i);
            TimeUnit.SECONDS.sleep(2);
        }
        return ReturnT.SUCCESS;
    }

}
两个项目(任务中心和执行器)启动,之后访问http://localhost:8080/xxl-job-admin
1.Bean的运行模式
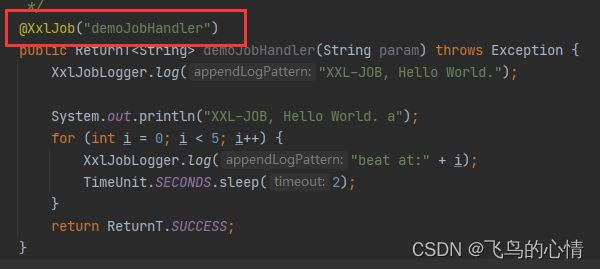
点击任务列表,新增,选择Bean的运行模式,任务描述对应:@XxlJob("demoJobHandler")中的demoJobHandler,配置好Cron
之后就可以执行了。添加之后,操作中的启动即可。
2.GLUE(Java)模式
上面说的是Bean模式,那么还有一种很重要的模式:GLUE(Java)模式,
选择这个模式的时候,JobHandler为灰色不可编辑
但是 添加之后有这个Glue IDE
点击GLue IDE可以编辑代码,这里写代码的时候别忘了引入包,AbcService是在执行器里的代码
package com.xxl.job.service.handler;

import com.xxl.job.core.log.XxlJobLogger;
import com.xxl.job.core.biz.model.ReturnT;
import com.xxl.job.core.handler.IJobHandler;

import com.xxl.job.executor.mvc.service.AbcService;
import org.springframework.beans.factory.annotation.Autowired;

public class DemoGlueJobHandler extends IJobHandler {

     @Autowired
      private AbcService abcService ;

	@Override
	public ReturnT execute(String param) throws Exception {


      abcService.methodA(param);
		XxlJobLogger.log("XXL-JOB, Hello World.");
		return ReturnT.SUCCESS;
	}

}
这里保存的时候还可以进行版本的控制,非常方便
点击运行,
这种glue的方式适合在线上运行但是还想去新加定时任务的情况下使用。
负载均衡
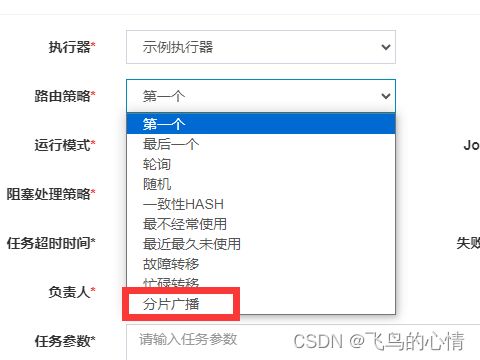
负载均衡:在任务管理中,新增任务的时候,有一个路由策略,可以进行集群的负载均衡。
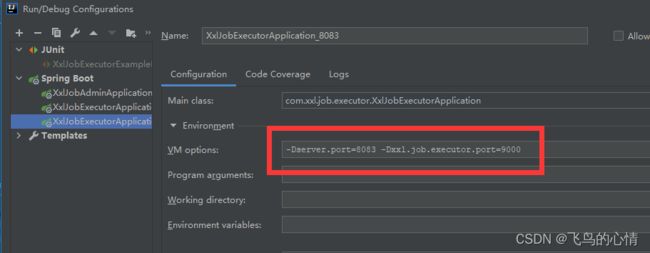
将应用启动两个,修改对应的服务端口和调度中心调用执行器的接口,之后启动两个服务。 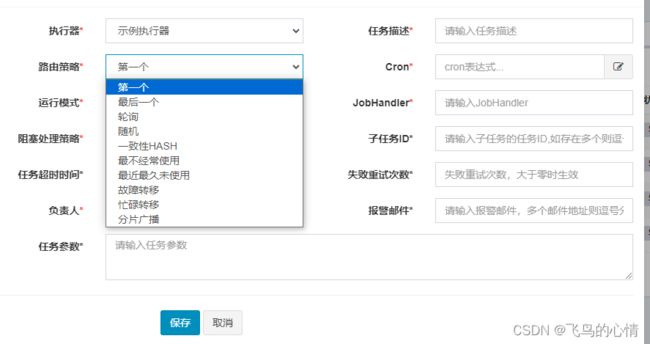
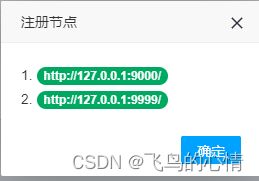
在执行器管理中,可以看到有两个执行器了
点击查看:
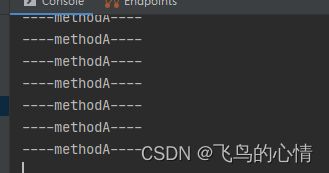
如果我们选择“轮询”的方式,那么我们会发现两个服务会轮流执行。
分片广播
还有一种路由策略:分片广播的方式。
这种方式很重要,应用场景:当我们执行一个耗时的操作的时候,可以让多个执行器一起执行,比如说只有一个执行器执行的话用20s,那么我们用分片广播的方式就可以10s完成执行。
  /**
     * 2、分片广播任务
     */
    @XxlJob("shardingJobHandler")
    public ReturnT shardingJobHandler(String param) throws Exception {

        // 分片参数
        int shardIndex = XxlJobContext.getXxlJobContext().getShardIndex();
        int shardTotal = XxlJobContext.getXxlJobContext().getShardTotal();

        XxlJobLogger.log("分片参数:当前分片序号 = {}, 总分片数 = {}", shardIndex, shardTotal);

        long l1 = System.currentTimeMillis();
        System.out.println(l1);
        List userMobilePlans ;
        if(shardTotal==1){
            userMobilePlans =userMobilePlanMapper.selectAllUser();
        }else{
            userMobilePlans = userMobilePlanMapper
                    .selectAllUserMobilePlans(shardIndex, shardTotal);
        }
        userMobilePlans.stream().map(userMobilePlan -> {
            try {
                TimeUnit.MILLISECONDS.sleep(10);
            } catch (InterruptedException e) {
                e.printStackTrace();
            }
            return userMobilePlan;
        }).collect(Collectors.toList());
        long l2 = System.currentTimeMillis();
        System.out.println("花费时间:" + (l2-l1)+"ms");

        // 业务逻辑
//        for (int i = 0; i < shardTotal; i++) {
//            if (i == shardIndex) {
//                XxlJobLogger.log("第 {} 片, 命中分片开始处理", i);
//            } else {
//                XxlJobLogger.log("第 {} 片, 忽略", i);
//            }
//        }

        return ReturnT.SUCCESS;
    }
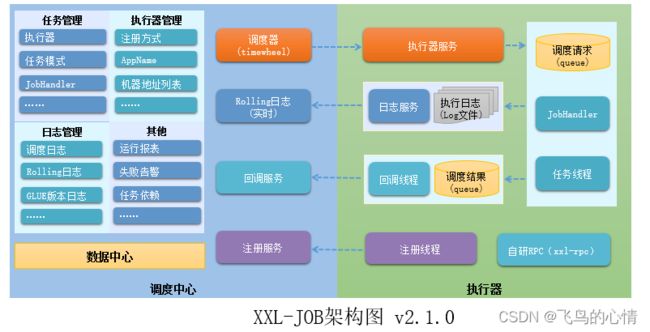
ps:XXL-JOB的架构图
官方的文档:分布式任务调度平台XXL-JOB

