junit自动化测试
测试步骤及方法如下:
1.选择要测试的java代码(本文以如下代码为例)
 package junitDemo;

public class Operation {
	   private int leftOperand = 0;
	   private int rightOperand= 0;
	   private int value = 0;
	   private char operator;

	public Operation() {
		// TODO Auto-generated constructor stub
	}

	public int getLeft() {
		return leftOperand;
	}

	public int getRight() {
		return rightOperand;
	}

	public int getValue() {
		return value;
	}

	public char getOperator() {
		return operator;
	}

	public boolean equals(Operation anOperation) {
		return leftOperand == anOperation.getLeft() && rightOperand == anOperation.getRight() && operator == anOperation.getOperator();
	}
	public int construct(int left,int right,char op) {
		int result = 0;
		if(!(0<=left && left<=100)) {
			throw new RuntimeException("左运算数不在0~100的范围");
		}
		if(!(0<=right && right<=100)) {
			throw new RuntimeException("右运算数不在0~100的范围");
		}
		if(op == '+') {
			result = left + right;
			if(!(0<=result && result <= 100)) {
				throw new RuntimeException("加法运算结果不在0~100的范围");
			}
		}else if(op == '-') {
			result = left - right;
			if(!(0<=result && result <= 100)) {
				throw new RuntimeException("减法运算结果不在0~100的范围");
			}
		}else {
			throw new RuntimeException(op+"不是加号或减号运算符");
		}
		leftOperand = left;
		rightOperand = right;
		operator = op;
		value = result;
		return value;
	}

	public String toString() {
		return leftOperand + operator + rightOperand + "=" + value;
	}
}
2.新建java测试类
在要测试的java类上右击,点击new,然后选择other,最后选择Junit下的Junit Test Case,如图所示,然后点击Next选择需要测试的方法,这里选择的是construct()方法和toString(),然后就会生成测试类。

3.测试
(1)首先对自动生成的测试代码进行运行
代码如下:
package junitDemo;

import static org.junit.jupiter.api.Assertions.*;
import org.junit.jupiter.api.BeforeEach;
import org.junit.jupiter.api.Test;

class OperationTest {

	    @BeforeEach
	    void setUp() throws Exception {
	    }

	   @Test
	   void testConstruct() {
		   fail("Not yet implemented");
	   }

	  @Test
	  void testToString() {
		   fail("Not yet implemented");
	  }
}
测试结果:
出错,原因是我们此时还没有实现代码。

(2)测试Construct()方法
1)首先,定义Operation对象,然后在testConstruct()方法中编写测试用例,主要代码如下:
@Test
	public void testConstruct() {
		assertEquals(op.construct(35, 45, '+'),80);
	}
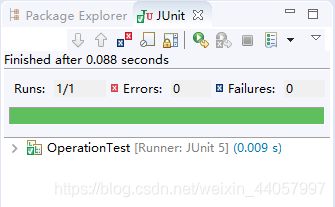
其中,左操作数为35,右操作数为45,进行加法运算,预期运算结果为80。
测试结果正确,如图所示:
2)继续测试testConstruct()方法,再多加几组测试用例,代码如下:
@Test
	public void testConstruct1() {
		assertEquals(op.construct(35, 45, '+'),80);
	}
	@Test
	public void testConstruct2() {
		assertEquals(op.construct(55, 45, '-'),10);
	}
	@Test
	public void testConstruct3() {
		assertEquals(op.construct(46, 10, '+'),66);
	}
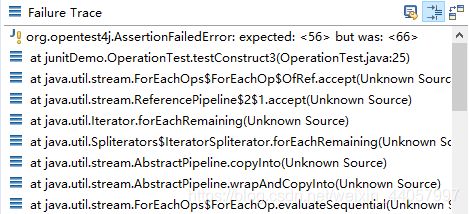
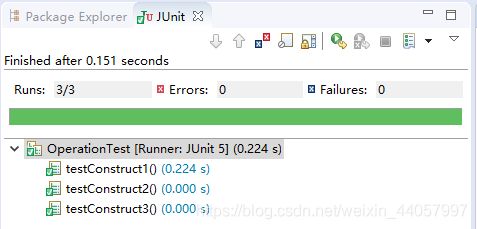
其中,第一个测试用例左操作数为35,右操作数为45,进行加法运算,预期运算结果为80,第二个测试用例左操作数为55,右操作数为45,进行减法运算,预期运算结果为10,第三个测试用例左操作数为46,右操作数为10,进行加法运算,预期运算结果为66。测试结果如下:

第三组的测试显示错误,有可能是预期结果错误,也有可能是代码出错,我们可以查看具体的结果,如下图所示,很显然是预期结果出错,本应该为56,但是给出的预期结果为66.
将第三组的预期结果修改为56,可以得到如下结果:
(3)测试ToString()方法
1)测试代码如下,左操作数为35,右操作数为45,进行加法运算,预期的输出结果为35+45=80。
@Test
	 void testToString() {
		 op.construct(35, 45, '+');
		 assertEquals(op.toString(),"35+45=80");
	 }
测试结果如图:
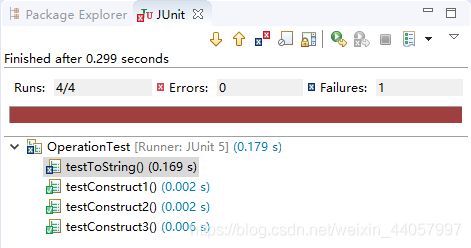
测试结果显示有错误,我们预期的输出结果为35+45=80,但是实际结果却是整数等于80。

2)继续测试ToString()方法
对ToString()方法进行修改,修改后代码如下:
public String toString() {
		  return "" + leftOperand + operator + rightOperand + "=" + value;
}
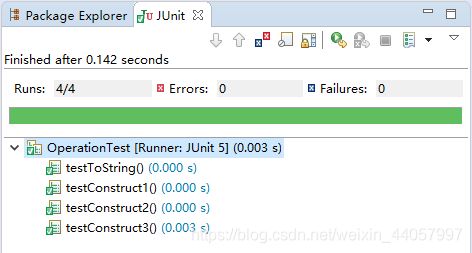
将修改后的代码进行测试,测试结果显示正确:
(4)测试getValue()方法
左操作数为25,右操作数为30,操作符为加号,预期结果为55,测试代码如下:
@Test
	   public void testGetValue() {
		  op.construct(25,30,'+');
		  assertEquals(op.getValue(),55);
	}
测试结果正确,如下图所示:
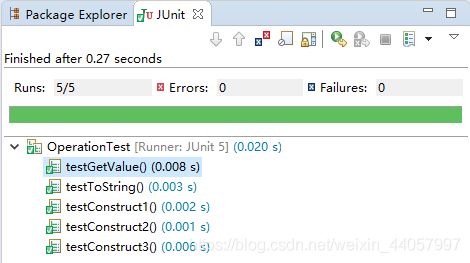
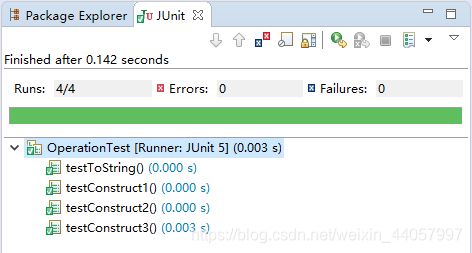
@Ignore的意思为忽略测试,将getValue()方法前面的@Test修改为@Ignore看一下测试结果,可以发现测试时没有测试getValue()方法。
@Ignore
	   public void testGetValue() {
		   op.construct(25,30,'+');
		   assertEquals(op.getValue(),55);
	}
4.测试方法总结
(1)@Text:表示测试某个方法;
(2)@Before:测试前清除之前的结果;
(3)@Ignore:忽略测试;
(4)@Text(timeout= ):超时限制测试;
(5)@RunWith:进行多轮测试