YOLOv8-pose关键点检测自制数据集
YOLOv8 已经出来一段时间了,它同时拥有目标检测,实例分割,关键点检测,跟踪和分类的功能,并且效果达到了SOTA,使得 YOLOv8 得到了很多科研人员的青睐。这里我们主要使用了 github 公布的 ultralytics 代码:https://github.com/ultralytics/ultralytics 。
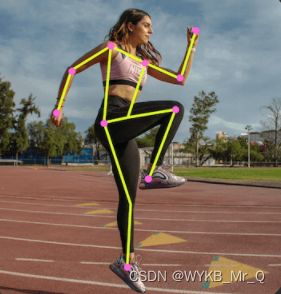
接下来,我们主要记录一下,如何自己制作关键点检测数据集,并跑通YOLOv8项目。YOLOv8项目中的关键点检测,也就是 pose 分支,主要是标注了人体的骨骼部分,来精炼表示人体运动,如下图所示。
YOLOv8-pose 关键点检测数据集标注格式
在对数据集进行标注时,我们首先要弄清楚,YOLOv8-pose 关键点检测需要的数据格式是什么样的?
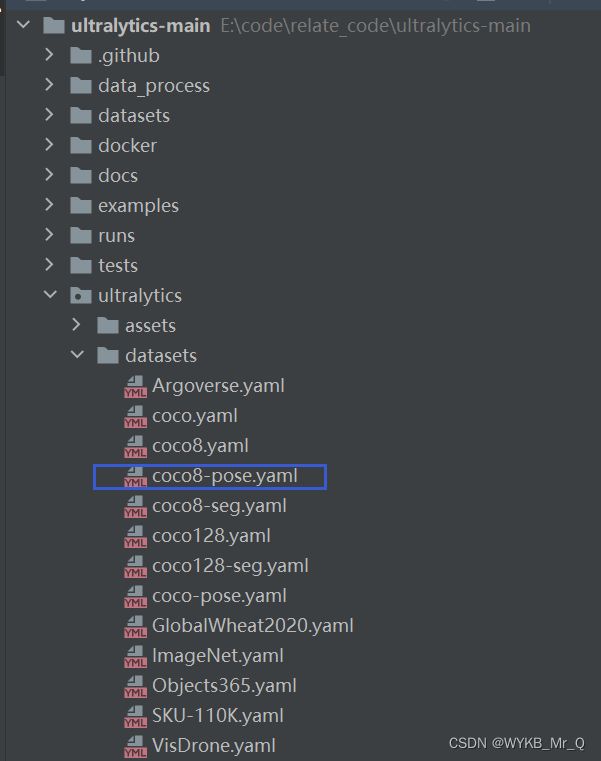
官网代码中提供了pose关键点检测的示例数据集,名为 coco8-pose.yaml, 我们可以根据里面的网址,将数据集下载下来,看一看具体的标注格式要求。
coco8-pose的数据标注格式和标注图片如下所示。我们先来看下标注格式,这个文件是 .txt 结尾的文件,并且里面共有56个数据。
第一个数据是0,表示该目标的类别,为person;接下来的四个数据,表示矩形框的坐标;后面还有51个数据,为17*3, 表示17个关键点的坐标及是否可见。
其中 0.00000 表示没有显露出不可见,1.00000 表示被遮挡不可见,2.00000 表示可见。由于这个图片的下半身不可见,所以标注数据中后面几个点的坐标数据和标签都为 0.00000.
0 0.671279 0.617945 0.645759 0.726859 0.519751 0.381250 2.000000 0.550936 0.348438 2.000000 0.488565 0.367188 2.000000 0.642412 0.354687 2.000000 0.488565 0.395313 2.000000 0.738046 0.526563 2.000000 0.446985 0.534375 2.000000 0.846154 0.771875 2.000000 0.442827 0.812500 2.000000 0.925156 0.964063 2.000000 0.507277 0.698438 2.000000 0.702703 0.942187 2.000000 0.555094 0.950000 2.000000 0.000000 0.000000 0.000000 0.000000 0.000000 0.000000 0.000000 0.000000 0.000000 0.000000 0.000000 0.000000
下文中,我们以奶牛为例,介绍一下关键点检测的数据集如何制作。
使用 “labelme” 软件对奶牛的关键点进行标注
在标注时,我们首先要注意几点:
第一,标注关键点时,要先使用矩形框框出目标,再标注关键点;
第二,关键点不用固定的顺序,但每张图像都要保持一致。换句话说1号点是鼻子时,所有的图像1号点都应当是鼻子;
第三,被遮挡的点也应当标记出来;
第四,由于labelme无法标注关键点是否可见,默认为1.00000,这里我们不做处理,后续将其全部更改为2.00000,即可。
图像中,矩形框设置lable,为你自己的数据类型,接下来的点可以直接标注1,2,3 …比较方便。如果这里你想到,还有骨架呢,点和点之间的连线,那不用着急,这里不需要标注点和点的连线。那个连线只是可视化部分,为了方便观察绘制的。咱们这里主要就是预测关键点,其他的不用管即可。
通过标注关键点和矩形框,我们得到了符合 labelme 输出结果的 .json 文件,然后我们需要将其转化为 .txt 文件。这里我们分两步走,先将lableme输出结果转化为coco格式,再将其转化为yolo格式。
lableme转coco格式
以下是转化为coco格式的代码。我们需要将数据集提前划分为训练集和测试集,然后处理两次就可以了。以训练集为例,先将labelme标注的 .json 文件放入json文件夹中,新建一个 coco 文件夹,用来存放输出结果。
在以下代码中,我们需要更改第209行-212行的内容,将default=“cow”中的cow改成你自己的类别,第212行的17改为你自己标注的关键点数量。
import os
import sys
import glob
import json
import argparse
import numpy as np
from tqdm import tqdm
from labelme import utils


class Labelme2coco_keypoints():
    def __init__(self, args):
        """
        Lableme 关键点数据集转 COCO 数据集的构造函数:

        Args
            args:命令行输入的参数
                - class_name 根类名字

        """

        self.classname_to_id = {args.class_name: 1}
        self.images = []
        self.annotations = []
        self.categories = []
        self.ann_id = 0
        self.img_id = 0

    def save_coco_json(self, instance, save_path):
        json.dump(instance, open(save_path, 'w', encoding='utf-8'), ensure_ascii=False, indent=1)

    def read_jsonfile(self, path):
        with open(path, "r", encoding='utf-8') as f:
            return json.load(f)

    def _get_box(self, points):
        min_x = min_y = np.inf
        max_x = max_y = 0
        for x, y in points:
            min_x = min(min_x, x)
            min_y = min(min_y, y)
            max_x = max(max_x, x)
            max_y = max(max_y, y)
        return [min_x, min_y, max_x - min_x, max_y - min_y]

    def _get_keypoints(self, points, keypoints, num_keypoints):
        """
        解析 labelme 的原始数据, 生成 coco 标注的 关键点对象

        例如:
            "keypoints": [
                67.06149888292556,  # x 的值
                122.5043507571318,  # y 的值
                1,                  # 相当于 Z 值,如果是2D关键点 0:不可见 1:表示可见。
                82.42582269256718,
                109.95672933232304,
                1,
                ...,
            ],

        """

        if points[0] == 0 and points[1] == 0:
            visable = 0
        else:
            visable = 1
            num_keypoints += 1
        keypoints.extend([points[0], points[1], visable])
        return keypoints, num_keypoints

    def _image(self, obj, path):
        """
        解析 labelme 的 obj 对象,生成 coco 的 image 对象

        生成包括:id,file_name,height,width 4个属性

        示例:
             {
                "file_name": "training/rgb/00031426.jpg",
                "height": 224,
                "width": 224,
                "id": 31426
            }

        """

        image = {}

        img_x = utils.img_b64_to_arr(obj['imageData'])  # 获得原始 labelme 标签的 imageData 属性,并通过 labelme 的工具方法转成 array
        image['height'], image['width'] = img_x.shape[:-1]  # 获得图片的宽高

        # self.img_id = int(os.path.basename(path).split(".json")[0])
        self.img_id = self.img_id + 1
        image['id'] = self.img_id

        image['file_name'] = os.path.basename(path).replace(".json", ".jpg")

        return image

    def _annotation(self, bboxes_list, keypoints_list, json_path):
        """
        生成coco标注

        Args:
            bboxes_list: 矩形标注框
            keypoints_list: 关键点
            json_path:json文件路径

        """

        if len(keypoints_list) != args.join_num * len(bboxes_list):
            print('you loss {} keypoint(s) with file {}'.format(args.join_num * len(bboxes_list) - len(keypoints_list), json_path))
            print('Please check !!!')
            sys.exit()
        i = 0
        for object in bboxes_list:
            annotation = {}
            keypoints = []
            num_keypoints = 0

            label = object['label']
            bbox = object['points']
            annotation['id'] = self.ann_id
            annotation['image_id'] = self.img_id
            annotation['category_id'] = int(self.classname_to_id[label])
            annotation['iscrowd'] = 0
            annotation['area'] = 1.0
            annotation['segmentation'] = [np.asarray(bbox).flatten().tolist()]
            annotation['bbox'] = self._get_box(bbox)

            for keypoint in keypoints_list[i * args.join_num: (i + 1) * args.join_num]:
                point = keypoint['points']
                annotation['keypoints'], num_keypoints = self._get_keypoints(point[0], keypoints, num_keypoints)
            annotation['num_keypoints'] = num_keypoints

            i += 1
            self.ann_id += 1
            self.annotations.append(annotation)

    def _init_categories(self):
        """
        初始化 COCO 的 标注类别

        例如:
        "categories": [
            {
                "supercategory": "hand",
                "id": 1,
                "name": "hand",
                "keypoints": [
                    "wrist",
                    "thumb1",
                    "thumb2",
                    ...,
                ],
                "skeleton": [
                ]
            }
        ]
        """

        for name, id in self.classname_to_id.items():
            category = {}

            category['supercategory'] = name
            category['id'] = id
            category['name'] = name
            # 17 个关键点数据
            category['keypoint'] = [str(i + 1) for i in range(args.join_num)]

            self.categories.append(category)

    def to_coco(self, json_path_list):
        """
        Labelme 原始标签转换成 coco 数据集格式,生成的包括标签和图像

        Args:
            json_path_list:原始数据集的目录

        """

        self._init_categories()

        for json_path in tqdm(json_path_list):
            obj = self.read_jsonfile(json_path)  # 解析一个标注文件
            self.images.append(self._image(obj, json_path))  # 解析图片
            shapes = obj['shapes']  # 读取 labelme shape 标注

            bboxes_list, keypoints_list = [], []
            for shape in shapes:
                if shape['shape_type'] == 'rectangle':  # bboxs
                    bboxes_list.append(shape)           # keypoints
                elif shape['shape_type'] == 'point':
                    keypoints_list.append(shape)

            self._annotation(bboxes_list, keypoints_list, json_path)

        keypoints = {}
        keypoints['info'] = {'description': 'Lableme Dataset', 'version': 1.0, 'year': 2021}
        keypoints['license'] = ['BUAA']
        keypoints['images'] = self.images
        keypoints['annotations'] = self.annotations
        keypoints['categories'] = self.categories
        return keypoints


if __name__ == '__main__':
    parser = argparse.ArgumentParser()
    parser.add_argument("--class_name", default="cow", help="class name", type=str)
    parser.add_argument("--input",  default="./json", help="json file path (labelme)", type=str)
    parser.add_argument("--output", default="./coco", help="output file path (coco format)", type=str)
    parser.add_argument("--join_num",  default=17, help="number of join", type=int)
    # parser.add_argument("--ratio", help="train and test split ratio", type=float, default=0.5)
    args = parser.parse_args()

    labelme_path = args.input
    saved_coco_path = args.output

    json_list_path = glob.glob(labelme_path + "/*.json")

    print('{} for json files'.format(len(json_list_path)))
    print('Start transform please wait ...')

    l2c_json = Labelme2coco_keypoints(args)  # 构造数据集生成类

    # 生成coco类型数据
    keypoints = l2c_json.to_coco(json_list_path)
    l2c_json.save_coco_json(keypoints, os.path.join(saved_coco_path, "keypoints.json"))
coco格式转yolo格式
以下是转化为yolo格式的代码。我们需要新建一个 txt 文件夹,用来存放输出结果。如果上面你的数据存放位置和我的一样,那就不用修改代码,如果有差异,就更改第12行-第17行的输入数据和输出位置即可。
# COCO 格式的数据集转化为 YOLO 格式的数据集
# --json_path 输入的json文件路径
# --save_path 保存的文件夹名字,默认为当前目录下的labels。

import os
import json
from tqdm import tqdm
import argparse

parser = argparse.ArgumentParser()
# 这里根据自己的json文件位置,换成自己的就行
parser.add_argument('--json_path',
                    default='coco/keypoints.json', type=str,
                    help="input: coco format(json)")
# 这里设置.txt文件保存位置
parser.add_argument('--save_path', default='txt', type=str,
                    help="specify where to save the output dir of labels")
arg = parser.parse_args()


def convert(size, box):
    dw = 1. / (size[0])
    dh = 1. / (size[1])
    x = box[0] + box[2] / 2.0
    y = box[1] + box[3] / 2.0
    w = box[2]
    h = box[3]

    x = round(x * dw, 6)
    w = round(w * dw, 6)
    y = round(y * dh, 6)
    h = round(h * dh, 6)
    return (x, y, w, h)


if __name__ == '__main__':
    json_file = arg.json_path  # COCO Object Instance 类型的标注
    ana_txt_save_path = arg.save_path  # 保存的路径

    data = json.load(open(json_file, 'r'))
    if not os.path.exists(ana_txt_save_path):
        os.makedirs(ana_txt_save_path)

    id_map = {}  # coco数据集的id不连续!重新映射一下再输出!
    with open(os.path.join(ana_txt_save_path, 'classes.txt'), 'w') as f:
        # 写入classes.txt
        for i, category in enumerate(data['categories']):
            f.write(category['name']+"\n")
            id_map[category['id']] = i
    # print(id_map)
    # 这里需要根据自己的需要,更改写入图像相对路径的文件位置。
    # list_file = open(os.path.join(ana_txt_save_path, 'train2017.txt'), 'w')
    for img in tqdm(data['images']):
        filename = img["file_name"]
        img_width = img["width"]
        img_height = img["height"]
        img_id = img["id"]
        head, tail = os.path.splitext(filename)
        ana_txt_name = head + ".txt"  # 对应的txt名字,与jpg一致
        f_txt = open(os.path.join(ana_txt_save_path, ana_txt_name), 'w')
        for ann in data['annotations']:
            if ann['image_id'] == img_id:
                box = convert((img_width, img_height), ann["bbox"])
                f_txt.write("%s %s %s %s %s" % (id_map[ann["category_id"]], box[0], box[1], box[2], box[3]))
                counter=0
                for i in range(len(ann["keypoints"])):
                    if ann["keypoints"][i] == 2 or ann["keypoints"][i] == 1 or ann["keypoints"][i] == 0:
                        f_txt.write(" %s " % format(ann["keypoints"][i] + 1,'6f'))
                        counter=0
                    else:
                        if counter==0:
                            f_txt.write(" %s " % round((ann["keypoints"][i] / img_width),6))
                        else:
                            f_txt.write(" %s " % round((ann["keypoints"][i] / img_height),6))
                        counter+=1
        f_txt.write("\n")
        f_txt.close()
这样你就能得到和yolo格式一样的关键点标注数据了,如下:
0 0.507031 0.44294 0.516927 0.542824 0.758333 0.49213 2.000000 0.706901 0.324306 2.000000 0.59362 0.245602 2.000000 0.477734 0.213194 2.000000 0.355339 0.188889 2.000000 0.323437 0.419213 2.000000 0.296094 0.463194 2.000000 0.266797 0.637963 2.000000 0.344271 0.463194 2.000000 0.336458 0.506019 2.000000 0.365755 0.663426 2.000000 0.526563 0.506019 2.000000 0.498568 0.58125 2.000000 0.482292 0.695833 2.000000 0.595573 0.515278 2.000000 0.608594 0.598611 2.000000 0.639193 0.696991 2.000000
显示正确的骨架连接
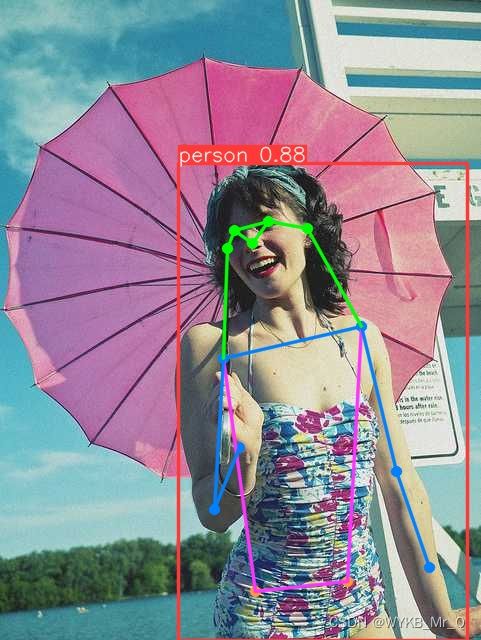
如果直接进行训练,你会发现,预测结果是这样的,线段连接错误,不是自己想要的。
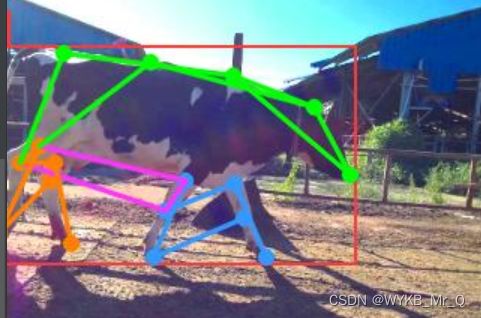
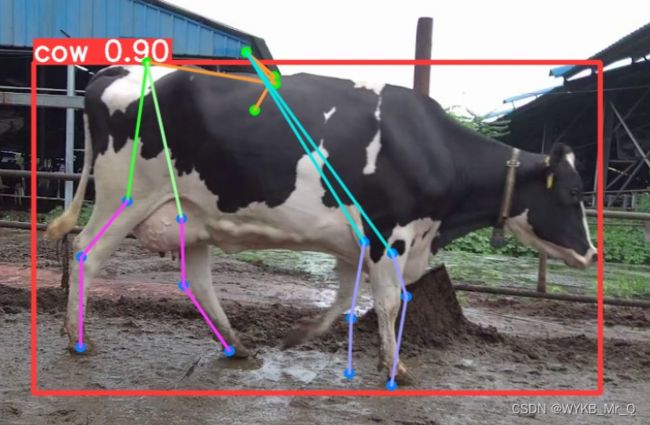
这里,你只需要更改 ./ultralytics-main\ultralytics\yolo\utils\plotting.py 文件,将self.skeleton参数,更改为你自己的连接线即可,这里就根据之前标注的关键点标号,进行连接。
下面的self.limb_color参数是刚才连接线的颜色设置,self.kpt_color是关键点的颜色设置,可以自己试着调整,需要保证数量上对应。

这是我的预测结果,只是试验试验,但可以看出已经是那么回事儿了。
参考链接:https://blog.csdn.net/m0_57458432/article/details/128220346
https://blog.csdn.net/m0_57458432/article/details/128222620?spm=1001.2014.3001.5502
日常学习记录,一起交流讨论吧!侵权联系~

