一、说明
用nexus搭建docker私有镜像仓库,我们可以去官网下载nexus安装包安装,然后做安装配置。
【nexus】用nexus3.5搭建docker私有仓库
https://www.jianshu.com/p/7a7db54a538f
从nexus3.x开始,我们的另一个选择是拉nexus的镜像,用容器运行nexus服务。
二、实验环境
操作系统: CentOS7.5 Minimal
nexusServer 192.168.1.106
dockerClient 192.168.1.104
三、 安装docker
在nexusServer 和dockerClient 服务器
关闭selinux
# setenforce 0
# sed -i 's/^SELINUX=.*/SELINUX=permissive/g' /etc/selinux/config
安装docker
# yum -y install yum-utils device-mapper-persistent-data lvm2
# yum-config-manager --add-repo https://download.docker.com/linux/centos/docker-ce.repo
# yum list docker-ce --showduplicates| sort -r

# yum -y install docker-ce-18.06.0.ce
# systemctl start docker
# systemctl status docker
# systemctl enable docker
# docker version


四、拉取镜像,运行nexus服务
在nexusServer 服务器
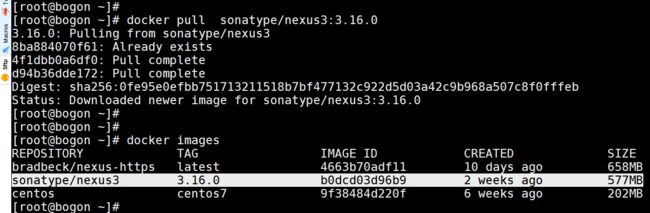
# docker pull sonatype/nexus3:3.16.0
# docker images
# mkdir /opt/nexus-data
# chown -R 200 /opt/nexus-data
注:容器中nexus的默认运行用户是nexus,uid和gid为200
# docker run -it --rm sonatype/nexus3:3.5.2 cat /etc/passwd
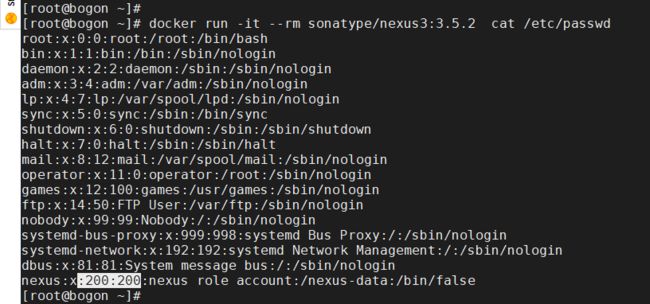
为什么需要提前创建目录并更改属主属组呢?
因为容器中nexus进程是普通用户nexus启动的,不是root,普通用户无法再宿主机上创建目录,如果目录属主不是nexus用户(或者映射在宿主的用户id),那么这个进程就没有写入权限。
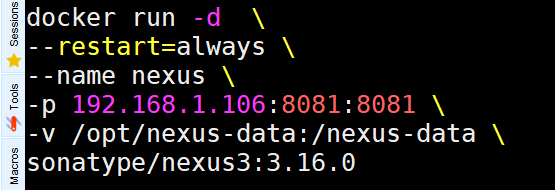
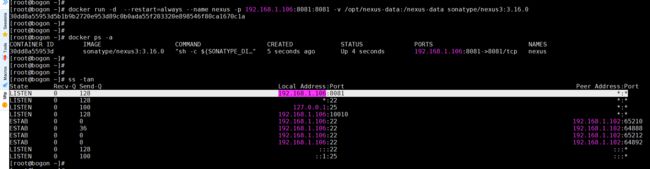
用命令行形式运行nexus容器
# docker run -d \
--restart=always \
--name nexus \
--ulimit nofile=65536:65536 \
-p 192.168.1.106:8081:8081 \
-v /opt/nexus-data:/nexus-data \
sonatype/nexus3:3.16.0
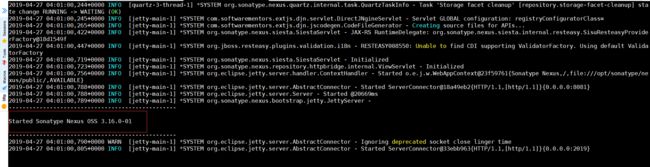
# docker logs -f nexus
# docker ps -a
# ss -tan
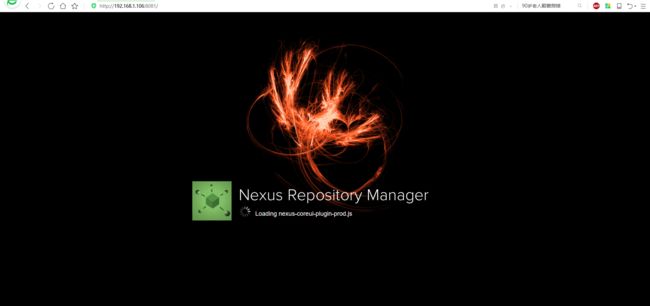
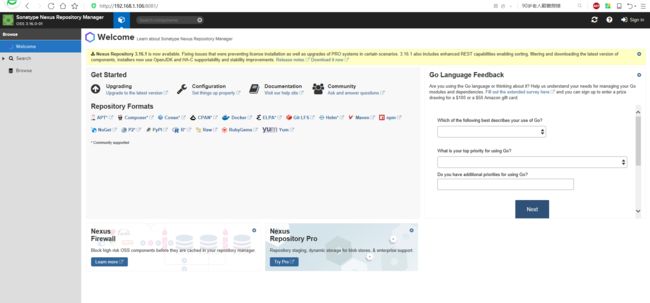
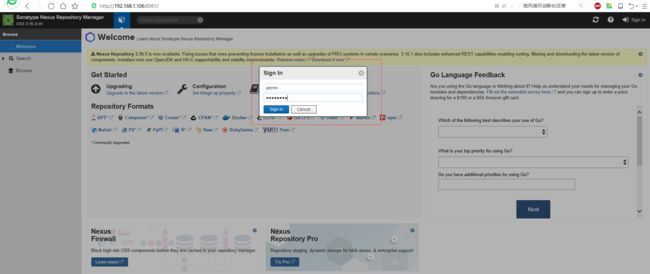
浏览器访问: http:192.168.1.106:8081
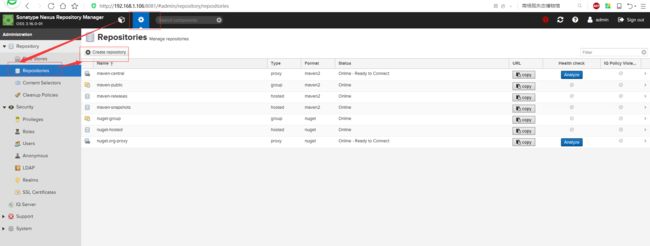
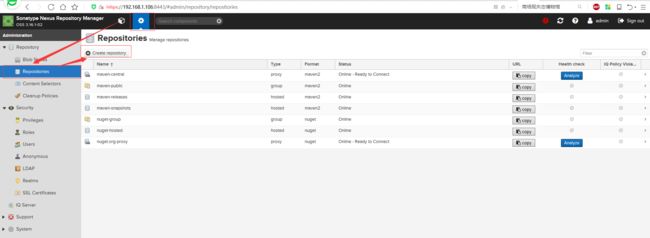
五,创建一个docker仓库
浏览器访问: http:192.168.1.106:8081
默认登录用户密码:admin/admin123

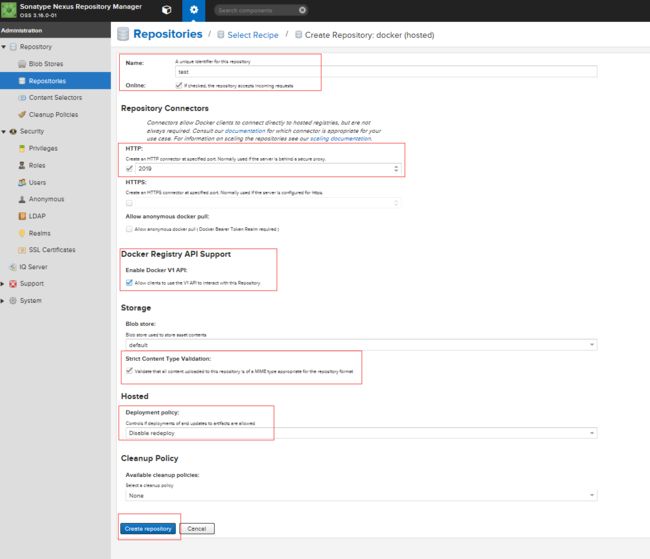
官方镜像搭建的nexus,不支持https,仓库端口只能选择http,否则服务异常

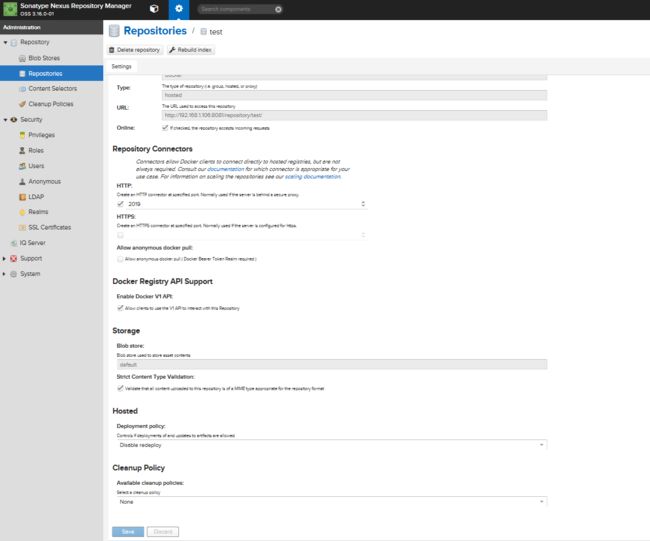
我们创建了一个名为 test的镜像仓库,仓库端口为 2019,协议为http,不是https!
重启nexus服务,开放2019端口
# docker stop nexus
# docker rm nexus
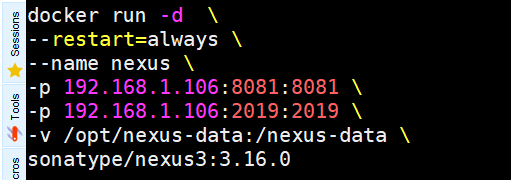
# docker run -d \
--restart=always \
--name nexus \
--ulimit nofile=65536:65536 \
-p 192.168.1.106:8081:8081 \
-p 192.168.1.106:2019:2019 \
-v /opt/nexus-data:/nexus-data \
sonatype/nexus3:3.16.0
# docker ps -a
# ss -tan

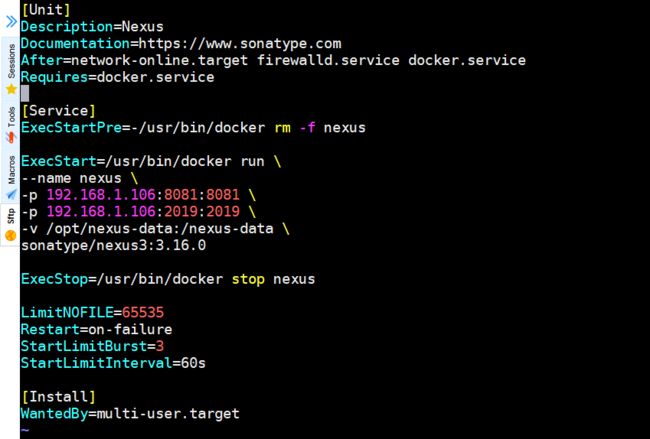
服务端启动方式改进,将nexus注册成系统服务
编写unit文件
# vim /etc/systemd/system/nexus.service
####################################################
[Unit]
Description=Nexus
Documentation=https://www.sonatype.com
After=network-online.target docker.service
Requires=docker.service
[Service]
ExecStartPre=-/usr/bin/docker rm -f nexus
ExecStart=/usr/bin/docker run \
--name nexus \
--ulimit nofile=65536:65536 \
-p 192.168.1.106:8081:8081 \
-p 192.168.1.106:2019:2019 \
-v /opt/nexus-data:/nexus-data \
sonatype/nexus3:3.16.0
ExecStop=/usr/bin/docker stop nexus
LimitNOFILE=65535
Restart=on-failure
StartLimitBurst=3
StartLimitInterval=60s
[Install]
WantedBy=multi-user.target
#####################################################
停止和删除命令行启动的nexus服务
# docker stop nexus
# docker rm nexus
用systemd启动服务
# systemctl daemon-reload
# systemctl start nexus
# systemctl enable nexus
# systemctl status nexus

六、客户端测试
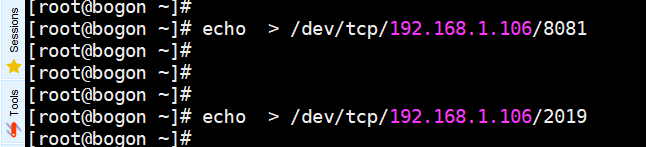
测试服务端端口连通性
# echo > /dev/tcp/192.168.1.106/8081
# echo > /dev/tcp/192.168.1.106/2019
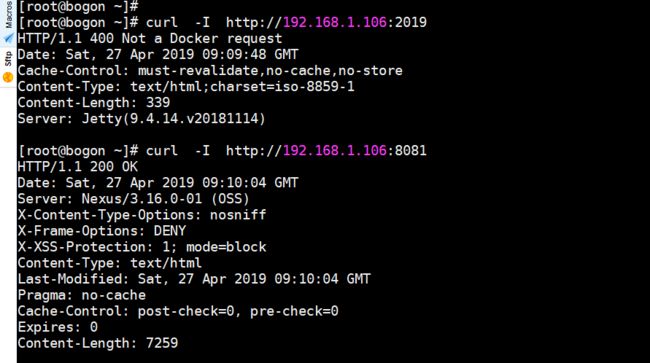
# curl -I http://192.168.1.106:8081
# curl -I http://192.168.1.106:2019
在nexusClient客户端登录仓仓库
# docker login http://192.68.1.106:2019 -u admin -p "admin123"
# cat /root/.docker/config.json

nexsu仓库开的是http,dockr 要走https,怎么解决?
添加仓库信任
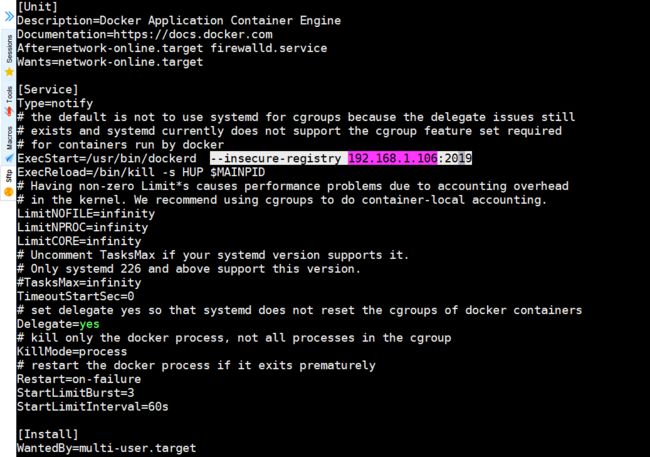
# vim /usr/lib/systemd/system/docker.service
#######################################################
ExecStart=/usr/bin/dockerd --insecure-registry 192.168.1.106:2019
########################################################
systemctl daemon-reload
# systemctl restart docker
# docker login 192.168.1.106:2019 -u admin -p "admin123"
# docker login http://192.168.1.106:2019 -u admin -p "admin123"

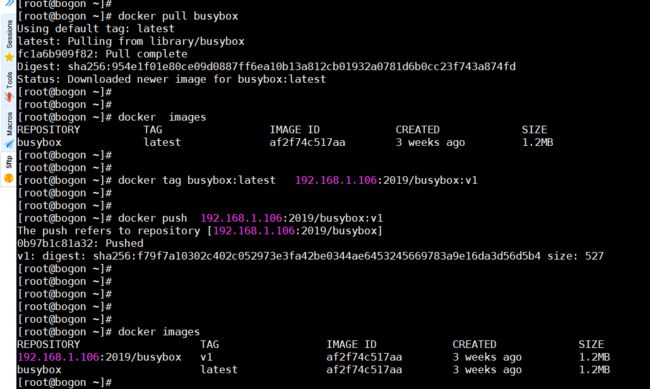
测试推送一个镜像
# docker pull busybox:latest
# docker tag busybox:latest 192.168.1.106:2019/busybox:v1
# docker push 192.168.1.106:2019/busybox:v1

七、改nexus仓库的http为https
前面我们用docker容器搭建nexus服务,创建了一个名为 test的镜像仓库,仓库端口为 2019,协议为http,不是https。
nexsu仓库开的是http,dockr 要走https,我们是通过在客户端添加仓库信任解决的。
那么,有没有更符合最佳实践的方式呢?有!用nexus-https镜像,nexus官方镜像的改进版。
Sonatype Nexus Repository Manager 3 with HTTPS support, based on CentOS
bradbeck/nexus-https
https://hub.docker.com/r/bradbeck/nexus-https
https://github.com/bradbeck/nexus-https
在nexusServer 服务器
# docker stop nexus
# docker rm nexus
# rm -rf /opt/nexus-data/*
# docker pull bradbeck/nexus-https
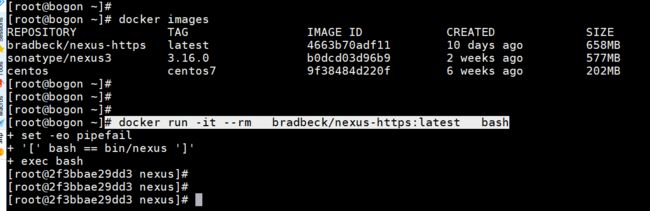
# docker images

用nexus-https镜像起一个容器,获取配置https所需的配置文件
# docker run -it --name nexus-https --rm bradbeck/nexus-https:latest bash
对nexusServer服务器,另开一个Xshell窗口
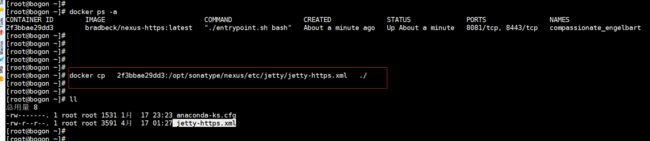
# docker ps -a

可以看到,起了一容器ID为 2f3bbae29dd3 的容器,当然,你起的容器ID肯定不同,灵活应变。
从容器中拷贝文件
# docker cp 2f3bbae29dd3:/opt/sonatype/nexus/etc/jetty/jetty-https.xml ./
或者你可以使用一行式:
# docker exec -it nexus-https cat /opt/sonatype/nexus/etc/jetty/jetty-https.xml > jetty-https.xml
创建容器服务相关目录
# mkdir /opt/nexus-data
# mkdir /opt/nexus-ssl
# mkdir /opt/nexus-jetty
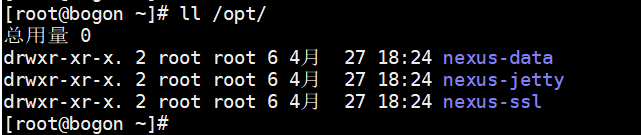
# chown -R 200 /opt/nexus-data /opt/nexus-ssl /opt/nexus-jetty
# cp jetty-https.xml /opt/nexus-jetty
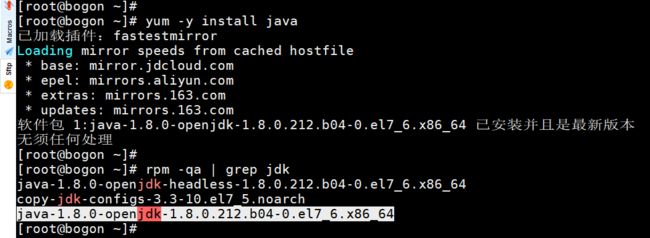
生成keystore证书文件
安装keytool证书工具
# yum -y install java
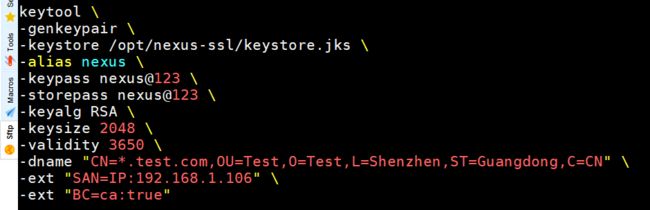
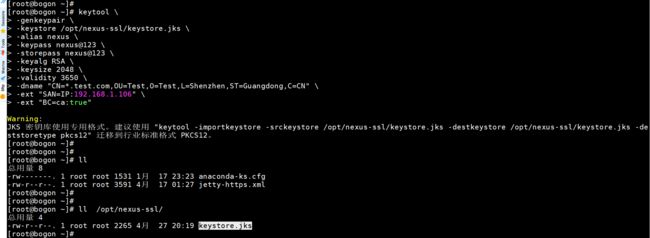
生成证书
# keytool \
-genkeypair \
-keystore /opt/nexus-ssl/keystore.jks \
-alias nexus \
-keypass nexus@123 \
-storepass nexus@123 \
-keyalg RSA \
-keysize 2048 \
-validity 5000 \
-dname "CN=*.test.com,OU=TEST,O=TEST,L=Shenzhen,ST=Guangdong,C=CN" \
-ext "SAN=IP:192.168.1.106" \
-ext "BC=ca:true"
# ll /opt/nexus-ssl/
# keytool -list -v -storepass "nexus@123" -keystore /opt/nexus-ssl/keystore.jks

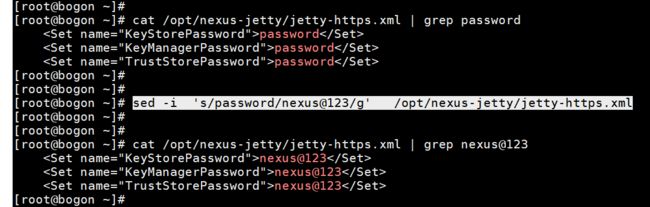
修改配置文件中证书默认密码
# sed -i 's/password/nexus@123/g' /opt/nexus-jetty/jetty-https.xml
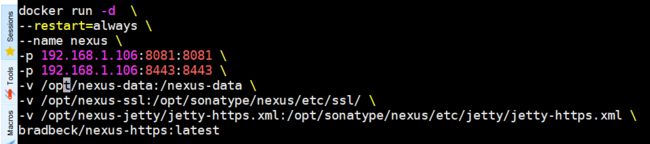
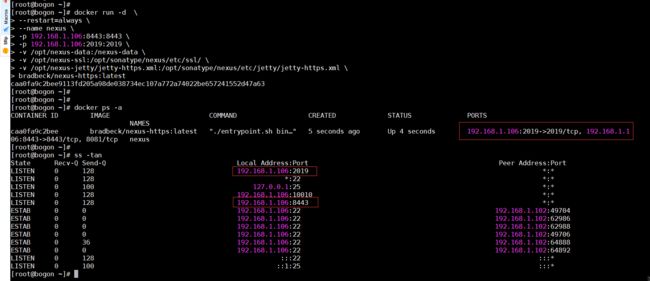
用nexus-https镜像启动nexus容器
# docker run -d \
--restart=always \
--name nexus \
--ulimit nofile=65536:65536 \
-p 192.168.1.106:8081:8081 \
-p 192.168.1.106:8443:8443 \
-v /opt/nexus-data:/nexus-data \
-v /opt/nexus-ssl:/opt/sonatype/nexus/etc/ssl/ \
-v /opt/nexus-jetty/jetty-https.xml:/opt/sonatype/nexus/etc/jetty/jetty-https.xml \
bradbeck/nexus-https:latest
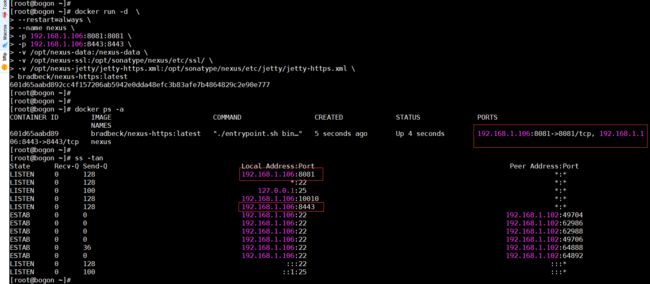
# docker ps -a
# ss -tan
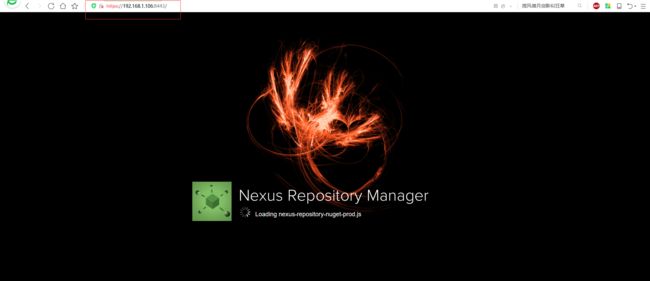
浏览器访问
https:192.168.1.106:8443
http://192.168.1.106:8081
如果不用http,那么启动容器的时候,不映射http的8081端口到宿主机。
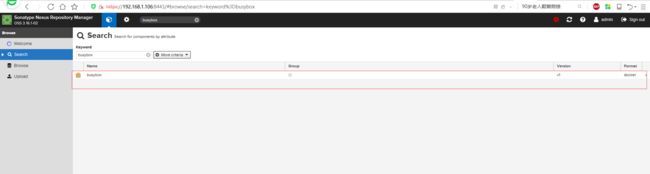
默认登录用户密码:admin/admin123


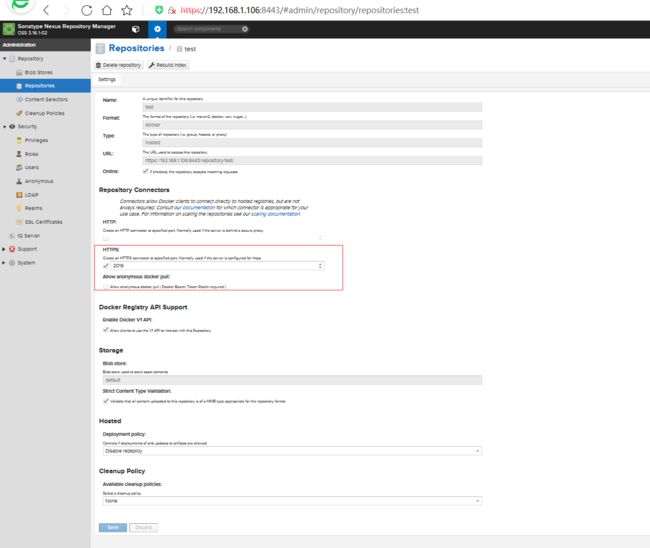
我们创建了一个名为 test的镜像仓库,仓库端口为 2019,协议为https,不是http!
重启nexus服务,开放2019端口
# docker stop nexus
# docker rm nexus
# docker run -d \
--restart=always \
--name nexus \
--ulimit nofile=65536:65536 \
-p 192.168.1.106:8443:8443 \
-p 192.168.1.106:2019:2019 \
-v /opt/nexus-data:/nexus-data \
-v /opt/nexus-ssl:/opt/sonatype/nexus/etc/ssl/ \
-v /opt/nexus-jetty/jetty-https.xml:/opt/sonatype/nexus/etc/jetty/jetty-https.xml \
bradbeck/nexus-https:latest

# docker stop nexus
# docker rm nexus
服务端启动方式改进,将nexus注册成系统服务
编写unit文件
# vim /etc/systemd/system/nexus.service
####################################################
[Unit]
Description=Nexus
Documentation=https://www.sonatype.com
After=network-online.target docker.service
Requires=docker.service
[Service]
ExecStartPre=-/usr/bin/docker rm -f nexus
ExecStart=/usr/bin/docker run \
--name nexus \
--ulimit nofile=65536:65536 \
-p 192.168.1.106:8443:8443 \
-p 192.168.1.106:2019:2019 \
-v /opt/nexus-data:/nexus-data \
-v /opt/nexus-ssl:/opt/sonatype/nexus/etc/ssl/ \
-v /opt/nexus-jetty/jetty-https.xml:/opt/sonatype/nexus/etc/jetty/jetty-https.xml \
bradbeck/nexus-https:latest
ExecStop=/usr/bin/docker stop nexus
LimitNOFILE=65535
Restart=on-failure
StartLimitBurst=3
StartLimitInterval=60s
[Install]
WantedBy=multi-user.target
#####################################################
停止和删除命令行启动的nexus服务
# docker stop nexus
# docker rm nexus
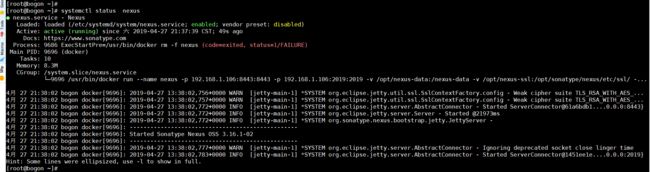
用systemd启动服务
# systemctl daemon-reload
# systemctl start nexus
# systemctl enable nexus
# docker logs -f nexus
# systemctl status nexus
八、客户端测试
在dockerClient服务器
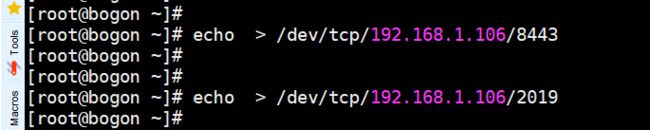
测试服务端端口连通性
# echo > /dev/tcp/192.168.1.106/8443
# echo > /dev/tcp/192.168.1.106/2019
# curl -I -k https://192.168.1.106:8443
# curl -I -k https://192.168.1.106:2019

在nexusClient客户端登录仓库
# docker login 192.168.1.106:2019 -u admin -p "admin123"

获取nexus服务端证书
# yum -y install java
# keytool -printcert -sslserver 192.168.1.106:2019 -v
# keytool -printcert -sslserver 192.168.1.106:2019 -rfc

# keytool -printcert -sslserver 192.168.1.106:2019 -rfc > /etc/pki/ca-trust/source/anchors/nexus.crt
# cat /etc/pki/ca-trust/source/anchors/nexus.crt

刷新操作系统认证,重启docker
# update-ca-trust
# systemctl restart docker
# docker login 192.168.1.106:2019 -u admin -p "admin123"
# docker login https://192.168.1.106:2019 -u admin -p "admin123"
# cat /root/.docker/config.json

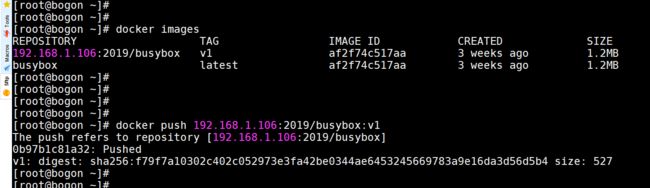
测试推送一个镜像
# docker pull busybox:latest
# docker tag busybox:latest 192.168.1.106:2019/busybox:v1
# docker push 192.168.1.106:2019/busybox:v1
九、参考
sonatype/docker-nexus3
https://hub.docker.com/r/sonatype/docker-nexus3
https://github.com/sonatype/docker-nexus3
nexus3.x docker镜像仓库及仓库代理配置
https://segmentfault.com/a/1190000015629878
sonatype nexus docker volume error
https://stackoverflow.com/questions/36405434/sonatype-nexus-docker-volume-error
Docker — 从入门到实践
https://yeasy.gitbooks.io/docker_practice
Understanding how uid and gid work in Docker containers
https://medium.com/@mccode/understanding-how-uid-and-gid-work-in-docker-containers-c37a01d01cf
bradbeck/nexus-https
https://hub.docker.com/r/bradbeck/nexus-https
https://github.com/bradbeck/nexus-https
Using Self-Signed Certificates with Nexus Repository Manager and Docker Daemon
https://support.sonatype.com/hc/en-us/articles/217542177-Using-Self-Signed-Certificates-with-Nexus-Repository-Manager-and-Docker-Daemon
Transport Layer Security (TLS) Self-Signed Certificates
https://support.sonatype.com/hc/en-us/articles/213465768-SSL-Certificate-Guide
Nexus Repository Manager 3 using SSL Unreachable by browsers or Docker
https://stackoverflow.com/questions/53183851/nexus-repository-manager-3-using-ssl-unreachable-by-browsers-or-docker