基于WSL2+NVIDIA Docker的开发环境最佳实践
1. Windows 11 安装WSL2 Ubuntu 22.04 LTS
1.1 安装windows附加功能
点击:设置—>应用—>可选功能—>更多windows功能

弹出的窗口:
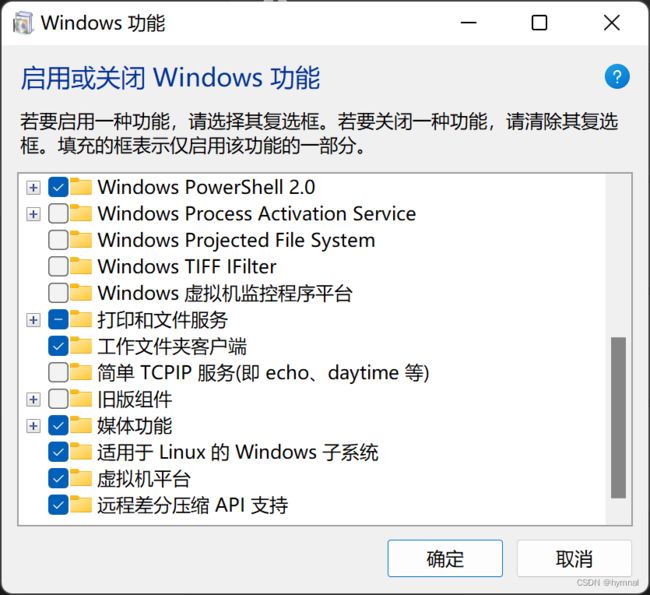
勾选“适用于Linux的Windows子系统”和“虚拟机平台”,点击“确定”按钮。
安装完成,系统重启。
1.2 升级WSL2
下载wsl_update_x64.msi升级包,并执行安装。

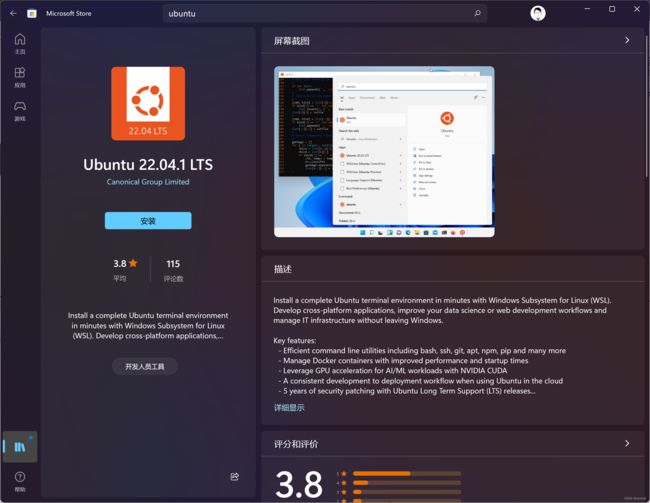
1.3 应用商店安装Ubuntu 22.04
1.4 安装完成后更新系统
sudo apt update
sudo apt upgrade
2. WSL2 Ubuntu更新NVIDIA驱动
WSL2 Ubuntu系统的NVIDIA驱动版本与Windows系统中的NVIDIA驱动版本一致,升级驱动只需要升级Windows下的驱动即可随之更新。
2.1 更新Windows下NVIDIA驱动
官方GeForce驱动程序 | NVIDIA
可以下载自动更新程序,很方便。
GeForce Experience界面下更新至最新版本(516.94)
2.2 WSL2 Ubuntu下使用“nvidia-smi”命令查看更新后的版本号
nvidia驱动已经更新至了516.94,CUDA版本更新至11.7。
h@ProArt:~$ nvidia-smi
Tue Sep 20 20:27:51 2022
+-----------------------------------------------------------------------------+
| NVIDIA-SMI 515.65.01    Driver Version: 516.94       CUDA Version: 11.7     |
|-------------------------------+----------------------+----------------------+
| GPU  Name        Persistence-M| Bus-Id        Disp.A | Volatile Uncorr. ECC |
| Fan  Temp  Perf  Pwr:Usage/Cap|         Memory-Usage | GPU-Util  Compute M. |
|                               |                      |               MIG M. |
|===============================+======================+======================|
|   0  NVIDIA GeForce ...  On   | 00000000:01:00.0 Off |                  N/A |
| N/A    0C    P0    23W /  N/A |      0MiB / 16384MiB |      0%      Default |
|                               |                      |                  N/A |
+-------------------------------+----------------------+----------------------+

+-----------------------------------------------------------------------------+
| Processes:                                                                  |
|  GPU   GI   CI        PID   Type   Process name                  GPU Memory |
|        ID   ID                                                   Usage      |
|=============================================================================|
|  No running processes found                                                 |
+-----------------------------------------------------------------------------+
h@ProArt:~$
3. 安装nvidia docker
nvidia docker官网教程
3.1 Windows下安装Docker Desktop
Docker Desktop 官网
3.2 WSL2 Ubuntu下查看docker是否安装成功
h@ProArt:~$ docker -v
Docker version 20.10.17, build 100c701
h@ProArt:~$
3.3 WSL2 Ubuntu添加nvidia-docker2安装源
 distribution=$(. /etc/os-release;echo $ID$VERSION_ID) \
      && curl -fsSL https://nvidia.github.io/libnvidia-container/gpgkey | sudo gpg --dearmor -o /usr/share/keyrings/nvidia-container-toolkit-keyring.gpg \
      && curl -s -L https://nvidia.github.io/libnvidia-container/experimental/$distribution/libnvidia-container.list | \
         sed 's#deb https://#deb [signed-by=/usr/share/keyrings/nvidia-container-toolkit-keyring.gpg] https://#g' | \
         sudo tee /etc/apt/sources.list.d/nvidia-container-toolkit.list
3.4 WSL2 Ubuntu下安装nvidia-docker2
sudo apt update
sudo apt install -y nvidia-docker2
3.5 可以用啦,启动一个pytorch试试呗
NVIDIA Container官网
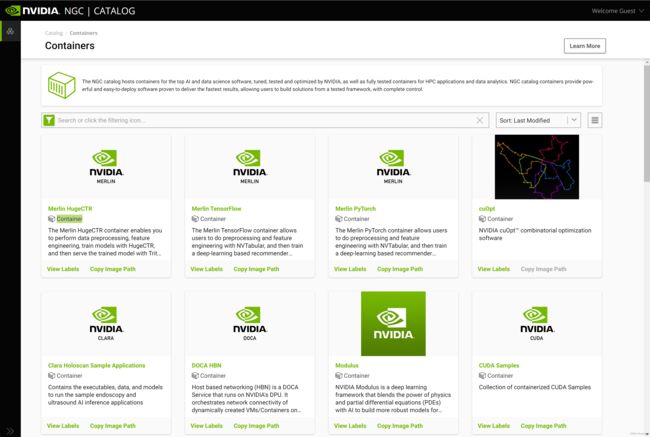
搜索pytorch,当前最新版本22.08-py3。
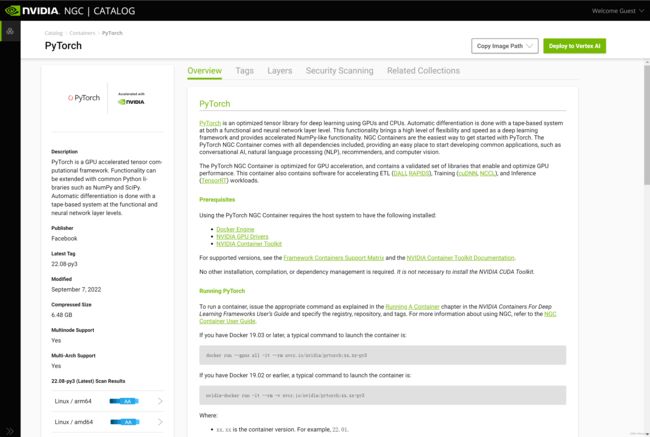
按照提示用命令下载并运行pytorch docker
docker run --gpus all -it --rm nvcr.io/nvidia/pytorch:22.08-py3
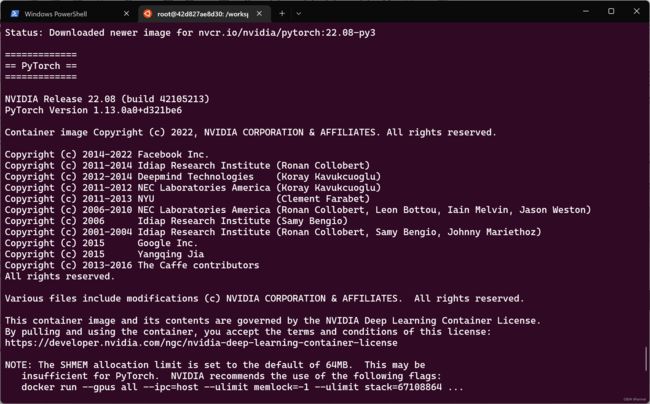
运行结果如下:
3.6 将docker 8888端口映射到主机8888端口
docker run --gpus all -it --rm -p 8888:8888 -v ~:/workspace \
	--ipc=host --ulimit memlock=-1 --ulimit stack=67108864 \
	nvcr.io/nvidia/pytorch:22.08-py3
h@ProArt:~$ docker run --gpus all -it --rm -p 8888:8888 -v ~:/workspace         --ipc=host --ulimit memlock=-1 --ulimit stack=67108864    nvcr.io/nvidia/pytorch:22.08-py3

=============
== PyTorch ==
=============

NVIDIA Release 22.08 (build 42105213)
PyTorch Version 1.13.0a0+d321be6

Container image Copyright (c) 2022, NVIDIA CORPORATION & AFFILIATES. All rights reserved.

Copyright (c) 2014-2022 Facebook Inc.
Copyright (c) 2011-2014 Idiap Research Institute (Ronan Collobert)
Copyright (c) 2012-2014 Deepmind Technologies    (Koray Kavukcuoglu)
Copyright (c) 2011-2012 NEC Laboratories America (Koray Kavukcuoglu)
Copyright (c) 2011-2013 NYU                      (Clement Farabet)
Copyright (c) 2006-2010 NEC Laboratories America (Ronan Collobert, Leon Bottou, Iain Melvin, Jason Weston)
Copyright (c) 2006      Idiap Research Institute (Samy Bengio)
Copyright (c) 2001-2004 Idiap Research Institute (Ronan Collobert, Samy Bengio, Johnny Mariethoz)
Copyright (c) 2015      Google Inc.
Copyright (c) 2015      Yangqing Jia
Copyright (c) 2013-2016 The Caffe contributors
All rights reserved.

Various files include modifications (c) NVIDIA CORPORATION & AFFILIATES.  All rights reserved.

This container image and its contents are governed by the NVIDIA Deep Learning Container License.
By pulling and using the container, you accept the terms and conditions of this license:
https://developer.nvidia.com/ngc/nvidia-deep-learning-container-license
3.7 运行jupyter notebook
root@de33376dcdf0:/workspace# jupyter notebook
[I 14:10:11.532 NotebookApp] Writing notebook server cookie secret to /root/.local/share/jupyter/runtime/notebook_cookie_secret
[I 14:10:11.869 NotebookApp] jupyter_tensorboard extension loaded.
[I 14:10:12.040 NotebookApp] JupyterLab extension loaded from /opt/conda/lib/python3.8/site-packages/jupyterlab
[I 14:10:12.040 NotebookApp] JupyterLab application directory is /opt/conda/share/jupyter/lab
[I 14:10:12.041 NotebookApp] [Jupytext Server Extension] NotebookApp.contents_manager_class is (a subclass of) jupytext.TextFileContentsManager already - OK
[I 14:10:12.042 NotebookApp] Serving notebooks from local directory: /workspace
[I 14:10:12.042 NotebookApp] Jupyter Notebook 6.4.10 is running at:
[I 14:10:12.042 NotebookApp] http://hostname:8888/?token=cea64a4c499ce3e282f892b086fcceeb1fbe25a65494ef16
[I 14:10:12.042 NotebookApp] Use Control-C to stop this server and shut down all kernels (twice to skip confirmation).
[C 14:10:12.044 NotebookApp]

    To access the notebook, open this file in a browser:
        file:///root/.local/share/jupyter/runtime/nbserver-387-open.html
    Or copy and paste this URL:
        http://hostname:8888/?token=cea64a4c499ce3e282f892b086fcceeb1fbe25a65494ef16
[I 14:10:19.602 NotebookApp] 302 GET / (172.17.0.1) 0.400000ms
[I 14:10:19.606 NotebookApp] 302 GET /tree? (172.17.0.1) 0.570000ms
主机浏览器访问“127.0.0.1:8888”,运行正常。
