SpringBoot项目学习02之Thymeleaf模板引擎
本文主要介绍一下Thymeleaf模板引擎的基本使用,以及使用Spring Boot整合Thymeleaf模板引擎。
1.Spring Boot整合Thymeleaf模板引擎
想要在Spring Boot项目中使用该模板引擎,首先需要引入该模板引擎的依赖。Spring Boot内部支持该模板引擎,因此,只需要引入依赖就可以使用该模板引擎了。
<!-- Thymeleaf 模板引擎依赖 -->
<dependency>
   <groupId>org.springframework.boot</groupId>
   <artifactId>spring-boot-starter-thymeleaf</artifactId>
</dependency>
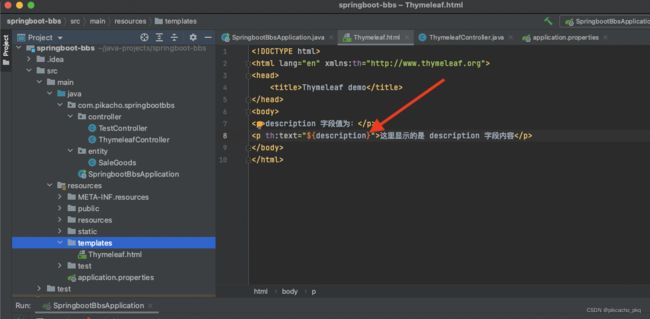
在resources/templates目录新建模板文件thymeleaf.html ,Thymeleaf模板引擎的默认后缀名即为html,新增文件后,首先在模板文件的标签中导入 Thymeleaf的名称空间。导入该名称空间主要是为了Thymeleaf的语法提示和Thymeleaf标签的使用。
<html lang="en" xmlns:th="http://www.thymeleaf.org">
thymeleaf.html
DOCTYPE html>
<html lang="en" xmlns:th="http://www.thymeleaf.org">
<head>
    <title>Thymeleaf demotitle>
head>
<body>
<p>description 字段值为:p>
<p th:text="${description}">这里显示的是 description 字段内容p>
body>
html>
ThymeleafController.java
@Controller
public class ThymeleafController {
    @RequestMapping("/thymeleaf")
    public String hello(HttpServletRequest request,
                        @RequestParam(value = "description", required = false, defaultValue = "sprinngboot-thymeleaf") String description){
        request.setAttribute("description", description);
        return "thymeleaf";
    }
}
启动项目后,访问http://localhost:8080/bbs/thymeleaf,结果如下,这里后端设置了参数的默认值为sprinngboot-thymeleaf,所以即使前端没有传入参数,页面同样会显示参数。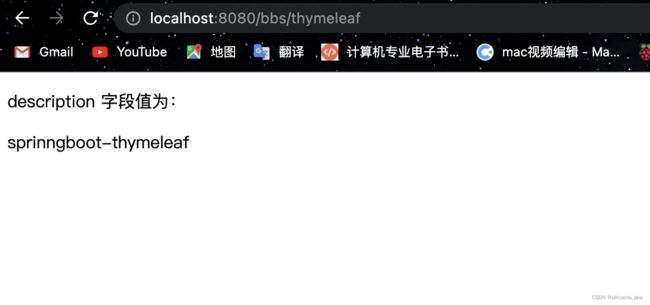
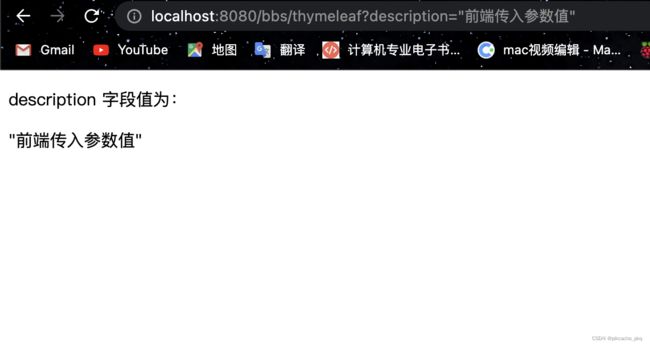
访问http://localhost:8080/bbs/thymeleaf?description=“前端传入参数值”,结果如下。
2.一些细节问题
Thymeleaf的默认缓存设置是通过配置文件的spring.thymeleaf.cache配置属性决定的,Thymeleaf默认是使用模板缓存的,该设置有助于改善应用程序的性能,因为模板只需编译一次即可,但是在开发过程中不能实时看到页面变更的效果,除非重启应用程序,因此建议将该属性设置为 false,在配置文件中修改如下。
spring.thymeleaf.cache=false
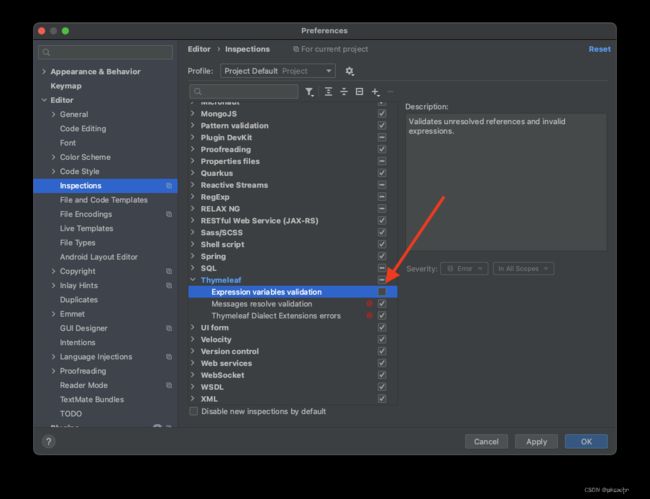
在使用Thymeleaf开发时可能会碰到这种问题,在模板文件中通过Thymeleaf语法读取变量时,该变量名称下会出现红色波浪线,也就是错误的标志。但是这种爆红不会影响程序的正常运行。

3.Thymeleaf模板引擎的基本使用
这里简单介绍一下该模板引擎的基本使用,如果想要完整地了解该模板引擎,可以去Thymeleaf官方文档学习Thymeleaf官方文档
Thymeleaf模板文件语句中包含三块内容:
- html标签
- Thymeleaf模板引擎的th标签
- Thymeleaf表达式
例如:
<p th:text="${description}">p>
该语句也展示了 Thymeleaf 模板文件的编写规则:
- 任意的Thymeleaf属性标签th:*需要写在html标签体中( th:block 除外 )
- Thymeleaf表达式写在Thymeleaf属性标签中
attributes.html
DOCTYPE html>
<html lang="en" xmlns:th="http://www.thymeleaf.org">
<head>
    <title>Thymeleaf setting-value-to-specific-attributestitle>
    <meta charset="UTF-8">
head>

<body th:background="${th_background}" background="#D0D0D0">

<h1 th:text="${title}">html标签演示h1>
<div>
    <h5>id、name、value标签:h5>

    <input id="input1" name="input1" value="1" th:id="${th_id}" th:name="${th_name}" th:value="${th_value}"/>
div>
<br/>
<div class="div1" th:class="${th_class}">
    <h5>class、href标签:h5>

    <a th:href="${th_href}" href="https://gitbook.cn/">链接地址a>
div>
body>
html>
ThymeleafController.java
    @GetMapping("/attributes")
    public String attributes(ModelMap map) {
        // 更改 h1 内容
        map.put("title", "Thymeleaf 标签演示");
        // 更改 id、name、value
        map.put("th_id", "thymeleaf-input");
        map.put("th_name", "thymeleaf-input");
        map.put("th_value", "13");
        // 更改 class、href
        map.put("th_class", "thymeleaf-class");
        map.put("th_href", "http://13blog.site");
        return "attributes";
    }
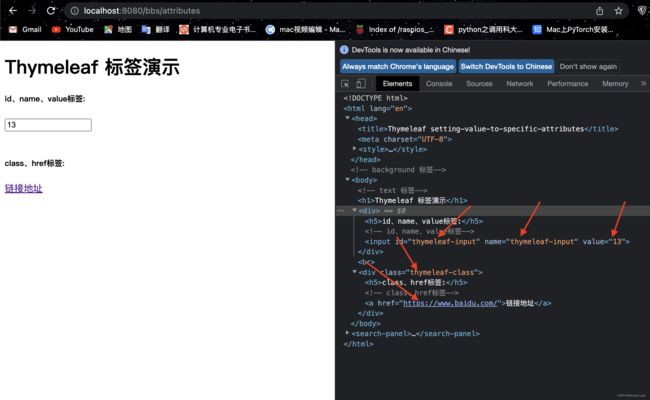
启动项目后,访问http://localhost:8080/bbs/attributes,结果如下。
这里只是简单的使用,当然Thymeleaf模板引擎的使用不会如此简单,需要使用什么特性,去查看文档就行了。