Unity进阶--使用PhotonServer实现服务端和客户端通信--PhotonServer(一)
文章目录
- Unity进阶--使用PhotonServer实现服务端和客户端通信
-
- 服务器的安装和配置
- 添加日志
- 客户端的配置
- 客户端和服务器的通信
- Dlc 出现vscode引用不好使的时候
Unity进阶–使用PhotonServer实现服务端和客户端通信
服务器的安装和配置
Photon的地址:https://www.photonengine.com/zh-cn/sdks
- 下载对应的sdk:
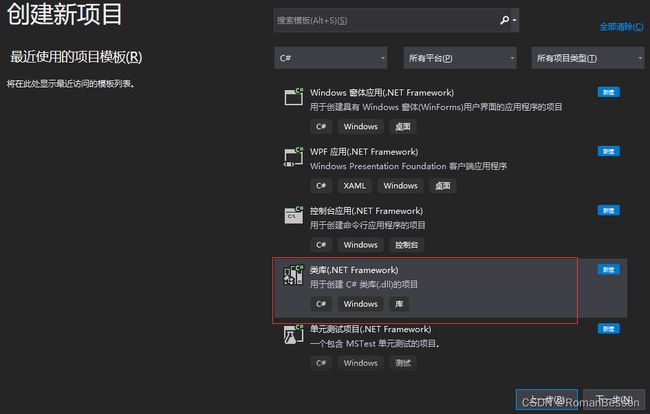
- 在Visual studio 里创建新的类库:
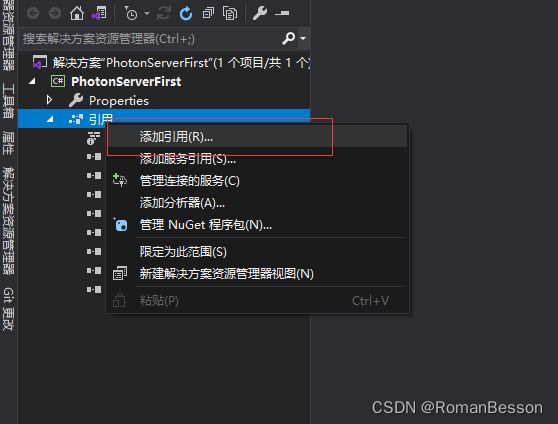
在项目里添加对应的dll文件引用:
在这个文件夹里找:
这五个插件:
编写服务器端
using System;
using System.Collections.Generic;
using System.Linq;
using System.Text;
using System.Threading.Tasks;
using Photon.SocketServer;

namespace PhotonServerFirst
{
    public class PSTest : ApplicationBase
    {
        protected override PeerBase CreatePeer(InitRequest initRequest)
        {
            return new PSpeer(initRequest);
        }

        protected override void Setup()
        {

        }

        protected override void TearDown()
        {

        }
    }
}
编写客户端模板
using System;
using System.Collections.Generic;
using System.Linq;
using System.Text;
using System.Threading.Tasks;
using Photon.SocketServer;
using PhotonHostRuntimeInterfaces;

namespace PhotonServerFirst
{
    public class PSpeer : ClientPeer
    {
        public PSpeer(InitRequest initRequest) : base(initRequest)
        {

        }

        protected override void OnDisconnect(DisconnectReason reasonCode, string reasonDetail)
        {
            throw new NotImplementedException();
        }

        protected override void OnOperationRequest(OperationRequest operationRequest, SendParameters sendParameters)
        {
            throw new NotImplementedException();
        }
    }
}
创建服务器文件
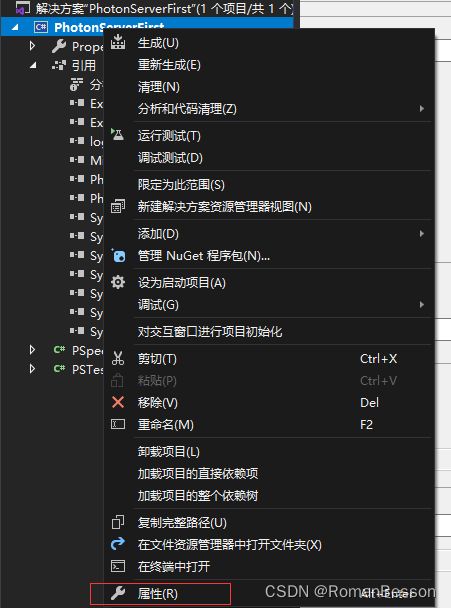
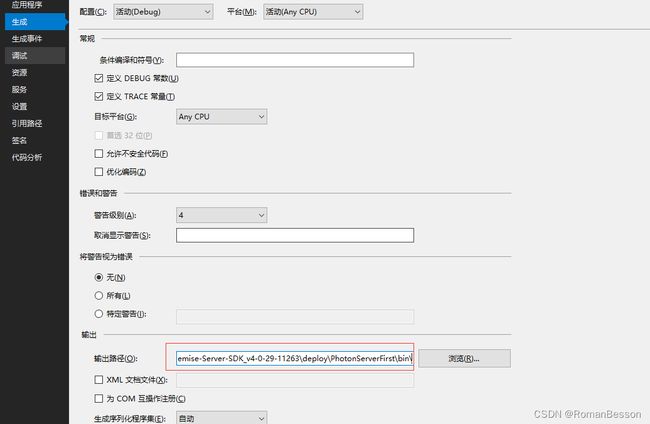
- 修改生成目录:
放到之前创建的bin里。
然后生成。
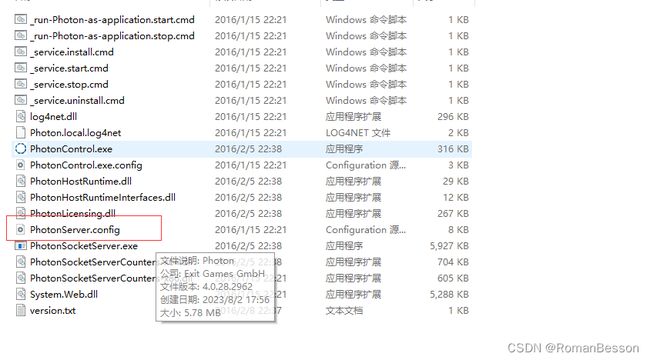
- 修改PhotonServer配置文件
-
配置文件:
     <!-- DisplayName:显示名称 -->
	<PhotonServerFirst
		MaxMessageSize="512000"
		MaxQueuedDataPerPeer="512000"
		PerPeerMaxReliableDataInTransit="51200"
		PerPeerTransmitRateLimitKBSec="256"
		PerPeerTransmitRatePeriodMilliseconds="200"
		MinimumTimeout="5000"
		MaximumTimeout="30000"
		DisplayName="PhotonServerFirst"
		>

		<!-- 0.0.0.0 opens listeners on all available IPs. Machines with multiple IPs should define the correct one here. -->
		<!-- Port 5055 is Photon's default for UDP connections. -->
		<UDPListeners>
			<UDPListener
				IPAddress="0.0.0.0"
				Port="5055"
				OverrideApplication="PhotonServerFirst">
			</UDPListener>
		</UDPListeners>

		<!-- 0.0.0.0 opens listeners on all available IPs. Machines with multiple IPs should define the correct one here. -->
		<!-- Port 4530 is Photon's default for TCP connecttions. -->
		<!-- A Policy application is defined in case that policy requests are sent to this listener (known bug of some some flash clients) -->
		<TCPListeners>
			<TCPListener
				IPAddress="0.0.0.0"
				Port="4530"
				PolicyFile="Policy\assets\socket-policy.xml"
				InactivityTimeout="10000"
				OverrideApplication="PhotonServerFirst"
				>
			</TCPListener>
		</TCPListeners>


		<!-- Defines the Photon Runtime Assembly to use. -->
		<Runtime
			Assembly="PhotonHostRuntime, Culture=neutral"
			Type="PhotonHostRuntime.PhotonDomainManager"
			UnhandledExceptionPolicy="Ignore">
		</Runtime>

		<Applications Default="PhotonServerFirst">

			<!-- Name:要注意和上面填写的应用名字相同 -->
			<!--BaseDirectory:编译好的dll所在文件夹名-->
		    <!--Assembly:dll名-->
		    <!--Type:命名空间.类名-->
			<Application
				Name="PhotonServerFirst"
				BaseDirectory="PhotonServerFirst"
				Assembly="PhotonServerFirst"
				Type="PhotonServerFirst.PSTest"
				ForceAutoRestart="true"
				WatchFiles="dll;config"
				ExcludeFiles="log4net.config">
			</Application>

		</Applications>
	</PhotonServerFirst>
这样photonServer下就有我们创建的服务器了。
添加日志
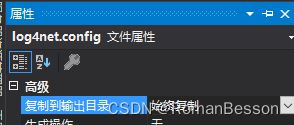
-
然后把属性改为始终复制
-
改一下输出的日志名字
<file type="log4net.Util.PatternString" value="%property{Photon:ApplicationLogPath}\\PhotonServerFirst.Server.log" /> -
配置服务器程序
using System; using System.Collections.Generic; using System.Linq; using System.Text; using System.Threading.Tasks; using Photon.SocketServer; using ExitGames.Logging; using ExitGames.Logging.Log4Net; using log4net.Config; using System.IO; namespace PhotonServerFirst { public class PSTest : ApplicationBase { //日志需要的 private static readonly ILogger log = LogManager.GetCurrentClassLogger(); protected override PeerBase CreatePeer(InitRequest initRequest) { return new PSpeer(initRequest); } //初始化 protected override void Setup() { InitLog(); } //server端关闭的时候 protected override void TearDown() { } #region 日志 ////// 初始化日志以及配置 /// private void InitLog() { //日志的初始化 log4net.GlobalContext.Properties["Photon:ApplicationLogPath"] = this.ApplicationRootPath + @"\bin_Win64\log"; //设置日志的路径 FileInfo configFileInfo = new FileInfo(this.BinaryPath + @"\log4net.config"); //获取配置文件 if (configFileInfo.Exists) { //对photonserver设置日志为log4net LogManager.SetLoggerFactory(Log4NetLoggerFactory.Instance); XmlConfigurator.ConfigureAndWatch(configFileInfo); log.Info("初始化成功"); } } #endregion } } -
打开photonserver运行应用,日志输出则配置成功。
客户端的配置
- 在
Photon-OnPremise-Server-SDK_v4-0-29-11263 > lib >下寻找Photon3Unity3D.dll放到unity3d的插件文件夹(Pluigins)里。 - 编写客户端脚本绑定到一个单例不会被销毁的组件里。(代码如下)
客户端和服务器的通信
-
客户端
using System.Collections; using System.Collections.Generic; using UnityEngine; using ExitGames.Client.Photon; public class PhotonManager : MyrSingletonBase<PhotonManager>, IPhotonPeerListener { private PhotonPeer peer; void Awake() { DontDestroyOnLoad(this); } // Start is called before the first frame update void Start() { peer = new PhotonPeer(this, ConnectionProtocol.Tcp); peer.Connect("127.0.0.1:4530", "PhotonServerFirst"); } void Update() { peer.Service(); if (Input.GetKeyDown(KeyCode.Space)) { Dictionary<byte, object> dic = new Dictionary<byte, object>(); dic.Add(1,"你好,我是王小虎"); peer.OpCustom(1, dic, true); } } private void OnDestroy() { //断开连接 peer.Disconnect(); } public void DebugReturn(DebugLevel level, string message) { } ////// 接收服务器事件 /// /// public void OnEvent(EventData eventData) { if(eventData.Code == 1) { Debug.Log("事件" + eventData.Parameters[1]); } } /// /// 接收服务器响应 /// /// public void OnOperationResponse(OperationResponse operationResponse) { if (operationResponse.OperationCode == 1){ Debug.Log(operationResponse.Parameters[1]); } } /// /// 状态改变 /// /// public void OnStatusChanged(StatusCode statusCode) { Debug.Log(statusCode); } } -
服务器
using System;
using System.Collections.Generic;
using System.Linq;
using System.Text;
using System.Threading.Tasks;
using Photon.SocketServer;
using PhotonHostRuntimeInterfaces;

namespace PhotonServerFirst
{
    public class PSpeer : ClientPeer
    {
        public PSpeer(InitRequest initRequest) : base(initRequest)
        {

        }

        //处理客户端断开的后续工作
        protected override void OnDisconnect(DisconnectReason reasonCode, string reasonDetail)
        {
            throw new NotImplementedException();
        }

        //处理客户端的请求
        protected override void OnOperationRequest(OperationRequest operationRequest, SendParameters sendParameters)
        {
            switch (operationRequest.OperationCode)
            {
                case 1:
                    //收到
                    Dictionary<byte, object> data = operationRequest.Parameters;
                    PSTest.log.Info("收到客户端消息:" + data[1].ToString());

                    //返回
                    Dictionary<byte, object> data2 = new Dictionary<byte, object>();
                    data2.Add(1, "你好,我是服务器");
                    //  OperationResponse operationResponse = new OperationResponse();
                    //  operationResponse.OperationCode = 1;
                    //  operationResponse.Parameters = data2;

                    //创建一个响应
                    OperationResponse operationResponse = new OperationResponse(1, data2);
                    SendOperationResponse(operationResponse, sendParameters);

                    //创建一个事件
                    EventData Edata = new EventData(1, data2);
                    SendEvent(Edata, sendParameters);

                    break;
                default:
                    break;
            }
        }
    }
}
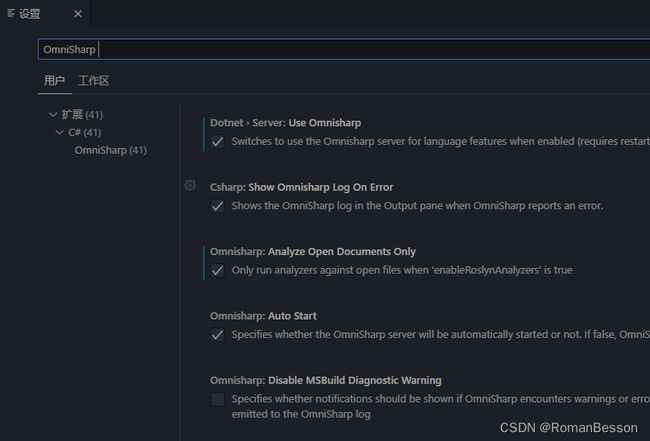
Dlc 出现vscode引用不好使的时候
检查下这个。



![在[外链图片转存失败,源站可能有防盗链机制,建议将图片保存下来直接上传(img-H5BLT0QY-1691110946420)(../AppData/Roaming/Typora/typora-user-images/image-20230803090947410.png)]](http://img.e-com-net.com/image/info8/8801175fb0ad403c86780fdf5a00e969.jpg)
