32.SpringMVC配置
SpringMVC配置
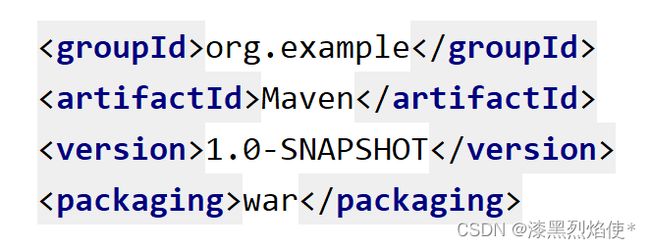
在pom.xml里面将之前的"jar"打包方式更改为"war"
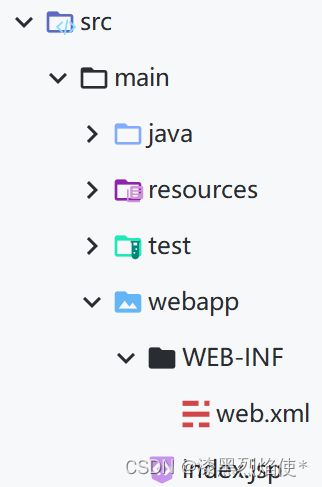
因为之前在JavaWeb创建Maven时就是按web工程来创建的(详细可参考5.IDEA里面使用Maven.md博客),所以不需要再创建webapp目录了,完整目录如下:
引入依赖
pom.xml
	<dependency>
		<groupId>org.springframeworkgroupId>
		<artifactId>spring-webmvcartifactId>
		<version>5.3.1version>
	dependency>


    <dependency>
        <groupId>ch.qos.logbackgroupId>
        <artifactId>logback-classicartifactId>
        <version>1.2.3version>
    dependency>


    <dependency>
        <groupId>javax.servletgroupId>
        <artifactId>javax.servlet-apiartifactId>
        <version>3.1.0version>
        <scope>providedscope>
    dependency>


    <dependency>
        <groupId>org.thymeleafgroupId>
        <artifactId>thymeleaf-spring5artifactId>
        <version>3.0.12.RELEASEversion>
    dependency>
配置web.xml
默认配置方式
注册SpringMVC的前端控制器DispatcherServlet
web.xml
<web-app xmlns="http://xmlns.jcp.org/xml/ns/javaee"
         xmlns:xsi="http://www.w3.org/2001/XMLSchema-instance"
         xsi:schemaLocation="http://xmlns.jcp.org/xml/ns/javaee http://xmlns.jcp.org/xml/ns/javaee/web-app_4_0.xsd"
         version="4.0">

	<servlet>
		<servlet-name>SpringMVCservlet-name>
        <servlet-class>org.springframework.web.servlet.DispatcherServletservlet-class>
	servlet>

	<servlet-mapping>
        <servlet-name>SpringMVCservlet-name>

        <url-pattern>/url-pattern>
	servlet-mapping>
web-app>
扩展配置方式
与默认方式相比多了一个
web.xml
<web-app xmlns="http://xmlns.jcp.org/xml/ns/javaee"
         xmlns:xsi="http://www.w3.org/2001/XMLSchema-instance"
         xsi:schemaLocation="http://xmlns.jcp.org/xml/ns/javaee http://xmlns.jcp.org/xml/ns/javaee/web-app_4_0.xsd"
         version="4.0">

    <servlet>
		<servlet-name>SpringMVCservlet-name>
		<servlet-class>org.springframework.web.servlet.DispatcherServletservlet-class>


		<init-param>

            <param-name>contextConfigLocationparam-name>

            <param-value>classpath:SpringMVC.xmlparam-value>
		init-param>

		<load-on-startup>1load-on-startup>

    servlet>

	<servlet-mapping>
            <servlet-name>SpringMVCservlet-name>

        <url-pattern>/url-pattern>
	servlet-mapping>
web-app>
创建请求控制器
由于前端控制器对浏览器发送的请求进行了统一的处理,但是具体的请求有不同的处理过程,因此需要
创建处理具体请求的类,即请求控制器
请求控制器中每一个处理请求的方法称为控制器方法
因为SpringMVC的控制器由一个POJO(普通的Java类)担任,因此需要通过@Controller注解将其标识
为一个控制层组件,交给Spring的IOC容器管理,此时SpringMVC才能够识别控制器的存在
HelloController.java
package com.atguigu.SpringMVC.controller;

import org.springframework.stereotype.Controller;
import org.springframework.web.bind.annotation.RequestMapping;

@Controller
public class HelloController {
    //@RequestMapping注解:处理请求和控制器方法之间的映射关系
    //localhost:8080/springMVC/
    @RequestMapping("/")
    public String index(){
        //将逻辑视图返回
        return "index";
    }
}
在WEB-INF/templates目录下创建index.html
DOCTYPE html>
<html lang="en">
<head>
    <meta charset="UTF-8">
    <title>Titletitle>
head>
<body>
    <h1>欢迎来到主页h1>
body>
html>
创建SpringMVC配置文件
- 在默认配置方式下:SpringMVC的配置文件默认读取
web.xml中的""+"-servlet.xml" - 在扩展配置方式下:为
例如,以下配置所对应SpringMVC的配置文件位于WEB-INF下,文件名为SpringMVCservlet.xml
SpringMVC-servlet.xml
<beans xmlns="http://www.springframework.org/schema/beans"
       xmlns:xsi="http://www.w3.org/2001/XMLSchema-instance"
       xmlns:context="http://www.springframework.org/schema/context"
       xsi:schemaLocation="http://www.springframework.org/schema/beans http://www.springframework.org/schema/beans/spring-beans.xsd http://www.springframework.org/schema/context https://www.springframework.org/schema/context/spring-context.xsd">


    <context:component-scan base-package="com.atguigu.SpringMVC.controller"/>


    <bean id="viewResolver" class="org.thymeleaf.spring5.view.ThymeleafViewResolver">

        <property name="order" value="1"/>
        <property name="characterEncoding" value="UTF-8"/>

        <property name="templateEngine">
            <bean class="org.thymeleaf.spring5.SpringTemplateEngine">

                <property name="templateResolver">
                    <bean class="org.thymeleaf.spring5.templateresolver.SpringResourceTemplateResolver">


                        <property name="prefix" value="/WEB-INF/templates/"/>

                        <property name="suffix" value=".html"/>
                        <property name="templateMode" value="HTML5"/>
                        <property name="characterEncoding" value="UTF-8" />
                    bean>
                property>
            bean>
        property>
    bean>
beans>
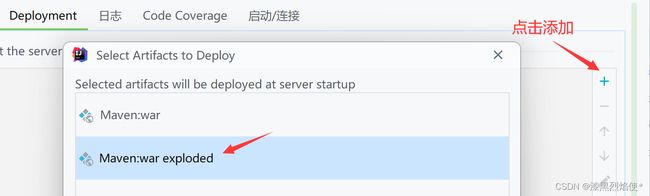
配置Tomcat

配置artifacts:
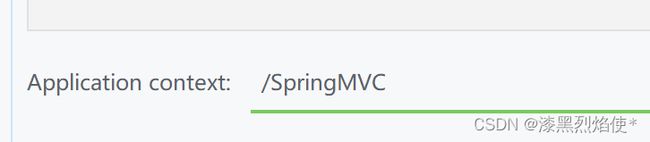
修改虚拟映射地址:
测试
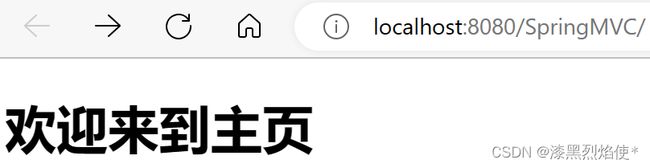
启动Tomcat,地址栏输入http://localhost:8080/SpringMVC/hello
Tomcat成功接收请求并访问到受保护目录下WEB-INF的资源templates/index.html
值得注意的是,Tomcat启动时会默认去访问
webapp/index.jsp,只有当访问不到时才会以"请求"的方式访问页面,也就是对应@RequestMapping("/")请求
路径问题
在中添加thymeleaf命名空间xmlns:th="http://www.thymeleaf.org"(可以在IDEA模板设置中添加这个语句,方便日后的使用)
index.html
DOCTYPE html>
<html lang="en" xmlns:th="http://www.thymeleaf.org">
<head>
    <meta charset="UTF-8">
    <title>Titletitle>
head>
<body>
    <h1>欢迎来到主页h1>
    <a th:href="@{/hello}">相对路径(通过Thymeleaf渲染)a>
    <a href="/hello">绝对路径(缺少上下文路径)a>
body>
html>
success.html
DOCTYPE html>
<html lang="en" xmlns:th="http://www.thymeleaf.org">
<head>
    <meta charset="UTF-8">
    <title>Titletitle>
head>
<body>
    <h1>你好,世界!h1>
body>
html>
HelloController.java
    @RequestMapping("/hello")
    public String sayHello(){
        return "success";
    }
测试结果:只有相对路径的方式才能访问得到
success.html页面
总结
浏览器发送请求
- 若请求地址符合前端控制器的
- 前端控制器会读取SpringMVC的核心配置文件,通过扫描组件找到控制器,将请求地址和控制器中**@RequestMapping注解的value属性值**进行匹配
- 若匹配成功,该注解所标识的控制器方法就是处理请求的方法。处理请求的方法需要返回一个字符串类型的视图名称,该视图名称会被视图解析器解析,加上前缀和后缀组成视图的路径,通过Thymeleaf对视图进行渲染,最终**转发(地址栏没有变)**到视图所对应页面