Angular学习之轮播图组件
首先创建轮播组件
ng g c components/imageSlider然后在index.js中配置导出。
一、创建组件
首先定义html模板
这里用到了ngfor语句,所以在ts中进行变量声明
这里在其他网站拷贝的图片。安利一波免费图片网站:https://en.freejpg.com.ar/
export interface ImageSlider{
  imgUrl: string;
  link: string;
  caption: string;
}

sliders :ImageSlider [] =[
    {
      imgUrl:
        "https://en.freejpg.com.ar/image-900/c1/c1d2/F100012189-woman_looking_towards_the_beautiful_beach_landscape_while_the_sun_rises.jpg",
      link :'',
      caption:''
    },
    {
      imgUrl:
        "https://en.freejpg.com.ar/image-900/1b/1b9d/F100012208-couple_kissing_in_front_of_the_railroad_tracks.jpg",
      link :'',
      caption:''
    },
    {
      imgUrl:
        "https://en.freejpg.com.ar/image-900/cd/cd00/F100012185-woman_enjoying_the_field_while_in_the_sun.jpg",
      link :'',
      caption:''
    },
    {
      imgUrl:
        "https://en.freejpg.com.ar/image-900/91/9175/F100011708-christmas_tree_at_night_phone_taking_photo.jpg",
      link :'',
      caption:''
    },
    {
      imgUrl:
        "https://en.freejpg.com.ar/image-900/34/3453/F100011699-cute_little_puppy_with_christmas_hat.jpg",
      link :'',
      caption:''
    }
  ]
然后进行样式编写
.container{
    position: relative;
    overflow: hidden;
}

.container .image-slider{
    display: flex;
    overflow-x: scroll;
}
.nav-section{
    position: absolute;
    bottom: 0;
    width: 100%;
    opacity: 0.5;
    color: #fff;
    background-color: #000;
    display: flex;
    justify-content: flex-end;
    align-items: stretch;
}

.nav-section .slide-button{
    display: flex;
    width: 10px;
    height: 10px;
    background-color: #fff;
    text-decoration: none;
    border-radius: 50%;
    margin: 5px;
}
然后把改组件追加到app.common.html中,
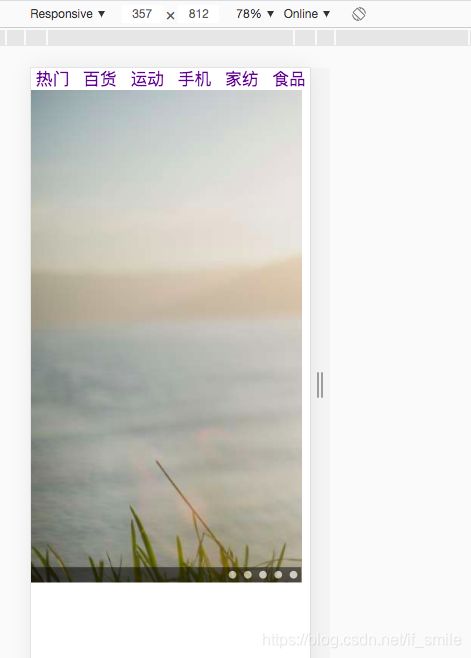
运行之后是这种效果:
二、在app.common中声明管理图片
使用父组件传值子组件功能,外部引入图片属性。
在ImageSliderComponent中添加下面的
@Input() sliders: ImageSlider[] =[];在app.component.html中添加
然后在app.common.ts中添加
imageSliders :ImageSlider [] =[
    {
      imgUrl:
        "https://en.freejpg.com.ar/image-900/c1/c1d2/F100012189-woman_looking_towards_the_beautiful_beach_landscape_while_the_sun_rises.jpg",
      link :'',
      caption:''
    },
    {
      imgUrl:
        "https://en.freejpg.com.ar/image-900/1b/1b9d/F100012208-couple_kissing_in_front_of_the_railroad_tracks.jpg",
      link :'',
      caption:''
    },
    {
      imgUrl:
        "https://en.freejpg.com.ar/image-900/cd/cd00/F100012185-woman_enjoying_the_field_while_in_the_sun.jpg",
      link :'',
      caption:''
    },
    {
      imgUrl:
        "https://en.freejpg.com.ar/image-900/91/9175/F100011708-christmas_tree_at_night_phone_taking_photo.jpg",
      link :'',
      caption:''
    },
    {
      imgUrl:
        "https://en.freejpg.com.ar/image-900/34/3453/F100011699-cute_little_puppy_with_christmas_hat.jpg",
      link :'',
      caption:''
    }
  ]
展示结果跟之前一样。
三、模板在组件中引用更改组件样式
在image-slider.component.html中给标签添加id,例如:imageSlider和image
在组件中引用如下:
由于img标签里面的id标识image是多个,所以使用@ViewChildren进行生命(image-slider.component.ts)
//  ngfor 包含则是动态,不包含则是静态
  @ViewChild('imageSlider',{static:true}) imgSlider: ElementRef;

  @ViewChildren('image') images: QueryList;
然后统一修改图片的高度如下(不推荐) image-slider.component.ts:
ngAfterViewInit():void{
    console.log(this.images);
    // 不推荐
    this.images.forEach(item => item.nativeElement.style.height="200px");

  }
更改后如下图,图片的高度更改了:
官方不推荐上面方式修改,据说会存在注入攻击(不明觉厉) 使用rd2的方式,首先引入并自动注入。
import {  Renderer2 } from '@angular/core';

constructor(private rd2: Renderer2) { }
然后把上面修改高度的代码改为下面的语句 image-slider.component.ts。
//推荐,注入攻击,会检查
    this.images.forEach(item => {
      this.rd2.setStyle(item.nativeElement,"height","200px")
    })
实现后的效果跟上图一样
四、把组件引入到app.common中统一管理
在app.common.html中引入组件添加id标识:
然后在ts中引用,因为我们知道类型,所以就可以直接声明类型
@ViewChild('imageSlider',{static:true}) imageSlider: ImageSliderComponent;引入之后,在app.common.ts中修改高度如下,因为引入的是组件,所以更改是组件的属性:
ngAfterViewInit():void{
    console.log(this.imageSlider);
    this.imageSlider.images.forEach(item => {
      this.rd2.setStyle(item.nativeElement,"height","200px")
    })
  }
实现后的效果如上图所示。
拖动tab组件会影响imageSlider组件,bug修复
实现后与之前的组件共同展示,拖动上面组件,下面组件会一起滚动。
在tab的样式中ul添加
ul{
    padding: 0;
    margin: 0;
    overflow-x: auto;   //添加这个
    display: flex;
    flex-direction: row;
}
组件优化
进入image-slider的样式文件,设置图片样式
.container img{
    width: 100%;
    height: 100%;
    object-fit: cover;
}
object-fit CSS 属性指定可替换元素的内容应该如何适应到其使用的高度和宽度确定的框。
然后设置组件的高度为父组件传入。 image-slider.component.ts
export class ImageSliderComponent implements OnInit {
@Input() sliders: ImageSlider[] =[];
@Input() sliderHeight='160px'
添加组件自动轮播,在ts文件中页面加载好后添加定时任务 image-slider.component.ts
let i=0;
setInterval(()=>{
this.rd2.setProperty(this.imgSlider.nativeElement,'scrollLeft',
((++i % this.sliders.length)*this.imgSlider.nativeElement.scrollWidth)/this.sliders.length)
},2*1000)//2秒
在css样式中添加过渡与吸附效果
.container .image-slider{
display: flex;
overflow-x: scroll;
/* 过渡 */
scroll-behavior: smooth;
/* x轴吸附,与下面图片的样式配合 */
scroll-snap-type: x mandatory;
}
.container img{
width: 100%;
height: 100%;
object-fit: cover;
/* 吸附效果 吸附起始位置 */
scroll-snap-align: start;
}
现在还有一些bug,就是自动轮播的时候,手动进行滑动会导致滑动顺序错乱。
修复手动滑动影响自动轮播bug
image-slider.component.ts

