系统学习Linux-Mariadb高可用MHA
概念
MHA(MasterHigh Availability)是一套优秀的MySQL高可用环境下故障切换和主从复制的软件。
MHA 的出现就是解决MySQL 单点的问题。
MySQL故障切换过程中,MHA能做到0-30秒内自动完成故障切换操作。
MHA能在故障切换的过程中最大程度上保证数据的一致性,以达到真正意义上的高可用。
组成
MHA manager——管理节点
MHA node——数据节点(每个节点上都需要安装)
特点
自动故障切换过程中,MHA试图从宕机的主服务器上保存二进制日志,最大程度的保证数据不丢失
使用半同步复制,可以大大降低数据丢失的风险,如果只有一个slave已经收到了最新的二进制日志,MHA可以将最新的二进制日志应用于其他所有的slave服务器上,因此可以保证所有节点的数据一致性
目前MHA支持一主多从架构,最少三台服务,即一主两从
工作原理
从宕机崩溃的master 保存二进制日志事件(binlog events);
识别含有最新的更新slave日志
应用差异的中继日志(relay log)到其他的slave
应用从master保存的二进制日志事件
提升一个slave为新的master
使其他的slave连接新的master进行复制
| 案例 | |||
| 192.168.31.24 | manager(MHA) | mgt | |
| 192.168.31.25 | master | master | node |
| 192.168.31.26 | slave | slave1 | |
| 192.168.31.27 | slave | slave2 | |
搭建实验环境4台虚拟机分别配置基础环境与ip
修改每台虚拟机主机名方便实验
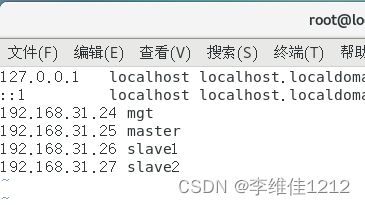
修改etc/hosts文件
vim /etc/hosts
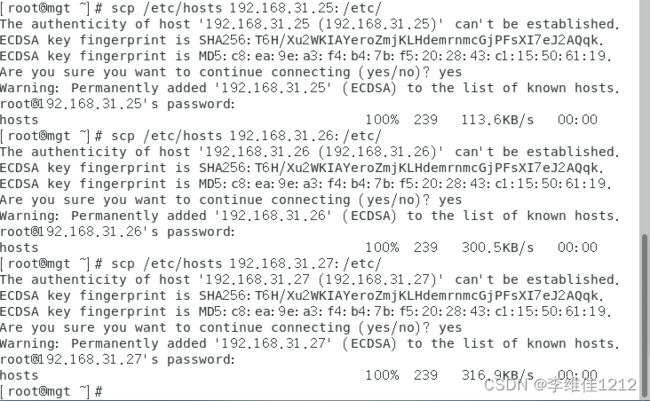
配置所有hosts的节点后scp到其他虚拟机
scp /etc/hosts ip:/etc
去每台虚拟机验证是否存在hosts内容
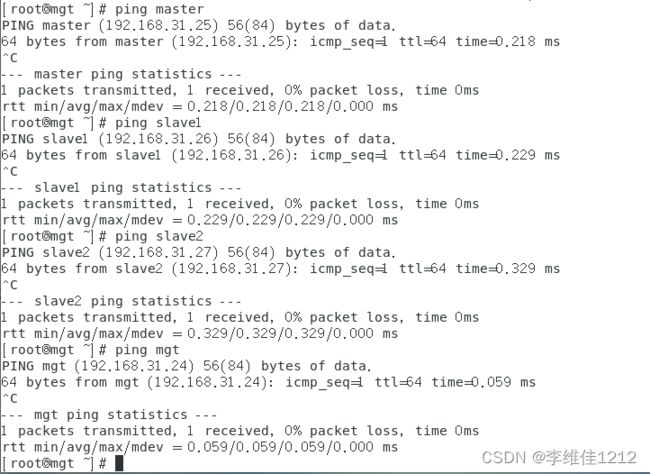
验证连通性
一定每台机器都要测试
配置ssh免密登陆(每台ssh-keygen)
[root@mgt ~]# ssh-keygen
Generating public/private rsa key pair.
Enter file in which to save the key (/root/.ssh/id_rsa):
Enter passphrase (empty for no passphrase):
Enter same passphrase again:
Your identification has been saved in /root/.ssh/id_rsa.
Your public key has been saved in /root/.ssh/id_rsa.pub.
The key fingerprint is:
SHA256:OFdoPhxC3bHTgT9y7PN+z0Xr6pcpfB4fwz8tzsDfDwM root@mgt
The key's randomart image is:
+---[RSA 2048]----+
|      .. ..o.    |
|     .  ..oo .   |
|      . + +o.    |
|       * o..=    |
|      o S  +E.  .|
|       o . .o....|
|            +oo*=|
|             *+@X|
|            .=@=@|
+----[SHA256]-----+

[root@mgt]# cd ./ssh
[root@mgt .ssh]# ls
id_rsa  id_rsa.pub  known_hosts
将循环迭代25、26和27,并分别执行ssh-copy-id命令来将公钥复制到
远程主机192.168.31.$i中的root用户下
for i in 25 26 27;do ssh-copy-id [email protected].$i;done
测试每台主机的免密并一定把yes输入一遍
ssh-keygen(每台虚拟机)
虚拟机
mgt:for i in 25 26 27;do ssh-copy-id [email protected].$i;done
master:for i in 24 26 27;do ssh-copy-id [email protected].$i;done
slave1:for i in 24 25 27;do ssh-copy-id [email protected].$i;done
slave2:for i in 24 26 25;do ssh-copy-id [email protected].$i;done
| mgt虚拟机需要远程的ip与名 | ssh master/slave1/slave2 ssh 192.168.31.25/26/27 |
| master虚拟机需要远程的ip与名 | ssh mgt/slave1/slave2 ssh 192.168.31.24/26/27 |
| slave1虚拟机需要远程的ip与名 | ssh mgt/master/slave2 ssh 192.168.31.24/25/27 |
| slave2虚拟机需要远程的ip与名 | ssh mgt/master/slave1 ssh 192.168.31.24/25/26 |
ssh master/slave1/slave2 与 ssh 192.168.31.25/26/27
安装mariadb并启动
搭配master配置
重启
systemctl restart mariadb
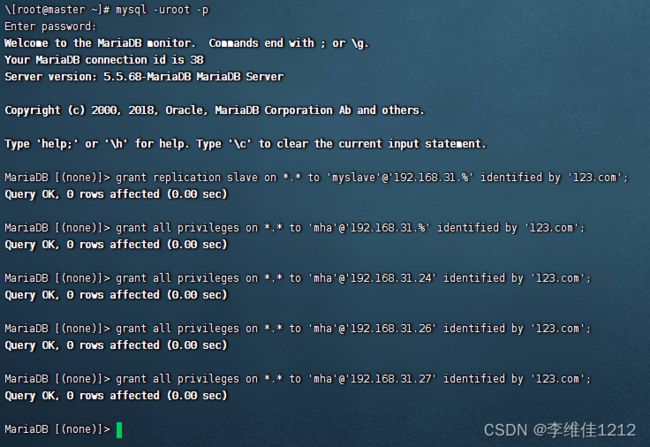
添加用户权限
grant replication slave on *.* to 'myslave'@'192.168.31.%' identified by '123.com';
grant all privileges on *.* to 'mha'@'192.168.31.%' identified by '123.com';
grant all privileges on *.* to 'mha'@'192.168.31.24' identified by '123.com';
grant all privileges on *.* to 'mha'@'192.168.31.26' identified by '123.com';
grant all privileges on *.* to 'mha'@'192.168.31.27' identified by '123.com';
slave1\2服务器进行
vim /etc/my.conf
slave1赋予权限
mysql -e "grant replication slave on *.* to 'myslave'@'192.168.31.%' identified by '123.com';"
mysql -e "grant all privileges on *.* to 'mha'@'192.168.31.%' identified by '123.com';"
mysql -e "grant all privileges on *.* to 'mha'@'192.168.31.24' identified by '123.com';"
mysql -e "grant all privileges on *.* to 'mha'@'192.168.31.25' identified by '123.com';"
mysql -e "grant all privileges on *.* to 'mha'@'192.168.31.27' identified by '123.com';"
slave2赋予权限
mysql -e "grant replication slave on *.* to 'myslave'@'192.168.31.%' identified by '123.com';"
mysql -e "grant all privileges on *.* to 'mha'@'192.168.31.%' identified by '123.com';"
mysql -e "grant all privileges on *.* to 'mha'@'192.168.31.24' identified by '123.com';"
mysql -e "grant all privileges on *.* to 'mha'@'192.168.31.25' identified by '123.com';"
mysql -e "grant all privileges on *.* to 'mha'@'192.168.31.26' identified by '123.com';"
登陆Mysql绑定主
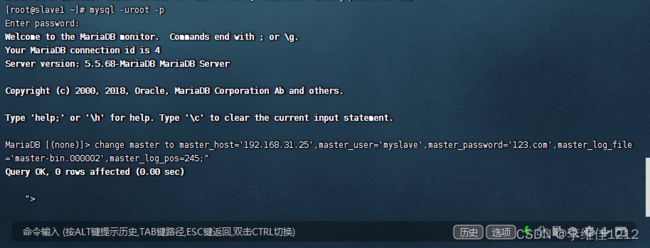
change master to master_host='192.168.31.25',master_user='myslave',master_password='123.com',master_log_file='master-bin.000002',master_log_pos=326;"
slave start;
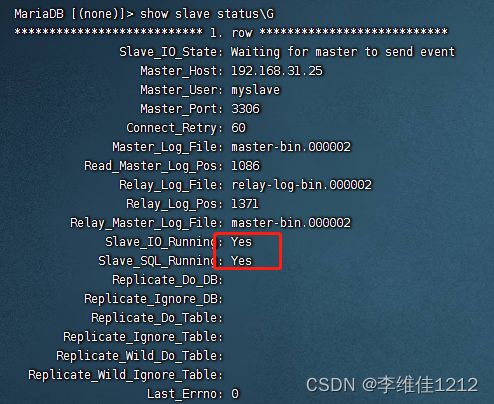
show slave status\G
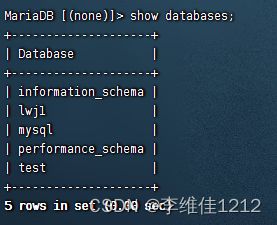
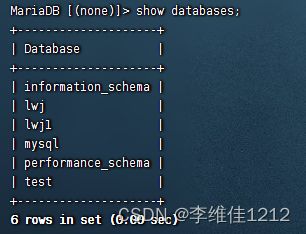
master创建数据库测试
create database lwj1;
slave1/2查看是否存在
MHA安装
所有节点安装perl环境(安装两次更新成统一版本)
yum install epel-release -y
更新完后安装编译
yum -y install perl-DBD-MySQL perl-ExtUtils-MakeMaker perl-Config-Tiny perl-Log-Dispatch perl-Parallel-ForkManager perl-Time-HiRes perl-CPAN
所有节点安装node包(如果有包导入进去解压安装)
tar xf mha4mysql-node-0.57.tar.gz
cd mha4mysql-node-0.57
perl Makefile.PL && make && make install
验证看到脚本就可以 原始没脚本
cd /usr/local/ bin
其他虚拟机也安装以上所有
安装manager(只有mgt服务需要)
tar xf mha4mysql-manager-0.57.tar.gz
cd /root/mha4mysql-manager-0.57
perl Makefile.PL && make && make install
编译后复制脚本到usr/local/bin
cp sample/scripts/master_ip_failover /usr/local/bin/
cp sample/scripts/master_ip_online_change /usr/local/bin/
配置文件建立
mkdir /etc/masterha
vim /etc/masterha/app1.cnf
可以当做日后模板文件
[server default]
manager_log=/var/log/masterha/app1/manager.log
manager_workdir=/var/log/masterha/app1
master_binlog_dir=/var/lib/mysql
master_ip_failover_script=/usr/local/bin/master_ip_failover
master_ip_online_change_script=/usr/local/bin/master_ip_online_change
password=123.com
ping_interval=1
remote_workdir=/tmp
repl_password=123.com
repl_user=myslave
secondary_check_script=/usr/local/bin/masterha_secondary_check -s 192.168.31.26 -s 192.168.31.27
shutdown_script=""
ssh_user=root
user=mha

[server1]
hostname=192.168.31.25
port=3306

[server2]
candidate_master=1
check_repl_delay=0
hostname=192.168.31.26
port=3306

[server3]
hostname=192.168.31.27
port=3306
修改master_ip_failover脚本
cd /usr/local/bin
删除 master_ip_failover 自己写入准备好的脚本内容 不然容易报错
vim master_ip_failover

#!/usr/bin/env perl
use strict;
use warnings FATAL => 'all';

use Getopt::Long;

my (
$command, $ssh_user, $orig_master_host, $orig_master_ip,
$orig_master_port, $new_master_host, $new_master_ip, $new_master_port
);
#############################添加内容部分#########################################
my $vip = '192.168.31.100';								#指定vip的地址
my $brdc = '192.168.31.255';								#指定vip的广播地址
my $ifdev = 'ens33';										#指定vip绑定的网卡
my $key = '1';												#指定vip绑定的虚拟网卡序列号
my $ssh_start_vip = "/sbin/ifconfig ens33:$key $vip";		#代表此变量值为ifconfig ens33:1 192.168.184.200
my $ssh_stop_vip = "/sbin/ifconfig ens33:$key down";		#代表此变量值为ifconfig ens33:1 192.168.184.200 down
my $exit_code = 0;											#指定退出状态码为0
#my $ssh_start_vip = "/usr/sbin/ip addr add $vip/24 brd $brdc dev $ifdev label $ifdev:$key;/usr/sbin/arping -q -A -c 1 -I $ifdev $vip;iptables -F;";
#my $ssh_stop_vip = "/usr/sbin/ip addr del $vip/24 dev $ifdev label $ifdev:$key";
##################################################################################
GetOptions(
'command=s' => \$command,
'ssh_user=s' => \$ssh_user,
'orig_master_host=s' => \$orig_master_host,
'orig_master_ip=s' => \$orig_master_ip,
'orig_master_port=i' => \$orig_master_port,
'new_master_host=s' => \$new_master_host,
'new_master_ip=s' => \$new_master_ip,
'new_master_port=i' => \$new_master_port,
);

exit &main();

sub main {

print "\n\nIN SCRIPT TEST====$ssh_stop_vip==$ssh_start_vip===\n\n";

if ( $command eq "stop" || $command eq "stopssh" ) {

my $exit_code = 1;
eval {
print "Disabling the VIP on old master: $orig_master_host \n";
&stop_vip();
$exit_code = 0;
};
if ($@) {
warn "Got Error: $@\n";
exit $exit_code;
}
exit $exit_code;
}
elsif ( $command eq "start" ) {

my $exit_code = 10;
eval {
print "Enabling the VIP - $vip on the new master - $new_master_host \n";
&start_vip();
$exit_code = 0;
};
if ($@) {
warn $@;
exit $exit_code;
}
exit $exit_code;
}
elsif ( $command eq "status" ) {
print "Checking the Status of the script.. OK \n";
exit 0;
}
else {
&usage();
exit 1;
}
}
sub start_vip() {
`ssh $ssh_user\@$new_master_host \" $ssh_start_vip \"`;
}
## A simple system call that disable the VIP on the old_master
sub stop_vip() {
`ssh $ssh_user\@$orig_master_host \" $ssh_stop_vip \"`;
}

sub usage {
print
"Usage: master_ip_failover --command=start|stop|stopssh|status --orig_master_host=host --orig_master_ip=ip --orig_master_port=port --new_master_host=host --new_master_ip=ip --new_master_port=port\n";
}
测试MHA
masterha_check_ssh --conf=/etc/masterha/app1.cnf
masterha_check_repl --conf=/etc/masterha/app1.cnf
启动命令
nohup masterha_manager --conf=/etc/masterha/app1.cnf --remove_dead_master_conf --ignore_last_failover < /dev/null > /var/log/masterha/app1/manager.log 2>&1 &
查看命令jobs
此时会master会出现一个ens33:1 192.168.31.100的虚拟地址
停用master后测试
此时可以看到ens33:1跳到了slave1
高可用成功
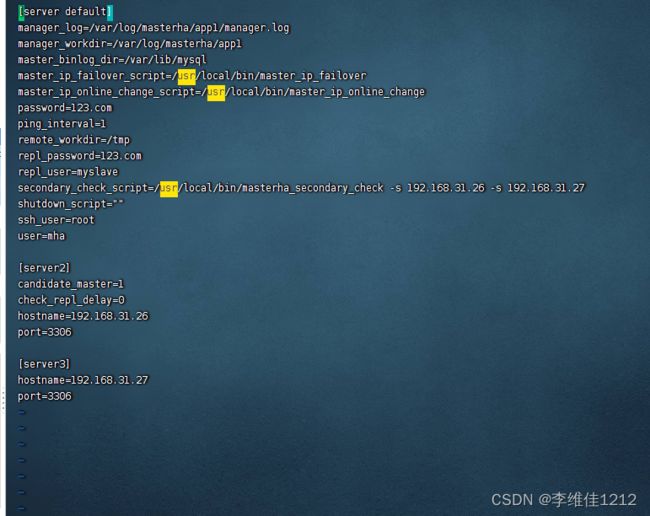
再次查看/etc/masterha/app1.cnf
此时配置文件已被脚本修改slave1的配置被删除
故障恢复
修改app1.cnf启动配置
添加master主机配置信息
分别在slave上重新指定master主机及binlog日志同步信息


