Ubuntu下通过源码编译方式升级内核
1. 下载内核源码包及补丁包
(1)查看当前Ubuntu系统的内核版本。
root@ubuntu:/usr/src# uname -r
5.4.0-109-generic(2)选择与当前内核版本接近的内核源码进行下载。
root@ubuntu:/usr/src# wget https://launchpad.net/ubuntu/+archive/primary/+sourcefiles/linux/5.4.0-109.123/linux_5.4.0.orig.tar.gz(3)下载补丁包和dsc文件。
root@ubuntu:/usr/src# wget https://launchpad.net/ubuntu/+archive/primary/+sourcefiles/linux/5.4.0-109.123/linux_5.4.0-109.123.diff.gzroot@ubuntu:/usr/src# wget https://launchpad.net/ubuntu/+archive/primary/+sourcefiles/linux/5.4.0-109.123/linux_5.4.0-109.123.dsc注:
- 内核版本要和补丁一致。
- 选择一个与当前内核版本接近并且更新的补丁下载(系统启动时会自动选择版本更高的内核)。
2. 解压源码并打入补丁
(1) 解压并解包源码包(xxx.tar.gz文件)。
root@ubuntu:/usr/src# tar zxvf linux_5.4.0.orig.tar.gz解压之后得到一个xxx的目录。
root@ubuntu:/usr/src# ls
linux-5.4                    linux_5.4.0-109.123.dsc  linux-5.4.10.tar.gz              linux-headers-5.4.0-109-generic  linux-hwe-5.4-headers-5.4.0-107  linux-hwe-5.4-headers-5.4.0-84
linux_5.4.0-109.123.diff.gz  linux_5.4.0.orig.tar.gz  linux-headers-5.4.0-107-generic  linux-headers-5.4.0-84-generic   linux-hwe-5.4-headers-5.4.0-109
(2)进入解压后的源码目录。
root@ubuntu:/usr/src# cd linux-5.4/(3)将补丁文件打入源码包。
root@ubuntu:/usr/src/linux-5.4# zcat ../linux_5.4.0-109.123.diff.gz | patch -p1注意:此时的路径为解压后的内核源码包路径。
3. 配置及编译内核
(1)备份启动文件。
root@ubuntu:/usr/src/linux-5.4# cp /boot/grub/grub.cfg /boot/grub/grub.cfg.bak(2)安装编译环境软件。
sudo apt install libncurses5-dev
sudo apt install libssl-dev
sudo apt install build-essential
sudo apt install openssl
sudo apt install pkg-config
sudo apt install libc6-dev
sudo apt install bison
sudo apt install flex
sudo apt install libelf-dev
sudo apt install zlibc
sudo apt install minizip
sudo apt install libidn11-dev
sudo apt install libidn11
(3)净化源码目录。
root@ubuntu:/usr/src/linux-5.4# make mrproper(4)复制原内核配置,即拷贝config文件。
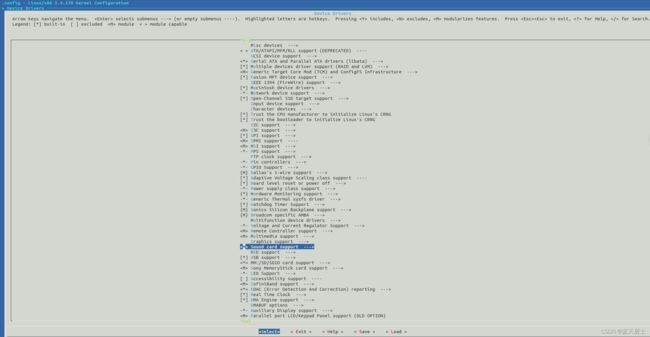
root@ubuntu:/usr/src/linux-5.4# cp /boot/config-5.4.0-109-generic ./.config(5)通过“make menuconfig”命令配置不同于标准版的内核选项(这一步是根本目的)。
(6)编译内核。
root@ubuntu:/usr/src/linux-5.4# make -j10注:
- 直接make,就是make all,已经包含make modules了。
- 如果编译过程中报错,则根据错误信息自行搜索解决方法;或者选择更为接近的内核版本,重新执行步骤1、2以及3.(3)以后的步骤。
如笔者实际编译时遇到以下错误:
……
CC [M] drivers/scsi/53c700.o
LD [M] drivers/scsi/hv_storvsc.o
CC drivers/scsi/scsi_sysfs.o
AR drivers/scsi/built-in.a
AR drivers/built-in.a
GEN .version
CHK include/generated/compile.h
LD vmlinux.o
MODPOST vmlinux.o
MODINFO modules.builtin.modinfo
BTF: .tmp_vmlinux.btf: pahole (pahole) is not available
Failed to generate BTF for vmlinux
Try to disable CONFIG_DEBUG_INFO_BTF
Makefile:1127: recipe for target 'vmlinux' failed
make: *** [vmlinux] Error 1
root@ubuntu:/usr/src/linux-5.4#
解决方法:
root@ubuntu:/usr/src/linux-5.4# apt install dwarves之后再次运行“make -j10”命令,上边遇到的错误不存在了,此问题解决。
(7)安装模块。
root@ubuntu:/usr/src/linux-5.4# make modules_install安装modules到/lib/modules/下。此操作之后,/lib/modules/目录会新生成一个新内核版本号文件。
安装前:
root@ubuntu:/usr/src/linux-5.4# ls /lib/modules/
5.4.0-107-generic  5.4.0-109-generic  5.4.0-84-generic
安装后:
root@ubuntu:/home/ph# ls /lib/modules/
5.4.0-107-generic  5.4.0-109-generic  5.4.0-84-generic  5.4.178
(8)安装内核。
root@ubuntu:/usr/src/linux-5.4# make install
sh ./arch/x86/boot/install.sh 5.4.178 arch/x86/boot/bzImage \
	System.map "/boot"
run-parts: executing /etc/kernel/postinst.d/apt-auto-removal 5.4.178 /boot/vmlinuz-5.4.178
run-parts: executing /etc/kernel/postinst.d/initramfs-tools 5.4.178 /boot/vmlinuz-5.4.178
update-initramfs: Generating /boot/initrd.img-5.4.178
run-parts: executing /etc/kernel/postinst.d/unattended-upgrades 5.4.178 /boot/vmlinuz-5.4.178
run-parts: executing /etc/kernel/postinst.d/update-notifier 5.4.178 /boot/vmlinuz-5.4.178
run-parts: executing /etc/kernel/postinst.d/xx-update-initrd-links 5.4.178 /boot/vmlinuz-5.4.178
I: /vmlinuz.old is now a symlink to boot/vmlinuz-5.4.0-109-generic
I: /initrd.img.old is now a symlink to boot/initrd.img-5.4.0-109-generic
I: /vmlinuz is now a symlink to boot/vmlinuz-5.4.178
I: /initrd.img is now a symlink to boot/initrd.img-5.4.178
run-parts: executing /etc/kernel/postinst.d/zz-update-grub 5.4.178 /boot/vmlinuz-5.4.178
Sourcing file `/etc/default/grub'
Generating grub configuration file ...
Found linux image: /boot/vmlinuz-5.4.178
Found initrd image: /boot/initrd.img-5.4.178
Found linux image: /boot/vmlinuz-5.4.0-109-generic
Found initrd image: /boot/initrd.img-5.4.0-109-generic
Found linux image: /boot/vmlinuz-5.4.0-107-generic
Found initrd image: /boot/initrd.img-5.4.0-107-generic
Found linux image: /boot/vmlinuz-5.4.0-84-generic
Found initrd image: /boot/initrd.img-5.4.0-84-generic
Found memtest86+ image: /boot/memtest86+.elf
Found memtest86+ image: /boot/memtest86+.bin
done
root@ubuntu:/usr/src/linux-5.4#
注:安装bzImage到/boot/下,并且会它会根据/boot/下的kernel版本信息自动将新安装的kernel的启动项加到/boot/grub/grub.cfg中。
(9)更新grub。
root@ubuntu:/usr/src/linux-5.4# update-grub
Sourcing file `/etc/default/grub'
Generating grub configuration file ...
Found linux image: /boot/vmlinuz-5.4.178
Found initrd image: /boot/initrd.img-5.4.178
Found linux image: /boot/vmlinuz-5.4.0-109-generic
Found initrd image: /boot/initrd.img-5.4.0-109-generic
Found linux image: /boot/vmlinuz-5.4.0-107-generic
Found initrd image: /boot/initrd.img-5.4.0-107-generic
Found linux image: /boot/vmlinuz-5.4.0-84-generic
Found initrd image: /boot/initrd.img-5.4.0-84-generic
Found memtest86+ image: /boot/memtest86+.elf
Found memtest86+ image: /boot/memtest86+.bin
done
(10)重启。
root@ubuntu:/usr/src/linux-5.4# reboot注:步骤3中以上步骤均需要有root权限。笔者直接切换到了root用户,如果是普通用户,则步骤3中的所有子步骤命令前均需要加sudo。
(11)系统重新启动后,查看内核版本。
ph@ubuntu:~$ uname -r
5.4.178
至此,通过源码编译方式升级内核的工作就全部完成了!后续可以测试此内核的新特性了。
总结:
(1)选择版本接近的内核源码尤为重要,这样编译过程中才能有比较少的编译错误;
(2)有时候看似编译通过了,应该再运行一次编译命令,如:make、make modules_install等,可能实际上并没有通过;
(3)遇到问题的时候,需要到网上搜索,或者根据提示自行解决,编译过程并不是一帆风顺、一蹴而就的。
