Springboot+Vue前后端分离项目-管理系统-上
目录
一.项目介绍
1.技术栈
2.页面原型
二.创建数据库
1.用户表
2.角色表
3.菜单表
4.用户角色映射表
5.角色菜单映射表
三.前端环境搭建
1.Node环境搭建
2.创建项目
3.项目初始化
(1).安装依赖
(2).测试是否正常启动
4.配置修改
(1).修改首页名称项
(2).修改登录项
(3).最终效果
(4).个性化定制 (可省略这一步)
5.下划菜单修改
6.更改图标
四.后端环境搭建
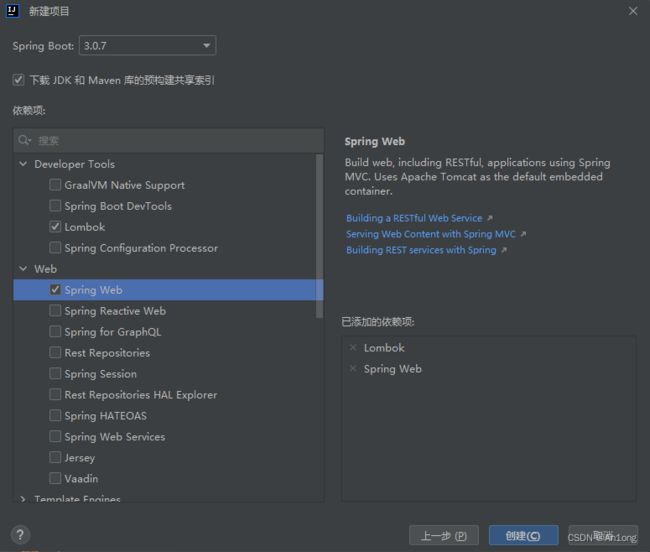
1.创建项目
引入依赖
修改配置
测试启动类
2.接口梳理
3.创建代码生成器
最后一步:
4.公共响应类
五.登录页接口实现
1.登录接口
测试
编辑
2.获取用户信息接口
测试
3.注销接口
测试
六.前后端对接
跨域
一.项目介绍
1.技术栈
- 前端技术
- Vue 前端框架
- Vuex 全局状态管理框架
- ElementUI 前端UI框架
- Axios 前端HTTP框架
- vue-element-admin 项目脚手架
- 后端技术
- Springboot 容器+MVC框架
- MyBatis ORM框架
- MyBatis-Plus Mybatis增强工具
- Redis 非关系型数据库
2.页面原型
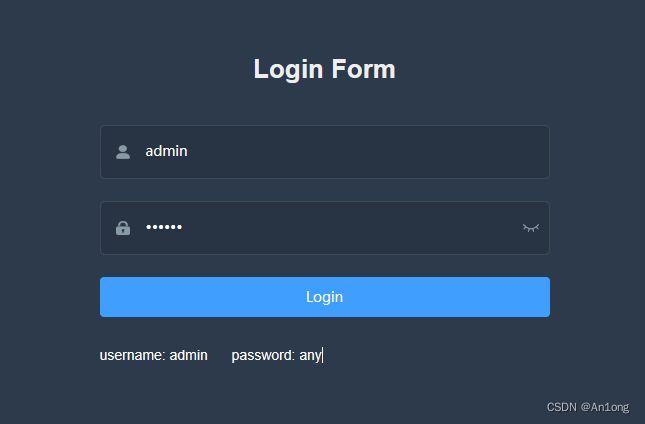
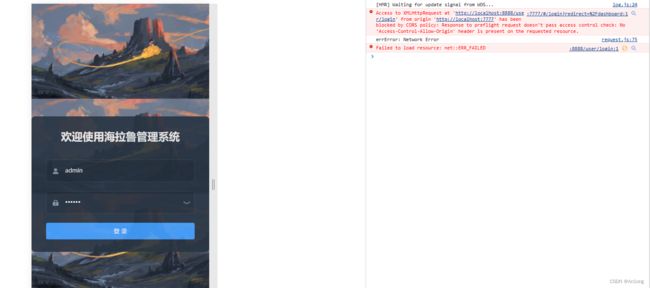
登陆页面
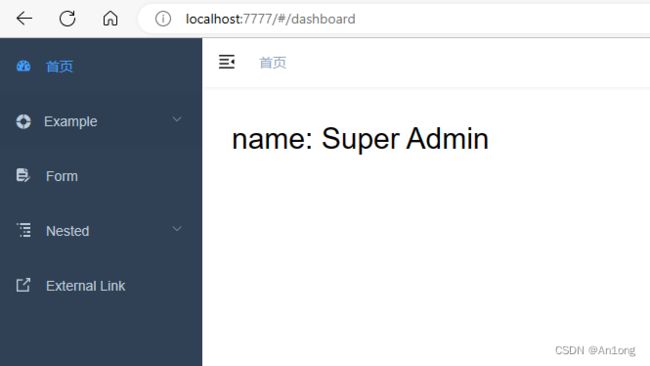
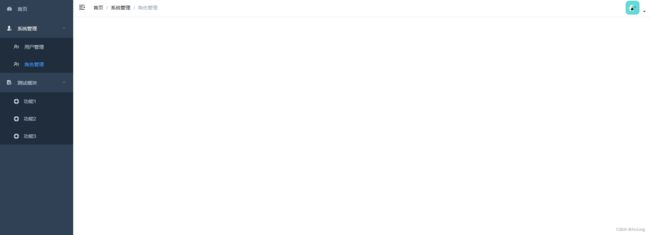
管理界面
二.创建数据库
用户表
角色表
菜单表
用户角色映射表
角色菜单映射表
1.用户表
CREATE TABLE `x_user` (
  `id` int(11) NOT NULL AUTO_INCREMENT,
  `username` varchar(50) NOT NULL,
  `password` varchar(100) DEFAULT NULL,
  `email` varchar(50) DEFAULT NULL,
  `phone` varchar(20) DEFAULT NULL,
  `status` int(1) DEFAULT NULL,
  `avatar` varchar(200) DEFAULT NULL,
   `deleted` INT(1) DEFAULT 0,
  PRIMARY KEY (`id`)
) ENGINE=InnoDB AUTO_INCREMENT=3 DEFAULT CHARSET=utf8;

insert into `x_user` (`id`, `username`, `password`, `email`, `phone`, `status`, `avatar`, `deleted`) values('1','admin','123456','[email protected]','18677778888','1','https://wpimg.wallstcn.com/f778738c-e4f8-4870-b634-56703b4acafe.gif','0');
insert into `x_user` (`id`, `username`, `password`, `email`, `phone`, `status`, `avatar`, `deleted`) values('2','zhangsan','123456','[email protected]','13966667777','1','https://wpimg.wallstcn.com/f778738c-e4f8-4870-b634-56703b4acafe.gif','0');
insert into `x_user` (`id`, `username`, `password`, `email`, `phone`, `status`, `avatar`, `deleted`) values('3','lisi','123456','[email protected]','13966667778','1','https://wpimg.wallstcn.com/f778738c-e4f8-4870-b634-56703b4acafe.gif','0');
insert into `x_user` (`id`, `username`, `password`, `email`, `phone`, `status`, `avatar`, `deleted`) values('4','wangwu','123456','[email protected]','13966667772','1','https://wpimg.wallstcn.com/f778738c-e4f8-4870-b634-56703b4acafe.gif','0');
insert into `x_user` (`id`, `username`, `password`, `email`, `phone`, `status`, `avatar`, `deleted`) values('5','zhaoer','123456','[email protected]','13966667776','1','https://wpimg.wallstcn.com/f778738c-e4f8-4870-b634-56703b4acafe.gif','0');
insert into `x_user` (`id`, `username`, `password`, `email`, `phone`, `status`, `avatar`, `deleted`) values('6','songliu','123456','[email protected]','13966667771','1','https://wpimg.wallstcn.com/f778738c-e4f8-4870-b634-56703b4acafe.gif','0');
2.角色表
CREATE TABLE `x_role` (
  `role_id` int(11) NOT NULL AUTO_INCREMENT,
  `role_name` varchar(50) DEFAULT NULL,
  `role_desc` varchar(100) DEFAULT NULL,
  PRIMARY KEY (`role_id`)
) ENGINE=InnoDB AUTO_INCREMENT=4 DEFAULT CHARSET=utf8mb4;

insert into `x_role` (`role_id`, `role_name`, `role_desc`) values('1','admin','超级管理员');
insert into `x_role` (`role_id`, `role_name`, `role_desc`) values('2','hr','人事专员');
insert into `x_role` (`role_id`, `role_name`, `role_desc`) values('3','normal','普通员工');
3.菜单表
CREATE TABLE `x_menu` (
  `menu_id` int(11) NOT NULL AUTO_INCREMENT,
  `component` varchar(100) DEFAULT NULL,
  `path` varchar(100) DEFAULT NULL,
  `redirect` varchar(100) DEFAULT NULL,
  `name` varchar(100) DEFAULT NULL,
  `title` varchar(100) DEFAULT NULL,
  `icon` varchar(100) DEFAULT NULL,
  `parent_id` int(11) DEFAULT NULL,
  `is_leaf` varchar(1) DEFAULT NULL,
  `hidden` tinyint(1) DEFAULT NULL,
  PRIMARY KEY (`menu_id`)
) ENGINE=InnoDB AUTO_INCREMENT=12 DEFAULT CHARSET=utf8mb4;


insert  into `x_menu`(`menu_id`,`component`,`path`,`redirect`,`name`,`title`,`icon`,`parent_id`,`is_leaf`,`hidden`) values (1,'Layout','/user','/user/list','userManage','用户管理','userManage',0,'N',0),(2,'user/user','list',NULL,'userList','用户列表','userList',1,'Y',0),(3,'user/role','role',NULL,'roleList','角色列表','role',1,'Y',0),(4,'user/permission','permission',NULL,'permissionList','权限列表','permission',1,'Y',0);
4.用户角色映射表
CREATE TABLE `x_user_role` (
                               `id` int(11) NOT NULL AUTO_INCREMENT,
                               `user_id` int(11) DEFAULT NULL,
                               `role_id` int(11) DEFAULT NULL,
                               PRIMARY KEY (`id`)
) ENGINE=InnoDB AUTO_INCREMENT=5 DEFAULT CHARSET=utf8mb4;

insert into `x_user_role` (`id`, `user_id`, `role_id`) values('1','1','1');
5.角色菜单映射表
CREATE TABLE `x_role_menu` (
  `id` int(11) NOT NULL AUTO_INCREMENT,
  `role_id` int(11) DEFAULT NULL,
  `menu_id` int(11) DEFAULT NULL,
  PRIMARY KEY (`id`)
) ENGINE=InnoDB AUTO_INCREMENT=5 DEFAULT CHARSET=utf8mb4;
三.前端环境搭建
1.Node环境搭建
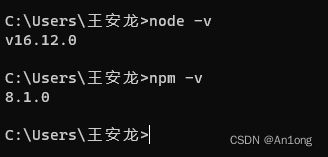
版本不要超过16.12.0,因为vue-admin-template不支持最新版本的Node18
如果你没有安装,安装看这里
2.创建项目
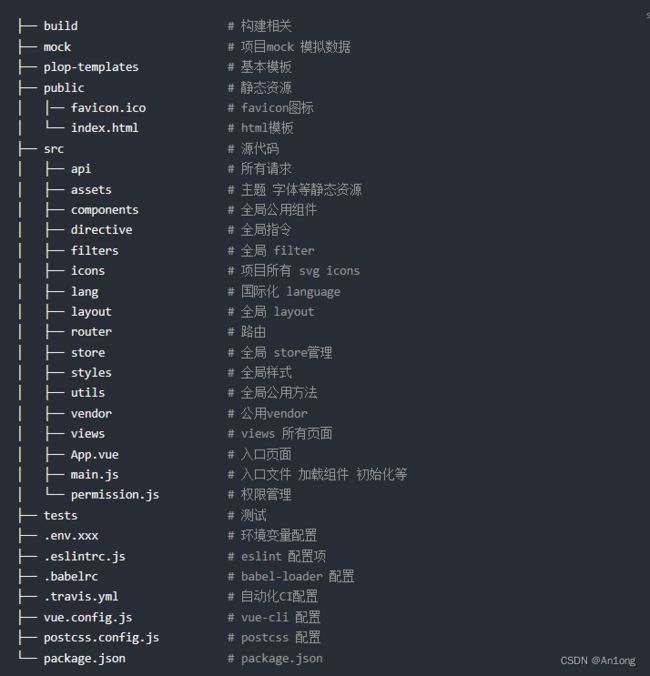
打开模板vue-admin-template,修改为自己的项目名字 ,这个项目会为你生成一个完整的开发框架
3.项目初始化
(1).安装依赖
安装淘宝镜像

npm config set registry http://registry.npm.taobao.org/

安装依赖

npm install
(2).测试是否正常启动
npm run dev4.配置修改
(1).修改首页名称项
- vue.config.js 修改端口、语法校验、浏览器默认开关
- src\settings.js 修改项目展示标题
- scr\router\Index.js 修改项目页面标题
vue.config.js
- port:项目启动占用的端口
- lintOnsave:语法校验,建议关闭,不然有时候多写个空格逗号也会莫名报错
- open:自动打开页面,可关可不关
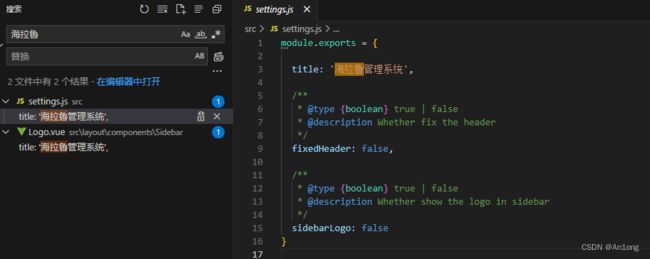
settings.js
在搜索框中搜索Vue Admin Template,然后替换,也可以直接去settings.js文件中修改
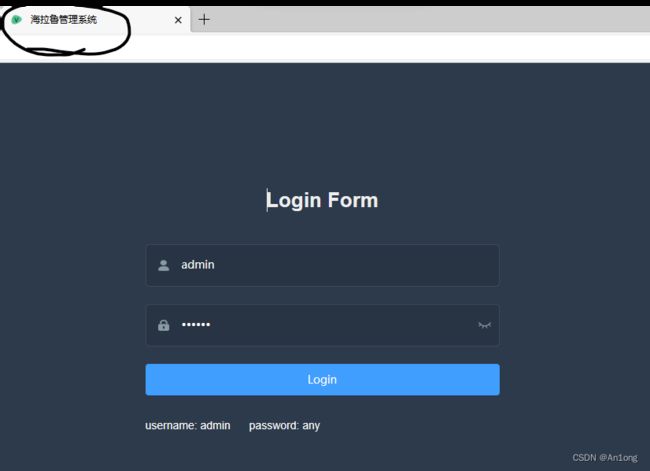
修改完之后是这个样子
对应这里
router\Index.js
对应这里
(2).修改登录项
在src\views\login\index.vue中修改
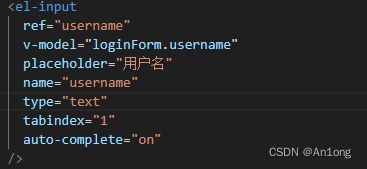
我们可以看到以下属性
- login
(3).最终效果
(4).个性化定制 (可省略这一步)
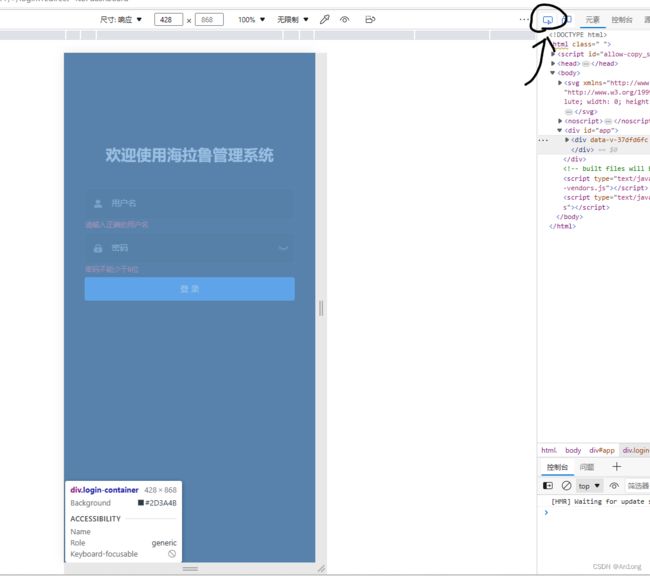
如何查看组件的样式选择器是什么?
右键检查,点击右上角
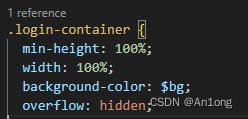
可以看到背景板的样式选择器是.login-container
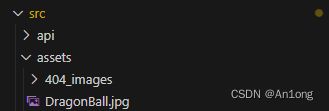
我们首先将准备好的图片放入assets中,然后再选择器下面加上其URL路径
  background-image: url('../../assets/DragonBall.jpg');
  //整张平铺100%
  background-size: 100%;
效果:
修改一下登录框的位置,并给它来个背景板框起来,让他整齐一点
  display: flex;
  align-items: center;

  .login-form {
    position: relative;
    width: 520px;
    max-width: 100%;
    padding: 35px 35px 0;
    margin: 0 auto;
    overflow: hidden;
    //为登录框部分添加一个背景色板
    background-color: #283443;
    //将四角改为圆弧,好看一点
    border-radius: 8px;
    //添加一点透明度
    opacity: 0.9;
  }
效果
这部分的完整代码如下
.login-container {
  min-height: 100%;
  width: 100%;
  background-color: $bg;
  overflow: hidden;

  background-image: url('../../assets/DragonBall.jpg');
  //整张平铺100%
  background-size: 100%;

  display: flex;
  align-items: center;

  .login-form {
    position: relative;
    width: 520px;
    max-width: 100%;
    padding: 35px 35px 0;
    margin: 0 auto;
    overflow: hidden;
    //为登录框部分添加一个背景色板
    background-color: #283443;
    //将四角改为圆弧,好看一点
    border-radius: 8px;
    //添加一点透明度
    opacity: 0.9;
  }
}
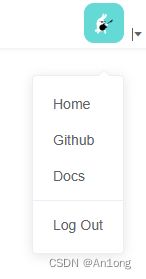
5.下划菜单修改
src\layout\components\Navbar.vue
6.更改图标
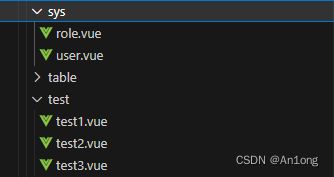
- 在src\views目录下创建sys模块目录,test模块目录
- 在sys下创建user.vue,role.vue两个组件文件
- 在test下创建test1.vue,test2.vue,test3.vue
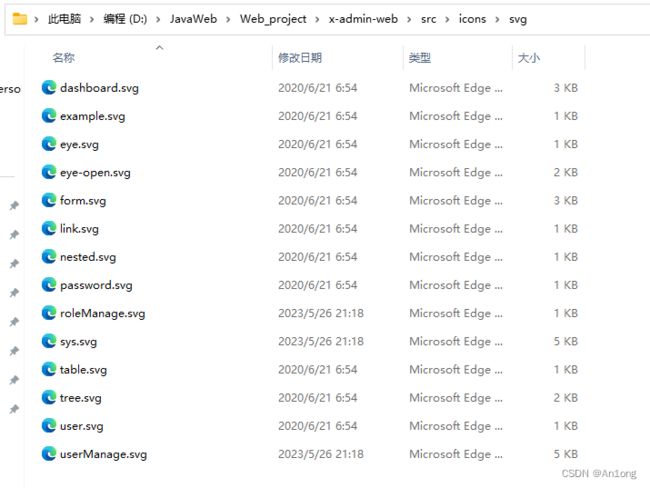
将自己准备好的图标放在src\icons\svg目录下
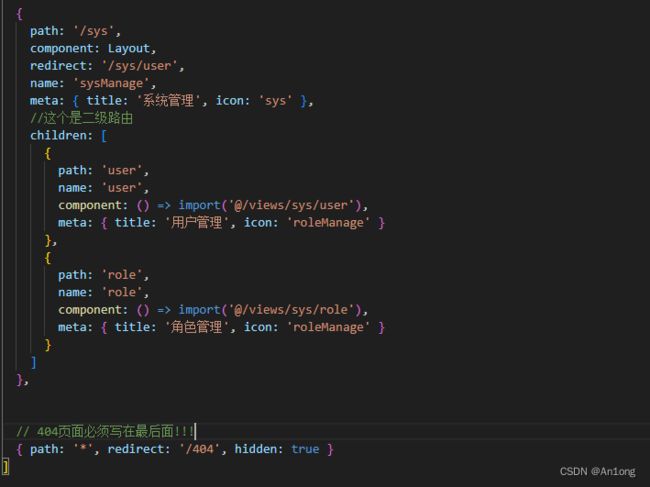
然后再router中修改
效果
以此为基础,创建多个让页面好看点,
这部分的全部路由代码为
{
    path: '/login',
    component: () => import('@/views/login/index'),
    hidden: true
  },

  {
    path: '/404',
    component: () => import('@/views/404'),
    hidden: true
  },

  {
    path: '/',
    component: Layout,
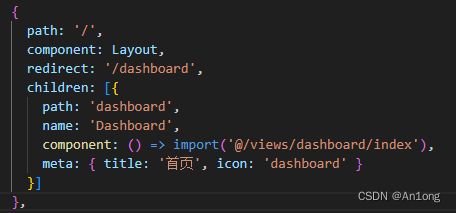
    redirect: '/dashboard',
    children: [{
      path: 'dashboard',
      name: 'Dashboard',
      component: () => import('@/views/dashboard/index'),
      meta: { title: '首页', icon: 'dashboard' }
    }]
  },

  {
    path: '/sys',
    component: Layout,
    redirect: '/sys/user',
    name: 'sysManage',
    meta: { title: '系统管理', icon: 'sys' },
    //这个是二级路由
    children: [
      {
        path: 'user',
        name: 'user',
        component: () => import('@/views/sys/user'),
        meta: { title: '用户管理', icon: 'roleManage' }
      },
      {
        path: 'role',
        name: 'role',
        component: () => import('@/views/sys/role'),
        meta: { title: '角色管理', icon: 'roleManage' }
      }
    ]
  },
  {
    path: '/test',
    component: Layout,
    redirect: '/test/test1',
    name: 'test',
    meta: { title: '测试模块', icon: 'form' },
    //这个是二级路由
    children: [
      {
        path: 'test1',
        name: 'test1',
        component: () => import('@/views/test/test1'),
        meta: { title: '功能1', icon: 'el-icon-s-help' }
      },
      {
        path: 'test2',
        name: 'test2',
        component: () => import('@/views/test/test2'),
        meta: { title: '功能2', icon: 'el-icon-s-help' }
      },
      {
        path: 'test3',
        name: 'test3',
        component: () => import('@/views/test/test3'),
        meta: { title: '功能3', icon: 'el-icon-s-help' }
      },

    ]
  },


  // 404页面必须写在最后面!!!
  { path: '*', redirect: '/404', hidden: true }
但是这里有一个小缺陷,这里居然不是首页
我们在src\components\Breadcrumb\index.vue下搜索
四.后端环境搭建
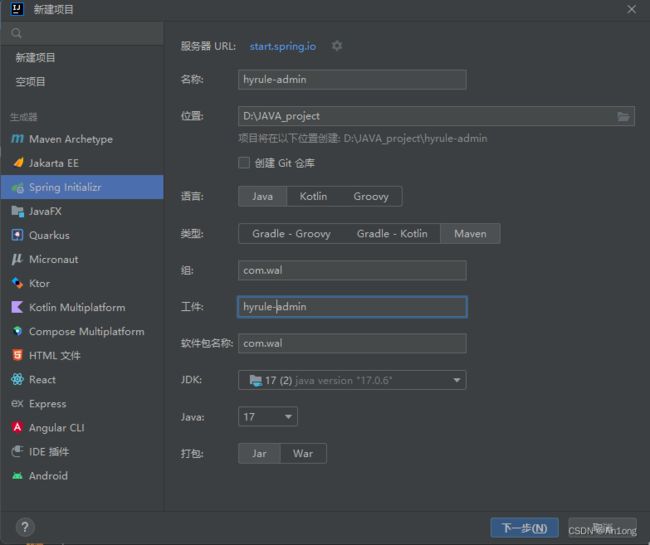
1.创建项目
引入依赖
            com.baomidou
            mybatis-plus-boot-starter
            3.5.3.1


            com.baomidou
            mybatis-plus-generator
            3.5.3.1


            org.freemarker
            freemarker


            org.springframework.boot
            spring-boot-starter-data-redis
修改配置
将application的后缀名改为yml格式
server:
  port: 8888

spring:
  datasource:
    username: root
    password: 123456
    url: jdbc:mysql:///an1ong
#    不需要配置连接池,springboot有自带的连接池
#    也不需要配置驱动类driver-class-name,会默认配置,除非想要覆盖
  redis:
    port: 6379
    host: localhost

#打印日志信息
logging:
  level:
    com.wal: debug
测试启动类
2.接口梳理
| 接口 | url | method |
| 登录 | /user/login | POST |
| 获取用户信息 | /user/info | GET |
| 注销 | /user/logout | POST |
3.创建代码生成器
我可以不用,但是我不能没有
注意不要放在java文件夹下,要放在test文件夹下
package com.wal;

import com.baomidou.mybatisplus.generator.FastAutoGenerator;
import com.baomidou.mybatisplus.generator.config.OutputFile;
import com.baomidou.mybatisplus.generator.engine.FreemarkerTemplateEngine;

import java.util.Collections;

public class CodeGenerator {
    public static void main(String[] args) {
        //使用时修改这个模块名就行了
        String moduleName = "sys";
        String mapperLocation = "D:\\JAVA_project\\hyrule-admin\\src\\main\\resources\\mapper\\" + moduleName;

//        设置你需要的表对应的实体类名
        String tables = "x_user,x_role,x_menu,x_user_role,x_role_menu";

        FastAutoGenerator.create("jdbc:mysql:///an1ong",
                        "root",
                        "123456")
                .globalConfig(builder -> {
                    builder.author("20101403wal") // 设置作者
//                            .enableSwagger() // 开启 swagger 模式
//                            .fileOverride() // 覆盖已生成文件
                            .outputDir("D:\\JAVA_project\\hyrule-admin\\src\\main\\java"); // 指定输出目录
                })
                .packageConfig(builder -> {
                    builder.parent("com.wal") // 设置父包名
                            .moduleName(moduleName) // 设置父包模块名
                            .pathInfo(Collections.singletonMap(OutputFile.xml, mapperLocation)); // 设置mapperXml生成路径
                })
                .strategyConfig(builder -> {
                    builder.addInclude(tables) // 设置需要生成的表名
                    .addTablePrefix("x_"); // 设置过滤表前缀
                })
                .templateEngine(new FreemarkerTemplateEngine()) // 使用Freemarker引擎模板,默认的是Velocity引擎模板
                .execute();
    }
}
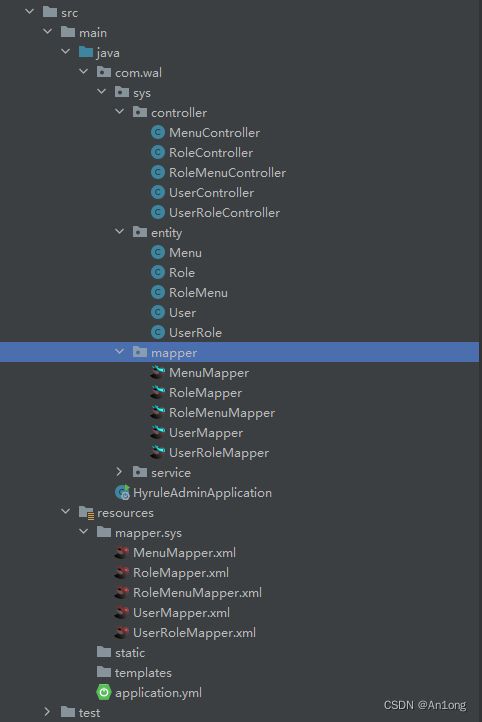
运行查看结果
最后一步:
- 在启动类上加上@MapperScan注解
因为生成的Mapper类上没有@Mapper注解,也可以在Mapper类上直接加,但是直接在启动类上使用@MapperScan就可以一劳永逸了
在测试类中测试一下
测试select * from user
mybatis-plus把此类的crud封装了起来,所以可以直接使用
@SpringBootTest
class HyruleAdminApplicationTests {

    @Resource
    private UserMapper userMapper;

    @Test
    void testMapper() {
        List users = userMapper.selectList(null);
        users.forEach(System.out::println);
    }

}
可以在日志中看到其对应的查询语句
完成初始化创建
4.公共响应类
这个类是为了前后端分离之后的前后端交互统一结果的响应
这里注意,因为我们使用的vue-element-admin模板,前端接受的返回值code就是20000和20001等,如果有自己的需求就去前端处自己更改,否则返回值code就用20000
import lombok.Data;
import lombok.AllArgsConstructor;
import lombok.NoArgsConstructor;

//这个类是为了前后端分离之后的前后端交互统一结果的相应
@Data
//这个注解可以自动为属性生成get&set方法
@NoArgsConstructor
@AllArgsConstructor
public class Result {
    private Integer code;   //响应码 20000-成功 20001失败
    private String message; //响应信息 描述字符串
    private T data;         //返回的数据

    public static  Result success(){
        //增删改 成功响应
        return new Result<>(20000,"success",null);
    }

    public static  Result success(T data){
        //查询 成功响应
        return new Result<>(20000,"success",data);
    }

    public static  Result success(T data,String message){
        return new Result<>(20000,message,data);
    }

    public static  Result success(String message){
        return new Result<>(20000,message,null);
    }

    public static  Result error(){
        return new Result<>(20001,"fail",null);
    }

    public static  Result error(Integer code){
        return new Result<>(code,"fail",null);
    }

    public static  Result error(Integer code, String message){
        return new Result<>(code,message,null);
    }

    public static  Result error(String message){
        return new Result<>(20001,message,null);
    }

}
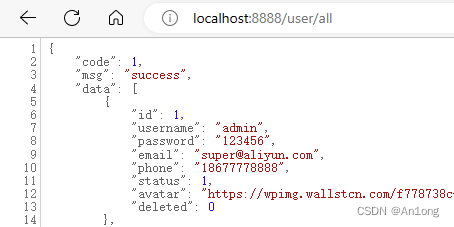
使用测试
@RestController
@RequestMapping("/user")
public class UserController {
    @Autowired
    private IUserService userService;

    @GetMapping("/all")
    public Result> getAll(){
        List users = userService.list();
        return Result.success(users);
    }
}
五.登录页接口实现
1.登录接口
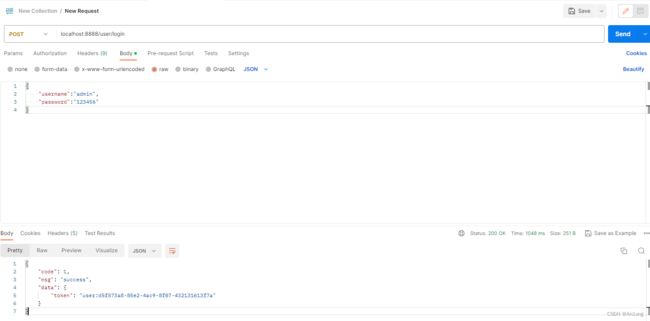
从数据库查询是否有该用户,若该用户存在,则生成token返回Result,并将个人信息存入Redis
Controller层
    @PostMapping("/login")
    //这个user接收过来时是一个json格式,需要用@RequestMapping转换为实体类
    public Result> login(@RequestBody User user){
        Map data = userService.login(user);
        if (data != null){
            return Result.success(data);
        }
        return Result.error(0,"用户名或密码错误");
    }
Service层
package com.wal.sys.service.impl;

import com.baomidou.mybatisplus.core.conditions.query.LambdaQueryWrapper;
import com.wal.sys.entity.User;
import com.wal.sys.mapper.UserMapper;
import com.wal.sys.service.IUserService;
import com.baomidou.mybatisplus.extension.service.impl.ServiceImpl;
import org.springframework.beans.factory.annotation.Autowired;
import org.springframework.data.redis.core.RedisTemplate;
import org.springframework.stereotype.Service;

import java.util.HashMap;
import java.util.Map;
import java.util.UUID;
import java.util.concurrent.TimeUnit;

/**
 *
 *  服务实现类
 *
 *
 * @author 20101403wal
 * @since 2023-05-28
 */
@Service
public class UserServiceImpl extends ServiceImpl implements IUserService {
    @Autowired
    private RedisTemplate redisTemplate;

    @Override
    public Map login(User user) {
        //根据用户名与密码查询结果
        LambdaQueryWrapper wrapper = new LambdaQueryWrapper<>();
        wrapper.eq(User::getUsername,user.getUsername());
        wrapper.eq(User::getPassword,user.getPassword());
        User loginUser = this.baseMapper.selectOne(wrapper);

        //若结果不为空,则生成token,并将用户信息存入redis
        if (loginUser!=null){
            //暂时用UUID,终极方案应为jwt
            String key = "user:" + UUID.randomUUID();

            //存入redis
            loginUser.setPassword(null);    //密码不要存进去
            //默认这是永久有效的,要设置timeout时间
            redisTemplate.opsForValue().set(key,loginUser,30, TimeUnit.MINUTES);

            //返回数据
            Map data = new HashMap<>();
            data.put("token",key);
            return data;
        }
        return null;
    }

}
这里没有@AutoWired UserMapper是因为Mybatis-plus生成的mapper没有@Mapper注解,你可以使用老办法在Mapper类中加上注解然后在这里引入,后面的例子会展示到
也可以像这样使用通用Service
然后这样使用引入的mapper
我们这里使用redis来存储用户的登录信息
引入依赖
            org.springframework.boot
            spring-boot-starter-data-redis
创建redis的配置类
package com.wal.config;
import com.fasterxml.jackson.annotation.JsonAutoDetect;
import com.fasterxml.jackson.annotation.JsonInclude;
import com.fasterxml.jackson.annotation.JsonTypeInfo;
import com.fasterxml.jackson.annotation.PropertyAccessor;
import com.fasterxml.jackson.databind.DeserializationFeature;
import com.fasterxml.jackson.databind.MapperFeature;
import com.fasterxml.jackson.databind.ObjectMapper;
import com.fasterxml.jackson.databind.SerializationFeature;
import com.fasterxml.jackson.databind.jsontype.impl.LaissezFaireSubTypeValidator;
import org.springframework.beans.factory.annotation.Autowired;
import org.springframework.context.annotation.Bean;
import org.springframework.context.annotation.Configuration;
import org.springframework.data.redis.connection.RedisConnectionFactory;
import org.springframework.data.redis.core.RedisTemplate;
import org.springframework.data.redis.serializer.Jackson2JsonRedisSerializer;
import org.springframework.data.redis.serializer.StringRedisSerializer;
import java.text.SimpleDateFormat;
import java.util.TimeZone;
@Configuration
public class MyRedisConfig {
@Autowired
private RedisConnectionFactory factory;
@Bean
public RedisTemplate redisTemplate(){
RedisTemplate redisTemplate = new RedisTemplate<>();
//连接redis
redisTemplate.setConnectionFactory(factory);
//处理你之前做的序列化处理
redisTemplate.setKeySerializer(new StringRedisSerializer());
Jackson2JsonRedisSerializer serializer = new Jackson2JsonRedisSerializer 测试
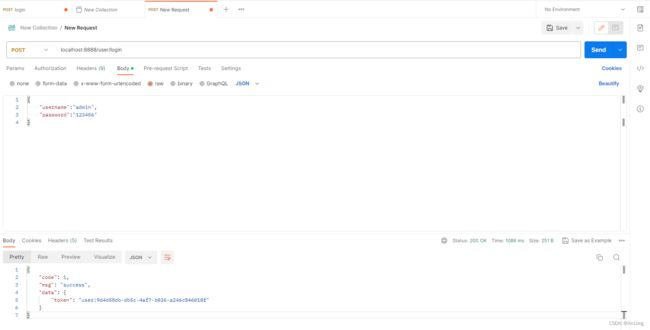
我们在postman中测试接口
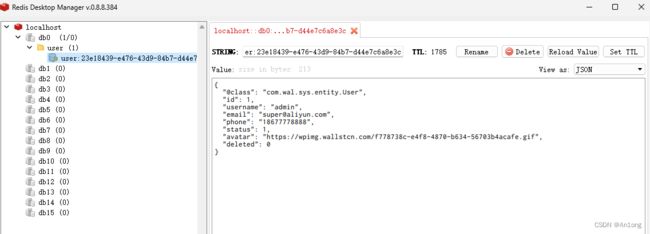
查看redis中的信息
2.获取用户信息接口
| 接口属性 | 值 |
| url | /user/info?token=xxx |
| method | get |
| 请求参数 | token |
| 返回参数 | { "code":1, "message":"success", "data":{ role:[ ], "name":“admin” "avatar":"" } } |
Controller层
    @GetMapping("/info")
    //参数是在url后面的,用@RequestParam可以获取到
    public Result> getUserInfo(@RequestParam("token") String token){
        //根据token从redis中获取用户信息
        Map data = userService.getUserInfo(token);
        if (data != null){
            return Result.success(data);
        }
        return Result.error(0,"用户名或密码错误");
    }
Service层
需要引入依赖fastjson来反序列化
            com.alibaba.fastjson2
            fastjson2
            2.0.25
在这里实现的功能主要是获取token后对其反序列化返回给controller
    @Override
    public Map getUserInfo(String token){
        //根据token在redis中获取用户信息,
        Object obj = redisTemplate.opsForValue().get(token);
//        对obj处理成json
        //因为是序列化存储的,使用时要反序列化
        if (obj != null){
            User loginUser = JSON.parseObject(JSON.toJSONString(obj),User.class);
            //取数据
            Map data = new HashMap<>();
            //这个参数中的名字要与前端对应上
            data.put("name",loginUser.getUsername());
            data.put("avatar",loginUser.getAvatar());

            //得到角色列表
            List roleList = this.baseMapper.getRoleNameByUserId(loginUser.getId());
            data.put("roles",roleList);

            return data;
        }
        return null;
    }
Mapper层
public interface UserMapper extends BaseMapper {
    public List getRoleNameByUserId(Integer userId);
}
在xml文件中配置sql语句,因为这个功能mybatis中没有,需要自己定义
- id要与方法名对应一致
- parame要与参数类型对应一直
- 动态sql参数userId要与方法参数userId对应
- 返回值类型String要与List<>中的类型一致
测试
将post返回的token通过get请求提交
成功运行
3.注销接口
退出登录,从redis中清除token
| 接口属性 | 值 |
| url | /user/login |
| method | post |
| 请求参数 | token |
| 返回参数 | { "code":1, "message":"success", "data":null } |
Contoller层
    @PostMapping("/logout")
    //传入的是token,要用RequestHeader注解接收
    public Result logout(@RequestHeader("X-Token") String token){
        userService.logout(token);
        return Result.success();
    }
Service层
    @Override
    public void logout(String token){
        //从redis中删除
        redisTemplate.delete(token);
    }
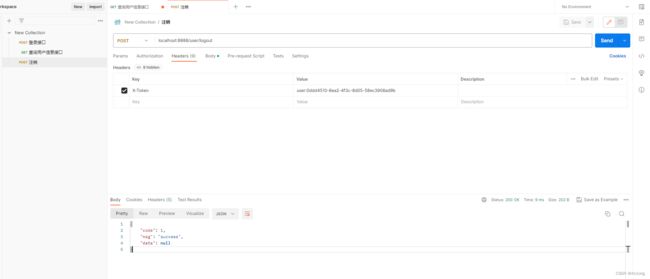
测试
六.前后端对接
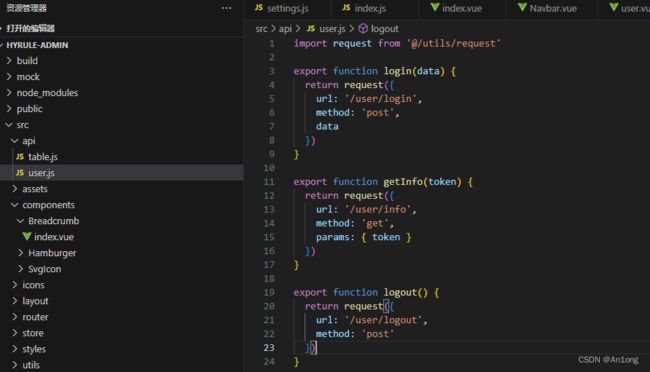
我们来到vue中修改前端接口代码,将接口url与后端接口对应
修改配置
- 在本地直接部署就在development中修改配置
- 打包部署在production中修改配置
- 两配置文件中内容是一样的,仅仅是环境不一样
base_api中修改根端口,调用接口的时候会用这一节拼接上这个base api
在vue.config中关闭mock服务
跨域
我们启动项目,发现出现了跨域问题
解决方法看这里:解决跨域问题
直接使用cors配置类
import org.springframework.context.annotation.Bean;
import org.springframework.context.annotation.Configuration;
import org.springframework.web.cors.CorsConfiguration;
import org.springframework.web.cors.UrlBasedCorsConfigurationSource;
import org.springframework.web.filter.CorsFilter;

@Configuration
public class MyCorsConfig {

    @Bean
    public CorsFilter corsFilter(){
        CorsConfiguration config = new CorsConfiguration();
        //允许谁来异步访问
//        config.addAllowedOrigin("*");    //允许所有人访问,不安全不推荐
        config.addAllowedOrigin("http://localhost:7777");   //这里写允许访问的前端服务器
        config.setAllowCredentials(true);    //传递cookie

        config.addAllowedMethod("*");    //允许哪些方法访问(*是全部方法)
//        config.addAllowedMethod("OPTIONS");
//        config.addAllowedMethod("HEAD");
//        config.addAllowedMethod("GET");
//        config.addAllowedMethod("PUT");
//        config.addAllowedMethod("POST");
//        config.addAllowedMethod("DELETE");
//        config.addAllowedMethod("PATCH");

//        允许的头信息
        config.addAllowedHeader("*");

        //过滤资源
        UrlBasedCorsConfigurationSource configSource = new UrlBasedCorsConfigurationSource();
        configSource.registerCorsConfiguration("/**",config);

        return new CorsFilter(configSource);
    }
}
页面成功跳转,前后端对接成功
七.管理页面
1.用户管理布局
搜索栏
我们使用element标签来创建页面 组件 | Element
使用什么样式就直接在里面找就可以了,不需要死记
查询
为了美观,我们使用card样式将其套起来
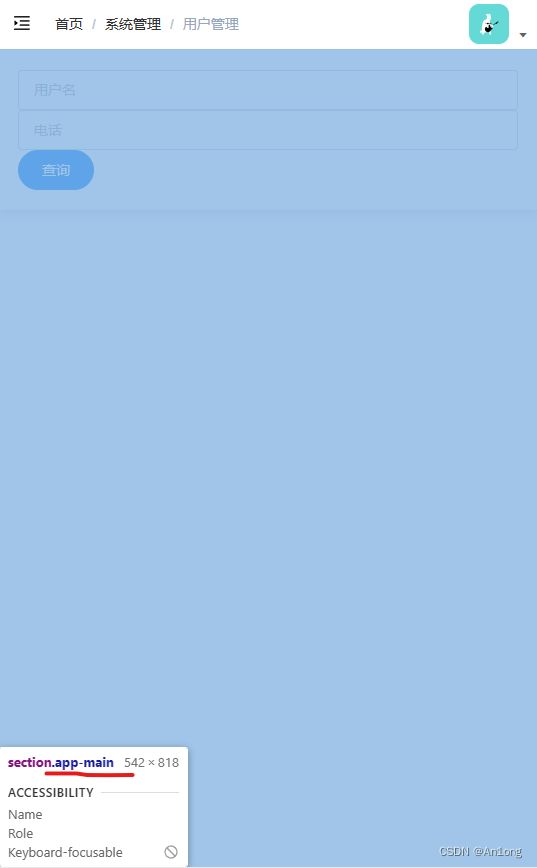
但是此时卡片的边界与左栏上栏默认的贴在了一起,依旧不美观,我们可以直接修改一下卡片外边距,但是并不推荐这种做法,因为之后还有别的组件需要修改边距,我们这里修改整个区域的css
整个区域指的这里
我们打开F12查看此区域叫什么名字
我们在根组件App.vue中设置style,定义一个全局边距
再来修改一下框的宽度、右边距以及查询按钮的图案,这里仅修改这个地方的框大小就行了,没必要设置全局属性
查询
十分甚至九分的美观啊(喜
若是想在这卡片末尾添加一个小按钮,我们可以使用Layout布局页面
这部分的完整代码如下
查询
结果栏
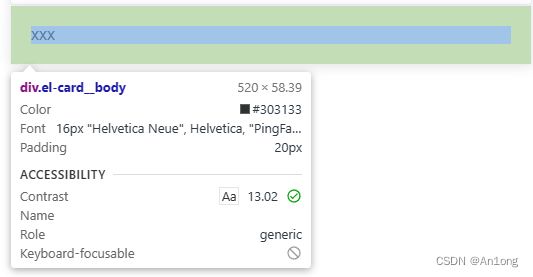
我们同样将结果列表放入card组件,就是为了美观,不放也行
 测试发现两个卡片距离太近,我们可以依照上面那样在根组件App.vue中设置全局底边距,这样别的该种类组件也能用,如果只是想在本组件生效那就写在本类文件的style中
先查看该组件css名称
.el-card{
  /* 底部边距 */
  margin-bottom: 10px ;
}
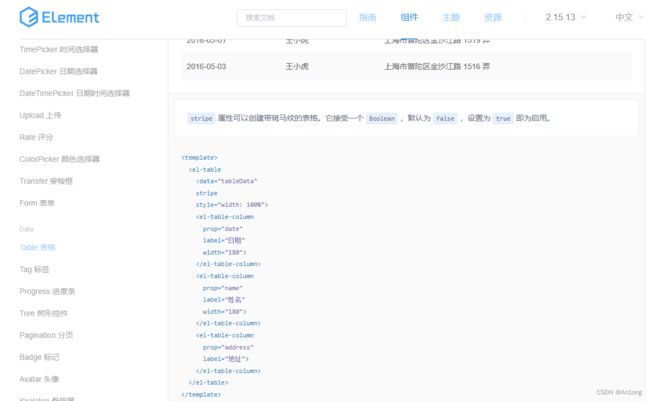
我们来使用表格替换掉xxx
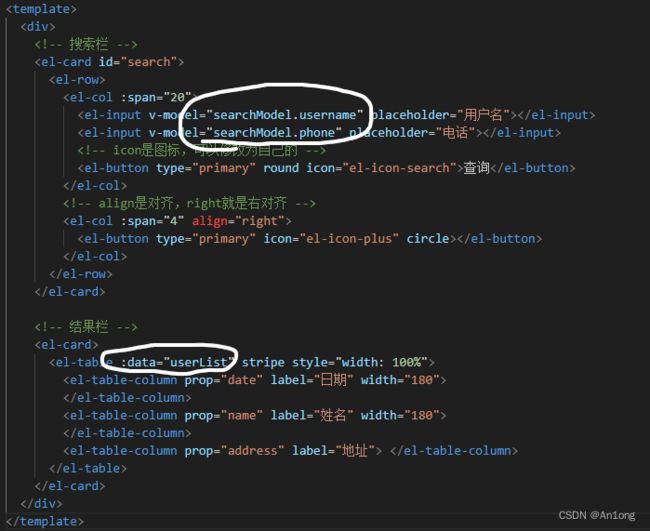
直接使用的话会报错,因为数据绑定不正常
我们先在script中创建空数据,因为data中返回的searchModel是对象类型,所以调用的时候要使用“对象.属性”的形式,而userList是数组,直接使用即可
修改我们之前的代码绑定的数据
添加/修改我们需要的字段,对应数据库字段即可
添加分页组件,在element中查找分页组件组件 | Element
这里面绑定了两个方法4个参数,所以不能直接使用,要先在script中定义出来,不然会报错
更改一下分页展示的语言
最终效果
这部分的全部代码
查询
2.用户管理接口
我们首先要实现分页查询,具体可以查看mybatis的官网插件主体 | MyBatis-Plus (baomidou.com)
创建分页插件拦截器
import com.baomidou.mybatisplus.annotation.DbType;
import com.baomidou.mybatisplus.extension.plugins.MybatisPlusInterceptor;
import com.baomidou.mybatisplus.extension.plugins.inner.PaginationInnerInterceptor;
import org.springframework.context.annotation.Bean;
import org.springframework.context.annotation.Configuration;

@Configuration
public class MpConfig {
    @Bean
    public MybatisPlusInterceptor mybatisPlusInterceptor() {
        MybatisPlusInterceptor interceptor = new MybatisPlusInterceptor();
        interceptor.addInnerInterceptor(new PaginationInnerInterceptor(DbType.MYSQL));
        return interceptor;
    }
}
我们使用mybatis自带的page方法,发现需要传入wrapper对象
Controller层
    @GetMapping("/list")
    //                                                required表示查询时Params不必带上该参数
    public Result> getUserList(@RequestParam(value = "username",required = false) String username,
                                              @RequestParam(value = "phone",required = false) String phone,
                                              @RequestParam("pageNo") Long pageNo,
                                              @RequestParam("pageSize") Long pageSize){
        LambdaQueryWrapper wrapper = new LambdaQueryWrapper<>();
        //判断长度是否大于零,其实判断你username是不是非空
        wrapper.eq(StringUtils.hasLength(username),User::getUsername,username);
        wrapper.eq(StringUtils.hasLength(phone),User::getPhone,phone);
        Page page = new Page<>(pageNo, pageSize);

        userService.page(page,wrapper);

        Map data = new HashMap<>();
        data.put("total",page.getTotal());
        data.put("rows",page.getRecords());

        return Result.success(data);
    }
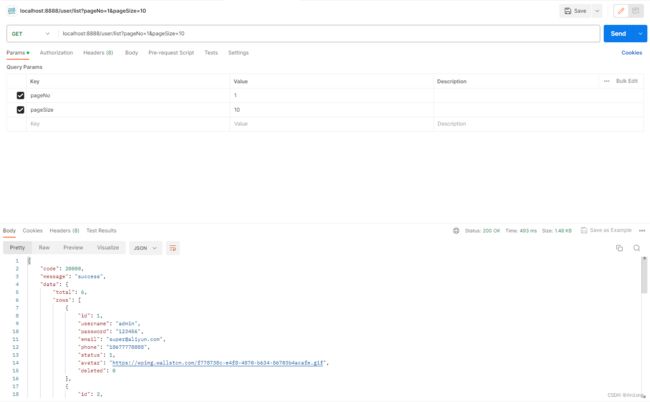
测试
3.接口对接
我们若是想要对接,首先在vue中需要定义api,前面做登录接口时,模板已经帮我们定义好了登录接口部分,现在我们需要自己来实现
一个模块一个js文件,我们在api文件夹下创建userManage.js
import request from '@/utils/request'

export default {
    // searchModel是前端传来的数据
    getUserList(searchModel){
        return request({
            url: '/user/list',
            method: 'get',
            // post上传的是json格式,get上传的params
            params:{
                pageNo: searchModel.pageNo,
                pageSize: searchModel.pageSize,
                username: searchModel.username,
                phone: searchModel.phone
            }
        });
    },
    // 有别的方法在这里写
}
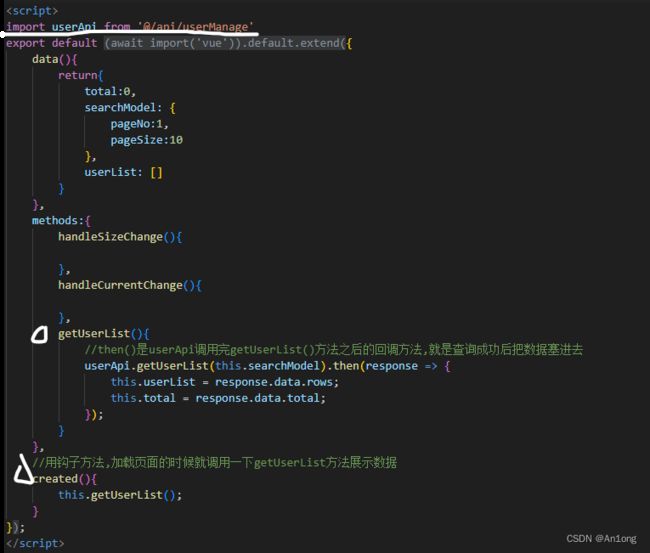
在user.vue中引入
我们为查询按钮绑定一下事件
查看效果
此时我们看到并没有1页展示5条数据,是因为没有定义这两个方法,当变量发生改变时调用方法
        handleSizeChange(pageSize){
            this.searchModel.pageSize = pageSize;
            this.getUserList();
        },
        handleCurrentChange(pageNo){
            this.searchModel.pageNo = pageNo;
            this.getUserList();
        },

