3:Ubuntu上配置QT交叉编译环境并编译QT程序到Jetson Orin Nano(ARM)
1.Ubuntu Qt 配置交叉编译环境
1.1 ubuntu 20.04安装Qt
sudo apt-get install qtcreator1.2 配置QT


GCC配置同上


最后配置Kits

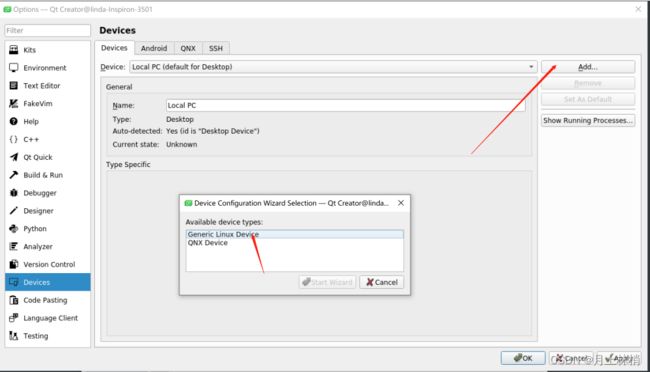
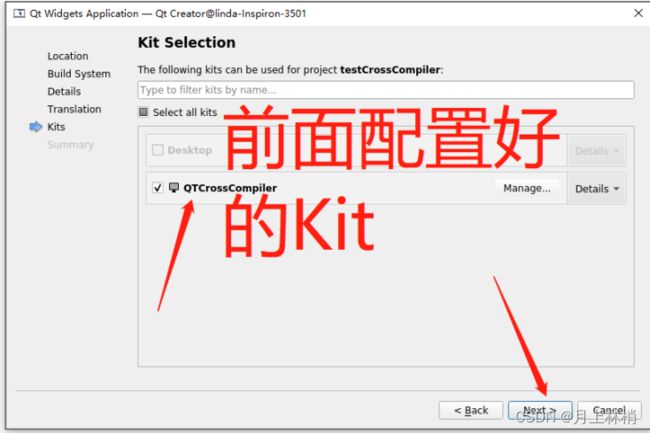
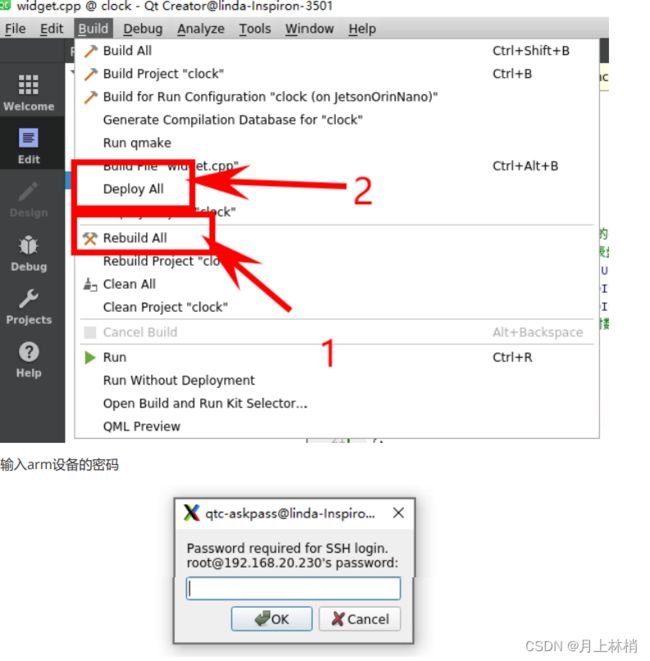
上面设置完成之后 ,设置Kits 中的Device(这是为了能够直接把项目部署到arm设备上)

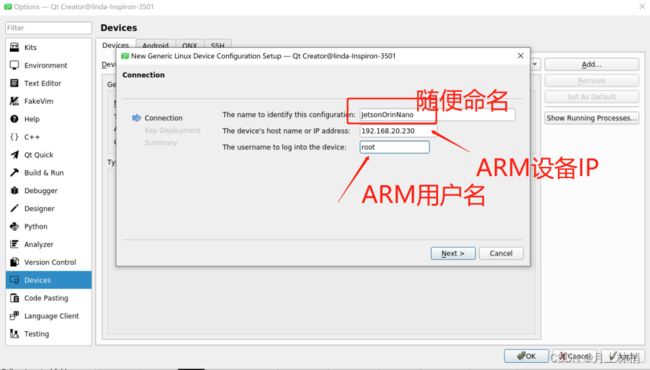

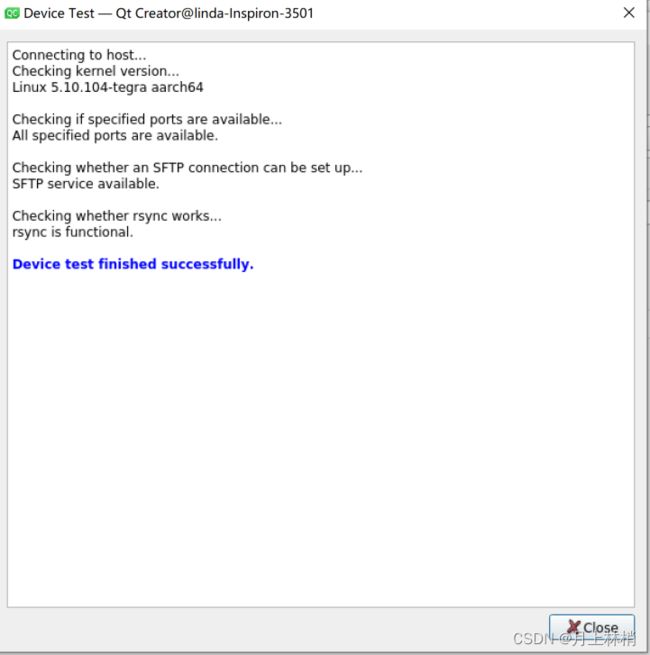
点击NEXT之后会出现连接被拒绝,不用担心 ,下面会对其设置密码。
 验证arm设置的密码。


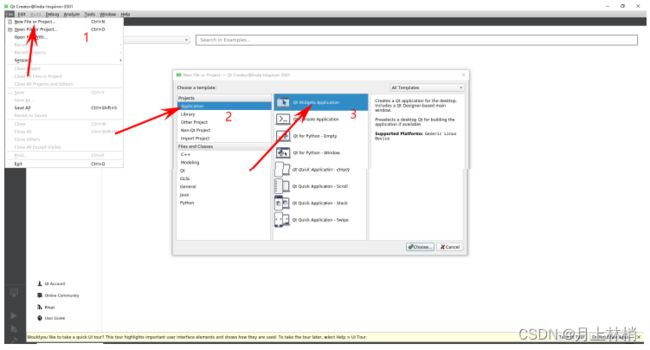
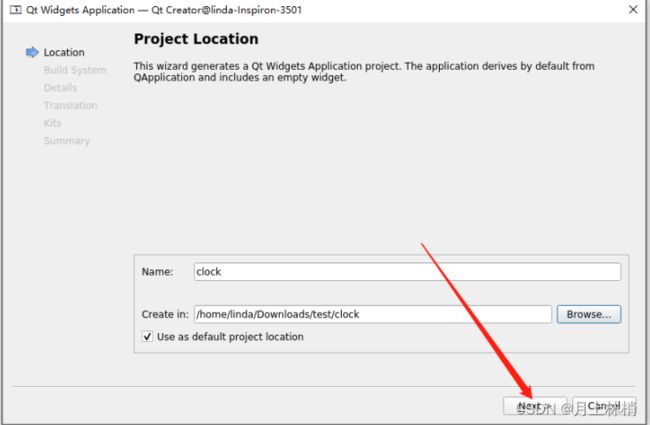
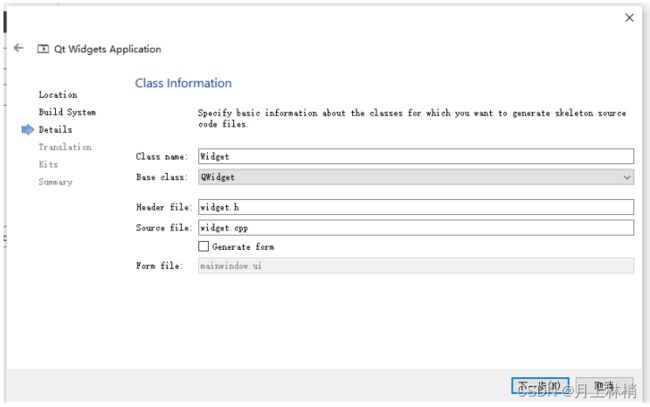
1.3 创建Qt项目


代码:
此代码是抄的别人的,具体是哪位博主的,忘记了。如果该博主看到了 请@下我,我会把连接附上
main.cpp
#include "widget.h"
#include

int main(int argc, char *argv[])
{
    QApplication a(argc, argv);
    Widget w;
    w.show();
    return a.exec();
}
widget.cpp
#include "widget.h"
#include
#include
#include
#include
#include
#include
#define CLOCK_RADIUS (80) //时钟的半径

#define PANEL_RADIUS_NUM (3) //表盘的3个圆

#define PANEL_RADIUS1 CLOCK_RADIUS //圆1的半径

#define PANEL_RADIUS2 (CLOCK_RADIUS - 6) //圆2的半径

#define PANEL_RADIUS3 (CLOCK_RADIUS - 8) //圆3的半径

#define HOUR_NUM_SIZE (10) //小时数字的字体大小

//3个表针的形状(三角形)

static QPoint hourHand[3] = {
    QPoint(5, 3),
    QPoint(-5, 3),
    QPoint(0, -30)
};

static QPoint minuteHand[3] = {
    QPoint(4, 6),
    QPoint(-4, 6),
    QPoint(0, -45)
};

static QPoint secondHand[3] = {
    QPoint(2, 10),
    QPoint(-2, 10),
    QPoint(0, -60)
};

//表针与刻度颜色

static QColor hourColor(255, 0, 0);

static QColor minuteColor(0, 0, 255);

static QColor secondColor(0, 255, 0);

//表盘参数

struct panelPara{
    int radius;
    QColor color;
};
//圆的半径与对于的颜色

static panelPara stPanelParaArr[] = {
   {PANEL_RADIUS1, QColor(255, 200, 100)},
   {PANEL_RADIUS2, QColor(164, 211, 238)},
   {PANEL_RADIUS3, QColor(255, 255, 255)},
};

Widget::Widget(QWidget *parent)
   : QWidget(parent)
{
    QTimer *timer = new QTimer(this);
    connect(timer, SIGNAL(timeout()), this, SLOT(update()));
    timer->start(1000);
    setWindowTitle(tr("Clock"));
    setMinimumSize(200, 200); //设置最小尺寸

}

Widget::~Widget()
{
}

void Widget::paintEvent(QPaintEvent *event)
{
    int side = qMin(width(), height());
    QTime time = QTime::currentTime();
    QPainter painter(this);
    painter.setRenderHint(QPainter::Antialiasing);
    painter.translate(width()/2, height()/2); //画图的基准位置

    painter.scale(side/200.0, side/200.0); //随窗口尺寸自动缩放

    //表盘

    for (int i=0; i
widget.h
#ifndef WIDGET_H
#define WIDGET_H
#include

class Widget : public QWidget

{
    Q_OBJECT

public:
    Widget(QWidget *parent = nullptr);
    ~Widget();
    void paintEvent(QPaintEvent *event);
};

#endif // WIDGET_H
配置 clock.pro ,在pro文件添加下面代码。
#要部署的到ARM设备上的目录

target.path=/opt/arm #安装目标文件

INSTALLS+=target
先对项目进行编译,再把项目发布到 arm设备。
上面项目部署之后,登陆arm设备进到对应的目录下查看代码。

查看生成的文件 格式, 为arm aarch 64 正是arm 设备运行的文件 。
![]()
执行命令运行程序,如下
nvidia@ubuntu:/opt/clock/bin$ ./clock 
2.windows下使用visual studio或qt进行
arm linux程序开发环境搭建
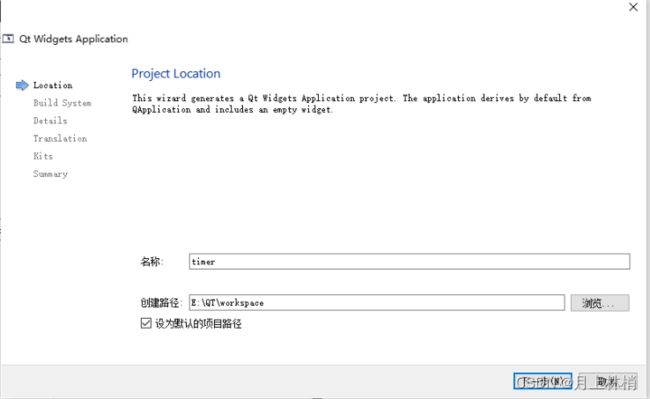
2.1 创建项目


widget.cpp
#include "widget.h"
#include "ui_widget.h"
#include
#pragma execution_character_set("utf-8")

Widget::Widget(QWidget *parent) :
   QWidget(parent),
   ui(new Ui::Widget)
{
   ui->setupUi(this);
   connect(&timer, SIGNAL(timeout()), this, SLOT(timeout_slot()));
   connect(&timer, SIGNAL(timeout()), this, SLOT(update()));
   connect(ui->Btn_Reset, SIGNAL(clicked()), this, SLOT(update()));
   time.setHMS(0,0,0,0);
   ui->Txt_ShowTime->setText("00:00:00");
   ui->Btn_Start->setChecked(false);
   ui->Btn_Reset->setEnabled(false);
   ui->Btn_Hit->setEnabled(false);
}
Widget::~Widget()
{
   delete ui;
}
void Widget::timeout_slot()
{
   //qDebug("hello");
   QTime nowTime = QTime::currentTime();
   time = time.addMSecs(lastTime.msecsTo(nowTime));
   lastTime = nowTime;
   ui->Txt_ShowTime->setText(time.toString("mm:ss.zzz"));
}
void Widget::on_Btn_Start_toggled(bool checked)
{
    if (checked)
   {
       timer.start(ADD_TIME_MSEC);
       lastTime = QTime::currentTime();//记录时间戳

       ui->Btn_Start->setText("暂停");
       ui->Btn_Reset->setEnabled(false);
       ui->Btn_Hit->setEnabled(true);
   }
    else

   {
       timer.stop();
       ui->Btn_Start->setText("继续");
       ui->Btn_Reset->setEnabled(true);
       ui->Btn_Hit->setEnabled(false);
   }
}
void Widget::on_Btn_Reset_clicked()
{
   m_iHitCnt = 0;
   timer.stop();
   time.setHMS(0,0,0,0);
   ui->Txt_ShowTime->setText("00:00:00");
   ui->Txt_ShowItem->clear();
   ui->Btn_Start->setText("开始");
   ui->Btn_Start->setChecked(false);
   ui->Btn_Reset->setEnabled(false);
   ui->Btn_Hit->setEnabled(false);
}
void Widget::on_Btn_Hit_clicked()
{
   QString temp;
   m_iHitCnt++;
   temp.sprintf("--计次 %d--", m_iHitCnt);
   ui->Txt_ShowItem->setFontPointSize(9);
   ui->Txt_ShowItem->append(temp);
   ui->Txt_ShowItem->setFontPointSize(12);
   ui->Txt_ShowItem->append(time.toString("[mm:ss.zzz]"));
}
//------------------

#define CLOCK_RADIUS (90) //时钟的半径

#define PANEL_RADIUS_NUM (3) //表盘的3个圆

#define PANEL_RADIUS1 CLOCK_RADIUS //圆1的半径

#define PANEL_RADIUS2 (CLOCK_RADIUS - 6) //圆2的半径

#define PANEL_RADIUS3 (CLOCK_RADIUS - 8) //圆3的半径

#define PANEL_RADIUS4 (40) //内圆的半径

#define SEC_NUM_SIZE (10) //小时数字的字体大小

#define MIN_NUM_SIZE (7) //分钟数字的字体大小

//3个表针的形状(三角形)

static QPoint minuteHand[3] = {
QPoint(2, 6),
   QPoint(-2, 6),
   QPoint(0, -45)
};
static QPoint secondHand[3] = {
   QPoint(2, 8),
   QPoint(-2, 8),
   QPoint(0, -85)
};
//表针与刻度颜色

static QColor secondColor(0, 0, 255);
static QColor minuteColor(0, 0, 0);
//表盘参数

struct panelPara{
   int radius;
   QColor color;
};
//圆的半径与对于的颜色

static panelPara stPanelParaArr[] = {
   {PANEL_RADIUS1, QColor(255, 200, 100)},
   {PANEL_RADIUS2, QColor(164, 211, 238)},
   {PANEL_RADIUS3, QColor(255, 255, 255)},
};
void Widget::paintEvent(QPaintEvent *event)
{
   int side = qMin(width(), height());
   //QTime time = QTime::currentTime();
   QPainter painter(this);
   painter.setRenderHint(QPainter::Antialiasing);
   painter.translate(width()/3, height()*2/5); //画图的基准位置

   painter.scale(side/300.0, side/300.0); //随窗口尺寸自动缩放

   //表盘(3个同心圆)
    for (int i=0; i
widget.h
#ifndef WIDGET_H
#define WIDGET_H
#include
#include
#include
#include
#define ADD_TIME_MSEC 30

namespace Ui {
class Widget;
}
class Widget : public QWidget
{
   Q_OBJECT
public:
   explicit Widget(QWidget *parent = nullptr);
   ~Widget();
   void paintEvent(QPaintEvent *event);
   QTimer timer;
   QTime time;
   QTime lastTime;
private slots:
   void on_Btn_Start_toggled(bool checked);
   void timeout_slot();
   void on_Btn_Reset_clicked();
   void on_Btn_Hit_clicked();
private:
   Ui::Widget *ui;
   int m_iHitCnt = 0;
};

#endif // WIDGET_H
main.cpp
#include "widget.h"
#include

int main(int argc, char *argv[])
{
   QApplication a(argc, argv);
   Widget w;
   w.show();
   return a.exec();
}
2.2 运行项目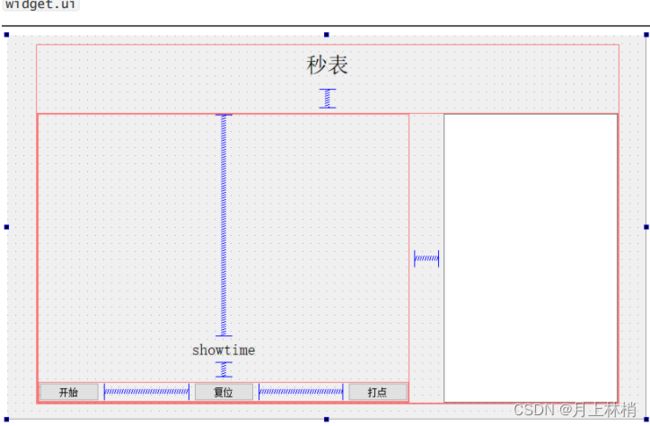

2.3把文件移动到Linux下
在win下编译通过之后,把文件 main.cpp timer.pro widget.cpp widget.h widget.ui 移动到
Linux 下
![]()
用编译源码生成的 qmake(前面2. Linux Server 20.04 Qt5.14.2配置Jetson Orin Nano Developer Kit 交叉编译环境 生成的qmake) 进行对 timer.pro 文件进行编译
/opt/Qt5JetsonOrinNano/sysroot/usr/local/Qt5JetsonOrinNano/bin/qmake timer.pro
之后会生成 Makefile 文件
![]() 再执行 make 命令
再执行 make 命令

生成 .o 文件
![]()
输入命令 file timer 查看生成的 timer 文件 类型
![]()
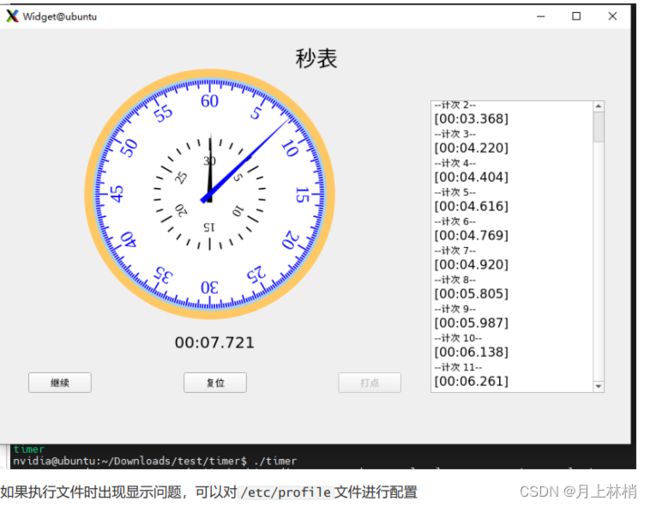
把文件拷贝到 arm 设备
scp ./timer [email protected]:/home/nvidia/Downloads/test/time
sudo vim /etc/profile

#加入下面5行代码

export QT_DEBUG_PLUGINS=1

export QTDIR=/usr/local/Qt5JetsonOrinNano#编译的源码

export LD_LIBRARY_PATH=/usr/local/Qt5JetsonOrinNano/lib:$LD_LIBRARY_PATH

export QT_QPA_PLATFORM_PLUGIN_PATH=$QTDIR/plugins

export QT_QPA_PLATFORM=xcb#编译源码时加入的显示模块 -xcb

sudo source /etc/profile