ThinkPHP 验证码扩展库的使用,以及多应用模式下,如何自定义验证码校验规则
ThinkPHP 验证码扩展库的使用,以及多应用模式下,如何自定义验证码校验规则
- 一、安装
- 二、页面使用
- 三、验证码相关配置属性
-
- 1. 自定义验证码配置
- 2. 自定义验证码(一)普通验证码
- 3. 自定义验证码(二)算数验证码
- 4. 自定义验证码(三)中文验证码
- 5. 验证校验
一、安装
首先,验证码扩展库是需要view扩展的
composer require topthink/think-view
安装完成后,接着安装验证码扩展库
composer require topthink/think-captcha
二、页面使用
页面使用的话,两种方式
<div>{:captcha_img()}div>


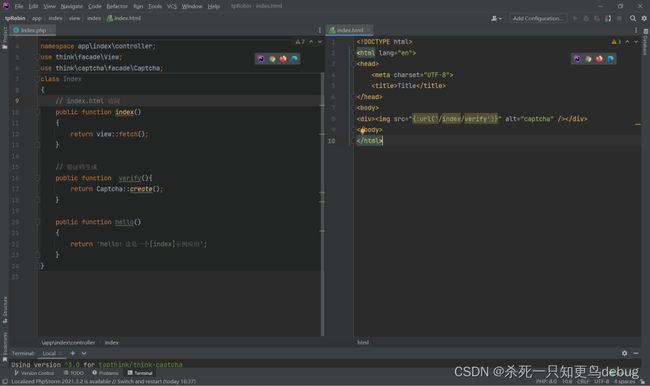
<div><img src="{:captcha_src()}" alt="captcha" />div>
侧重说明一下,使用第二种方式
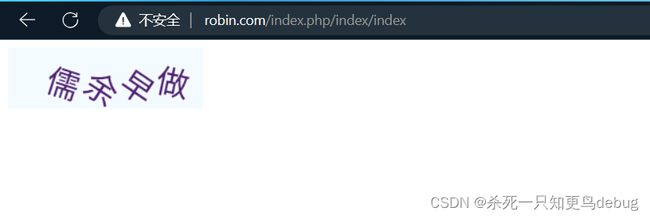
我们只需要在控制器中提供一个方法,用于验证码的生成,然后前端将img的src属性修改为对应的方法路径即可
三、验证码相关配置属性
属性说明:
| 参数 | 描述 | 默认 |
|---|---|---|
| codeSet | 验证码字符集合 | 略 |
| expire | 验证码过期时间 | (s) |
| math | 使用算术验证码 | false |
| useZh | 使用中文验证码 | false |
| zhSet | 中文验证码字符串 | 略 |
| useImgBg | 使用背景图片 | false |
| fontSize | 验证码字体大小(px) | 25 |
| useCurve | 是否画混淆曲线 | true |
| useNoise | 是否添加杂点 | true |
| imageH | 验证码图片高度,设置为0为自动计算 | 0 |
| imageW | 验证码图片宽度,设置为0为自动计算 | 0 |
| length | 验证码位数 | 5 |
| fontttf | 验证码字体,不设置是随机获取 | 空 |
| bg | 背景颜色 | [243, 251, 254] |
| reset | 验证成功后是否重置 | true |
1. 自定义验证码配置
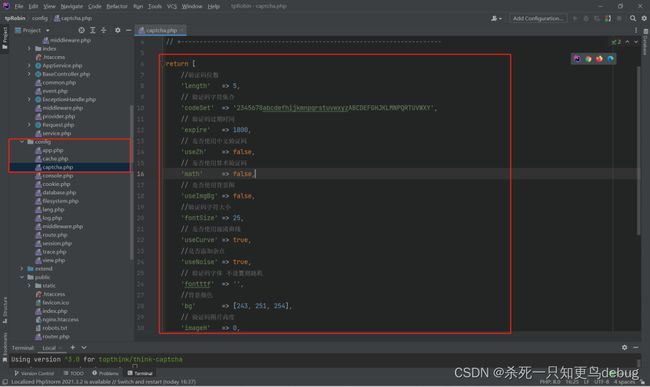
安装验证码扩展后,在当前项目中的全局配置文件config目录中,会多出一项captcha.php用于配置验证码的相关配置。
在单应用模式下,我们可以直接通过config/captcha.php 来配置项目中的验证码相关配置。
多应用模式下的话,将config/captcha.php 拷贝一份到每个应用中的config目录中,然后在根据不同的应用去修改相应的验证码配置。
2. 自定义验证码(一)普通验证码
  // +----------------------------------------------------------------------
  // | Captcha配置文件
  // +----------------------------------------------------------------------

  return [
  //验证码位数
  'length'   => 4,
  // 验证码字符集合
  'codeSet'  => '2345678abcdefhijkmnpqrstuvwxyzABCDEFGHJKLMNPQRTUVWXY',
  // 验证码过期时间
  'expire'   => 1800,
  // 是否使用中文验证码
  'useZh'    => false,
  // 是否使用算术验证码
  'math'     => false,
  // 是否使用背景图
  'useImgBg' => false,
  //验证码字符大小
  'fontSize' => 25,
  // 是否使用混淆曲线
  'useCurve' => false,
  //是否添加杂点
  'useNoise' => false,
  // 验证码字体 不设置则随机
  'fontttf'  => '',
  //背景颜色
  'bg'       => [243, 251, 254],
  // 验证码图片高度
  'imageH'   => 0,
  // 验证码图片宽度
  'imageW'   => 0,

  // 添加额外的验证码设置
  // verify => [
  //     'length'=>4,
  //    ...
  //],
  ];
3. 自定义验证码(二)算数验证码
// +----------------------------------------------------------------------
// | Captcha配置文件
// +----------------------------------------------------------------------

return [
    //验证码位数
    'length'   => 4,
    // 验证码字符集合
    'codeSet'  => '2345678abcdefhijkmnpqrstuvwxyzABCDEFGHJKLMNPQRTUVWXY',
    // 验证码过期时间
    'expire'   => 1800,
    // 是否使用中文验证码
    'useZh'    => false,
    // 是否使用算术验证码
    'math'     => true,
    // 是否使用背景图
    'useImgBg' => false,
    //验证码字符大小
    'fontSize' => 25,
    // 是否使用混淆曲线
    'useCurve' => false,
    //是否添加杂点
    'useNoise' => false,
    // 验证码字体 不设置则随机
    'fontttf'  => '',
    //背景颜色
    'bg'       => [243, 251, 254],
    // 验证码图片高度
    'imageH'   => 0,
    // 验证码图片宽度
    'imageW'   => 0,

    // 添加额外的验证码设置
    // verify => [
    //     'length'=>4,
    //    ...
    //],
];
4. 自定义验证码(三)中文验证码
  // +----------------------------------------------------------------------
  // | Captcha配置文件
  // +----------------------------------------------------------------------

  return [
  //验证码位数
  'length'   => 4,
  // 验证码字符集合
  'codeSet'  => '2345678abcdefhijkmnpqrstuvwxyzABCDEFGHJKLMNPQRTUVWXY',
  // 验证码过期时间
  'expire'   => 1800,
  // 是否使用中文验证码
  'useZh'    => true,
  // 是否使用算术验证码
  'math'     => false,
  // 是否使用背景图
  'useImgBg' => false,
  //验证码字符大小
  'fontSize' => 25,
  // 是否使用混淆曲线
  'useCurve' => false,
  //是否添加杂点
  'useNoise' => false,
  // 验证码字体 不设置则随机
  'fontttf'  => '',
  //背景颜色
  'bg'       => [243, 251, 254],
  // 验证码图片高度
  'imageH'   => 0,
  // 验证码图片宽度
  'imageW'   => 0,

  // 添加额外的验证码设置
  // verify => [
  //     'length'=>4,
  //    ...
  //],
  ];
5. 验证校验
这里为了简单演示,就使用一个表单校验一下:
- 页面部分
DOCTYPE html>
<html lang="en">
  <head>
    <meta charset="UTF-8">
    <title>Titletitle>
  head>
  <body>
    <form action="http://robinadmin.com/index.php/index/check" method="get">
      <input name="yzm" type="text"> <div style="display: inline-block">{:captcha_img()}div>
      <input type="submit" value="提交">
      <p>{$rs}p>
    form>
  body>
html>
- 后台校验部分
declare (strict_types = 1);

namespace app\admin\controller;

use think\facade\View;
use think\Request;

class Index
{
    public function index()
    {
        return View::fetch();
    }

    public function hello()
    {
        return view::fetch('hello',[
            'rs'=>' '
        ]);
    }

    // 验证
    public function check(Request $request){
        // 1.获取验证码
        $yzm = $request->param('yzm');
        // 2.比对校验
        if(!captcha_check($yzm)){
            return view::fetch('hello',[
                'rs'=>'验证码错误'
            ]);
        }
        // 3.返回结果
        return view::fetch('hello',[
            'rs'=>'验证码正确'
        ]);
    }
}
上面的验证规则也可以修改如下,然后多提一嘴,实时验证的功能就是前端不断的发送请求给后端,当你的输入框的值改变时。
    public function check(Request $request){
        // 比对校验 input('请求方式.验证码输入框name名称')
        if(!captcha_check(input('get.yzm'))){
            return view::fetch('hello',[
                'rs'=>'验证码错误'
            ]);
        }
        // 返回结果
        return view::fetch('hello',[
            'rs'=>'验证码正确'
        ]);
    }


