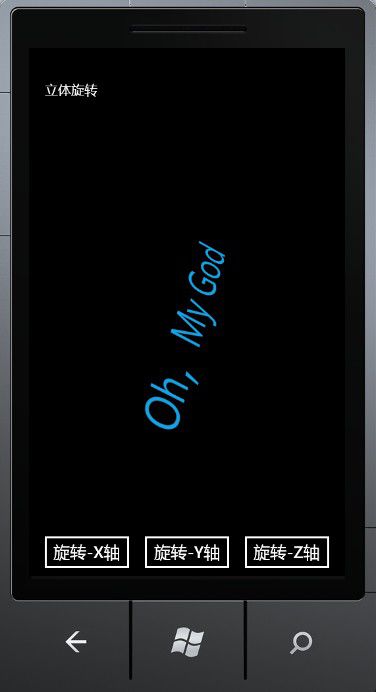
Windows Phone 7 立体旋转动画的实现
Storyboard.TargetProperty表示获取或设置应进行动画处理的属性的名称。通过对Storyboard.TargetProperty属性的设置可以很简单地实现X轴、Y轴、Z轴的立体旋转效果。
Storyboard.TargetProperty="RotationX"表示沿X轴旋转
Storyboard.TargetProperty="RotationY"表示沿Y轴旋转
Storyboard.TargetProperty="RotationZ"表示沿Z轴旋转
下面是一个立体旋转的实例:


     <

     phone:PhoneApplicationPage


     x:Class

     ="PerspectiveRotation.MainPage"


 xmlns

     ="http://schemas.microsoft.com/winfx/2006/xaml/presentation"


 xmlns:x

     ="http://schemas.microsoft.com/winfx/2006/xaml"


 xmlns:phone

     ="clr-namespace:Microsoft.Phone.Controls;assembly=Microsoft.Phone"


 xmlns:shell

     ="clr-namespace:Microsoft.Phone.Shell;assembly=Microsoft.Phone"


 xmlns:d

     ="http://schemas.microsoft.com/expression/blend/2008"


 xmlns:mc

     ="http://schemas.openxmlformats.org/markup-compatibility/2006"


 mc:Ignorable

     ="d"

      d:DesignWidth

     ="480"

      d:DesignHeight

     ="768"


 FontFamily

     ="

     {StaticResource PhoneFontFamilyNormal}

     "


 FontSize

     ="

     {StaticResource PhoneFontSizeNormal}

     "


 Foreground

     ="

     {StaticResource PhoneForegroundBrush}

     "


 SupportedOrientations

     ="PortraitOrLandscape"

      Orientation

     ="Portrait"


 shell:SystemTray.IsVisible

     ="True"

     >


     <

     phone:PhoneApplicationPage.Resources

     >


     <

     Storyboard

     x:Name

     ="rotateX"

     >

     <!--

     沿X轴方向旋转的面板

     -->


     <

     DoubleAnimation

     Storyboard.TargetName

     ="planeProjection"


 Storyboard.TargetProperty

     ="RotationX"


 From

     ="0"

      To

     ="360"

      Duration

     ="0:0:5"


     />


     </

     Storyboard

     >


     <

     Storyboard

     x:Name

     ="rotateY"

     >

     <!--

     沿Y轴方向旋转的面板

     -->


     <

     DoubleAnimation

     Storyboard.TargetName

     ="planeProjection"


 Storyboard.TargetProperty

     ="RotationY"


 From

     ="0"

      To

     ="360"

      Duration

     ="0:0:5"


     />


     </

     Storyboard

     >


     <

     Storyboard

     x:Name

     ="rotateZ"

     >

     <!--

     沿Z轴方向旋转的面板

     -->


     <

     DoubleAnimation

     Storyboard.TargetName

     ="planeProjection"


 Storyboard.TargetProperty

     ="RotationZ"


 From

     ="0"

      To

     ="360"

      Duration

     ="0:0:5"


     />


     </

     Storyboard

     >


     </

     phone:PhoneApplicationPage.Resources

     >


     <!--

     LayoutRoot is the root grid where all page content is placed

     -->


     <

     Grid

     x:Name

     ="LayoutRoot"

      Background

     ="Transparent"

     >


     <

     Grid.RowDefinitions

     >


     <

     RowDefinition

     Height

     ="Auto"

     />


     <

     RowDefinition

     Height

     ="*"

     />


     </

     Grid.RowDefinitions

     >


     <!--

     TitlePanel contains the name of the application and page title

     -->


     <

     StackPanel

     x:Name

     ="TitlePanel"

      Grid.Row

     ="0"

      Margin

     ="12,17,0,28"

     >


     <

     TextBlock

     x:Name

     ="ApplicationTitle"

      Text

     ="立体旋转"

      Style

     ="

     {StaticResource PhoneTextNormalStyle}

     "

     />


     </

     StackPanel

     >


     <!--

     ContentPanel - place additional content here

     -->


     <

     Grid

     x:Name

     ="ContentPanel"

      Grid.Row

     ="1"

      Margin

     ="12,0,12,0"

     >


     <

     Grid.RowDefinitions

     >


     <

     RowDefinition

     Height

     ="*"


     />


     <

     RowDefinition

     Height

     ="Auto"


     />


     </

     Grid.RowDefinitions

     >


     <

     Grid.ColumnDefinitions

     >


     <

     ColumnDefinition

     Width

     ="*"


     />


     <

     ColumnDefinition

     Width

     ="*"


     />


     <

     ColumnDefinition

     Width

     ="*"


     />


     </

     Grid.ColumnDefinitions

     >


     <

     TextBlock

     Name

     ="txtblk"


 Grid.Row

     ="0"

      Grid.Column

     ="0"

      Grid.ColumnSpan

     ="3"


 Text

     ="Oh,My God"


 FontSize

     ="70"


 Foreground

     ="

     {StaticResource PhoneAccentBrush}

     "


 HorizontalAlignment

     ="Center"


 VerticalAlignment

     ="Center"

     >


     <

     TextBlock.Projection

     >


     <

     PlaneProjection

     x:Name

     ="planeProjection"


     />


     </

     TextBlock.Projection

     >


     </

     TextBlock

     >


     <

     Button

     Grid.Row

     ="1"

      Grid.Column

     ="0"


 Content

     ="旋转-X轴"


 Click

     ="RotateXClick"


     />


     <

     Button

     Grid.Row

     ="1"

      Grid.Column

     ="1"


 Content

     ="旋转-Y轴"


 Click

     ="RotateYClick"


     />


     <

     Button

     Grid.Row

     ="1"

      Grid.Column

     ="2"


 Content

     ="旋转-Z轴"


 Click

     ="RotateZClick"


     />


     </

     Grid

     >


     </

     Grid

     >


     </

     phone:PhoneApplicationPage

     >
     using

      System;


     using

      System.Windows;


     using

      Microsoft.Phone.Controls;


     namespace

      PerspectiveRotation
{


     public


     partial


     class

      MainPage : PhoneApplicationPage
 {


     public

      MainPage()
 {
 InitializeComponent();
 }


     //

     沿X轴旋转


     void

      RotateXClick(

     object

      sender, RoutedEventArgs args)
 {
 rotateX.Begin();
 }


     //

     沿Y轴旋转


     void

      RotateYClick(

     object

      sender, RoutedEventArgs args)
 {
 rotateY.Begin();
 }


     //

     沿Z轴旋转


     void

      RotateZClick(

     object

      sender, RoutedEventArgs args)
 {
 rotateZ.Begin();
 }
 }
}