在 Substance Painter中自定义Shader
为什么要学习在Substance Painter中自定义Shader?
答:需要实现引擎与Substance Painter中的渲染效果一致,材质的配置也一致,所见即所得。
基础概述
首先在着色器设置这里,我们可以查看当前渲染使用的着色器
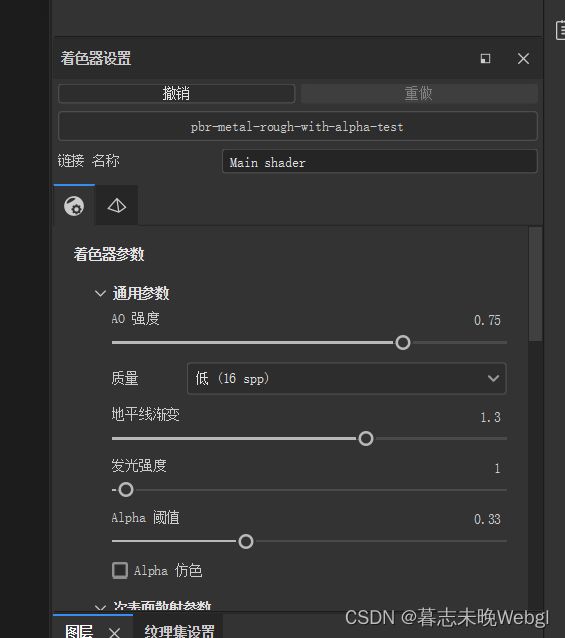
如果没有着色器设置窗口,可以在窗口这里打开

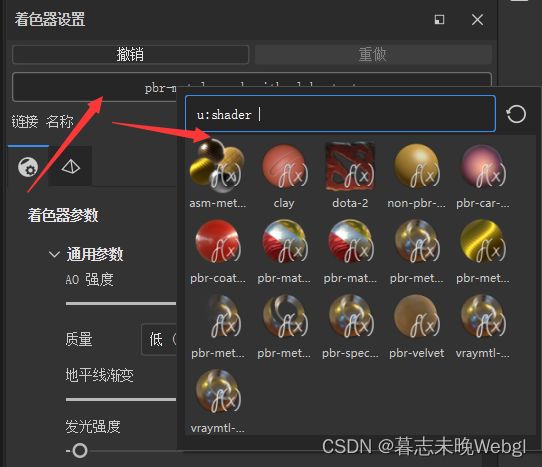
点击着色器名称,可以切换当前拥有的shader
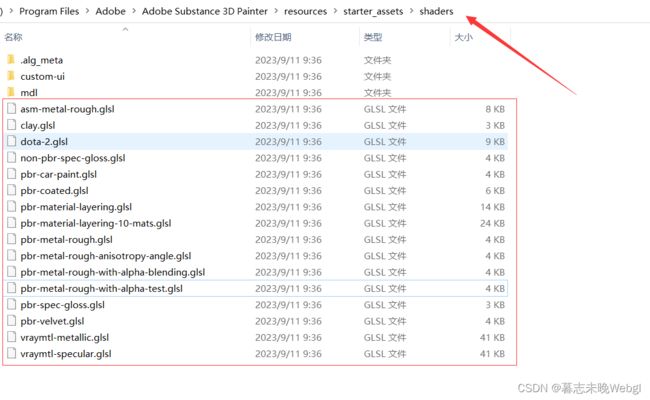
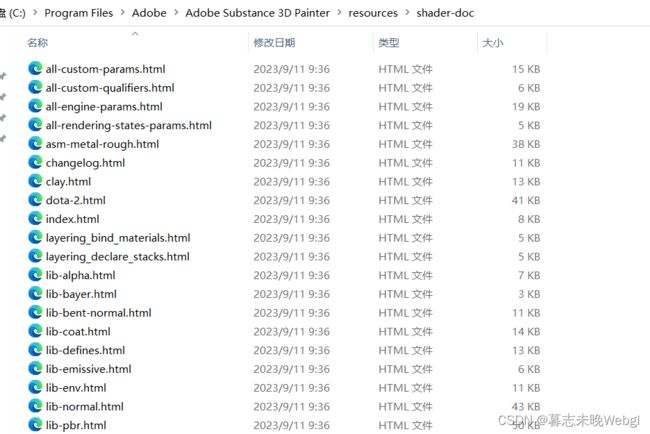
相应的内置的shader可以在安装目录找到
对应的Shader的api文档可以在帮助下拉中打开
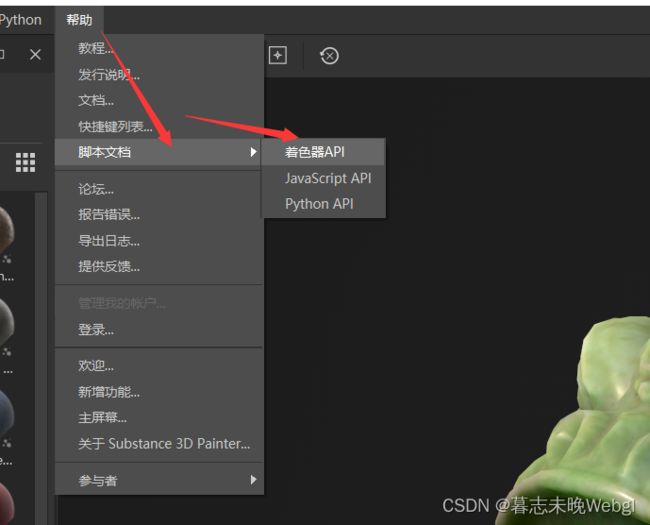
会打开相应的网页,

网页地址在/resources/shader-doc/index.html,你也可以直接在目录中查找
官方网站也有相应的文档,地址为https://helpx.adobe.com/substance-3d-painter/scripting-and-development/api-reference/shader-api.html

接下来,按照官方的教程,先在shaders文件夹下创建一个color.glsl文件

然后在里面写入
void shade(V2F inputs) {
  diffuseShadingOutput(vec3(0.0, 1.0, 1.0));
}
完成以后,点击重新选择shader,会发现你写的shader
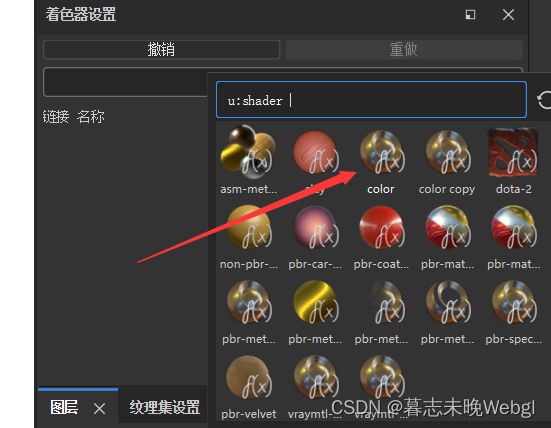
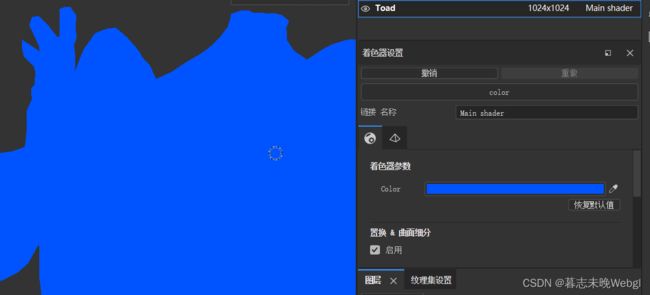
切换以后,模型的颜色就变成了一个单一的颜色,实现了第一部,自定义shader

更新shader
如果按照官方的这种方式,你每修改一次代码,都要重启一次编辑器,才可以实现shader的更新,那就太折磨人了,那有没有一种方式可以不需要重启也更新呢?答案是有的,接下来看如何实现。
首先在官方shader文件夹外创建一个shader,主要是为了区分,我这里在编辑器的Resources目录下创建了一个存放shader的目录

下面一部就是引用资源,我们通过资源管理引用,选择导入资源
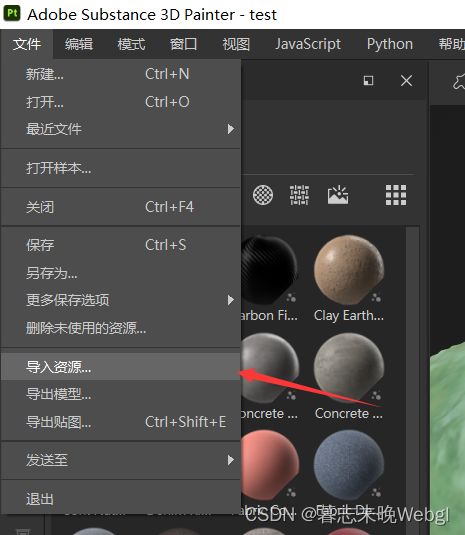
或者选择资源窗口上面的+号
选择添加资源,将刚才创建的shader添加进来
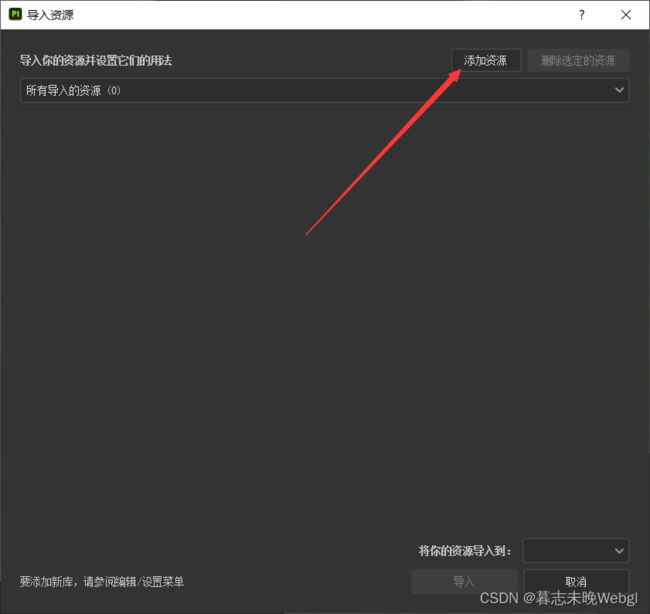
添加以后,列表中会显示当前资源

下面还需要设置将你的资源导入到哪里

当前会话:编辑器关闭之前一直生效,关闭后销毁。
项目:只有在当前项目中可以使用
库:所有项目都可以使用
我选择的是导入到项目中。
导入成功后,会在资源中显示你导入的shader

如果你只查看项目中自定义的资源,就会发现里面包含你导入的shader,或者直接搜名字也行
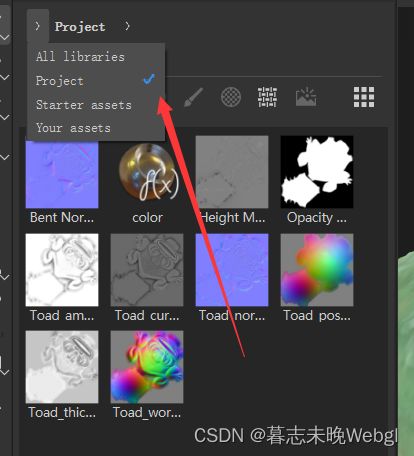
在这种情况下,如果你的shader更新了,只需要再资源里面,鼠标右键资源更新,即可实现更新

自定义配置参数
接下来是,实现自定义配置项,先自定义一个颜色,以//:开头的部分是编辑器调用用于显示在编辑器内的效果
//: param custom { "default": 1, "label": "Color", "widget": "color" }
uniform vec3 color;

void shade(V2F inputs) {
  diffuseShadingOutput(vec3(1.0, 1.0, 1.0) * color);
}
//: param custom { "default": 0, "label": "Color RGB", "widget": "color" }
uniform vec3 u_color_float3;
//: param custom { "default": 1, "label": "Color RGBA", "widget": "color" }
uniform vec4 u_color_float4;
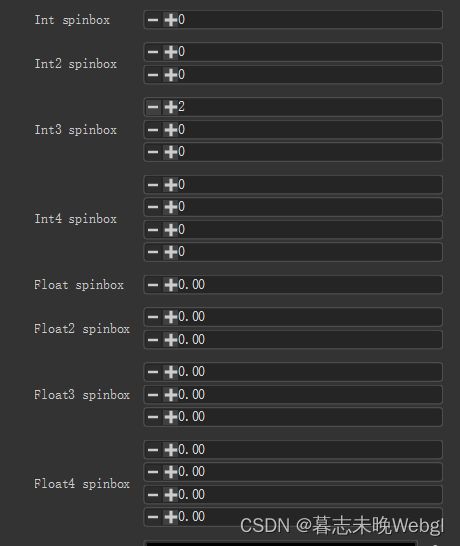
//: param custom { "default": 0, "label": "Int spinbox" }
uniform int u_spin_int1;
//: param custom { "default": 0, "label": "Int2 spinbox" }
uniform ivec2 u_spin_int2;
//: param custom { "default": 0, "label": "Int3 spinbox" }
uniform ivec3 u_spin_int3;
//: param custom { "default": 0, "label": "Int4 spinbox" }
uniform ivec4 u_spin_int4;
//: param custom { "default": 0, "label": "Float spinbox" }
uniform float u_spin_float1;
//: param custom { "default": 0, "label": "Float2 spinbox" }
uniform vec2 u_spin_float2;
//: param custom { "default": 0, "label": "Float3 spinbox" }
uniform vec3 u_spin_float3;
//: param custom { "default": 0, "label": "Float4 spinbox" }
uniform vec4 u_spin_float4;
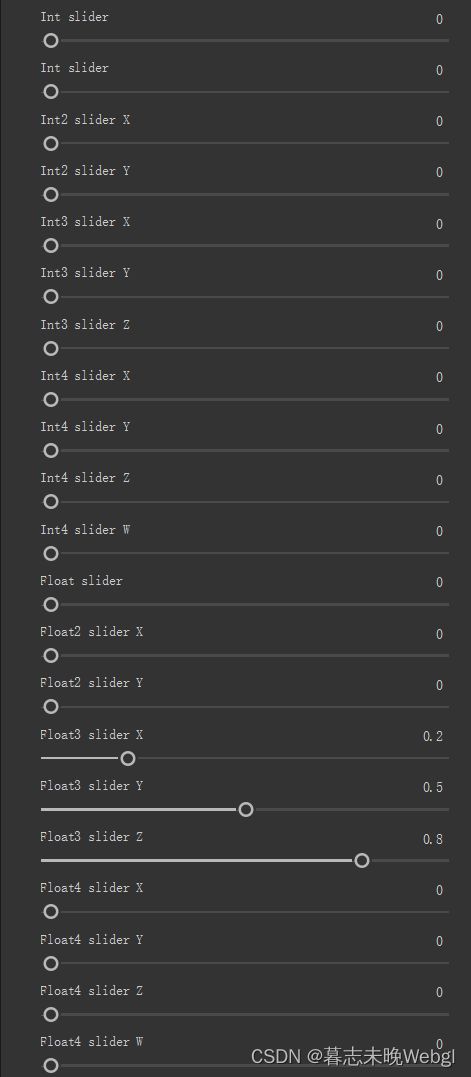
//: param custom { "default": 0, "label": "Int slider", "min": 0, "max": 10 }
uniform int u_slider_int1;
//: param custom { "default": 0, "label": "Int slider", "min": 0, "max": 10, "step": 2 }
uniform int u_slider_int1_stepped;
//: param custom { "default": 0, "label": "Int2 slider", "min": 0, "max": 10 }
uniform ivec2 u_slider_int2;
//: param custom { "default": 0, "label": "Int3 slider", "min": 0, "max": 10 }
uniform ivec3 u_slider_int3;
//: param custom { "default": 0, "label": "Int4 slider", "min": 0, "max": 10 }
uniform ivec4 u_slider_int4;
//: param custom { "default": 0, "label": "Float slider", "min": 0.0, "max": 1.0 }
uniform float u_slider_float1;
//: param custom { "default": 0, "label": "Float2 slider", "min": 0.0, "max": 1.0 }
uniform vec2 u_slider_float2;
//: param custom { "default": [0.2, 0.5, 0.8], "label": "Float3 slider", "min": 0.0, "max": 1.0 }
uniform vec3 u_slider_float3;
//: param custom { "default": 0, "label": "Float4 slider", "min": 0.0, "max": 1.0, "step": 0.02 }
uniform vec4 u_slider_float4_stepped;
//: param custom { "default": false, "label": "Boolean" }
uniform bool u_bool;
![]()
纹理配置
还有一句The texture is defined by its name in the shelf and must be in the Textures or Environments category.
意思要声明它的用途是普通贴图还是环境贴图,普通贴图和环境贴图的区别就是选择贴图时,可选择的贴图不同
//: param custom { "default": "", "default_color": [1.0, 1.0, 0.0, 1.0], "label": "Texture1" }
uniform sampler2D u_sampler1;
//: param custom { "default": "texture_name", "label": "Texture2" }
uniform sampler2D u_sampler2;
//: param custom { "default": "texture_name", "label": "Texture3", "usage": "texture" }
uniform sampler2D u_sampler3;
//: param custom { "default": "texture_name", "label": "Texture4", "usage": "environment" }
uniform sampler2D u_sampler4;
//: param custom {
//:   "default": -1,
//:   "label": "Combobox",
//:   "widget": "combobox",
//:   "values": {
//:     "Value -1": -1,
//:     "Value 0": 0,
//:     "Value 10": 10
//:   }
//: }
uniform int u_combobox;
使用纹理
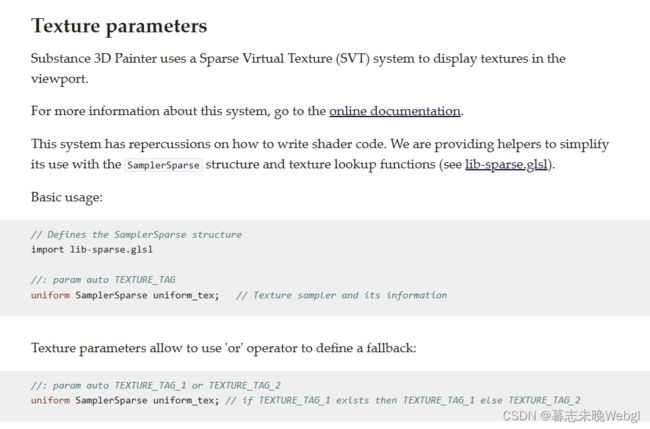
import lib-sparse.glsl
声明纹理,两行,第一行为需要链接的纹理通道,第二行为纹理名称
//: param auto texture_bent_normals
uniform SamplerSparse basecolor_tex;
param auto 后面跟着的就是通道名称,texture_bent_normals为烘焙出来的纹理,可以使用的有
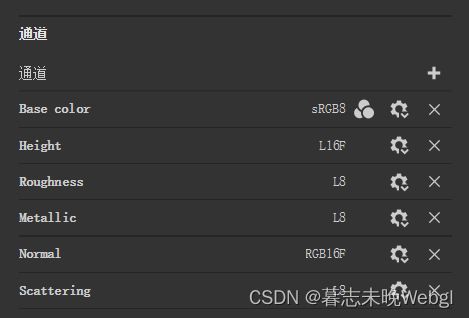
纹理设置通道
channel_ambientocclusion channel_anisotropyangle channel_anisotropylevel channel_basecolor channel_blendingmask channel_diffuse channel_displacement channel_emissive channel_glossiness channel_height channel_ior channel_metallic channel_normal channel_opacity channel_reflection channel_roughness channel_scattering channel_specular channel_specularlevel channel_transmissive
用户通道
channel_user0 channel_user1 channel_user2 channel_user3 channel_user4 channel_user5 channel_user6 channel_user7

模型贴图
texture_ambientocclusion : Ambient Occlusion map
texture_curvature : Curvature map
texture_id : ID map
texture_normal : Tangent space normal map
texture_normal_ws : World space normal map
texture_position : World space position map
texture_thickness : Thickness map
texture_height : Height map
texture_bent_normals : Bent normals map
texture_opacity : Opacity map
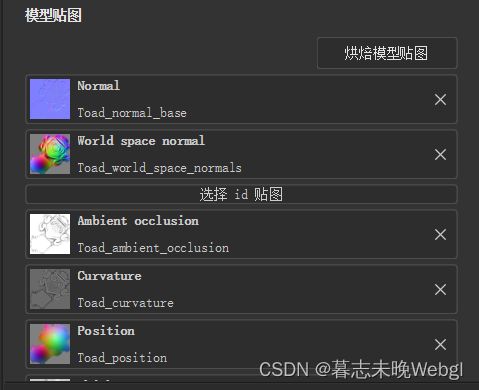
在shader中使用的纹理名称可以自定义,但是对应的通道无法自定义。
两个特殊的通道
texture_blue_noise 蓝色的扰动贴图
texture_environment 环境贴图,mipmap贴图,需要引入 lib-env.glsl 库
贴图颜色获取
vec4 baseColor = textureSparse(basecolor_tex, inputs.sparse_coord);
成功获取的贴图
完整代码:
import lib-sparse.glsl

//: param auto channel_basecolor
uniform SamplerSparse basecolor_tex;

//: param custom { "default": 1, "label": "Color", "widget": "color" }
uniform vec3 color;

void shade(V2F inputs) {
  vec4 baseColor = textureSparse(basecolor_tex, inputs.sparse_coord);
  vec3 diffuse = baseColor.rgb * color;
  diffuseShadingOutput(diffuse);
}
效果如下,成功显示出了模型的基础贴图
片元输出
先看一下顶点向片元传送的数据结构,将所需的内容都传递到了片元,变量名称后面带有[]的表示当前为数组,里面的数字代表数组长度。
struct V2F {
  vec3 normal;               // 法线
  vec3 tangent;              // 切线
  vec3 bitangent;            // 副切线
  vec3 position;             // 位置坐标
  vec4 color[1];             // 顶点颜色 (color0)
  vec2 tex_coord;            // 纹理坐标 (uv0)
  SparseCoord sparse_coord;  // sparse纹理坐标通过textureSparse()函数采样纹理
  vec2 multi_tex_coord[8];   // 纹理坐标数组 (uv0-uv7)
};
然后可以在shade函数内使用,最简单的方式就是直接返回单个值,返回一个四维向量
vec4 shade(V2F inputs)
{
  // We simply return the value of the RGB color picker
  return vec4(u_color_float3, 1.0);
}
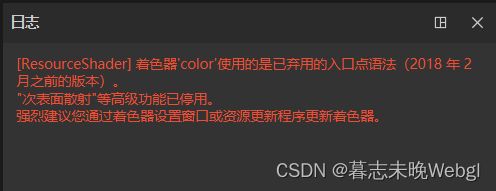
但是现在会提示,已经丢弃当前方式
然后就是现在经常使用的,通过函数输出diffuseShadingOutput
void shade(V2F inputs) {
  vec4 baseColor = textureSparse(basecolor_tex, inputs.sparse_coord);
  vec3 diffuse = baseColor.rgb * color;

  diffuseShadingOutput(diffuse);
}
它只输出了一个三维的向量,如果需要透明度alphaOutput函数
void shade(V2F inputs) {
  vec4 baseColor = textureSparse(basecolor_tex, inputs.sparse_coord);
  vec3 diffuse = baseColor.rgb * color;

  diffuseShadingOutput(diffuse);

  alphaOutput(1.0);
}
相关的输出函数定义
// 透明度. default value: 1.0
void alphaOutput(float);
// 漫反射. default value: vec3(0.0)
void diffuseShadingOutput(vec3);
// 镜面反射. default value: vec3(0.0)
void specularShadingOutput(vec3);
// 自发光. default value: vec3(0.0)
void emissiveColorOutput(vec3);
// 片元颜色. default value: vec3(1.0)
void albedoOutput(vec3);
// 次表面散射, see lib-sss.glsl for details. default value: vec4(0.0)
void sssCoefficientsOutput(vec4);
最基本的渲染:emissiveColor + albedo * diffuseShading + specularShading
渲染状态设置
剔除背面
//: state cull_face on
绘制正反面
//: state cull_face off
混合模式
无混合
//: state blend none
标准混合模式,从后到前绘制顺序
//: state blend over
标准混合模式,从后到前绘制顺序。假设颜色预先乘以alpha:
//: state blend over_premult
Additive 混合模式:
//: state blend add
Multiplicative 混合模式
//: state blend multiply
Shader sampling locality
By default, document channels are sampled using untransformed texture coordinates for rendering optimizations during painting.
If artifacts appear set the nonlocal state to on .
翻译大概为
着色器采样局部性
默认情况下,文档通道在绘制期间使用未转换的纹理坐标进行采样,以进行渲染优化。
如果出现工件,将非局部状态设置为on。
//: state nonlocal on
基础的了解了以后,后面就是查看内置库的视线,以及内置的pbr如何实现的,后面再更新的话,我将更新,如何再sp里面实现unity的内置standard
