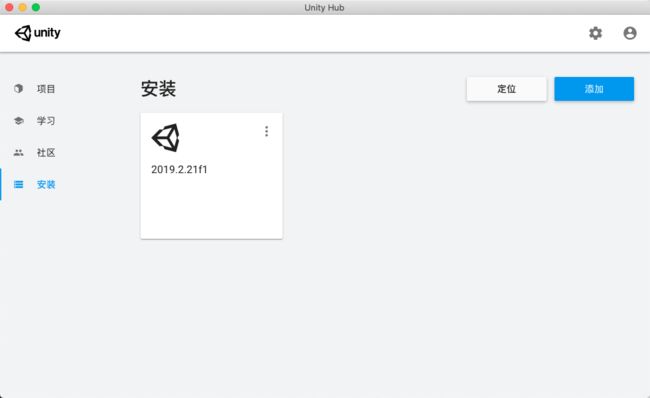
Unity Hub for Mac for Windows 与 Unity Personal Edition,sdk ndk jdk
//Unity Personal Edition
Unity2019个人版如何激活使用(不是破解,正规激活流程)
首先去官网下载对应版本的UnityHub
Unity官网地址: Unity官方下载_Unity最新版_从Unity Hub下载安装 | Unity中国官网
Start Your Creative Projects and Download the Unity Hub | Unity
安装完UnityHub,运行会提示登录Unity账号,可以用微信登录,点击右上角的这个按钮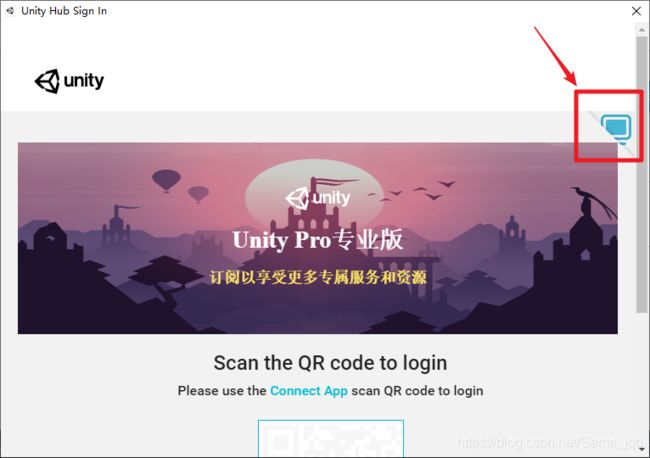
选择微信登录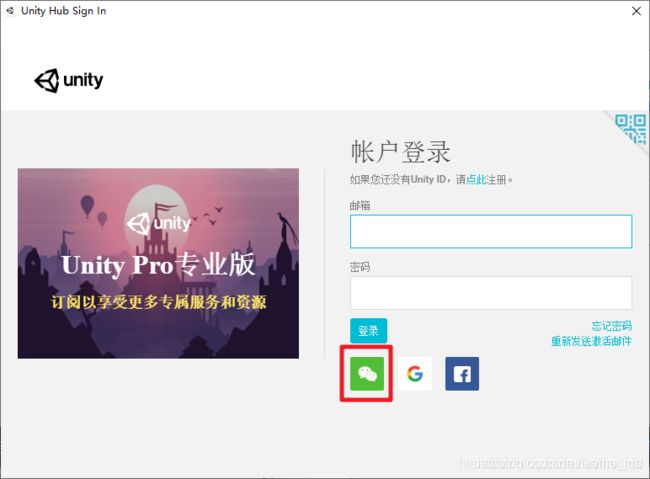
然后用手机扫码即可 blog.csdn.net/Game_jqd/article/details/108352367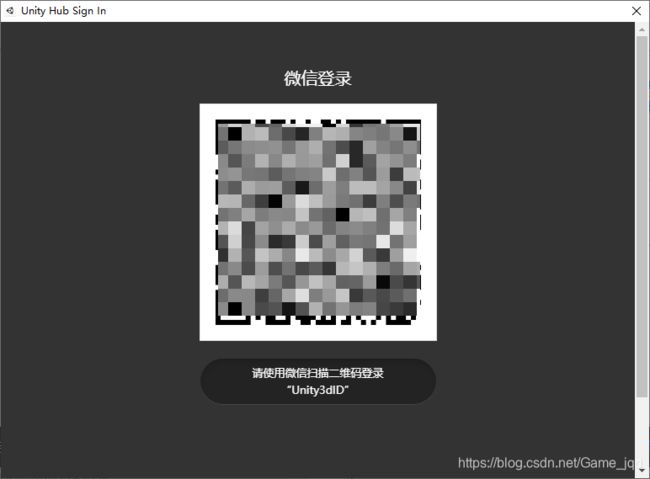
登录成功后,会提示激活,选择【手动激活】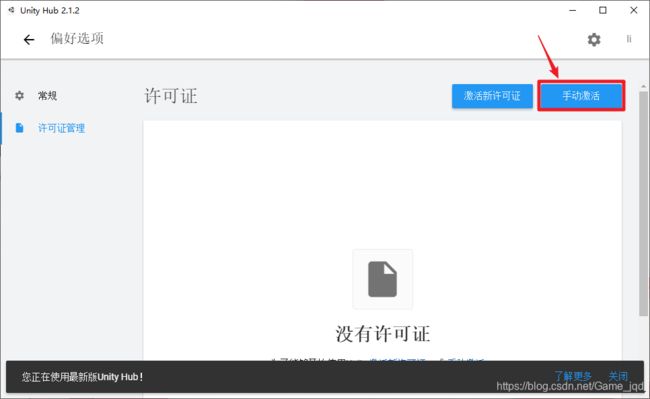
点击【保存许可证申请】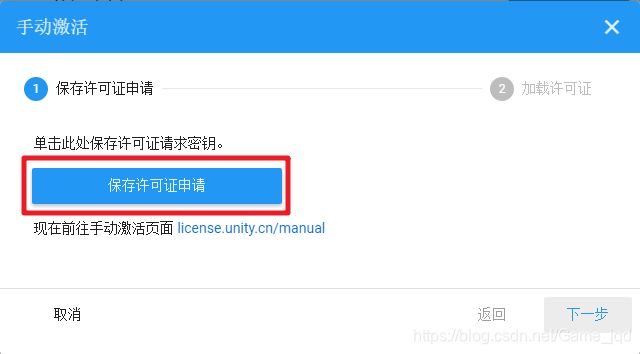
选择本地的某个目录,保存Unity_lic.alf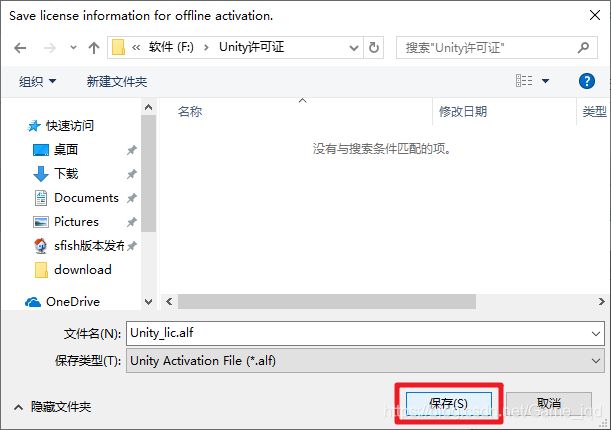
然后点击license.unity.cn/manual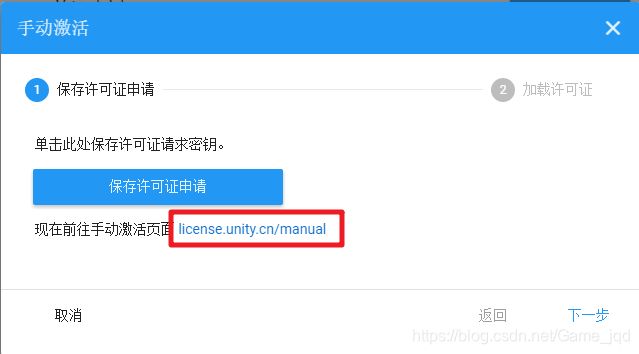
此时会打开浏览器,进入激活页面,也是用相同的微信号登录,然后点击【Browse】按钮,选择刚刚保存的Unity_lic.alf文件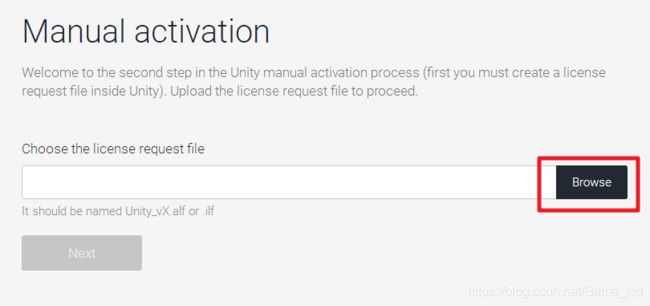
然后点击【Next】
选择【Unity Personal Editor】,再选择【I don’t use Unity in a professional capacity】,然后点击【Next】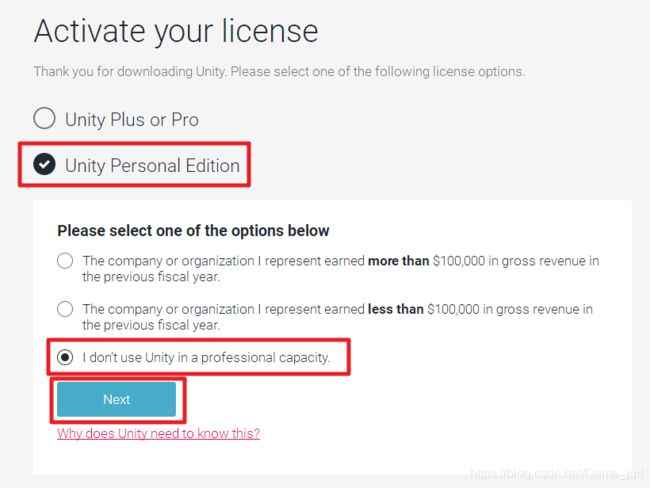
然后点击【Download license file】,保存许可证(.ulf)到本地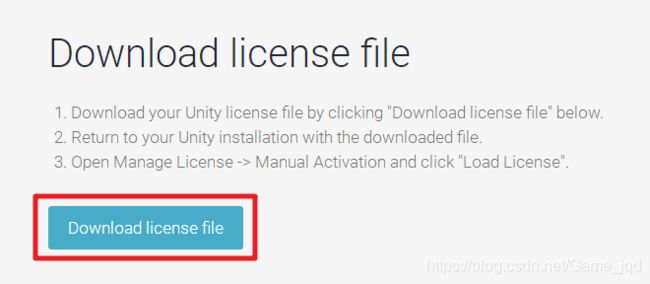

回到UnityHub,点击【下一步】,然后点击【···】,选择刚刚保存的许可证文件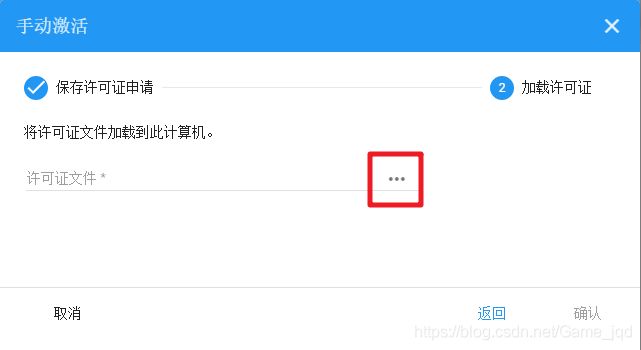
点击【确定】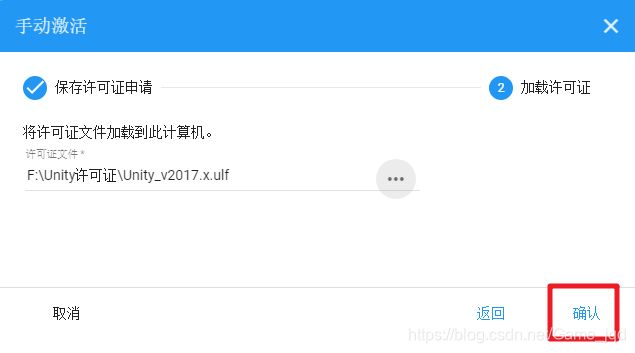
此时UnityHub中就可以看到我们的许可证了,点击返回偏好选项,即可开始创建Unity工程了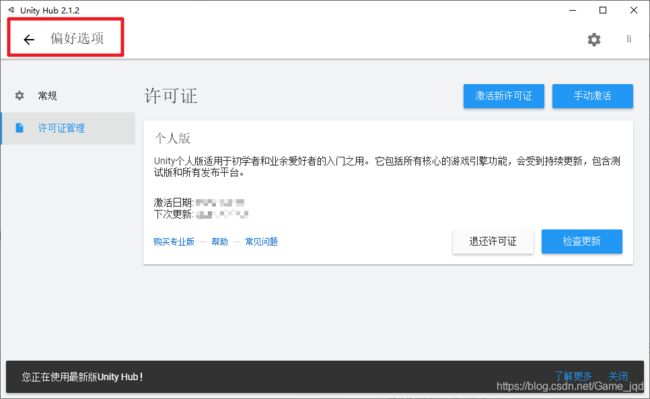
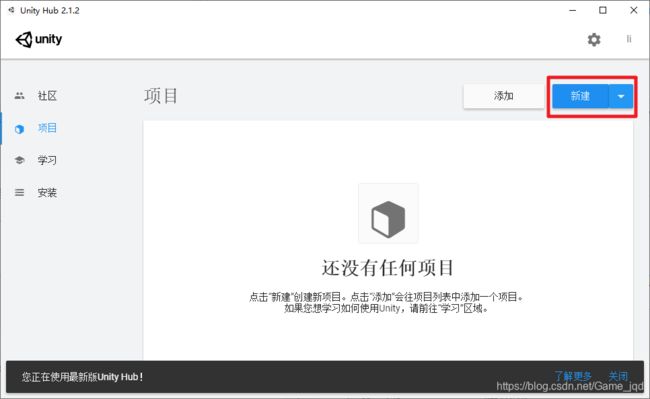
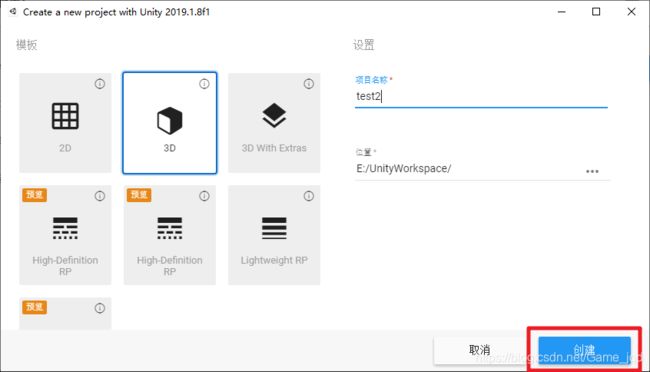
开始愉快地编程吧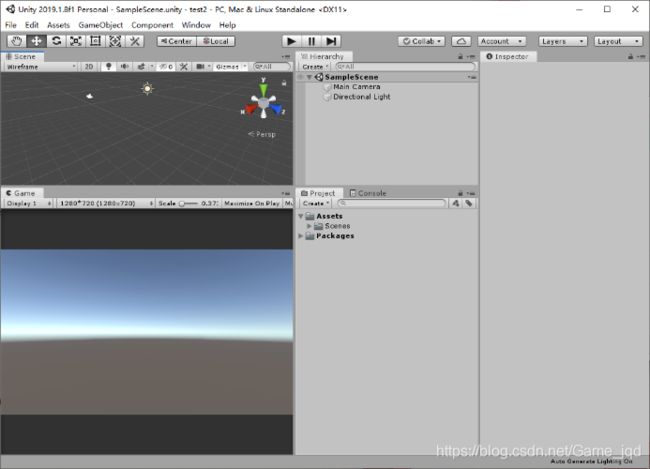
//Unity Hub for Mac//
一.安装node.js
菜鸟教程,自行选择下载安装包或者使用命令行进行安装。
Node.js 安装配置
本章节我们将向大家介绍在 Windows 和 Linux 上安装 Node.js 的方法。
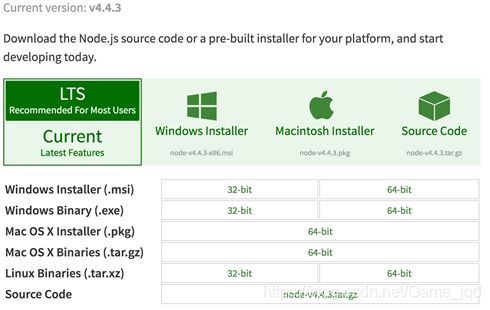
本安装教程以 Node.js v4.4.3 LTS(长期支持版本)版本为例。
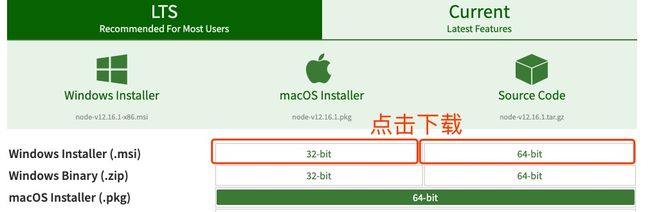
Node.js 安装包及源码下载地址为:Download | Node.js。
你可以根据不同平台系统选择你需要的 Node.js 安装包。
Node.js 历史版本下载地址:Index of /dist/
注意:Linux 上安装 Node.js 需要安装 Python 2.6 或 2.7 ,不建议安装 Python 3.0 以上版本。
Windows 上安装 Node.js
你可以采用以下两种方式来安装。
1、Windows 安装包(.msi)
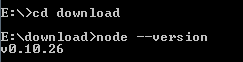
本文实例以 v0.10.26 版本为例,其他版本类似, 安装步骤:
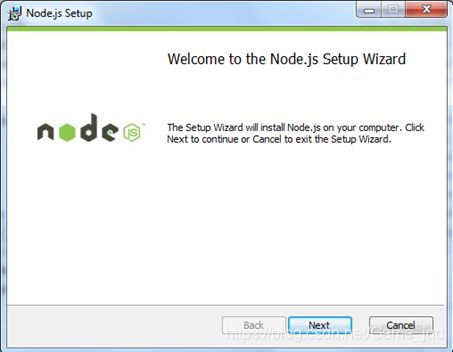
步骤 1 : 双击下载后的安装包 v0.10.26,如下所示:

步骤 2 : 点击以上的Run(运行),将出现如下界面:
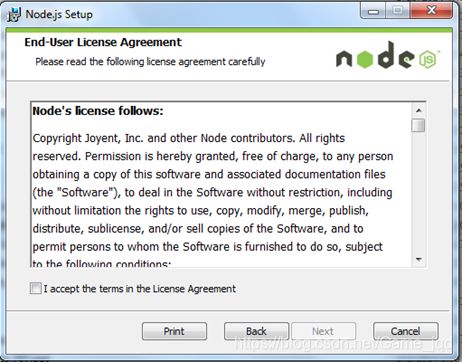
步骤 3 : 勾选接受协议选项,点击 next(下一步) 按钮 :
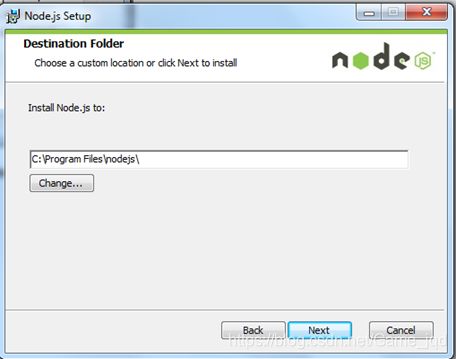
步骤 4 : Node.js默认安装目录为 "C:\Program Files\nodejs\" , 你可以修改目录,并点击 next(下一步):
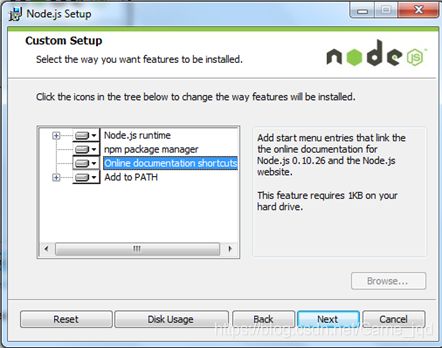
步骤 5 : 点击树形图标来选择你需要的安装模式 , 然后点击下一步 next(下一步)
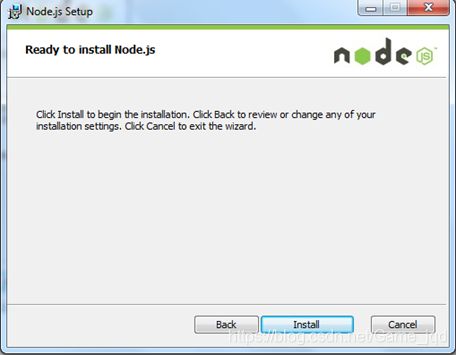
步骤 6 :点击 Install(安装) 开始安装Node.js。你也可以点击 Back(返回)来修改先前的配置。 然后并点击 next(下一步):
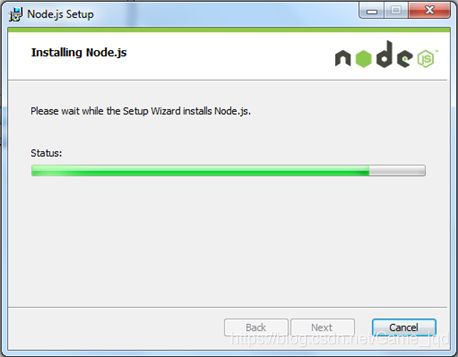
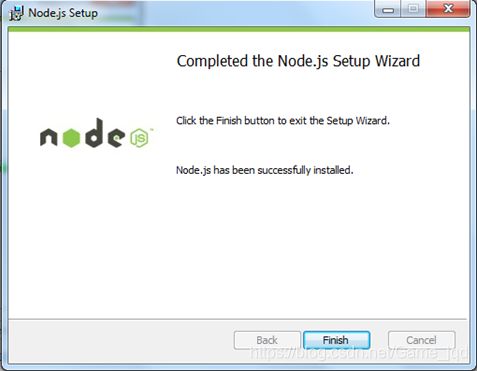
安装过程:
点击 Finish(完成)按钮退出安装向导。
检测PATH环境变量是否配置了Node.js,点击开始=》运行=》输入"cmd" => 输入命令"path",输出如下结果:
PATH=C:\oraclexe\app\oracle\product\10.2.0\server\bin;C:\Windows\system32;C:\Windows;C:\Windows\System32\Wbem;C:\Windows\System32\WindowsPowerShell\v1.0\;c:\python32\python;C:\MinGW\bin;C:\Program Files\GTK2-Runtime\lib;C:\Program Files\MySQL\MySQL Server 5.5\bin;C:\Program Files\nodejs\;C:\Users\rg\AppData\Roaming\npm我们可以看到环境变量中已经包含了C:\Program Files\nodejs\
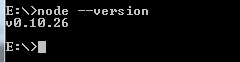
检查Node.js版本
2、Windows 二进制文件 (.exe)安装
32 位安装包下载地址 : http://nodejs.org/dist/v0.10.26/node.exe
64 位安装包下载地址 : http://nodejs.org/dist/v0.10.26/x64/node.exe
安装步骤
步骤 1 : 双击下载的安装包 Node.exe ,将出现如下界面 :
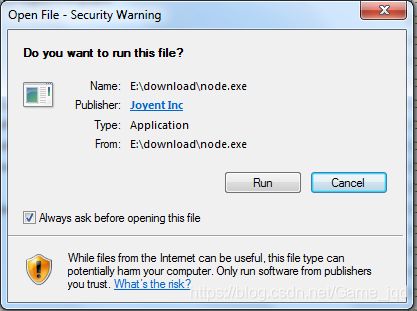
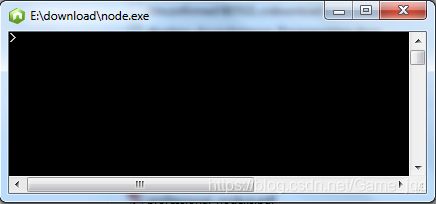
点击 Run(运行)按钮将出现命令行窗口:
版本测试
进入 node.exe 所在的目录,如下所示:
如果你获得以上输出结果,说明你已经成功安装了Node.js。
Linux 上安装 Node.js
直接使用已编译好的包
Node 官网已经把 linux 下载版本更改为已编译好的版本了,我们可以直接下载解压后使用:
# wget https://nodejs.org/dist/v10.9.0/node-v10.9.0-linux-x64.tar.xz // 下载# tar xf node-v10.9.0-linux-x64.tar.xz // 解压# cd node-v10.9.0-linux-x64/ // 进入解压目录# ./bin/node -v // 执行node命令 查看版本v10.9.0解压文件的 bin 目录底下包含了 node、npm 等命令,我们可以使用 ln 命令来设置软连接:
ln -s /usr/software/nodejs/bin/npm /usr/local/bin/ ln -s /usr/software/nodejs/bin/node /usr/local/bin/Ubuntu 源码安装 Node.js
以下部分我们将介绍在 Ubuntu Linux 下使用源码安装 Node.js 。 其他的 Linux 系统,如 Centos 等类似如下安装步骤。
在 Github 上获取 Node.js 源码:
$ sudo git clone https://github.com/nodejs/node.gitCloning into 'node'...修改目录权限:
$ sudo chmod -R 755 node使用 ./configure 创建编译文件,并按照:
$ cd node$ sudo ./configure$ sudo make$ sudo make install查看 node 版本:
$ node --versionv0.10.25Ubuntu apt-get命令安装
命令格式如下:
sudo apt-get install nodejssudo apt-get install npmCentOS 下源码安装 Node.js
1、下载源码,你需要在Download | Node.js下载最新的Nodejs版本,本文以v0.10.24为例:
cd /usr/local/src/wget http://nodejs.org/dist/v0.10.24/node-v0.10.24.tar.gz2、解压源码
tar zxvf node-v0.10.24.tar.gz3、 编译安装
cd node-v0.10.24./configure --prefix=/usr/local/node/0.10.24makemake install4、 配置NODE_HOME,进入profile编辑环境变量
vim /etc/profile设置 nodejs 环境变量,在 export PATH USER LOGNAME MAIL HOSTNAME HISTSIZE HISTCONTROL 一行的上面添加如下内容:
#set for nodejsexport NODE_HOME=/usr/local/node/0.10.24export PATH=$NODE_HOME/bin:$PATH:wq保存并退出,编译/etc/profile 使配置生效
source /etc/profile验证是否安装配置成功
node -v输出 v0.10.24 表示配置成功
npm模块安装路径
/usr/local/node/0.10.24/lib/node_modules/注:Nodejs 官网提供了编译好的 Linux 二进制包,你也可以下载下来直接应用。
Mac OS 上安装
你可以通过以下两种方式在 Mac OS 上来安装 node:
- 1、在官方下载网站下载 pkg 安装包,直接点击安装即可。
- 2、使用 brew 命令来安装:
brew install node二.打开终端命令
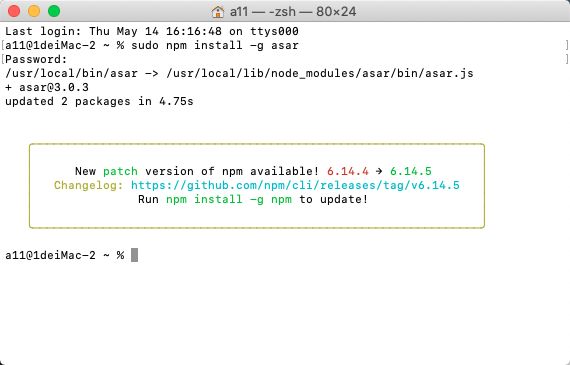
1.打开mac的终端,然后输入以下命令
sudo npm install -g asar blog.csdn.net/Game_jqd/article/details/108352367
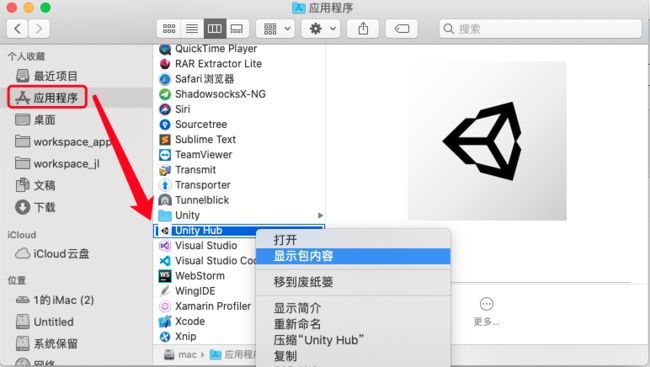
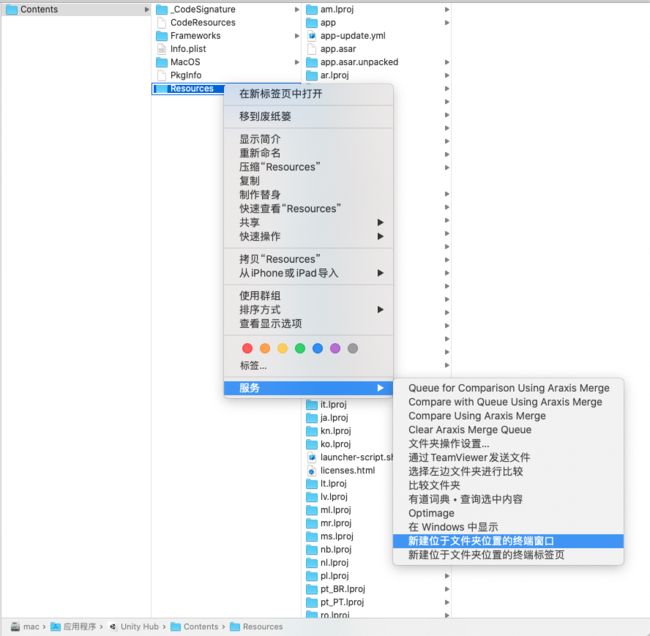
2.打开访达,在应用程序中找到Unity Hub,然后打开显示包内容,然后依次进入Contents ——> Resources,参照下图。
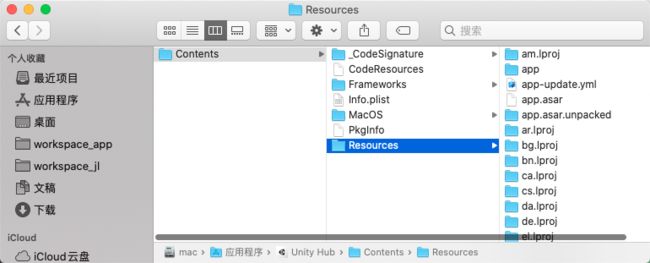
3. 在Resources文件夹上打开新建位于文件夹位置的终端窗口
4. 接着在打开的终端命令窗口上,输入
asar extract app.asar app blog.csdn.net/Game_jqd/article/details/108352367
5.修改Resources文件下的 app/src/services/licenseService/licenseClient.js 路径下js脚本
blog.csdn.net/Game_jqd/article/details/108352367
6.修改Resources文件下的 app/src/services/licenseService/licenseCore.js 路径下js脚本
三:大功告成
1.退出UnityHub,安装好nodejs后,用Win+R输入"cmd"执行以下命令
npm install -g asar
2.打开UnityHub安装目录如 C:\Program Files\Unity Hub\resources。
3.在C:\Program Files\Unity Hub\resources打开命令行,执行以下命令解压app.asar。
C:\Program Files\Unity Hub\resources> asar extract .\app.asar app
解压后删除C:\Program Files\Unity Hub\resources\app.asar。
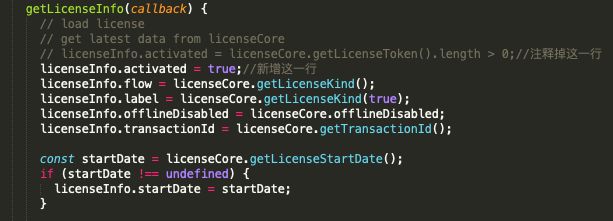
4.修改C:\Program Files\Unity Hub\resources\app\build\services\licenseService\licenseClient.js hub 2.4 +
blog.csdn.net/Game_jqd/article/details/108352367
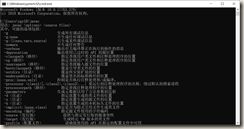
getLicenseInfo(callback) {
// load license
// get latest data from licenseCore
//licenseInfo.activated = licenseCore.getLicenseToken().length > 0;//注释这行
licenseInfo.activated = true;//新增这行
licenseInfo.flow = licenseCore.getLicenseKind();
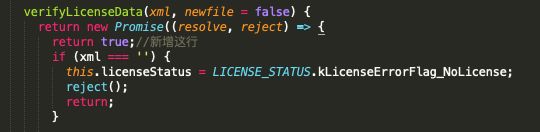
5.C:\Program Files\Unity Hub\resources\app\src\services\licenseService\licenseCore.js
C:\Program Files\Unity Hub\resources\app\build\services\licenseService\licenseCore.js hub 2.4 +
blog.csdn.net/Game_jqd/article/details/108352367
verifyLicenseData(xml) {
return new Promise((resolve, reject) => {
resolve(true);//新增这行
if (xml === '') {
//
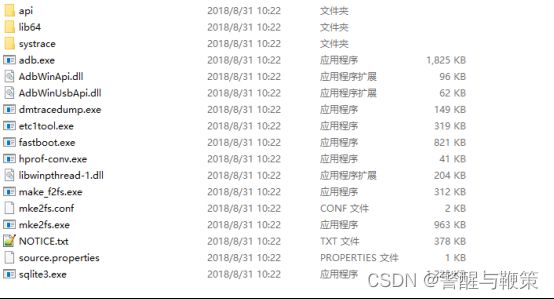
D:\自己安装\Unity2020.3.25f1\Editor\Data\PlaybackEngines\AndroidPlayer\OpenJDK
D:\自己安装\Unity2020.3.25f1\Editor\Data\PlaybackEngines\AndroidPlayer\SDK
D:\自己安装\Unity2020.3.25f1\Editor\Data\PlaybackEngines\AndroidPlayer\NDK
D:\自己安装\Unity2020.3.25f1\Editor\Data\PlaybackEngines\AndroidPlayer\Tools\gradle
C:\Program Files\Unity\Hub\Editor\2020.3.36f1c1\Editor\Data\PlaybackEngines\AndroidPlayer\NDK
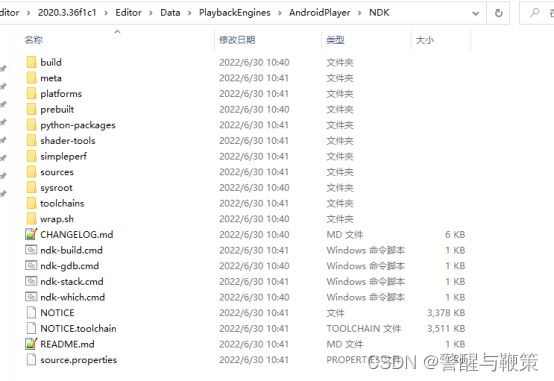
unity2020.3.36包含sdkndkjdk
android-ndk-r19-windows-x86_64.zip
unity2020.3.36包含sdkndkjdk\android-ndk-r19-windows-x86_64\android-ndk-r19
C:\Program Files\Unity\Hub\Editor\2020.3.36f1c1\Editor\Data\PlaybackEngines\AndroidPlayer\OpenJDK
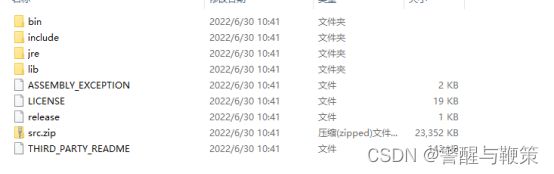 unity2020.3.36包含sdkndkjdk\jdk8u172-b11_4be8440cc514099cfe1b50cbc74128f6955cd90fd5afe15ea7be60f832de67b4
C:\Program Files\Unity\Hub\Editor\2020.3.36f1c1\Editor\Data\PlaybackEngines\AndroidPlayer\SDK
C:\Program Files\Unity\Hub\Editor\2020.3.36f1c1\Editor\Data\PlaybackEngines\AndroidPlayer\SDK\tools
unity2020.3.36包含sdkndkjdk\sdk-tools-windows-4333796\tools
C:\Program Files\Unity\Hub\Editor\2020.3.36f1c1\Editor\Data\PlaybackEngines\AndroidPlayer\SDK\platform-tools
unity2020.3.36包含sdkndkjdk\platform-tools_r28.0.1-windows\platform-tools
C:\Program Files\Unity\Hub\Editor\2020.3.36f1c1\Editor\Data\PlaybackEngines\AndroidPlayer\SDK\platforms

C:\Program Files\Unity\Hub\Editor\2020.3.36f1c1\Editor\Data\PlaybackEngines\AndroidPlayer\SDK\platforms\android-29
unity2020.3.36包含sdkndkjdk\platform-29_r05\android-10

C:\Program Files\Unity\Hub\Editor\2020.3.36f1c1\Editor\Data\PlaybackEngines\AndroidPlayer\SDK\platforms\android-30
unity2020.3.36包含sdkndkjdk\platform-30_r03\android-11
C:\Program Files\Unity\Hub\Editor\2020.3.36f1c1\Editor\Data\PlaybackEngines\AndroidPlayer\SDK\build-tools

C:\Program Files\Unity\Hub\Editor\2020.3.36f1c1\Editor\Data\PlaybackEngines\AndroidPlayer\SDK\build-tools\30.0.2
/
Unity - Manual: Android environment setup
OpenJDK JDK 18.0.1.1 GA Release
https://dl.google.com/android/repository/android-ndk-r19-windows-x86_64.zip
https://dl.google.com/android/repository/android-ndk-r21d-windows-x86_64.zip
https://developer.android.com/studio Tools –>SDK Manger
Download Android Studio & App Tools - Android Developers
NDK 修订历史记录 | Android NDK | Android Developers
Unsupported Downloads · android/ndk Wiki · GitHub
Java Downloads | Oracle
Java Downloads | Oracle
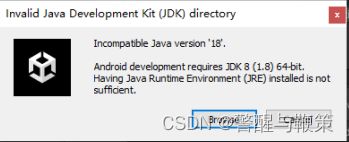
jdk-8u333-windows-x64.exe 这是jdk 8的
jdk-18_windows-x64_bin 18的不行
android-ndk-r21d-windows-x86_64 android-ndk-r19-windows-x86_64
android-ndk-r21e-windows-x86_64 这个都不行
///
jdk 环境变量
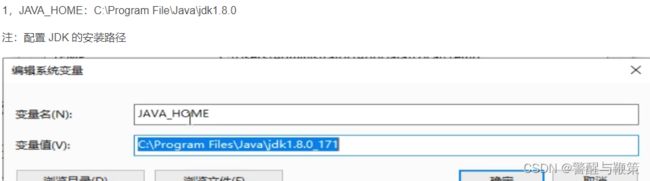
JDK 环境变量配置
点击桌面“我的电脑”,右键点击属性,找到高级属性设置
系统变量→新建 JAVA_HOME 变量
系统变量→寻找 Path 变量→编辑
方法一
2,PATH:%JAVA_HOME%\bin;
%JAVA_HOME%\jre\bin;
注:注意原来 Path 的变量值末尾有没有;号,如果没有,先输入;号再输入上面的代码
方法二
2,PATH:%JAVA_HOME%\bin;%JAVA_HOME%\jre\bin;
注:注意原来 Path 的变量值末尾有没有;号,如果没有,先输入;号再输入上面的代码

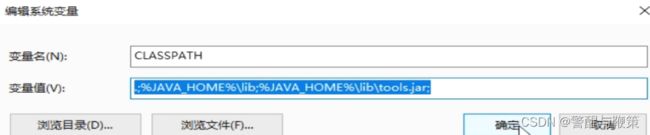
3,CLASS_PATH:.;%JAVA_HOME%\lib;%JAVA_HOME%\lib\tools.jar;
注:注意最前面的那个点
4. 检验是否配置成功:运行 cmd 输入:java -version
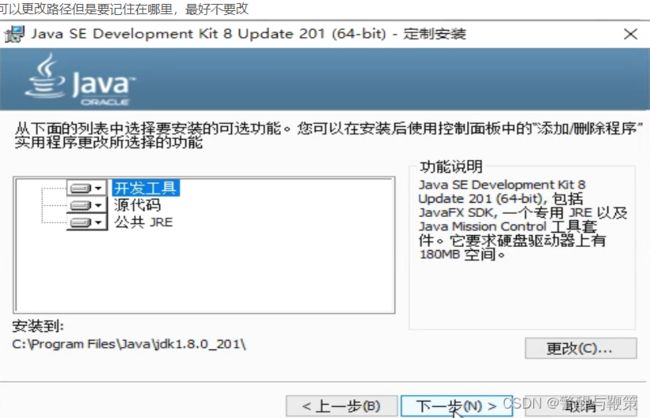
1.首先下载好jdk安装
2.右键选择 计算机→属性→高级系统设置→高级→环境变量→新建
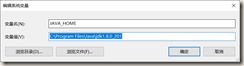
变量名:JAVA_HOME
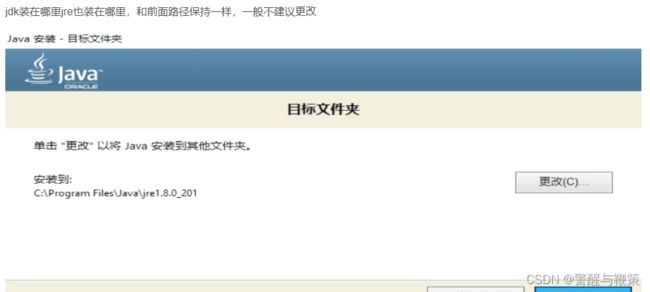
这里的变量值改为自己本机对应的路径,这里是选择jdk文件夹,不是jre文件夹,注意
3.继续新建
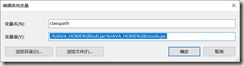
这个classpath变量名一定要小写,首字母可以大写,但是千万不要全部大写,否则无效
变量值可以复制:.;%JAVA_HOME%\lib\dt.jar;%JAVA_HOME%\lib\tools.jar;
前面的那个点不能漏掉
4.修改path,在系统变量里面找到Path,双击修改,新增如下两条:
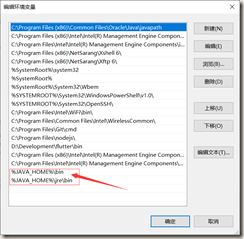
win7系统的输入%JAVA_HOME%\bin;%JAVA_HOME%\jre\bin;
如果百分号前面有其它字符,要加分号 ; 隔开
5.保存应用,如果之前有打开cmd,请关闭后重新打开,输入javac验证是否配置成功
///
Android environment setup
To create a Unity application for Android, you first need to set up your Unity project to support Android. To support Android, a Unity project requires the following dependencies
:
- The Android Build Support module.
- The Android Software Development Kit (SDK).
- The Native Development Kit (NDK).
- A Java Development Kit. By default, Unity uses OpenJDK.
Before you get started, check Unity’s Requirements and compatibility documentation for Android to make sure you’re aware of any limitations for developing a Unity application for Android.
Installing dependencies
Unity distributes dependencies as modules which means you use the Unity Hub to install them. You can install them either when you install a new Unity Editor version, or add them to an existing Unity Editor install. To install modules:
- At install time, see Downloading and installing Editors and modules with the Unity Hub.
- To an existing install, see Add modules.
The three modules to install are:
- Android Build Support
- Android SDK & NDK Tools
- OpenJDK
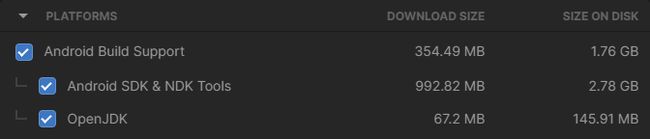
Unity Hub displaying the three dependency modules.
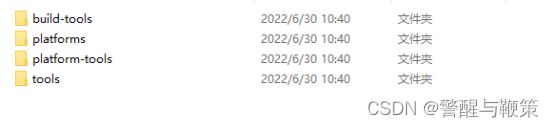
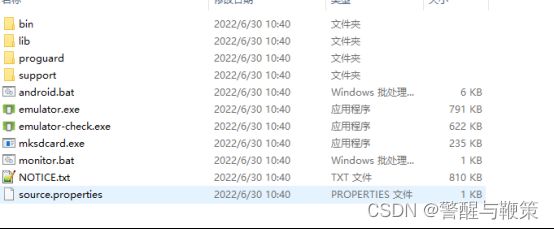
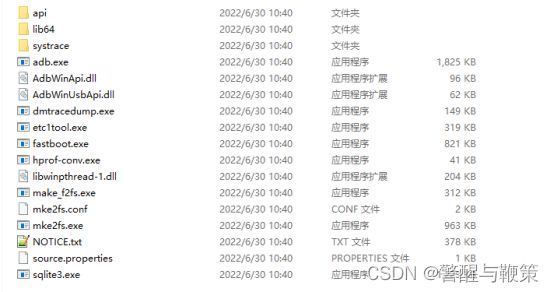
Unity installs Android SDK & NDK Tools and OpenJDK respectively in the SDK, NDK, and OpenJDK folders under /Unity/Hub/Editor/[EditorVersion]/Editor/Data/PlaybackEngines/AndroidPlayer/.
Customizing dependencies
You should use the Unity Hub to install Android SDK & NDK tools and OpenJDK to ensure that you receive the correct versions and configurations. However, there are situations where it’s useful to change the SDK, NDK, or JDK that Unity uses to build applications for Android. For example, if you have multiple versions of Unity with the same dependencies and you don’t want to duplicate the installation of the SDK, NDK, and JDK, you can specify a shared location.
To make Unity use a custom version of a dependency:
- Download the custom version of the dependency.
Warning: Unity only officially supports versions of the OpenJDK, SDK, or NDK that it supplies through the Hub. For more information, see Supported dependency versions. - In Unity, select Edit > Preferences (macOS: Unity > Preferences).
- In the left navigation column, select External Tools. The Android section of the External Tools panel contains entries for JDK, SDK, NDK, and Gradle
. Each entry contains:- A checkbox that indicates whether to use the version that Unity provides or a custom version.
- The path to the dependency’s installation folder.
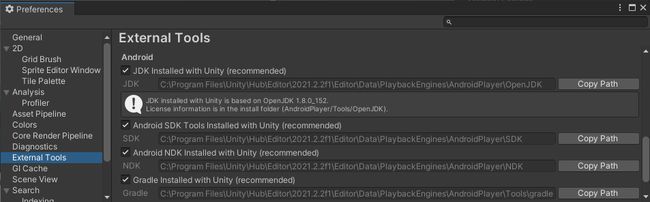
- To customize the installation for any of these dependencies, disable the dependency’s respective …installed with Unity (recommended) checkbox then click Browse and select the installation folder for the custom dependency.
Supported dependency versions
This section contains information on which versions of each dependency each Unity version supports. Each version of Unity requires a specific version of the Android NDK and Android JDK, but there are no exact version requirements for the Android SDK.
SDK
Unity relies on tools that the Android SDK provides and different versions of the SDK usually have the same tools available. This means you can use any recent version of the SDK since they all contain the build tools that Unity requires.
Important: The only exceptions are Android SDK Build-tools versions higher than version 30. Unity doesn’t support Android SDK Build-tools versions higher than 30.
NDK
The following table shows the NDK version that each Unity version supports:
| Unity version | NDK version |
|---|---|
| 2019.4 LTS | r19 |
| 2020.3 LTS | r19 |
| 2021.2 | r21d |
JDK
The following table shows the JDK version that each Unity version supports:
| Unity version | JDK version |
|---|---|
| 2019.4 LTS | 8 (OpenJDK version 1.8) |
| 2020.3 LTS | 8 (OpenJDK version 1.8) |
| 2021.2 | 8 (OpenJDK version 1.8) |
Setting the Android SDK Target API
The Unity Hub installs the latest version of the Android SDK Target API that Google Play requires. If you need to use a more recent version, you can change it in the Android Player Settings. To do this:
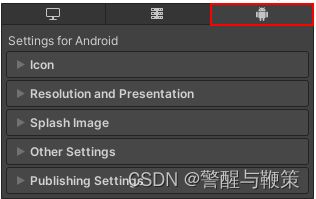
- Select Edit > Project Settings.
- In the Project settings window, select the Player tab, then open Android Player Settings:
- In the Other Settings section, change the Target API Level.
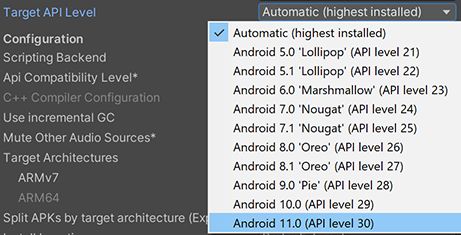
If you select a target API version newer than the latest installed version, the Unity Android SDK Updater can automatically download and install the new version. Unity displays a prompt and you can choose to either:
- Automatically download and install the new version of the Android SDK.
- Continue to use the highest installed version of the Android SDK.
If you select a target API version that isn’t installed and is older than the latest installed version, the Unity Android SDK Updater can’t perform the update and Unity displays an error message. In this case, to update the Android SDK Target API, you must use the Android sdkmanager from either Android Studio or the command-line tool. Regardless of the method you choose, make sure to select the correct Android SDK folder for Unity in the Edit > Preferences > External Tools window. For more information, see Customizing dependencies.
Important: On Windows, if you installed the Unity Editor in the default folder (/Program Files/), you must run the sdkmanager with elevated privilege (Run as Administrator) to perform the update.
Chrome OS
In Unity, Chrome OS is part of the Android development environment. This means you can deliver new and existing Android applications to Chrome OS. Also, since many Chrome OS devices are laptops or have a laptop mode, you can use features such as mouse and keyboard input. For more information:
- On Chrome OS in Unity: Chrome OS.
- On how to build an Android application for Chrome OS: Building your Chrome OS application.
///