【C++】string 之 assign、at、append函数的学习
前言
在学习string类的过程中,我发现了assign这个函数,感觉很有用,就来记录一下
assign函数原型:
void assign(size_type n, const T& x = T());

void assign(const_iterator first, const_iterator last);
assign函数有两种使用方式:
第一种:容器名.assign (a, b);
容器名.assign (a, b);
将vector中的内容清空,并给予a个b元素
下面给出一个例子:
#include通过上面这个例子,我们可以发现,首先,在传入新的元素之前,assign函数会先清空vector中的内容,之后,再传入新的数据,并且,无论是传入一个变量,还是传入未初始化的变量,都可以实现assign的功能
注意:第一个元素,即要传入的元素个数不能是未初始化的变量,不然程序会报错
第二种:容器名2.assign(容器名1.begin(),容器名1.end());
容器名2.assign(容器名1.begin(),容器名1.end());
提示:
这种使用方法的含义就是:
将容器1中的begin()和end()之间的元素放到容器2中,包含起始位置和终止位置。同样的,也是先清空容器2中的内容
下面给出一个例子:
#include通过上面这些例子,相信我们就可以基本明白assign是如何使用的了
at函数
函数源码
vector<_Tp, _Allocator>::at(size_type __n)
{
	if (__n >= size())
		this->__throw_out_of_range();
	return this->__begin_[__n];
}
了解即可,不用深究
at函数的使用
arr[3]与arr.at(3)的效果是一样的,只是使用at函数,不会发生越界访问的情况,更加安全
举个例子:
#include运行结果:

相信通过上面的学习,我们已经明白了如何使用at函数
append函数
接下来,我们来学习append函数
用法1:完全复制
格式:
append函数的使用格式:
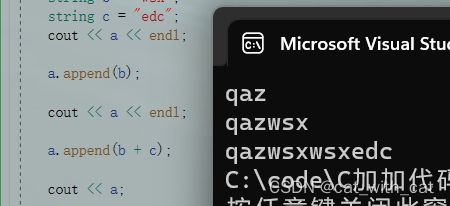
字符串1.append(字符串2);
例子:
下面,举一个例子,方便大家理解:
#include运行结果:

通过上面这个例子,我们可以知道虽然append函数一次只能复制一个字符串,但这个字符串是可以先运算的,比如:b+c
用法2:部分复制(后面的字符)
append除了复制全部内容以外,还可以选取部分进行复制
格式:
使用格式:
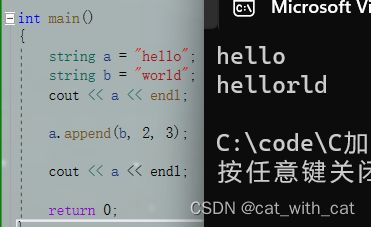
字符串1.append(字符串2,起始位置index,复制元素个数n);
作用:
将字符串2中第index个位置开始(包含起始位置的元素),共n个元素,拷贝到字符串1的末尾
例子:
下面给出一段代码,方便大家理解:
#include运行结果:

特别的:
当只传入起始位置index,而不传入复制元素个数n的时候,编译器默认拷贝到字符串末尾
用法3:部分复制(前面的字符)
格式:
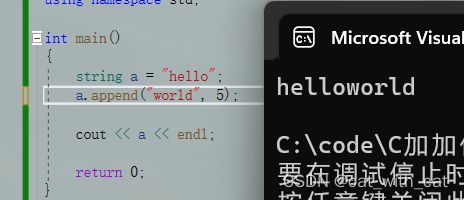
字符串1.append(C语言风格的字符串2,复制元素的个数n);
将字符串2中从开始位置算起,共复制n个元素放到字符串1的末尾
例子:
#include注意:
当直接传入字符串的时候,编译器默认它是C语言风格的字符串
例子如下:
#include用法4:复制相同字符
格式:
字符串1.append(复制字符的个数n,复制的字符ch);
作用:
将n个ch复制到字符串1的后面
例子:
#include结语
对于assign、at和append函数的学习和介绍到这里就结束了,希望这篇文章对你有帮助,我们下次见~


