Prometheus+Grafana监控PG
Prometheus是由SoundCloud开发的开源监控报警系统和时间序列数据库(TSDB),它是一个监控采集与数据存储框架(监控服务器端),具体采集什么数据依赖于Exporter(监控客户端)
Grafana是一个高“颜值”的监控绘图程序,也是一个可视化面板(Dashboard)。Grafana的厉害之处除了高“颜值”,还支持多种数据源(支持Graphite、Zabbix、InfluxDB、Prometheus和OpenTSDB作为数据源)和灵活丰富的Dashboard配置选项
安装环境:
| Prometheus |
Grafana |
postgres_exporter |
pgscv |
node_exporter |
|
| IP:端口 |
10.10.237.20:9090 |
10.10.237.20:3000 |
10.10.237.20:9187 |
10.10.237.20:9890 |
10.10.237.20:9100 |
| 访问地址 |
http://10.10.237.20:9090 |
http://10.10.237.20:3000 |
http://10.10.237.20:9187/metrics |
http://10.10.237.20:9890/metrics |
http://10.10.237.20:9100/metrics |
1、安装Prometheus
Prometheus下载:Download | Prometheus
| groupadd prometheus useradd -g prometheus prometheus cd /usr/local tar -xvf /soft/prometheus-2.45.0.linux-amd64.tar.gz mv prometheus-2.45.0.linux-amd64 prometheus chown -R prometheus.prometheus prometheus cd prometheus/ 将配置文件中的localhost:9090改为10.10.237.20:9090 vi prometheus.yml - job_name: "prometheus" static_configs: - targets: ["10.10.237.20:9090"] mkdir -p /prometheus/data chown -R prometheus.prometheus /prometheus/data cat /etc/systemd/system/prometheus.service [Unit] Description=prometheus After=network.target [Service] Type=simple User=prometheus ExecStart=/usr/local/prometheus/prometheus --config.file=/usr/local/prometheus/prometheus.yml --storage.tsdb.path=/prometheus/data Restart=on-failure [Install] WantedBy=multi-user.target systemctl enable prometheus.service systemctl start prometheus.service |
prometheus就已经安装并启动,默认会启动9090端口,通过浏览器打开该端口页面,不需用户名和密码
http://10.10.237.20:9090
2、rpm包安装Grafana
下载rpm包
Download Grafana | Grafana Labs
查看最新的版本,根据对应的平台,按照提供的地址下载rpm包
| yum -y install urw-fonts rpm -ivh grafana-enterprise-10.0.0-1.x86_64.rpm rpm包安装默认创建/usr/lib/systemd/system/grafana-server.service,并将配置文件放置/usr/share/grafana /usr/share/grafana/conf/defaults.ini,grafana默认 netstat -an|grep 3000 systemctl start grafana-server systemctl status grafana-server systemctl enable grafana-server |
grafana安装完成,默认会启动3000端口,通过浏览器打开该端口页面,默认用户名密码admin/admin
http://10.10.237.20:3000
3、关联Prometheus和Grafana
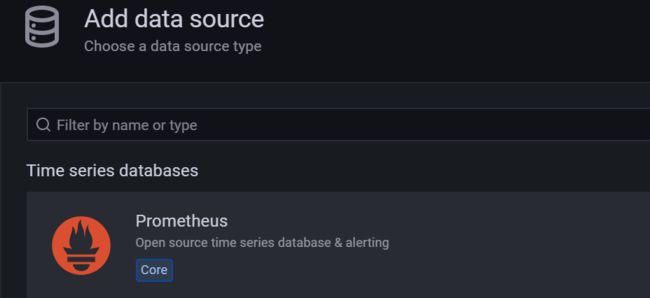
通过在grafana中添加Data Source,把Prometheus和Grafana关联起来
选择【Prometheus】
URL设为【http://10.10.237.20:9090】
Import【Prometheus 2.0 Stats】
【Save & test】
打开【Prometheus 2.0 Stats】可以看到基本的监控项
4、Haodb主机安装postgres_exporter
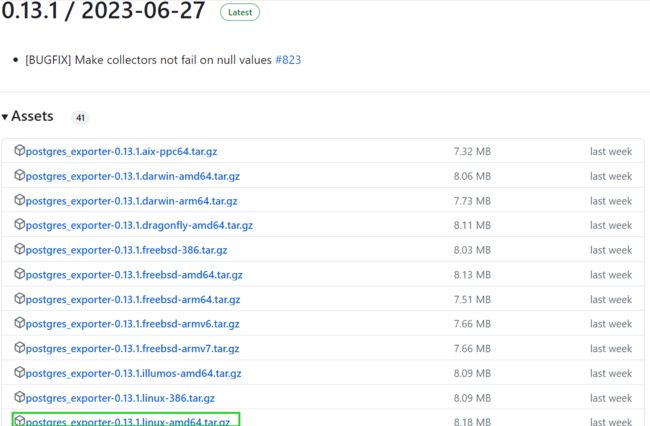
postgres_exporter-0.*.*.linux-amd64.tar.gz
https://github.com/prometheus-community/postgres_exporter/releases
选择最新的版本
| cd /soft tar -xvf postgres_exporter-0.13.1.linux-amd64.tar.gz cd /usr/local/ mkdir exporter cp /soft/postgres_exporter-0.13.1.linux-amd64/postgres_exporter /usr/local/exporter chown haodb.haodb postgres_exporter |
创建postgres_exporter服务 (前提是存在haodb用户密码也是haodb,也存在haodb库,来确定DATA_SOURCE_NAME)
/usr/lib/systemd/system/postgres_exporter.service
[Unit]
Description=postgres Exporter
Wants=network-online.target
After=network-online.target

[Service]
Type=simple
User=haodb
Group=haodb
Environment=DATA_SOURCE_NAME=postgresql://haodb:[email protected]:5432/haodb?sslmode=disable
ExecStart=/usr/local/exporter/postgres_exporter
ExecReload=/bin/kill -HUP
KillMode=process
TimeoutStopSec=20s
Restart=always

[Install]
WantedBy=default.target
启动postgres_exporter 服务
| systemctl start postgres_exporter |
postgres_exporter占用9187端口
查看metrics
5、Haodb主机安装pgscv
pgscv是PostgreSQL 生态系统指标收集器,收集了很多关于PostgreSQL环境的统计信息并通过 HTTP/metrics 以 Prometheus 指标展示. 它试图超越postgres_exporter提供的功能,通过尽可能少的配置,轻松地从postgres收集“几乎所有的指标”
下载pgscv,因为V0.8.*版本还在测试阶段,可下载V0.7.*
https://github.com/lesovsky/pgscv/releases
| tar -xvf pgscv_0.7.5_linux_amd64.tar.gz cp pgscv /usr/local/exporter chown haodb.haodb /usr/local/exporter/pgscv |
创建pgscv服务 (前提是存在haodb用户密码也是haodb,也存在haodb库,来确定POSTGRES_DSN)
/usr/lib/systemd/system/pgscv.service
[Unit]
Description=pgscv
Wants=network-online.target
After=network-online.target

[Service]
Type=simple
User=haodb
Group=haodb
Environment=POSTGRES_DSN=postgresql://haodb:[email protected]:5432/haodb?sslmode=disable PGSCV_LISTEN_ADDRESS=0.0.0.0:9890
ExecStart=/usr/local/exporter/pgscv
ExecReload=/bin/kill -HUP
KillMode=process
TimeoutStopSec=20s
Restart=always

[Install]
WantedBy=default.target| systemctl start pgscv |
pgscv占用9890端口
查看metrics
6、Haodb主机添加node_exporter
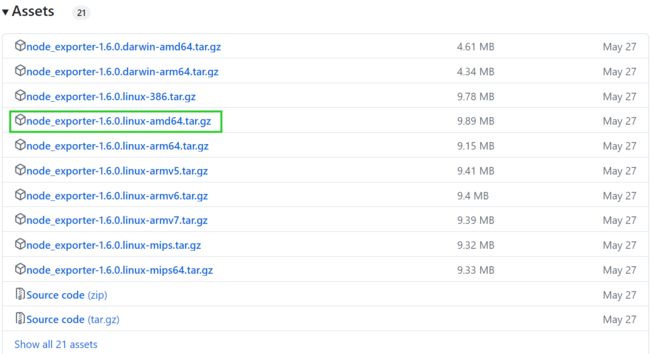
下载node_exporter
https://github.com/prometheus/node_exporter/releases
| tar -xvf node_exporter-1.6.0.linux-amd64.tar.gz cd node_exporter-1.6.0.linux-amd64 cp node_exporter /usr/local/exporter/ |
创建node_exporter服务
/usr/lib/systemd/system/node_exporter.service
[Unit]
Description=node_exporter
Wants=network-online.target
After=network-online.target

[Service]
Type=simple
User=root
Group=root
ExecStart=/usr/local/exporter/node_exporter
ExecReload=/bin/kill -HUP
KillMode=process
TimeoutStopSec=20s
Restart=always

[Install]
WantedBy=default.target
启动node_exporter
| systemctl start node_exporter |
node_exporter占用9100端口
查看metrics
7、在promethues配置文件中添加postgres_exporter、pgscv和node_exporter
vi /usr/local/prometheus/prometheus.yml
| - job_name: "haodb" static_configs: - targets: ["10.10.237.20:9187"] - targets: ['10.10.237.20:9890'] - job_name: "host" static_configs: - targets: ["10.10.237.20:9100"] |
重启Prometheus
| systemctl restart prometheus |
在http://10.10.237.20:9090/targets查看新加的target
7、配置grafana监控
新建一个Folder-Haodb
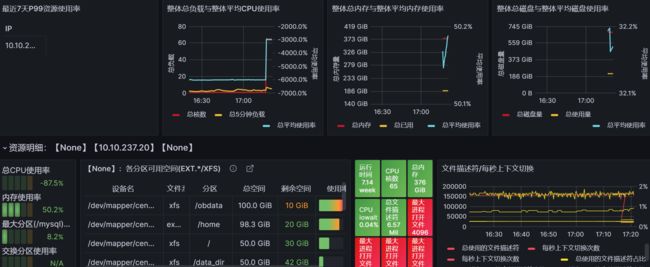
(1)配置主机监控
下载主机监控dashboard json
Node Exporter Dashboard 220413 ConsulManager自动同步版 | Grafana Labs
grafana导入json
监控页面如图:
(2)配置pgscv监控
下载json dashboard模板
pgSCV: PostgreSQL | Grafana Labs
步骤同主机监控
haodb监控如图:
9、pgscv需要使用pg_stat_statements插件监控sql
pg_stat_statements插件配置见
登录 · 云知识空间
配置过上述插件后,监控如图:
10、配置自定义的监控项
如果想要监控自定义的sql,可以使用postgres_exporter的--extend.query-path选项来实现
如想要监控总连接数,可以使用以下方式:
(1)修改/usr/lib/systemd/system/postgres_exporter.service,添加PG_EXPORTER_EXTEND_QUERY_PATH
[Unit]
Description=postgres Exporter
Wants=network-online.target
After=network-online.target

[Service]
Type=simple
User=haodb
Group=haodb
Environment=DATA_SOURCE_NAME=postgresql://haodb:[email protected]:5432/haodb?sslmode=disable PG_EXPORTER_EXTEND_QUERY_PATH=/usr/local/exporter/queries.yaml
ExecStart=/usr/local/exporter/postgres_exporter
ExecReload=/bin/kill -HUP
KillMode=process
TimeoutStopSec=20s
Restart=always

[Install]
WantedBy=default.target
(2)以如下格式创建/usr/local/exporter/queries.yaml
pg_connection:
query: "SELECT count(*) as total_connection from pg_stat_activity"
metrics:
- total_connection:
usage: "GAUGE"
description: "Total connections"
description对应下面metric中的HELP;usage对应TYPE
(3)重启postgres_exporter服务
systemctl daemon-reload
systemctl restart postgres_exporter
(4)查看postgres_exporter的metrics是否包含pg_connection
(5)配置grafana可视化图像
Add -> Visualization
Metric选择自定义的metric
即可得到可视化图像
11、配置钉钉告警
选择钉钉群中的【智能群助手】
【添加机器人】并设置
选择【自定义】
选择【IP地址段】并设置为grafana所在ip
复制自动生成的Webhook
选择Grafana的【Notification channels】
添加【New channel】
选择Test看是否能收到群消息
12、配置告警规则
添加告警规则(折线图可以添加告警规则)
定义告警规则
13、监控patroni
(1)安装patroni_exporter
下载patroni_exporter
https://github.com/Showmax/patroni-exporter
构建patroni_exporter镜像
unzip patroni-exporter-master.zip
cd /soft/patroni-exporter-master
docker build -t patroni_exporter .
docker run -d -ti patroni_exporter --port 9547 --patroni-url http://10.10.237.21:8008/patroni --timeout 5 --debug
(1)配置Prometheus
直接访问patroni节点的8008端口,即可获得Prometheus所需要的metrics
修改Prometheus配置文件,添加下面配置,如:
- job_name: "patroni"
static_configs:
- targets: ["10.10.237.23:8008"]
重启Prometheus服务:
systemctl restart prometheus
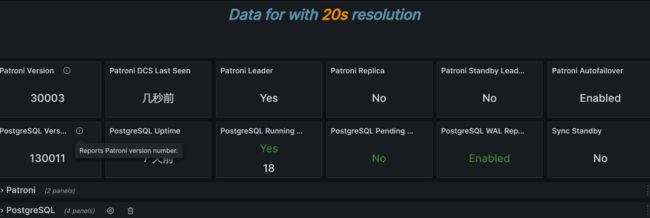
(2)添加patroni的grafana dashboard
下载模板并导入到grafana
PostgreSQL Patroni | Grafana Labs
即可看到patroni监控:


