若依cloud -【 47 ~ 57】
47 服务监控介绍
- 什么是服务监控
监视当前系统应用状态、内存、线程、堆栈、日志等等相关信息,主要目的在服务出现问题或者快要出现问题时能够准确快速地发现以减小影响范围。
- 为什么要使用服务监控
服务监控在微服务改造过程中的重要性不言而喻,没有强大的监控能力,改造微服务架构后,就无法掌控各个不同服务(多个)的情况,在遇到调用失败时,如果不能快速发现系统的问题,对于业务来说就是一场灾难。
- spring boot actuator 服务监控接口
actuator是监控系统健康情况的工具。
- spring boot admin 服务监控管理
Spring Boot Admin是一个针对spring-boot的actuator接口进行UI美化封装的监控工具。他可以:在列表中浏览所有被监控spring-boot项目的基本信息,详细的Health信息、内存信息、JVM信息、垃圾回收信息、各种配置信息(比如数据源、缓存列表和命中率)等,还可以直接修改logger的level。
48 服务监控使用
0、新建ruoyi-admin-web
1、添加依赖
	org.springframework.boot
	spring-boot-starter-web


	org.springframework.boot
	spring-boot-starter-actuator
2、在application.yml配置暴露所有监控端点
server:
  port: 9100
spring:
  application:
    name: ruoyi-admin-web

# 其实不配置也没有问题。
# 如果不配置,就默提供(暴露)少许的几个接口给外部。
# 根据实际情况决定要不要配置。
# 一般情况下我们会使用以下配置暴露所有的接口。这样的话,他提供的所有的接口啊,都会被我们发现。
management:
  endpoints:
    web:
      exposure:
        include: '*'
3、监控启动类
@SpringBootApplication
public class RuoYiMonitorApplication
{
    public static void main(String[] args)
    {
        SpringApplication.run(RuoYiMonitorApplication.class, args);
        System.out.println("(♥◠‿◠)ノ゙  监控中心启动成功   ლ(´ڡ`ლ)゙  \n" +
                " .-------.       ____     __        \n" +
                " |  _ _   \\      \\   \\   /  /    \n" +
                " | ( ' )  |       \\  _. /  '       \n" +
                " |(_ o _) /        _( )_ .'         \n" +
                " | (_,_).' __  ___(_ o _)'          \n" +
                " |  |\\ \\  |  ||   |(_,_)'         \n" +
                " |  | \\ `'   /|   `-'  /           \n" +
                " |  |  \\    /  \\      /           \n" +
                " ''-'   `'-'    `-..-'              ");
    }
}
4、测试验证
49 服务监控,端点分类
浏览器访问localhost:9100/actuator时,页面中显示的是很多各种可以访问的地址组成的json字符串:
{
    "_links": {
        "self": {
            "href": "http://localhost:9100/actuator",
            "templated": false
        },
        "beans": {
            "href": "http://localhost:9100/actuator/beans",
            "templated": false
        },
        "caches-cache": {
            "href": "http://localhost:9100/actuator/caches/{cache}",
            "templated": true
        },
        "caches": {
            "href": "http://localhost:9100/actuator/caches",
            "templated": false
        },
        "health": {
            "href": "http://localhost:9100/actuator/health",
            "templated": false
        },
        "health-path": {
            "href": "http://localhost:9100/actuator/health/{*path}",
            "templated": true
        },
        "info": {
            "href": "http://localhost:9100/actuator/info",
            "templated": false
        },
        "conditions": {
            "href": "http://localhost:9100/actuator/conditions",
            "templated": false
        },
        "configprops": {
            "href": "http://localhost:9100/actuator/configprops",
            "templated": false
        },
        "configprops-prefix": {
            "href": "http://localhost:9100/actuator/configprops/{prefix}",
            "templated": true
        },
        "env": {
            "href": "http://localhost:9100/actuator/env",
            "templated": false
        },
        "env-toMatch": {
            "href": "http://localhost:9100/actuator/env/{toMatch}",
            "templated": true
        },
        "loggers": {
            "href": "http://localhost:9100/actuator/loggers",
            "templated": false
        },
        "loggers-name": {
            "href": "http://localhost:9100/actuator/loggers/{name}",
            "templated": true
        },
        "heapdump": {
            "href": "http://localhost:9100/actuator/heapdump",
            "templated": false
        },
        "threaddump": {
            "href": "http://localhost:9100/actuator/threaddump",
            "templated": false
        },
        "metrics-requiredMetricName": {
            "href": "http://localhost:9100/actuator/metrics/{requiredMetricName}",
            "templated": true
        },
        "metrics": {
            "href": "http://localhost:9100/actuator/metrics",
            "templated": false
        },
        "scheduledtasks": {
            "href": "http://localhost:9100/actuator/scheduledtasks",
            "templated": false
        },
        "mappings": {
            "href": "http://localhost:9100/actuator/mappings",
            "templated": false
        },
        "refresh": {
            "href": "http://localhost:9100/actuator/refresh",
            "templated": false
        },
        "features": {
            "href": "http://localhost:9100/actuator/features",
            "templated": false
        }
    }
}
50 服务监控,集成Admin-Ui:使用admin-ui格式化显示上面的json数据。
0、ruoyi-admin-web
1、添加依赖
	de.codecentric
	spring-boot-admin-starter-server
	${spring-boot-admin.version}
2、监控启动类
@EnableAdminServer
@SpringBootApplication
public class RuoYiMonitorApplication
{
    public static void main(String[] args)
    {
        SpringApplication.run(RuoYiMonitorApplication.class, args);
        System.out.println("(♥◠‿◠)ノ゙  监控中心启动成功   ლ(´ڡ`ლ)゙  \n" +
                " .-------.       ____     __        \n" +
                " |  _ _   \\      \\   \\   /  /    \n" +
                " | ( ' )  |       \\  _. /  '       \n" +
                " |(_ o _) /        _( )_ .'         \n" +
                " | (_,_).' __  ___(_ o _)'          \n" +
                " |  |\\ \\  |  ||   |(_,_)'         \n" +
                " |  | \\ `'   /|   `-'  /           \n" +
                " |  |  \\    /  \\      /           \n" +
                " ''-'   `'-'    `-..-'              ");
    }
}
3、测试访问
浏览器访问(http://localhost:9100 )可以看到以下界面。
4、注意:还需要去配置客户端
51 服务监控,客户端配置
之前已经把Admin(actuator工具 + Admin-Ui)服务跑起来了,但是界面里边什么应用都没有(0应用、0实例数)。因此需要加一个客户端,然后给(actuator工具 + Admin-Ui)服务进行监控。
0、新建客户端模块ruoyi-admin-client
1、pom.xml:添加依赖
    org.springframework.boot
    spring-boot-starter-web


	de.codecentric
	spring-boot-admin-starter-client
    2.7.10


	org.springframework.boot
	spring-boot-starter-actuator
2、application.yml:配置服务端地址
server:
  port: 9200

# 注意放开端点,不然看到的信息非常少(只能看到默认的那几个)
management:
  endpoints:
    web:
      exposure:
        include: '*'
spring:
  application:
    name: ruoyi-admin-client
  boot:
    admin:
      client:
        # 指向服务端的ip + port
        url: http://localhost:9100
3、RuoyiClientApplication.java:启动类:去掉
package com.ruoyi.client;


import org.springframework.boot.SpringApplication;
import org.springframework.boot.autoconfigure.SpringBootApplication;

@SpringBootApplication
public class RuoYiClientApplication
{
    public static void main(String[] args)
    {
        SpringApplication.run(RuoYiClientApplication.class, args);
        System.out.println("(♥◠‿◠)ノ゙  监控中心启动成功   ლ(´ڡ`ლ)゙  \n" +
                " .-------.       ____     __        \n" +
                " |  _ _   \\      \\   \\   /  /    \n" +
                " | ( ' )  |       \\  _. /  '       \n" +
                " |(_ o _) /        _( )_ .'         \n" +
                " | (_,_).' __  ___(_ o _)'          \n" +
                " |  |\\ \\  |  ||   |(_,_)'         \n" +
                " |  | \\ `'   /|   `-'  /           \n" +
                " |  |  \\    /  \\      /           \n" +
                " ''-'   `'-'    `-..-'              ");
    }
}
4、测试验证
- 重启服务端、客户端
- 访问:服务端http://localhost:9100/
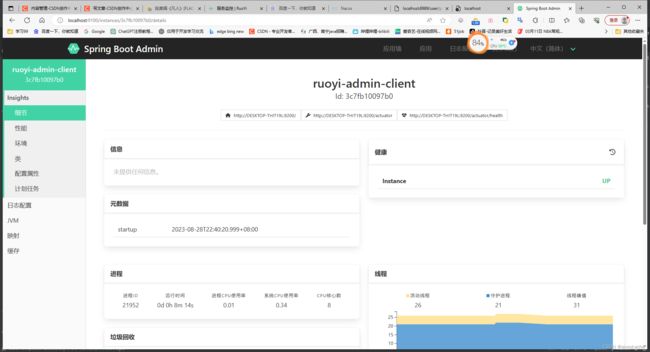
- 效果:展示客户端的所有信息。这个页面展示的信息,只是把之前的端点分类的所有接口(地址)都访问一遍,然后全部都用可视化界面进行展示。方便我们去分析整个应用情况:

52 服务监控,集成Nacos
为什么要集成nacos呢?麻烦 = 微服架构 + 配置IP的形式,能不能有一种方式可以不需要配IP呢?答案是有的。
在使用服务监控(Admin)时,如果没有注册中心,需要各个客户端填写Admin服务端地址,而Admin是支持Nacos、Eureka、ZooKeeper等组件,可以直接从注册中心拉取服务实例,服务监控(Admin)就可以监控该实例。
0、ruoyi-admin-client模块(客户端)
1、添加依赖
	com.alibaba.cloud
	spring-cloud-starter-alibaba-nacos-discovery
2、项目yml配置添加nacos地址,包含客户端和服务端
spring:
  application:
    # 应用名称
    name: ruoyi-xxxx
  cloud:
    nacos:
      discovery:
        # 服务注册地址
        server-addr: 127.0.0.1:8848
3、测试验证
- 启动nacos
- 重启客户端ruoyi-admin-client
- 重启服务端ruoyi-admin-web,进行监控
- 访问服务端(admin-ui):http://localhost:9100/ 里面并没有东西里面并没有东西。是因为,服务端(admin-ui)没有注册到nacos中,所以同样的,服务端(ruoyi-admin-web)要加入注册中心的依赖和在配置文件中配置注册中心的地址:

- 效果:

- 总结:只要在注册中心里的服务,依赖注册中心 + 配置暴露(所有接口)端点 + 配置注册中心的地址,都可以被服务监控进行监控。
53 服务监控,配置登录认证
本节讲服务监控怎么去设置登录认证,就是说需要权限(账号和密码)才能登录服务监控的服务端查询监控信息(现在只要在浏览器访问http://localhost:9100/,就可以查看所有的服务的监控信息)。
0、ruoyi-admin-web服务监控服务端
1、添加依赖
	org.springframework.boot
	spring-boot-starter-security
2、配置spring security权限
package com.ruoyi.modules.monitor.config;

import de.codecentric.boot.admin.server.config.AdminServerProperties;
import org.springframework.context.annotation.Configuration;
import org.springframework.security.config.annotation.web.builders.HttpSecurity;
import org.springframework.security.config.annotation.web.configuration.WebSecurityConfigurerAdapter;
import org.springframework.security.web.authentication.SavedRequestAwareAuthenticationSuccessHandler;

/**
 * 监控权限配置
 *
 * @author ruoyi
 */
@Configuration
public class WebSecurityConfigurer extends WebSecurityConfigurerAdapter
{
    private final String adminContextPath;

    public WebSecurityConfigurer(AdminServerProperties adminServerProperties)
    {
        this.adminContextPath = adminServerProperties.getContextPath();
    }

    @Override
    protected void configure(HttpSecurity http) throws Exception
    {
        SavedRequestAwareAuthenticationSuccessHandler successHandler = new SavedRequestAwareAuthenticationSuccessHandler();
        successHandler.setTargetUrlParameter("redirectTo");
        successHandler.setDefaultTargetUrl(adminContextPath + "/");

        http
            .headers().frameOptions().disable()
            .and().authorizeRequests()
            .antMatchers(adminContextPath + "/assets/**"
                , adminContextPath + "/login"
                , adminContextPath + "/actuator/**"
                , adminContextPath + "/instances/**"
            ).permitAll()
            .anyRequest().authenticated()
            .and()
            .formLogin().loginPage(adminContextPath + "/login")
            .successHandler(successHandler).and()
            .logout().logoutUrl(adminContextPath + "/logout")
            .and()
            .httpBasic().and()
            .csrf()
            .disable();
    }
}
3、在application.yml配置用户,默认账户ruoyi/123456
# spring
spring:
  security:
    user:
      # security默认的账号和密码
      name: ruoyi
      password: 123456
  boot:
    admin:
      ui:
        #配置登录页面的标题
        title: 若依服务状态监控
4、测试验证
54 服务监控,配置实时日志
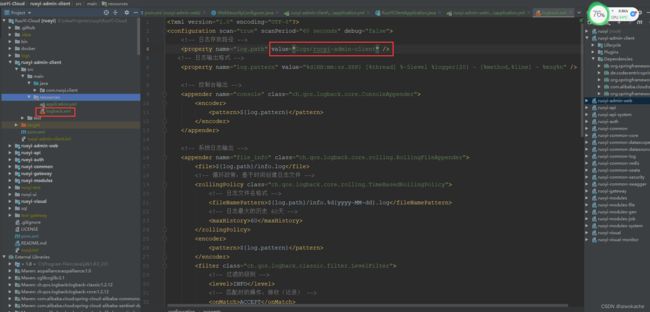
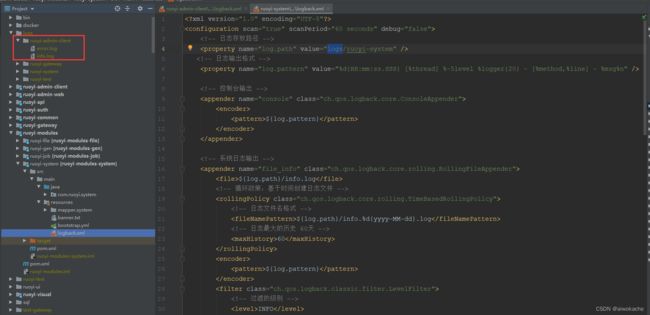
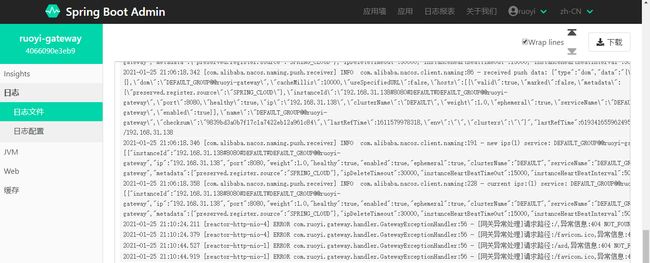
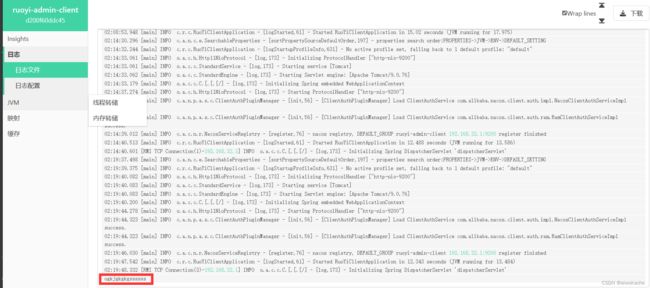
Spring Boot Admin提供了基于Web页面的方式实时查看服务输出的本地日志,前提是服务中配置了logging.file.name。配置了以生,就不用到每台机器(linux服务器)上使用命令或打开某个文件去查年实时日志了,直接在服务监控的控制台也可以直接查得到。
0、ruoyi-admin-client模块
			${log.pattern}


	    ${log.path}/info.log


			${log.path}/info.%d{yyyy-MM-dd}.log

			60


			${log.pattern}


            INFO

            ACCEPT

            DENY


	    ${log.path}/error.log


            ${log.path}/error.%d{yyyy-MM-dd}.log

			60


            ${log.pattern}


            ERROR

            ACCEPT

            DENY
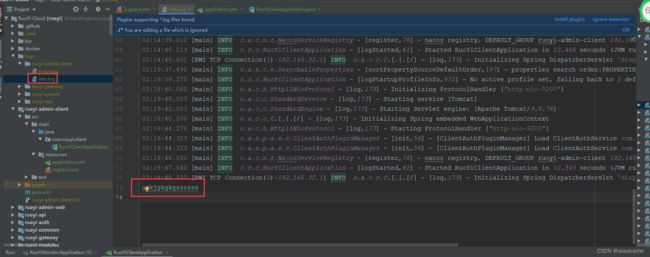
2、重启:ruoyi-admin-client,生成logs目录、error.log文件、info.log文件
3、bootstrap.yml或application.yml配置logging.file.name配置
logging:
  file:
    # 可配置绝对路径,也可以配置相对路径
    # 格式示例 = logs + 应用名称 + info.log
    # 实时的把控制台的日志显示到服务监控服务的控制台里面去。
    name: logs/${spring.application.name}/info.log
4、进入日志-日志文件查看实时日志,效果如下
55 服务监控,动态日志级别
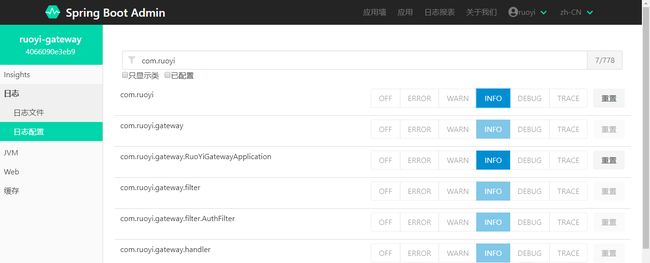
Spring Boot Admin支持动态修改日志级别。
动态是指手动去切换它,指定是哪个级别日志的才打印。
进入日志-日志配置修改日志级别,效果如下:
0、ruoyi-admin-client
1、创建TestController.java类
import org.slf4j.Logger;
import org.slf4j.LoggerFactory;
import org.springframework.web.bind.annotation.GetMapping;
import org.springframework.web.bind.annotation.PathVariable;
import org.springframework.web.bind.annotation.RestController;

@RestController
public class TestUserController
{
    private Logger log = LoggerFactory.getLogger(TestUserController.class);

    @GetMapping("test")
    public Object info(@PathVariable()
    {
        log.debug("==================debug======="); // 日志级别,debug
        log.info("==================info=======");  // 日志级别,info
        log.error("==================error======="); // 日志级别,error
        return "success";
    }
}
2、重启:ruoyi-admin-client
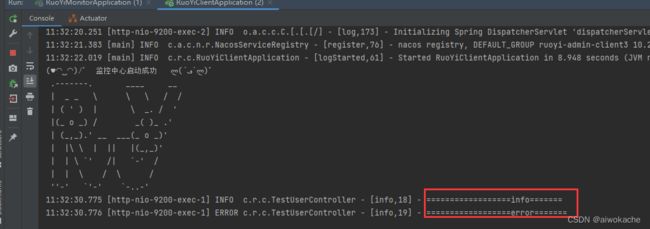
3、浏览器访问:"10.203.7.219:9200/test"接口:
默认的日志级别是info,因此控制台打印的是info和error级别的日志,这个没有问题。
4、重启:ruoyi-admin-web监控中心
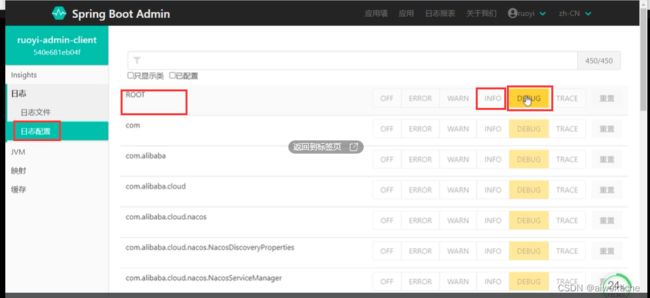
5、动态修改日志级别:info 改成 debug:无效果
6、动态修改日志级别:以com.ruoyi开头的,都改成info 改成 debug:
7、 浏览器访问:"10.203.7.219:9200/test"接口
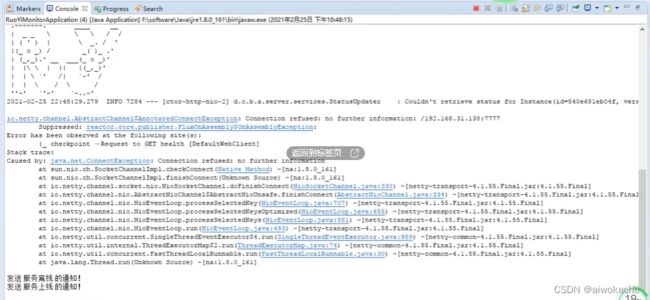
56 服务监控,实现自定义通知
自定义通知:服务监控服务端监控着很多应用,应用挂了、应用上线、应用离线等比较关键的状态下,服务监控服务端都应该发送通知。通知可以是自己的邮件、微信、短信。
服务监控服务端提供了状态改变的通知接口,因此实现此接口即可。
0、ruoyi-admin-web
1、ruoyi-admin-client
可以通过添加实现Notifier接口的Spring Beans来添加您自己的通知程序。
import org.springframework.stereotype.Component;
import de.codecentric.boot.admin.server.domain.entities.InstanceRepository;
import de.codecentric.boot.admin.server.domain.events.InstanceEvent;
import de.codecentric.boot.admin.server.domain.events.InstanceStatusChangedEvent;
import de.codecentric.boot.admin.server.notify.AbstractStatusChangeNotifier;
import reactor.core.publisher.Mono;

/**
 * 通知发送配置
 *
 * @author ruoyi
 */
@Component
public class RuoYiStatusChangeNotifier extends AbstractStatusChangeNotifier
{
    public RuoYiStatusChangeNotifier(InstanceRepository repository)
    {
        super(repository);
    }

    @Override
    protected Mono doNotify(InstanceEvent event,
            de.codecentric.boot.admin.server.domain.entities.Instance instance)
    {
        return Mono.fromRunnable(() -> {
            if (event instanceof InstanceStatusChangedEvent)
            {
                String status = ((InstanceStatusChangedEvent) event).getStatusInfo().getStatus();
                switch (status)
                {
                    // 健康检查没通过
                    case "DOWN":
                        System.out.println("发送 健康检查没通过 的通知!");
                        break;
                    // 服务离线
                    case "OFFLINE":
                        System.out.println("发送 服务离线 的通知!");
                        break;
                    // 服务上线
                    case "UP":
                        System.out.println("发送 服务上线 的通知!");
                        break;
                    // 服务未知异常
                    case "UNKNOWN":
                        System.out.println("发送 服务未知异常 的通知!");
                        break;
                    default:
                        break;
                }
            }
        });
    }
}
3、测试验证


