Python入门自学进阶-Web框架——42、Web框架了解-bottle、flask
WEB框架的三大组件:路由系统、控制器(含模板渲染)、数据库操作
微型框架:依赖第三方写的socket,WSGI, 本身功能少
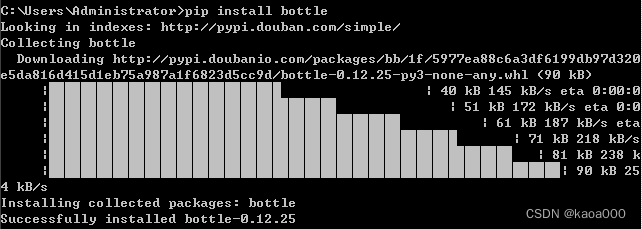
安装:
pip install bottle
pip install flask

安装flask,同时安装了MarkupSafe、Werkzeug、Jinja2、itsdangerous。
Werkzeug是Python的WSGI规范的实用函数库。使用广泛,基于BSD协议,是Flask使用的底层WSGI库;
itsdangerous是flask中引用的一个第三方包,用来解决生成token等网络安全问题;
MarkupSafe为 Python 实现 XML/HTML/XHTML 标记安全字符串;
Jinja2是一个模板语言,是一个现代的、设计友好的、依照django模板的python模板语言;
pip install tornado

已经安装过。
Bottle:
一个程序文件完成整个网站:
from bottle import template,Bottle
root = Bottle()
@root.route('/hello/')
# 装饰器,定义了URL,即/hello/这个url由index这个函数来处理,就是路由系统
def index():
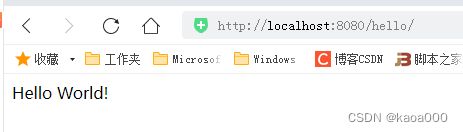
return "Hello World!"
root.run(host='localhost', port=8080)
# 这里就是启动webserver服务器,然后等待请求运行整个Python程序:

浏览器端请求:
上面的路由(即装饰器)是静态路由,还可以使用动态路由:
@root.route('/wiki/
defcallback(pagename):
...
pagename作为参数变量名,匹配字符串。
@root.route('/object/
defcallback(id):
...
id是一个int型的参数变量名。
@root.route('/show/
defcallback(name):
...
name是一个正则表达式参数变量。
@root.route('/static/
defcallback(path):
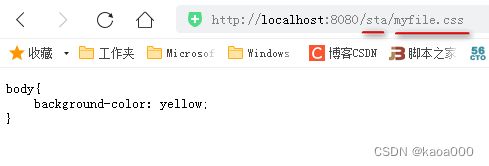
return static_file(path, root='static')
定义路径,类似Django中的静态文件路径,主要是定义文件在服务器存储中的位置。
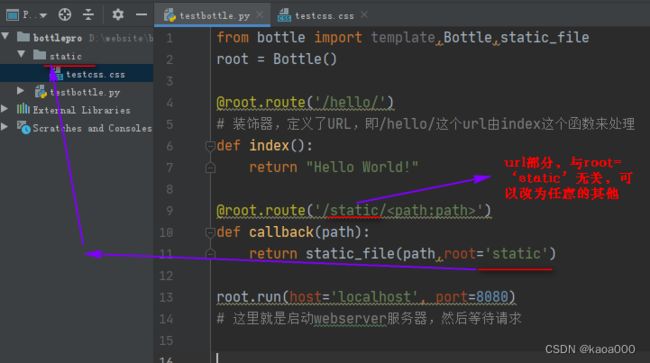
root指定的是项目中的一个目录,这里指定了项目中的static,在这个目录下有testcss.css文件,可以访问:
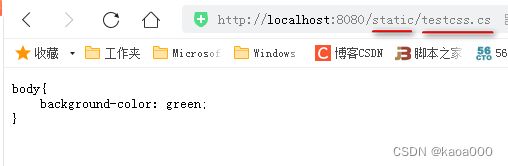
修改一下:

如果root为'static'不变,还可以这样访问:

对于路由对应的函数,除了返回字符串,还可以使用模板:
@root.route('/hello/')
# 装饰器,定义了URL,即/hello/这个url由index这个函数来处理
def index():
    # return "Hello World!"
    return template('Hello {{name}}!',name="小花")
对于template(),除了像上面直接在其中写模板外,还可以直接指定一个模板文件,如
return template(‘index.html’)
创建index.html文件。这里要注意的是默认bottle找模板的路径,在bottle中有如下配置变量
TEMPLATE_PATH = ['./', './views/'],即默认模板查找顺序是先在项目根目录,然后是views目录,我们可以添加自己定义的目录
最终程序:
from bottle import template,Bottle,static_file
import bottle
bottle.TEMPLATE_PATH.append('./templates/')

root = Bottle()


# 装饰器,定义了URL,即/hello/这个url由index这个函数来处理
@root.route('/hello/')
def index():
    print(bottle.TEMPLATE_PATH)
    # return "Hello World!"
    # return template('Hello {{name}}!',name="小花")
    return template("index.html")

@root.route('/sta/')
def callback(path):
    return static_file(path,root='static')

root.run(host='localhost', port=8080)
运行程序后,打印的TEMPLATE_PATH为:['./', './views/', './templates/'],但是却找不到模板文件:
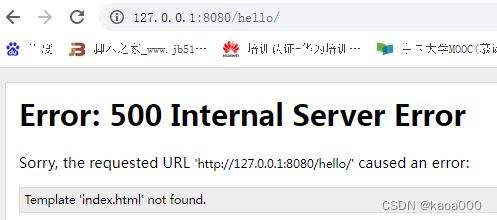
经过反复的测试,查找资料,这个问题我个人的理解是:
这个路径是linux系统的路径,在windows系统下失去效果,windows系统下,需要添加windows的绝对路径,使用os.path.abspath(os.path.join(os.path.dirname(__file__), "views")来获取windows下的绝对路径:
from bottle import run,template,Bottle,TEMPLATE_PATH
import os
app = Bottle()
TEMPLATE_PATH.insert(0, os.path.abspath(os.path.join(os.path.dirname(__file__), "templates")))
TEMPLATE_PATH.append(os.path.abspath(os.path.join(os.path.dirname(__file__), "views")))
print(TEMPLATE_PATH)

@app.route('/')
@app.route('/hello/')
def index(name='default'):
    return template('hello.html',name=name)

run(app,host='localhost',port=8080)
这时的TEMPLATE_PATH为:
['D:\\website\\bottlepro\\templates', './', './views/', 'D:\\website\\bottlepro\\views']
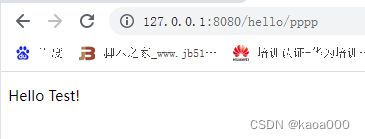
这时再访问,就没有问题了。
请求方法路由
@root.route('/hello/', method='POST')
def index():
...
@root.get('/hello/')
def index():
...
@root.post('/hello/')
def index():
...
@root.put('/hello/')
def index():
...
@root.delete('/hello/')
def index():
...
一个简单的登陆:
from bottle import template,Bottle,static_file,TEMPLATE_PATH,request,redirect
import os

TEMPLATE_PATH.append(os.path.abspath(os.path.join(os.path.dirname(__file__),'templates')))
root = Bottle()

# 装饰器,定义了URL,即/hello/这个url由index这个函数来处理
@root.route('/login/',method=['GET','POST'])
def login():
    if request.method == "GET":
        return template('login.html')
    else:
        # v = request.forms  # POST的数据都保存
        # v = request.query  # GET发来的请求数据
        # v = request.body   # POST发来的请求数据
        u = request.forms.get('user')
        p = request.forms.get('pwd')
        print(u,p)
        return redirect('/index/')
@root.route('/index/')
def index():
    return template('index.html')

@root.route('/sta/')
def callback(path):
    return static_file(path,root='static')

root.run(host='localhost', port=8080)
# 这里就是启动webserver服务器,然后等待请求
    Title


    Bottle登录
Bottle中的request其实是一个LocalReqeust对象,其中封装了用户请求的相关信息:
request.headers : 请求头信息
request.query : get请求信息
request.forms : post请求信息
request.files : 上传文件信息
request.params : get和post请求信息
request.GET : get请求信息
request.POST : post和上传信息
request.cookies : cookie信息
request.environ : 环境相关相关
bottle的模板,在使用for循环遍历列表生成
- 时的问题:
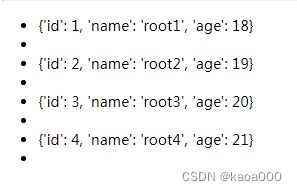
@root.route('/index/')
def index():
    user_list = [
        {'id': 1, 'name': 'root1', 'age': 18},
        {'id': 2, 'name': 'root2', 'age': 19},
        {'id': 3, 'name': 'root3', 'age': 20},
        {'id': 4, 'name': 'root4', 'age': 21},
    ]
    return template('index.html', user_list=user_list)
模板index.html:
{{user_list}}
-
% for item in user_list :
- {{item}} % end
预想的是这样:
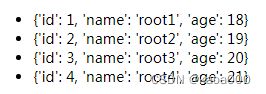
实际是这样:
多出来的这些空行,都是
- ::marker ,为何会多产生这些标签??怎么去掉?希望高手指点一二。
Flask:
基本框架与Bottle差不多,如下:
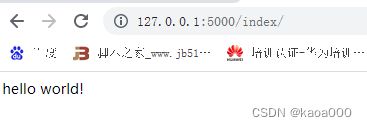
from flask import Flask

app = Flask(__name__)

@app.route('/index/')
def index():
    return "hello world!"

if __name__ == "__main__":
    app.run()
启动后:

默认是在5000端口。访问:
在Flask()中,可以对静态文件和模板路径进行配置:相关参数如下

默认模板路径就是templates,
这个不像Bottle,项目下创建了templates,就可以直接找到。
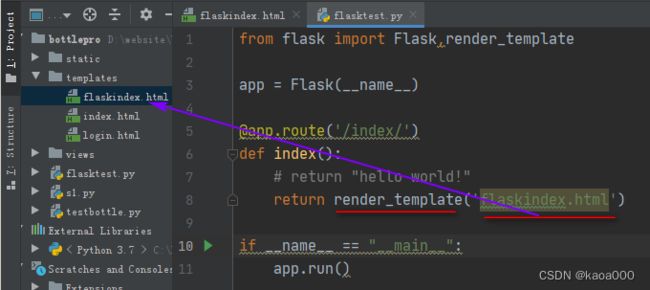
传递参数:
@app.route('/index/')
def index():
    # return "hello world!"
    return render_template('flaskindex.html',k1='hello',k2=['a','b','c'],k3={'name':'haha1','age':17})
模板:
Title
Flask index
{{k1}}
{{k2}}
{% for item in k2 %}
- {{item}}
{% endfor %}
{{k3}}
{% for k,v in k3.items() %}
{{k}}--{{v}}
{% endfor %}
还可以传递函数:

模板中:要在变量后加上小括号

Flask的动态路由方式:
- @app.route('/user/
') - @app.route('/post/
- @app.route('/post/
- @app.route('/post/
- @app.route('/login', methods=['GET', 'POST'])
DEFAULT_CONVERTERS = {
'default': UnicodeConverter,
'string': UnicodeConverter,
'any': AnyConverter,
'path': PathConverter,
'int': IntegerConverter,
'float': FloatConverter,
'uuid': UUIDConverter,
}
与bottle一样,也有方法请求路由,即在路由中增加“method=”参数
对于Http请求,Flask会讲请求信息封装在request中(werkzeug.wrappers.BaseRequest),提供的如下常用方法和字段以供使用:
request.method
request.args
request.form
request.values
request.files
request.cookies
request.headers
request.path
request.full_path
request.script_root
request.url
request.base_url
request.url_root
request.host_url
request.host
Flask中使用cookie:使用make_response函数包装render_template,生成的对象有set_cookie方法。先导入make_response
@app.route('/index/')
def index():
    # return "hello world!"
    # return render_template('flaskindex.html',k0=myfun,k1='hello',k2=['a','b','c'],k3={'name':'haha1','age':17})
    obj = make_response(render_template('flaskindex.html',k0=myfun,k1='hello',k2=['a','b','c'],k3={'name':'haha1','age':17}))
    obj.set_cookie('usern','xiaohua')
    return obj
Flask中重定向:redirect
url_for(别名),这里的别名就是函数名,不需要在route中单独定义

Flask中使用session,先导入session,from flask import session
要使用session,需要先配置一个SECRET_KEY,在Flask对象上设置,设置后才能在函数中使用:session['key']=value的方式
from flask import Flask,render_template,make_response,session,request,redirect,url_for
app = Flask(__name__)
app.config.update(SECRET_KEY=b'_5#y2L"F4Q8z\n\xec]/') # 要使用session,必须设置这个参数
def myfun():
return "测试传递函数"
@app.route('/index/')
def index():
# return "hello world!"
# return render_template('flaskindex.html',k0=myfun,k1='hello',k2=['a','b','c'],k3={'name':'haha1','age':17})
obj = make_response(render_template('flaskindex.html',k0=myfun,k1='hello',k2=['a','b','c'],k3={'name':'haha1','age':17}))
obj.set_cookie('usern','xiaohua')
return obj
@app.route('/login/',methods=['GET','POST'])
def login():
if request.method =='POST':
session['user'] = request.form.get('user') # 设置session内容
url = url_for('redirectaliastest')
return redirect(url)
else:
return render_template('login.html')
@app.route('/testurlfor')
def redirectaliastest():
print(session) # login中设置的session在这里能打印出
return render_template('flaskindex.html')
if __name__ == "__main__":
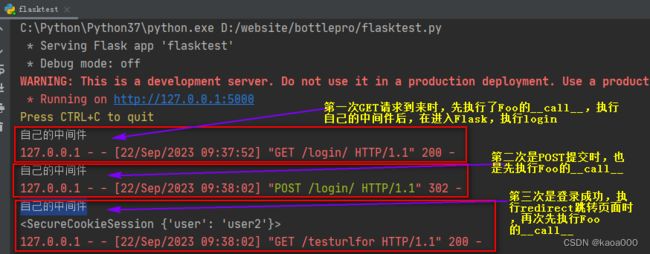
app.run()关于Flask的中间件调用机制:
所有的WSGI在执行时,即实例化时,要先执行__call__()方法,
def __call__(self, environ: dict, start_response: t.Callable) -> t.Any:

    return self.wsgi_app(environ, start_response)
这个方法返回的是是执行wsgi_app方法的结果,然后在进入到Flask。
我们可以将这个wsgi_app换成我们自定义的类,在__call__方法中添加我们自己的代码,最后在调用原来的wsgi_app,这样就在请求处理前,先经过了我们自己的处理,像Django的中间件就是这种机制实现的。
from flask import Flask,render_template,make_response,session,request,redirect,url_for

app = Flask(__name__)
app.config.update(SECRET_KEY=b'_5#y2L"F4Q8z\n\xec]/')

def myfun():
    return "测试传递函数"

@app.route('/index/')
def index():
    # return "hello world!"
    # return render_template('flaskindex.html',k0=myfun,k1='hello',k2=['a','b','c'],k3={'name':'haha1','age':17})
    obj = make_response(render_template('flaskindex.html',k0=myfun,k1='hello',k2=['a','b','c'],k3={'name':'haha1','age':17}))
    obj.set_cookie('usern','xiaohua')
    return obj

@app.route('/login/',methods=['GET','POST'])
def login():
    if request.method =='POST':
        session['user'] = request.form.get('user')
        url = url_for('redirectaliastest')

        return redirect(url)
    else:
        return render_template('login.html')

@app.route('/testurlfor')
def redirectaliastest():
    print(session)
    return render_template('flaskindex.html')

class Foo:
    def __init__(self,w):
        self.w = w

    def __call__(self, environ,start_response):
        print("自己的中间件")
        obj = self.w(environ,start_response)
        return obj
if __name__ == "__main__":
    app.wsgi_app = Foo(app.wsgi_app)
    # 将原来的wsgi_app换成我们的类,Foo加上括号,即Foo()会先init,然后call
    # call的时候先执行我们的逻辑(相当于中间件),最后执行原来的wsgi_app
    # 这种方法有点装饰器的设计模式
    app.run()
启动后,页面请求过程:
Flask的消息:取一次就消失:
放置在session中,使用flash(value),取用,get_flashed_message(),取完就删除了。