C代码中集成gtest单元测试
1. 原理
将 gtest 框架应用到 C 程序的原理比较简单,主要分 3 步:
1、编译测试框架 googletest 源码得到 libgtest.a 库文件(也可以根据需要编译成动态链接库或共享库文件.so)
2、编译待测试的 C 代码得到一个功能库文件,例如 libfoo.a
3、写一个单元测试文件(如:foo_unitttest.cc), 编译链接上 libgtest.a 和 libfoo.a 生成可执行文件进行测试
如果代码规模不大,对代码模块化要求也不高的话,可以将第2和第3步合并到一起执行,变成:
1、编译测试框架 googletest 源码得到 libgtest.a 库文件
2、写一个单元测试文件(如:foo_unitttest.cc),和待测试代码一起编译并链接到 libgtest.a 库得到可执行文件进行测试
2.实现
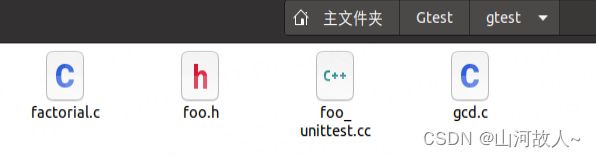
实现结构的图如下所示:

build_gtest.sh:运行例子的shell脚本
CMakeLists.txt:例子程序的编译脚本
googletest:gtest测试框架(Linux安装gtest_gtest安装_山河故人~的博客-CSDN博客)
gtest:例子代码及测试单元代码
下面分别将build_gtest.sh、CMakeLists.txt、gtest实现列举如下:
build_gtest.sh:
#!/bin/bash

TOP_DIR=$(cd $(dirname $0); pwd)

if [ ! -d "/build/" ];then
	mkdir build
else
	rm -rf build
	mkdir build
fi

cd $TOP_DIR/gtest
cmake ..
make

mv gtest_app $TOP_DIR/build

cd $TOP_DIR/build

./gtest_app

cd $TOP_DIR
CMakeLists.txt
# Note: CMake support is community-based. The maintainers do not use CMake
# internally.

cmake_minimum_required(VERSION 3.5)

project(gtest_app)

add_executable(gtest_app gtest/foo_unittest.cc)
target_sources(gtest_app PRIVATE gtest/factorial.c gtest/gcd.c)
target_include_directories(gtest_app PRIVATE gtest)

target_link_libraries(gtest_app PRIVATE /home/xxx/Gtest/googletest/build/lib/libgtest.a /home/xxx/Gtest/googletest/build/lib/libgtest_main.a pthread)
gtest包括文件内容如下:
头文件foo.h:
#ifndef __FOO_H__
#define __FOO_H__
#ifdef __cplusplus
extern "C"
{
#endif

int gcd(int a, int b);

int factorial(int n);

#ifdef __cplusplus
}
#endif
#endif
功能函数文件factorial.c:
#include "foo.h"

int factorial(int n)
{
    int i, res;

    res = 1;
    for (i=n; i>0; i--)
    {
        res *= i;
    }

    return res;
}
功能函数文件gcd.c:
#include "foo.h"

int gcd(int a, int b)
{
    if (b == 0)
    {
        return a;
    }
    else
    {
        return gcd(b, a % b);
    }
}
单元测试文件foo_unittest.cc:
#include "foo.h"
#include

TEST(GCDTest, EvenTest)
{
    EXPECT_EQ(2, gcd(4, 10));
    EXPECT_EQ(6, gcd(30, 18));
    EXPECT_EQ(15, gcd(30, 45));
}

TEST(GCDTest, PrimeTest)
{
    EXPECT_EQ(1, gcd(23, 10));
    EXPECT_EQ(1, gcd(359, 71));
    EXPECT_EQ(1, gcd(47, 83));
}

TEST(FactorialTest, HandlesZeroInput) {
  EXPECT_EQ(factorial(0), 1);
}

TEST(FactorialTest, HandlesPositiveInput) {
  EXPECT_EQ(factorial(1), 1);
  EXPECT_EQ(factorial(2), 2);
  EXPECT_EQ(factorial(3), 6);
  EXPECT_EQ(factorial(8), 40320);
}

#if 0
int main(int argc, char *argv[])
{
  testing::InitGoogleTest(&argc, argv);
  return RUN_ALL_TESTS();
}
#endif
3.运行
执行build_gtest.sh脚本

参考文章:两步实现在C代码中快速集成gtest进行单元测试_c语言 gtest_洛奇看世界的博客-CSDN博客