linux下 elasticsearch6.4.0安装,ik分词器的安装
ElasticSearch6.4.0安装
1,准备工作
1),上传压缩包到opt目录下

2),ES6.4.0 需要jdk1.8 以上的环境,安装jdk8
解压jdk,在usr/lib 下面创建jdk目录,把刚才解压的jdk1.8移动到该目录之下
 1.sudo tar -zxvf jdk-8u201-linux-x64.tar.gz
 2.cd  /usr/lib
 3.sudo mkdir jdk
 4.sudo mv /opt/jdk1.8.0_201 /usr/lib/jdk
注意:该处我们使用的不是root账户,在该服务器上面用sudo 拿不到 /etc/profile 里配置的环境变量,所以我们配置ES使用该jdk环境需要配置在ES的启动项中
2,安装ES
1),解压ES
sudo tar -zxvf elasticsearch-6.4.0.tar.gz
2),修改elasticsearch.yml 文件
# ======================== Elasticsearch Configuration =========================
#
# NOTE: Elasticsearch comes with reasonable defaults for most settings.
#       Before you set out to tweak and tune the configuration, make sure you
#       understand what are you trying to accomplish and the consequences.
#
# The primary way of configuring a node is via this file. This template lists
# the most important settings you may want to configure for a production cluster.
#
# Please consult the documentation for further information on configuration options:
# https://www.elastic.co/guide/en/elasticsearch/reference/index.html
#
# ---------------------------------- Cluster -----------------------------------
#
# Use a descriptive name for your cluster:
#
#cluster.name: my-application
#
# ------------------------------------ Node ------------------------------------
#
# Use a descriptive name for the node:
#
#node.name: node-1
node.name: ES-01
#
# Add custom attributes to the node:
#
#node.attr.rack: r1
#
# ----------------------------------- Paths ------------------------------------
#
# Path to directory where to store the data (separate multiple locations by comma):
#
#path.data: /path/to/data
path.data: /data/ES/elasticsearch-6.4.0/data   #数据路径
#
# Path to log files:
#
#path.logs: /path/to/logs
path.logs: /data/ES/elasticsearch-6.4.0/logs   #日志路径
#
# ----------------------------------- Memory -----------------------------------
#
# Lock the memory on startup:
#
#bootstrap.memory_lock: true
bootstrap.memory_lock: false
bootstrap.system_call_filter: false
#
# Make sure that the heap size is set to about half the memory available
# on the system and that the owner of the process is allowed to use this
# limit.
#
# Elasticsearch performs poorly when the system is swapping the memory.
#
# ---------------------------------- Network -----------------------------------
#
# Set the bind address to a specific IP (IPv4 or IPv6):
#
#network.host: 192.168.0.1
network.host: 192.168.0.1
#
# Set a custom port for HTTP:
#
#http.port: 9200
http.port: 9200
#
# For more information, consult the network module documentation.
#
# --------------------------------- Discovery ----------------------------------
#
# Pass an initial list of hosts to perform discovery when new node is started:
# The default list of hosts is ["127.0.0.1", "[::1]"]
#
#discovery.zen.ping.unicast.hosts: ["host1", "host2"]
#
# Prevent the "split brain" by configuring the majority of nodes (total number of master-eligible nodes / 2 + 1):
#
#discovery.zen.minimum_master_nodes:
#
# For more information, consult the zen discovery module documentation.
#
# ---------------------------------- Gateway -----------------------------------
#
# Block initial recovery after a full cluster restart until N nodes are started:
#
#gateway.recover_after_nodes: 3
#
# For more information, consult the gateway module documentation.
#
# ---------------------------------- Various -----------------------------------
#
# Require explicit names when deleting indices:
#
#action.destructive_requires_name: true
注意:以上没有注释的部分为修改部分
3),创建数据文件和日志文件
snsoft@ubuntu-docker01:~$ sudo mkdir -p /data/ES/elasticsearch-6.4.0/data
snsoft@ubuntu-docker01:~$ sudo mkdir -p /data/ES/elasticsearch-6.4.0/logs
4),修改启动项文件elasticsearch
#!/bin/bash

# CONTROLLING STARTUP:
#
# This script relies on a few environment variables to determine startup
# behavior, those variables are:
#
#   ES_PATH_CONF -- Path to config directory
#   ES_JAVA_OPTS -- External Java Opts on top of the defaults set
#
# Optionally, exact memory values can be set using the `ES_JAVA_OPTS`. Note that
# the Xms and Xmx lines in the JVM options file must be commented out. Example
# values are "512m", and "10g".
#
#   ES_JAVA_OPTS="-Xms8g -Xmx8g" ./bin/elasticsearch

export JAVA_HOME=/usr/lib/jdk/jdk1.8.0_201
export PATH=$JAVA_HOME/bin:$PATH

source "`dirname "$0"`"/elasticsearch-env

ES_JVM_OPTIONS="$ES_PATH_CONF"/jvm.options
JVM_OPTIONS=`"$JAVA" -cp "$ES_CLASSPATH" org.elasticsearch.tools.launchers.JvmOptionsParser "$ES_JVM_OPTIONS"`
ES_JAVA_OPTS="${JVM_OPTIONS//\$\{ES_TMPDIR\}/$ES_TMPDIR} $ES_JAVA_OPTS"


# start
if [ -x "$JAVA_HOME/bin/java" ]; then
        JAVA="/usr/lib/jdk/jdk1.8.0_201/bin/java"
else
        JAVA=`which java`
fi
# end


cd "$ES_HOME"
# manual parsing to find out, if process should be detached
if ! echo $* | grep -E '(^-d |-d$| -d |--daemonize$|--daemonize )' > /dev/null; then
  exec \
    "$JAVA" \
    $ES_JAVA_OPTS \
    -Des.path.home="$ES_HOME" \
    -Des.path.conf="$ES_PATH_CONF" \
    -Des.distribution.flavor="$ES_DISTRIBUTION_FLAVOR" \
    -Des.distribution.type="$ES_DISTRIBUTION_TYPE" \
    -cp "$ES_CLASSPATH" \
    org.elasticsearch.bootstrap.Elasticsearch \
    "$@"
else
  exec \
    "$JAVA" \
    $ES_JAVA_OPTS \
    -Des.path.home="$ES_HOME" \
    -Des.path.conf="$ES_PATH_CONF" \
    -Des.distribution.flavor="$ES_DISTRIBUTION_FLAVOR" \
    -Des.distribution.type="$ES_DISTRIBUTION_TYPE" \
    -cp "$ES_CLASSPATH" \
    org.elasticsearch.bootstrap.Elasticsearch \
    "$@" \
    <&- &
  retval=$?
  pid=$!
  [ $retval -eq 0 ] || exit $retval
  if [ ! -z "$ES_STARTUP_SLEEP_TIME" ]; then
    sleep $ES_STARTUP_SLEEP_TIME
  fi
  if ! ps -p $pid > /dev/null ; then
    exit 1
  fi
  exit 0
fi

exit $?
注意:其中新增的部分为:
export JAVA_HOME=/usr/lib/jdk/jdk1.8.0_201
export PATH=$JAVA_HOME/bin:$PATH

# start
if [ -x "$JAVA_HOME/bin/java" ]; then
        JAVA="/usr/lib/jdk/jdk1.8.0_201/bin/java"
else
        JAVA=`which java`
fi
# end
5),启动ES
因为ES禁止在root用户下面访问,当我们的普通用户用sudo命令去启动ES时会出错,所以需要修改文件的权限:
sudo chown -R snsoft:snsoft elasticsearch-6.4.0
sudo chown -R snsoft:snsoft data
启动出错:
ERROR: [1] bootstrap checks failed
[1]: max virtual memory areas vm.max_map_count [65530] is too low, increase to at least [262144]
[2019-05-20T14:14:56,808][INFO ][o.e.n.Node               ] [node-1] stopping ...
[2019-05-20T14:14:56,828][INFO ][o.e.n.Node               ] [node-1] stopped
[2019-05-20T14:14:56,829][INFO ][o.e.n.Node               ] [node-1] closing ...
[2019-05-20T14:14:56,849][INFO ][o.e.n.Node               ] [node-1] closed
[2019-05-20T14:14:56,856][INFO ][o.e.x.m.j.p.NativeController] Native controller process has stopped - no new native processes can be started
原因:最大虚拟内存太小,需要修改系统变量的最大值。
解决方案:修改配置sysctl.conf 增加配置值: vm.max_map_count=262144
sudo vi /etc/sysctl.conf
vm.max_map_count=262144
保存之后执行命令:
sudo sysctl -p
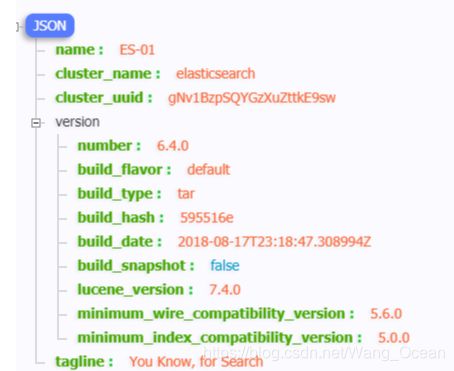
成功启动:访问:192.168.0.1:9200 出现则安装成
3,安装ik分词器
git上面下载ik分词器的压缩包,地址:
https://github.com/medcl/elasticsearch-analysis-ik/releases
与ES版本匹配的6.4.0版本:

需要注意的是我这里下载的是第一个 zip 压缩包,第2,3 个是源代码,下载完成之后需要用maven编译打包。
因为服务器上面没有安装unzip包且无法联网,所以在服务器上面无法解压该zip压缩包。
在这里我在tmp目录下面新建ik文件夹,在我本地的windows电脑上面解压zip压缩包之后,将里面的所有文件上传到服务器上面的/tmp/ik文件夹下面,最后移动文件夹ik到/elasticsearch-6.4.0/pluging下面:
mv /tmp/ik /opt/elasticsearch-6.4.0/plugins/
最终结果:

再次启动ES出现:

则安装分词器成功。