Nacos学习记录(cloud)一篇搞定
简介
看官方
安装
下载地址: https://github.com/alibaba/nacos/releases
我这里是windows直接找zip下载

导入数据库
新建数据库并且导入:nacos\conf\nacos-mysql.sql
修改application.properties配置文件
spring.datasource.platform=mysql

db.url.0=jdbc:mysql://127.0.0.1:3306/nacos_config?characterEncoding=utf8&connectTimeout=1000&socketTimeout=3000&autoReconnect=true&useUnicode=true&useSSL=false&serverTimezone=UTC
db.user.0=nacos_config
db.password.0=nacos_config
单机启动
startup.cmd -m standalone
http://127.0.0.1:8848/
账户:nacos
密码:nacos
把配置文件放到nacos上面并且配置自动发现
添加pom
        <dependency>
            <groupId>com.alibaba.cloud</groupId>
            <artifactId>spring-cloud-starter-alibaba-nacos-config</artifactId>
        </dependency>
        <dependency>
            <groupId>org.springframework.cloud</groupId>
            <artifactId>spring-cloud-starter-bootstrap</artifactId>
        </dependency>
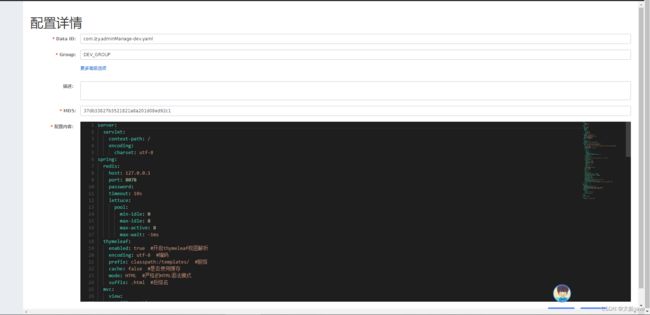
原来application.yml的内容在nacos上面新建配置(原来的application.yml可以清空了)


启动类添加
@EnableDiscoveryClient
新建bootstrap.yml
spring:
  application:
    name: com.lzy.authorizationServer
  profiles:
    active: dev
  cloud:
    nacos:
      discovery:
        server-addr: 192.168.197.1:8848
        namespace: dev
        group: DEV_GROUP
      config:
        server-addr: 192.168.197.1:8848
        file-extension: yaml
        group: DEV_GROUP
        namespace: dev
由于是多服务启动,服务端口不要再配置了,写到启动参数里面
--spring.profiles.active=dev --server.port=81
配置文件拆分
实际项目是我们多个服务用的是配置文件很多都是重复的所以要进行拆分这样就可以复用了
public-dev.yaml
server:
  servlet:
    context-path: /
    encoding:
      charset: utf-8
spring:
  thymeleaf:
    enabled: true  #开启thymeleaf视图解析
    encoding: utf-8  #编码
    prefix: classpath:/templates/  #前缀
    cache: false  #是否使用缓存
    mode: HTML  #严格的HTML语法模式
    suffix: .html  #后缀名
  mvc:
    view:
      suffix: action
    pathmatch:
      matching-strategy: ANT_PATH_MATCHER
mybatis-plus:
  configuration:
    map-underscore-to-camel-case: false
    auto-mapping-behavior: full
    log-impl: org.apache.ibatis.logging.stdout.StdOutImpl
  mapper-locations: classpath*:mapper/**/*Mapper.xml
  global-config:
    # 逻辑删除配置
    db-config:
      # 删除前
      logic-not-delete-value: 1
      # 删除后
      logic-delete-value: 0
logging:
  level:
    com.lzy: debug
mysql-dev.yaml
spring:
  datasource:
    name: testsb
    driver-class-name: com.mysql.cj.jdbc.Driver # MySQL 驱动,这里根据引入的 mysql-connector-java 包版本选择不同的 Driver, 8.x 需要用 cj
    url: jdbc:mysql://127.0.0.1:3306/testsb?serverTimezone=Asia/Shanghai&useUnicode=true&characterEncoding=utf8&useSSL=false
    username: testsb
    password: 123456
    type: com.zaxxer.hikari.HikariDataSource # JDBC 连接池类型:HikariCP
    hikari:
      connection-timeout: 30000     # 等待连接池分配链接的最大时长(毫秒),超过这个时长还没有可用的连接则发生 SQLException,默认:30 秒
      minimum-idle: 5               # 最小连接数
      maximum-pool-size: 20         # 最大连接数
      auto-commit: true             # 自动提交
      idle-timeout: 600000          # 连接超时的最大时长(毫秒),超时则被释放(retired),默认:10 分钟
      pool-name: DataSourceHikariCP # 连接池名称
      max-lifetime: 1800000         # 连接的生命时长(毫秒),超时而且没被使用则被释放(retired),默认: 30 分钟
      connection-test-query: select 1
redis-dev.yaml
spring:
  redis:
    host: 127.0.0.1
    port: 8078
    password:
    timeout: 10s
    lettuce:
      pool:
        min-idle: 0
        max-idle: 8
        max-active: 8
        max-wait: -1ms
bootstrap.yml
spring:
  application:
    name: 服务名称
  profiles:
    active: dev
  cloud:
    nacos:
      discovery:
        server-addr: 192.168.197.1:8848
        namespace: dev
        group: DEV_GROUP
      config:
        server-addr: 192.168.197.1:8848
        file-extension: yaml
        group: DEV_GROUP
        namespace: dev
        extension-configs:
          - data-id: public-dev.yaml
            group: DEV_GROUP
            refresh: true

          - data-id: mysql-dev.yaml
            group: DEV_GROUP
            refresh: true

          - data-id: redis-dev.yaml
            group: DEV_GROUP
            refresh: true
Nacos集群
我这里配合nginx使用
nginx配置
upstream nacos_list {
    server 127.0.0.1:8840 weight=10;
    server 127.0.0.1:8850 weight=10;
    server 127.0.0.1:8860 weight=10;
}

server {
    listen       8848;
    server_name  127.0.0.1;
    charset utf-8;

    location  /nacos {
	proxy_pass http://nacos_list/nacos;
        proxy_redirect off;
        proxy_set_header Host $host;
        proxy_set_header X-Real-IP $remote_addr;
        proxy_set_header X-Forwarded-For $proxy_add_x_forwarded_for;
		proxy_connect_timeout 60s;
        proxy_read_timeout 3600s;
        proxy_send_timeout 60s;
        proxy_http_version 1.1;
        proxy_set_header Upgrade $http_upgrade;
        proxy_set_header Connection "upgrade";
    }

    error_page   500 502 503 504  /50x.html;
    location = /50x.html {
        root   D:/javaTool/nginx-1.18.0/html;
    }
}
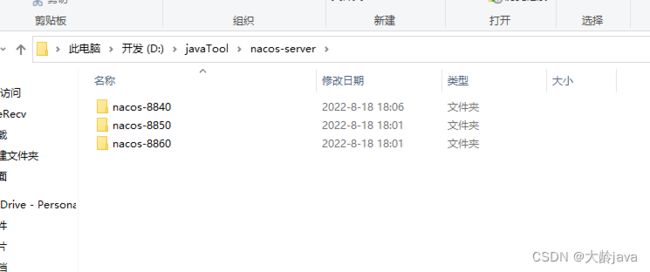
注意这里如果是一个服务器启动多个nacos端口起码预留2个偏移量
解释:
是因为在Nacos2.0以后,相对于之前的版本增加了gRPC的通信方式,简单来说 8801端口占用的偏移量是9801端口和9802端口、8802端口占用的偏移量是9802端口和9803端口、8803端口占用的偏移量是9803端口和9804端口,端口冲突了。

nacos/config/cluster.conf
192.168.197.1:8840
192.168.197.1:8850
192.168.197.1:8860
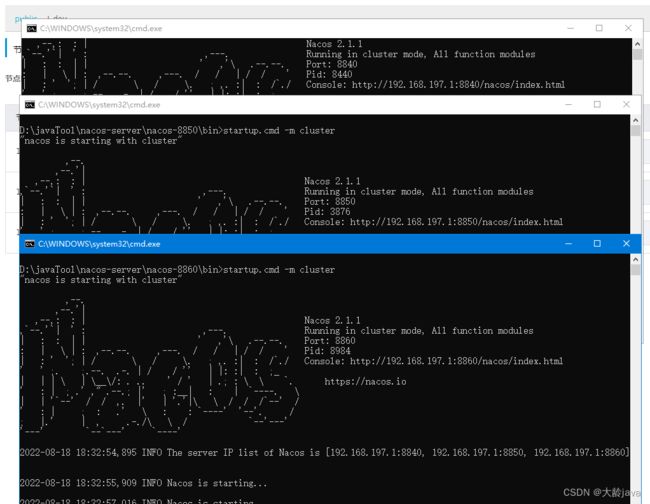
集群启动命令
startup.cmd -m cluster

全部启动后通过 htpp://192.168.197.1:8848/nacos 就可以访问了
到此基本操作就大功告成了。剩下的就是自己的业务摸索阶段。


