【SwiftUI模块】0006、SwiftUI自定义引导页动画 - 建议手跟着敲代码联合<0005、SwiftUI-粘性动画指示器引导页> - 加深你的Co(理)py(解)能力
SwiftUI小功能模块系列
0001、SwiftUI自定义Tabbar动画效果
0002、SwiftUI自定义3D动画导航抽屉效果
0003、SwiftUI搭建瀑布流-交错网格-效果
0004、SwiftUI-<探探App>喜欢手势卡片
0005、SwiftUI-粘性动画指示器引导页
0006、SwiftUI自定义引导页动画
技术:SwiftUI3.0、引导页、介绍页动画、自定义引导页动画
运行环境:
SwiftUI3.0 + Xcode13.4.1 + MacOS12.5 + iPhone Simulator iPhone 13 Pro Max
SwiftUI自定义引导页动画
-
- 概述
- 详细
-
- 一、运行效果
- 二、项目结构图
- 三、程序实现 - 过程
-
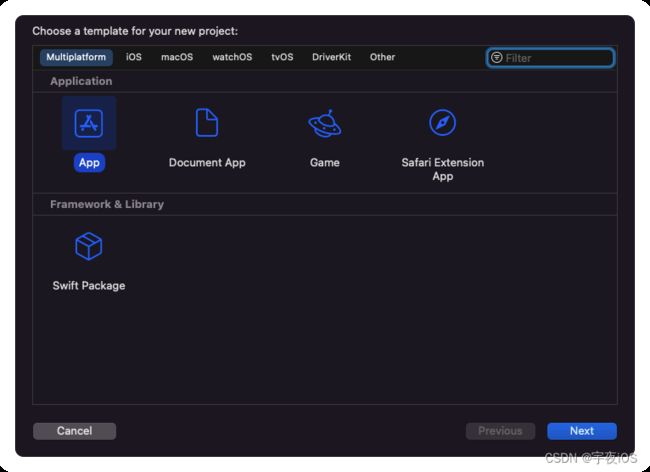
- 1.创建一个项目命名为 `OnBoardingAnimation`
- 1.1.引入资源文件和颜色
- 2. 创建一个虚拟文件`New Group` 命名为 `View`
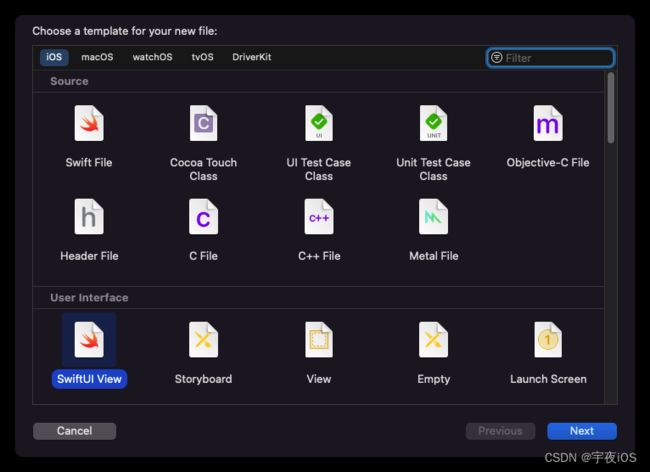
- 2. 创建一个文件`New File` 选择`SwiftUI View`类型 命名为`OnBoarding`
- 2. 创建一个文件`New File` 选择`SwiftUI View`类型 命名为`OffsetPageTabView`
- 3. 创建一个虚拟文件`New Group` 命名为 `Model`
- 3. 创建一个文件`New File` 选择`SwiftUI View`类型 命名为`BoardingScreen` 、并且删除预览视图、改造成模型 继承`Identifiable`
- Code
-
- ContentView - 主窗口
- OnBoarding - 引导页
- OffsetPageTabView.swift -偏移Tab视图逻辑处理
- BoardingScreen - 模型
- demo源码
概述
使用SwiftUI做一个
自定义引导页动画的案例
详细
一、运行效果
二、项目结构图
三、程序实现 - 过程
思路:
1.创建主页OnBoarding
2.搭建主页进行偏移的逻辑处理OffsetTabView
3.添加主页介绍信息的模型BoardingScreen
4.处理滚动的时候 通过 主页进行绑定OffsetPageTabView的偏移量offset进行监听 是否要改变当前页面
5.并且通过一个圆形矩形背景做一个自身360的旋转动画
1.创建一个项目命名为 OnBoardingAnimation
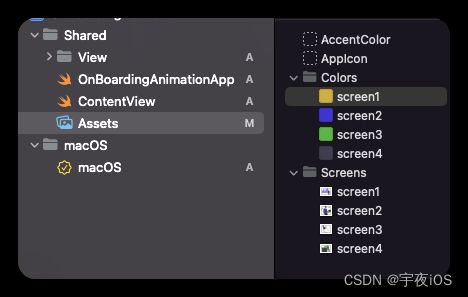
1.1.引入资源文件和颜色
颜色
screen1#D2BA64
screen2#5050CF
screen3#7EBA64
screen4#504F5F
引导页介绍图片4张
图片名称 和 颜色名称一样 。方便统一根据名字设置对应的页面
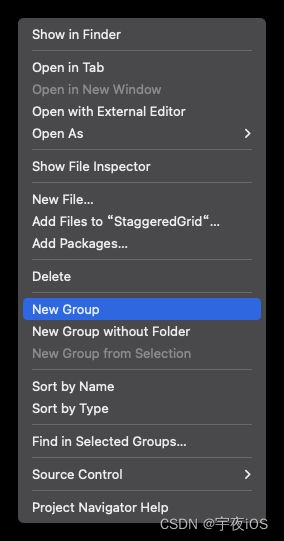
2. 创建一个虚拟文件New Group 命名为 View
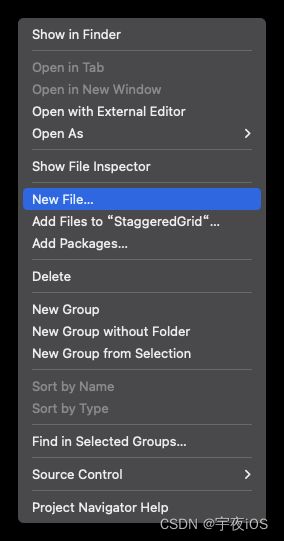
2. 创建一个文件New File 选择SwiftUI View类型 命名为OnBoarding
2. 创建一个文件New File 选择SwiftUI View类型 命名为OffsetPageTabView
具体实现和 0005、SwiftUI-粘性动画指示器引导页 案例一样
如果上一个案例 你有跟我实现 - 那么可以直接拖拽过来即可
3. 创建一个虚拟文件New Group 命名为 Model
3. 创建一个文件New File 选择SwiftUI View类型 命名为BoardingScreen 、并且删除预览视图、改造成模型 继承Identifiable
Code
ContentView - 主窗口
主要是展示主窗口
OnBoarding
//
//  ContentView.swift
//  Shared
//
//  Created by 李宇鸿 on 2022/8/17.
//

import SwiftUI

struct ContentView: View {
    var body: some View {
       OnBoarding()
    }
}

struct ContentView_Previews: PreviewProvider {
    static var previews: some View {
        ContentView()
    }
}
OnBoarding - 引导页
思路
- 主要部分核心模块 - 滚动页面 - UI创建
包含图片、两个文本- 叠加层 - 最顶层 做了指示器 和 跳过、下一页的按钮
指示器使用Circle创建和 做了登录和注册按钮- 创建引导页面数据、和滚动核心UI
OffsetPageTabView- 添加滚动的时候 做一个
圆形矩形背景进行360度自身旋转
//
//  OnBoarding.swift
//  OnBoardingAnimation (iOS)
//
//  Created by 李宇鸿 on 2022/8/17.
//

import SwiftUI

struct OnBoarding: View {
    @State var offset : CGFloat = 0
    var body: some View {
        // 自定义页面视图…
        OffsetPageTabView(offset:$offset){

            HStack(spacing:0){
                ForEach(boardingScreens) { screen in

                    VStack(spacing:15){

                      Image(screen.image)
                            .resizable()
                            .aspectRatio(contentMode: .fit)
                            .frame(width:getScrrenBounds().width - 100,height: getScrrenBounds().width - 100)
                        // 小屏幕采用……
                            .scaleEffect(getScrrenBounds().height < 750 ? 0.9 : 1)
                            .offset(y:getScrrenBounds().height < 750 ? -100 :  -120)


                        VStack(alignment:.leading,spacing: 12){

                            Text(screen.title)
                                .font(.largeTitle.bold())
                                .foregroundColor(.white)
                                .padding(.top,20)

                            Text(screen.description)
                                .fontWeight(.semibold)
                                .foregroundColor(.white)

                        }
                        .frame(maxWidth:.infinity,alignment:.leading)
                        .offset(y:-70)

                    }
                    .padding()
                    .frame(width:getScrrenBounds().width)
                    .frame(maxHeight: .infinity)
//                    .background(Color(screen.image))

                }

            }


        }
        // 动画
        // 使用一个圆形矩形做一个背景动画 基于自身白色圆形矩形进行一个360动画效果
        .background(
            RoundedRectangle(cornerRadius: 50)
                .fill(.white)
            // 大小为图像大小…
                .frame(width:getScrrenBounds().width - 100,height: getScrrenBounds().width - 100)
                .scaleEffect(2)
                .rotationEffect(.init(degrees: 25))
                .rotationEffect(.init(degrees: getRotation()))
                .offset(y: -getScrrenBounds().width + 20)
            ,alignment: .leading
        )


        .background(Color("screen\(getIndex() + 1)"))
        .animation(.easeInOut,value: getIndex())
        // 适配刘海屏
        .ignoresSafeArea(.container,edges: .all)
        // 叠加层 放在最前面
        .overlay(
            VStack{
                HStack(spacing:25){
                    Button  {

                    } label: {
                        Text("Login as iJustine")
                            .fontWeight(.semibold)
                            .foregroundColor(.black)
                            .padding(.vertical,20)
                            .frame(maxWidth: .infinity)
                            .background(Color.white,in:RoundedRectangle(cornerRadius: 12))
                    }

                    Button  {

                    } label: {
                        Text("SignUp")
                            .fontWeight(.semibold)
                            .foregroundColor(.black)
                            .offset(x:-5)
                            .padding(.vertical,20)
                            .frame(maxWidth: .infinity)
                            .background(Color.white,in:RoundedRectangle(cornerRadius: 12))
                    }


                }


                HStack{

                    Button{

                    } label: {
                        Text("Skip")
                            .fontWeight(.semibold)
                            .foregroundColor(.white)
                    }


                    // 指示器
                    HStack(spacing:8){
                        ForEach(boardingScreens.indices,id:\.self){
                            index in
                            Circle()
                                .fill(.white)
                                .opacity(index == getIndex() ? 1 : 0.4)
                                .frame(width: 8, height: 8)
                                .scaleEffect(index == (getIndex()) ? 1.3 : 0.85)
                                .animation(.easeInOut,value:getIndex())
                        }
                    }
                    .frame(maxWidth:.infinity)

                    Button{

                        //设置Mac Offset…
                        // Max 4个屏幕,所以Max将是3*宽
                        offset = min(offset + getScrrenBounds().width,getScrrenBounds().width * 3)
                    } label: {
                        Text("Next")
                            .fontWeight(.semibold)
                            .foregroundColor(.white)
                    }


                }
                .padding(.top,30)
                .padding(.horizontal,8)


            }
                .padding()
            ,alignment: .bottom
        )
    }


    // 得到旋转
    func getRotation()-> Double{
        let progress = offset / (getScrrenBounds().width * 4 )

        // 做一个完整的旋转…
        let rotation = Double(progress) * 360
        return rotation
    }


    // Changing BG Color based on offset...
    // 基于偏移改变背景颜色…
    func getIndex() -> Int {
        let progress = (offset / getScrrenBounds().width).rounded()
        return Int(progress)
    }
}

struct OnBoarding_Previews: PreviewProvider {
    static var previews: some View {
        OnBoarding()
    }
}


// 扩展视图获得屏幕边界…
extension View {
    func getScrrenBounds()-> CGRect{
        return UIScreen.main.bounds
    }
}
OffsetPageTabView.swift -偏移Tab视图逻辑处理
主要是做 滚动页面的逻辑处理
思路
- 基于ScrollView进行处理
- 提供初始化构造器 - 方便上层通过偏移量进行 调用初始化
init(offset: Binding, @ViewBuilder content: @escaping()->Content) - 监听ScrollView滚动的代理、更新当前的偏移量
class Coordinator- 提供滚动的代理 滚动到下一个页面 进行是否更新当前的偏移量
updateUIView
比 0005、SwiftUI-粘性动画指示器引导页多做了一个清除背景操作
import SwiftUI

// 自定义视图泰式将返回填充控件的偏移量…
struct OffsetPageTabView<Content: View>: UIViewRepresentable  {

    var content: Content
    @Binding var offset : CGFloat
    func makeCoordinator() -> Coordinator {
        return OffsetPageTabView.Coordinator(parent: self)
    }


    init(offset: Binding<CGFloat>  , @ViewBuilder content: @escaping()->Content){
        self.content = content()
        self._offset = offset
    }


    func makeUIView(context: Context) -> UIScrollView {
        let scrollview = UIScrollView()

        // 提取SwiftUI View并嵌入到UIKit ScrollView…
        let hostview = UIHostingController(rootView: content)
        hostview.view.translatesAutoresizingMaskIntoConstraints = false

        // 清除背景
        hostview.view.backgroundColor = .clear

        let constraints = [
            hostview.view.topAnchor.constraint(equalTo: scrollview.topAnchor),
            hostview.view.leadingAnchor.constraint(equalTo: scrollview.leadingAnchor),
            hostview.view.trailingAnchor.constraint(equalTo: scrollview.trailingAnchor),
            hostview.view.bottomAnchor.constraint(equalTo: scrollview.bottomAnchor),

            //如果你使用的是垂直填充…
            //然后不要声明高度限制…
            hostview.view.heightAnchor.constraint(equalTo: scrollview.heightAnchor)

        ]

        scrollview.addSubview(hostview.view)
        scrollview.addConstraints(constraints)

        // 启用分页
        scrollview.isPagingEnabled = true
        scrollview.showsVerticalScrollIndicator = false
        scrollview.showsHorizontalScrollIndicator = false


        // 设置代理
        scrollview.delegate = context.coordinator
        return scrollview

    }
    func updateUIView(_ uiView: UIScrollView, context: Context) {
        //只有当offset被手动更改时才需要更新…
        //检查当前和滚动视图的偏移量…
        let currentOffset = uiView.contentOffset.x
        if currentOffset != offset {
            print("updating");
            uiView.setContentOffset(CGPoint(x: offset, y: 0),animated:true)
        }

    }

    // 页面抵消……
    class Coordinator : NSObject,UIScrollViewDelegate {
        var parent : OffsetPageTabView
        init(parent: OffsetPageTabView){
            self.parent = parent
        }
        func scrollViewDidScroll(_ scrollView: UIScrollView) {
            let offset = scrollView.contentOffset.x
            parent.offset = offset
        }
    }


}

struct OffsetPageTabView_Previews: PreviewProvider {
    static var previews: some View {
        ContentView()
    }
}
BoardingScreen - 模型
介绍模型
import SwiftUI

struct BoardingScreen: Identifiable {
    var id = UUID().uuidString
    var image : String
    var title : String
    var description : String
}


// 相同的标题和描述…
let title = "Easy Payments with \n Walletoy"
let description = "Samll business can receive device \npayment super fast and super easy"

// 因为图片名称和BG颜色名称相同…

// 样本模型屏幕…
var boardingScreens : [BoardingScreen] = [

    BoardingScreen(image: "screen1", title: title, description: description),
    BoardingScreen(image: "screen2", title: title, description: description),
    BoardingScreen(image: "screen3", title: title, description: description),
    BoardingScreen(image: "screen4", title: title, description: description)

]
demo源码
如需看源码,请点击下载!


