R语言实现伦敦各地区预期寿命与全国平均水平差异地理数据可视化(热力图)
R语言实现伦敦各地区预期寿命与全国平均水平差异地理数据可视化
读取csv文件
使用read.csv()直接从web读取并在数字列中清除文本字符
read.csv( ) 与 read_csv( ) 区别
| read.csv( ) | read_csv( ) |
|---|---|
| R中默认的csv读取方式 | readr包提供的读取方式 |
| 适用于小文件 | 适用于较大csv文件 |
LondonData <- read_csv("https://files.datapress.com/london/dataset/ward-profiles-and-atlas/2015-09-24T14:21:24/ward-profiles-excel-version.csv",
                       locale = locale(encoding = "UTF-8"),
                       na = "n/a")
encoding = “UTF-8” , 在UTF-8中每个字符可以包含一个以上的字节,但是R中默认的编码方式为latin1,所以需要修改编码方式。
检查是否正确读入数据
方法一
使用class( )
class(LondonData)
输出
## [1] "spec_tbl_df" "tbl_df" "tbl" "data.frame"
方法二
使用dplyr包中的summarise_all( )和pivot_longer( )查看变量与变量类型
Datatypelist <- LondonData %>%
  summarise_all(class) %>%
  pivot_longer(everything(),
               names_to="All_variables",
               values_to="Variable_class")

Datatypelist
输出
# A tibble: 67 x 2
   All_variables                      Variable_class

 1 Ward name                          character
 2 Old code                           character
 3 New code                           character
 4 Population - 2015                  numeric
 5 Children aged 0-15 - 2015          numeric
 6 Working-age (16-64) - 2015         numeric
 7 Older people aged 65+ - 2015       numeric
 8 % All Children aged 0-15 - 2015    numeric
 9 % All Working-age (16-64) - 2015   numeric
10 % All Older people aged 65+ - 2015 numeric
# … with 57 more rows
数据筛选
这时所有数字列均已经以数字形式读入,现在已经有一些数据读入R,我们需要选择一个小的子集,只选取伦敦的数据进行处理。因为伦敦自治市的代码以E09开头(文件其余部分的区号以E05开头)所以使用filter( )函数选取需要的数据子集(类似于SQL中的select * from…where…)。
这时候问题又出现了,New code列使用的是字符格式而非整数,在这种情况下我们可以使用str_detect ( ) (stringr字符处理包)与filter ( ) 结合使用。
LondonBoroughs<- LondonData %>%
  filter(str_detect(`New code`, "^E09"))
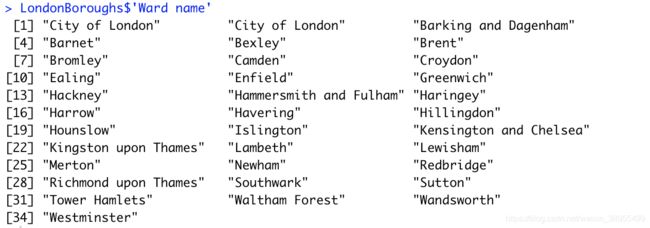
检查输出结果
LondonBoroughs$`Ward name`
异常数据处理
这个时候又出现问题了,发现City of London有两行,所以提取唯一行,使用distinct( ):
LondonBoroughs<-LondonBoroughs %>%
  distinct()
这样就OK了!
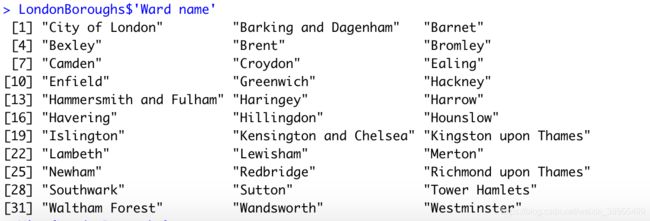
由于现在在对 “borough” 进行统计而不是“ward”,这样的命名容易产生误导,所以最好养成良好的习惯对列名进行重命名保持一致性。
library(janitor)

LondonBoroughs <- LondonBoroughs %>%
  dplyr::rename(Borough=`Ward name`)%>%
  clean_names()
数据处理
计算:
a. 平均预期寿命
b. 基于a的每个地区的归一化值
使用mutate( ) 在现有变量的基础上增加新变量
Life_expectancy <- LondonBoroughs %>%
  #平均男女预期寿命
  mutate(averagelifeexpectancy= (female_life_expectancy_2009_13 +
                                   male_life_expectancy_2009_13)/2)%>%
  #归一化寿命
  mutate(normalisedlifeepectancy= averagelifeexpectancy /
           mean(averagelifeexpectancy))%>%
  #挑选需要的列
  select(new_code,
         borough,
         averagelifeexpectancy,
         normalisedlifeepectancy)%>%
  #降序排列
  arrange(desc(normalisedlifeepectancy))
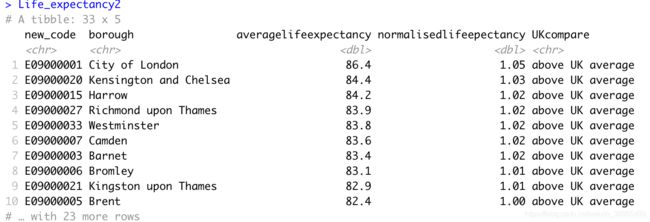
c. 使用case_when( )比较各地区预期寿命与英国平均寿命81.16
Life_expectancy2 <- Life_expectancy %>%
  mutate(UKcompare = case_when(averagelifeexpectancy>81.16 ~ "above UK average",
                               TRUE ~ "below UK average"))
Life_expectancy2
Life_expectancy2_group <- Life_expectancy2 %>%
  mutate(UKdiff = averagelifeexpectancy-81.16) %>%
  group_by(UKcompare)%>%
  summarise(range=max(UKdiff)-min(UKdiff), count=n(), Average=mean(UKdiff))

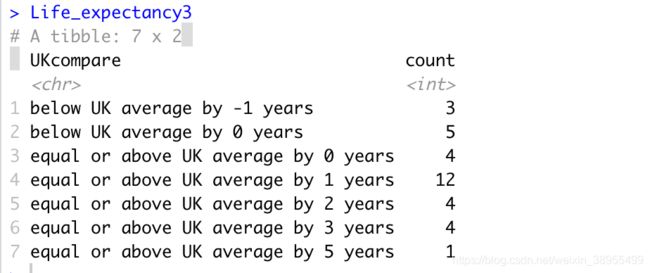
e.根据差值对区域进行统计
1) 将列UKdiff舍入到0个小数位(不添加新列)
2) 使用case_when()发现有相等的平均年龄或超过81的区域,并基于文本的合并“equal or above UK average by” 创建一个新的列containts,然后在UKdiff划分差异年数。通过str_c()函数,将两个或多个向量元素连接到单个字符向量, sep确定如何将这两个向量隔开。
3)按UKcompare列分组。
4)计算每组中的区域数。
Life_expectancy3 <- Life_expectancy %>%
  mutate(UKdiff = averagelifeexpectancy-81.16)%>%
  mutate(across(where(is.numeric), round, 3))%>%
  mutate(across(UKdiff, round, 0))%>%
  mutate(UKcompare = case_when(averagelifeexpectancy >= 81 ~
                                 str_c("equal or above UK average by",
                                       UKdiff,
                                       "years",
                                       sep=" "),
                               TRUE ~ str_c("below UK average by",
                                            UKdiff,
                                            "years",
                                            sep=" ")))%>%
  group_by(UKcompare)%>%
  summarise(count=n())
热力图可视化
使用maptools
install.packages("maptools")
install.packages(c("classInt", "tmap"))

# might also need these ones
install.packages(c("RColorBrewer", "sp", "rgeos",
                   "tmaptools", "sf", "downloader", "rgdal",
                   "geojsonio"))
直接从opendata读取GeoJson文件
# this will take a few minutes
EW <- st_read("https://opendata.arcgis.com/datasets/8edafbe3276d4b56aec60991cbddda50_2.geojson")
下载读取shp数据
# shapefile in local folder
EW <- st_read(here::here("prac2_data",
                        "Local_Authority_Districts__December_2015__Boundaries-shp",
                        "Local_Authority_Districts__December_2015__Boundaries.shp"))
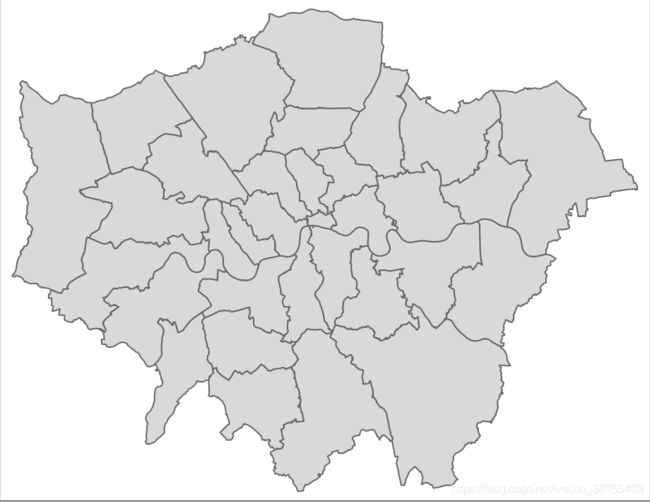
查找伦敦的地区并绘制图形
LondonMap<- EW %>%
  filter(str_detect(lad15cd, "^E09"))

#plot it using the qtm function
qtm(LondonMap)
在创建地图之前,需要使用merge()将一些属性数据连接到地图,但是首先要Janitor再次清理。
LondonData <- clean_names(LondonData)

#直接从web写入
BoroughDataMap <- EW %>%
  clean_names()%>%
  # . 表示已经载入的数据
  filter(str_detect(lad15cd, "^E09"))%>%
  merge(.,
        LondonData,
        by.x="lad15cd",
        by.y="new_code",
        no.dups = TRUE)%>%
  distinct(.,lad15cd,
           .keep_all = TRUE)
distinct()这意味着仅基于代码具有唯一的行,但保留所有其他变量.keep_all=TRUE。如果更改为.keep_all=FALSE(默认设置),则所有其他变量都将被删除。
使用qtm( ) 快速创建Choropleth贴图
tmap_mode("plot")

qtm(BoroughDataMap,
    fill = "rate_of_job_seekers_allowance_jsa_claimants_2015")
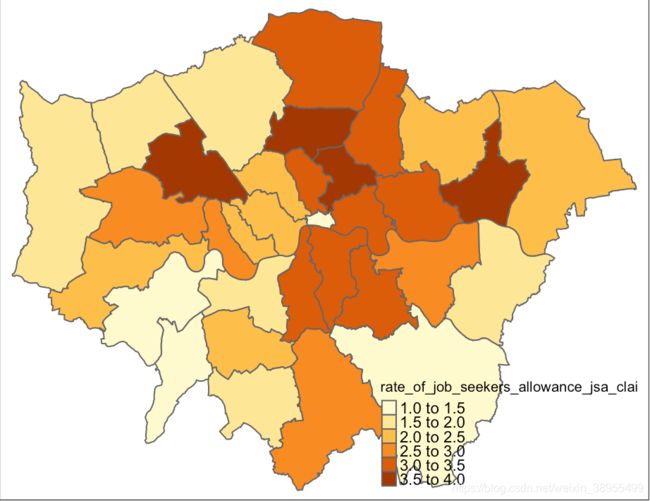
不好看! 这真的不好看! 加个底图吧!
使用read_osm()函数从OpenStreetMap(OSM)中提取底图tmaptools
st_box()函数在伦敦周围创建一个框,sf以提取底图图像
tmaplondon <- BoroughDataMap %>%
  st_bbox(.) %>%
  tmaptools::read_osm(., type = "osm", zoom = NULL)
tmap进行绘制,添加底图,添加伦敦的形状,要映射的属性,进行颜色划分的样式,透明度(alpha),指南针,比例和图例。
tmap_mode("plot")

tm_shape(tmaplondon)+
tm_rgb()+
tm_shape(BoroughDataMap) +
tm_polygons("rate_of_job_seekers_allowance_jsa_claimants_2015",
        style = "jenks",
        palette = "YlOrBr",
        midpoint = NA,
        title = "Rate per 1,000 people",
        alpha = 0.5) +
  tm_compass(position = c("left", "bottom"),type = "arrow") +
  tm_scale_bar(position = c("left", "bottom")) +
  tm_layout(title = "Job seekers' Allowance Claimants", legend.position = c("right", "bottom"))
Finally!合并Life_expectancy4map的空间数据EW并映射合并 tmap
Life_expectancy4map <- EW %>%
  merge(.,
        Life_expectancy4,
        by.x="lad15cd",
        by.y="new_code",
        no.dups = TRUE)%>%
  distinct(.,lad15cd,
           .keep_all = TRUE)

tmap_mode("plot")
tm_shape(tmaplondon)+
  tm_rgb()+
  tm_shape(Life_expectancy4map) +
  tm_polygons("UKdiff",
              style="pretty",
              palette="Blues",
              midpoint=NA,
              title="Number of years",
              alpha = 0.5) +
  tm_compass(position = c("left", "bottom"),type = "arrow") +
  tm_scale_bar(position = c("left", "bottom")) +
  tm_layout(title = "Difference in life expectancy", legend.position = c("right", "bottom"))
这样就大功告成啦!
第一次用R绘制热力图,感觉不管是数据处理还是地图绘制的工具包都是比较完备的,不用自己写函数方法,但是还要多熟练一下R的操作。
