用树莓派4b构建深度学习应用(十二)口罩篇
前言
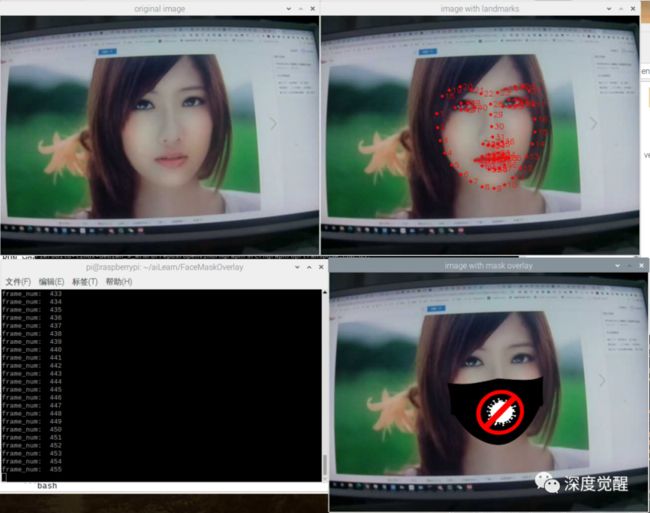
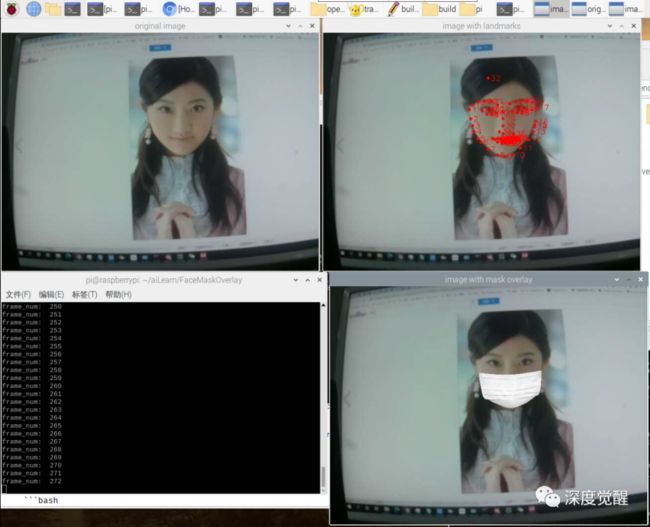
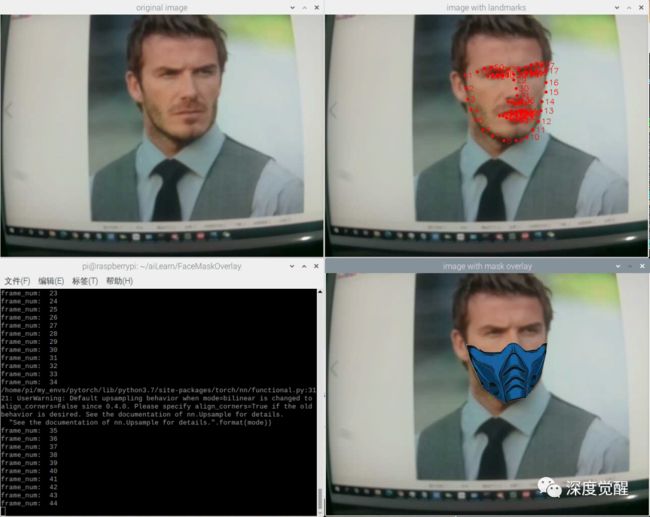
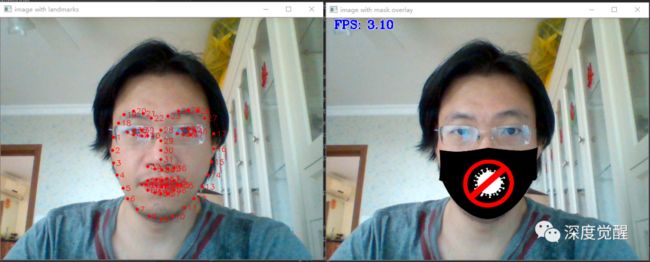
上一篇我们把环境和网络问题都解决了,这一篇在 COVID-19 仍在全世界肆虐的当下,我们尝试用 AI 来做一个有趣的自动戴口罩应用。主要用 OpenCV + CNN 来提取面部关键点坐标,再将口罩图片作为蒙版贴合上去。记得国庆中秋双节出门在外,也别忘了戴上口罩保护自己。
![]()
整个戴口罩分为三个阶段:
在图像上找到一张脸
检测脸上关键点标记
用口罩图片来覆盖到口鼻位置
人脸检测
首先,我们要在一张图像上定位脸部的位置,OpenCV 中 DNN 模块就能很轻松的做到。检测模型训练于 Caffe 框架,我们获取一个网络定义文件 face_detector.prototxt 和一个权重文件 face_detector.caffemodel。
# defining prototxt and caffemodel paths
# 人脸检测模型
detector_model = args.detector_model
detector_weights = args.detector_weights


# load model
detector = cv2.dnn.readNetFromCaffe(detector_model, detector_weights)
capture = cv2.VideoCapture(0)


while True:
    # capture frame-by-frame
    success, frame = capture.read()


    # get frame's height and width
    height, width = frame.shape[:2]  # 640×480


    # resize and subtract BGR mean values, since Caffe uses BGR images for input
    blob = cv2.dnn.blobFromImage(
        frame, scalefactor=1.0, size=(300, 300), mean=(104.0, 177.0, 123.0),
    )
    # passing blob through the network to detect a face
    detector.setInput(blob)
    # detector output format:
    # [image_id, class, confidence, left, bottom, right, top]
    face_detections = detector.forward()
推理之后,我们可以获得人脸序号,类型(人脸),置信度,左,下,右,上坐标值。
# loop over the detections
for i in range(0, face_detections.shape[2]):
    # extract confidence
    confidence = face_detections[0, 0, i, 2]


    # filter detections by confidence greater than the minimum threshold
    if confidence > 0.5:
        # get coordinates of the bounding box
        box = face_detections[0, 0, i, 3:7] * np.array(
            [width, height, width, height],
        )
我们挑出所有检测到的人脸,过滤掉置信度小于50%的目标,获取到人脸的目标框坐标。
✎ Tip
人脸检测模型的输入为(300,300),转换图片的时候要注意 Caffe 的输入格式为 BGR 方式。
获取人脸关键点
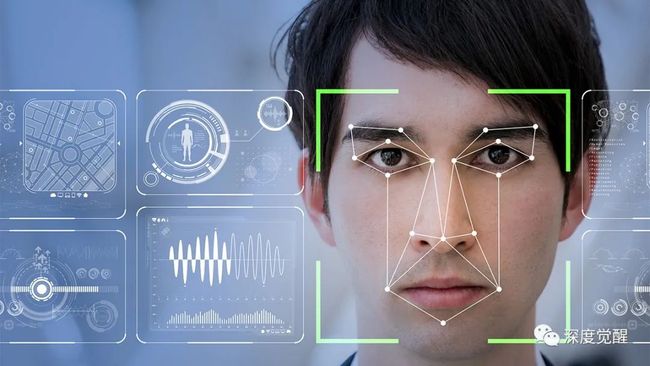
前面我们已经获得所有人脸的目标框,接下来作为人脸关键点检测模型的输入,就能获得眼睛,眉毛,鼻子,嘴巴,下巴和脸部轮廓等关键点位置。
1 模型概述
这里模型选用的是 HRNet,拥有与众不同的并联结构,可以随时保持高分辨率表征,不只靠从低分辨率表征里,恢复高分辨率表征。中科大和微软亚洲研究院,发布了新的人体姿态估计模型,当年刷新了三项COCO纪录,还中选了CVPR 2019。
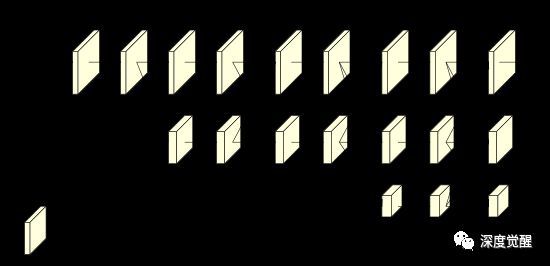
它从一个高分辨率的子网络开始,慢慢加入分辨率由高到低的子网络。特别之处在于,它不是依赖一个单独的、由低到高的上采样 (Upsampling) 步骤,粗暴地把低层、高层表征聚合到一起;而是在整个过程中,不停地融合 (Fusion) 各种不同尺度的表征。
团队用了交换单元 (Exchange Units) ,穿梭在不同的子网络之间:让每一个子网络,都能从其他子网络生产的表征里,获得信息。这样不断进行下去,就能得到丰富的高分辨率表征了。
更多细节,可以参考开源项目
https://github.com/HRNet/HRNet-Facial-Landmark-Detection
2 裁剪出人脸图片
要注意这里调整脸部尺寸的方式,由于人脸检测模型的输出目标框可能太贴近于脸部,因此我们无法直接采用检测框的精确坐标来裁剪图片。这里采用先把人脸放大1.5倍,再相对于中心位置裁剪出 256 * 256 的图片。
(x1, y1, x2, y2) = box.astype("int")


# crop to detection and resize
resized = crop(
    frame,
    torch.Tensor([x1 + (x2 - x1) / 2, y1 + (y2 - y1) / 2]),
    1.5,
    tuple(input_size),
)
3 预处理HRNet输入图像
转换图像格式,归一化预处理
# convert from BGR to RGB since HRNet expects RGB format
resized = cv2.cvtColor(resized, cv2.COLOR_BGR2RGB)
img = resized.astype(np.float32) / 255.0
# normalize landmark net input
normalized_img = (img - mean) / std
✎ Tip
要注意 HRNet 的输入图像是 RGB 格式。
4 模型构建
# init landmark model
# 人脸关键点模型
model = models.get_face_alignment_net(config)


# get input size from the config
input_size = config.MODEL.IMAGE_SIZE


# load model
state_dict = torch.load(args.landmark_model, map_location=device)


# remove `module.` prefix from the pre-trained weights
new_state_dict = OrderedDict()
for key, value in state_dict.items():
    name = key[7:]
    new_state_dict[name] = value


# load weights without the prefix
model.load_state_dict(new_state_dict)
# run model on device
model = model.to(device)
5 模型推理
将预处理后的图片输入HRnet 网络,得到68个人脸标记数据,再调用 decode_preds 函数来还原之前对图片的剪裁和缩放,得到原始图片为基准的关键点坐标。
# predict face landmarks
model = model.eval()
with torch.no_grad():
    input = torch.Tensor(normalized_img.transpose([2, 0, 1]))
    input = input.to(device)
    output = model(input.unsqueeze(0))
    score_map = output.data.cpu()
    preds = decode_preds(
        score_map,
        [torch.Tensor([x1 + (x2 - x1) / 2, y1 + (y2 - y1) / 2])],
        [1.5],
        score_map.shape[2:4],
    )
口罩图片绑定
现在我们获取到了面部的关键点信息,由于面具一般覆盖于鼻子下方到下巴的上方,因此选用的坐标序号从 2 到 16 这些关键点。
1 标注口罩图片
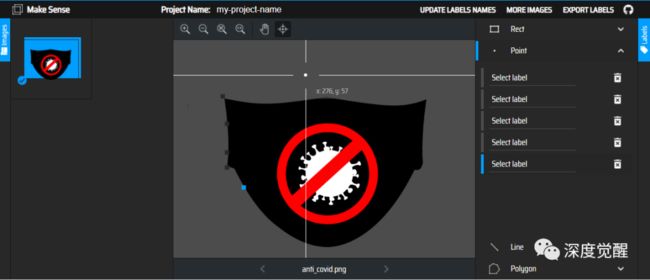
为了更好的对齐图片,我们需要对口罩图片进行标注。这里可以采用 makeense,这个开源在线标注工具。简单易用。
https://www.makesense.ai/
最后将标注保存为 csv 格式。
2 读取关键点坐标
这里选用关键点 2-16, 30,关键点的起始坐标为0开始。
# get chosen landmarks 2-16, 30 as destination points
# note that landmarks numbering starts from 0
dst_pts = np.array(
    [
        landmarks[1],
        landmarks[2],
        landmarks[3],
        landmarks[4],
        landmarks[5],
        landmarks[6],
        landmarks[7],
        landmarks[8],
        landmarks[9],
        landmarks[10],
        landmarks[11],
        landmarks[12],
        landmarks[13],
        landmarks[14],
        landmarks[15],
        landmarks[29],
    ],
    dtype="float32",
)


# load mask annotations from csv file to source points
mask_annotation = os.path.splitext(os.path.basename(args.mask_image))[0]
mask_annotation = os.path.join(
    os.path.dirname(args.mask_image), mask_annotation + ".csv",
)


with open(mask_annotation) as csv_file:
    csv_reader = csv.reader(csv_file, delimiter=",")
    src_pts = []
    for i, row in enumerate(csv_reader):
        # skip head or empty line if it's there
        try:
            src_pts.append(np.array([float(row[1]), float(row[2])]))
        except ValueError:
            continue
src_pts = np.array(src_pts, dtype="float32")
3 绑定关键点坐标
dst_pts 为检测到的人脸坐标;src_pts 为口罩图片标记坐标。
# overlay with a mask only if all landmarks have positive coordinates:
if (landmarks > 0).all():
    # load mask image
    mask_img = cv2.imread(args.mask_image, cv2.IMREAD_UNCHANGED)
    mask_img = mask_img.astype(np.float32)
    mask_img = mask_img / 255.0


    # get the perspective transformation matrix
    M, _ = cv2.findHomography(src_pts, dst_pts)


    # transformed masked image
    transformed_mask = cv2.warpPerspective(
        mask_img,
        M,
        (result.shape[1], result.shape[0]),
        None,
        cv2.INTER_LINEAR,
        cv2.BORDER_CONSTANT,
    )


    # mask overlay
    alpha_mask = transformed_mask[:, :, 3]
    alpha_image = 1.0 - alpha_mask


    for c in range(0, 3):
        result[:, :, c] = (
                alpha_mask * transformed_mask[:, :, c]
                + alpha_image * result[:, :, c]
        )


# display the resulting frame
cv2.imshow("image with mask overlay", result)
这里使用 OpenCV 库中的 findHomography 函数查找匹配的关键点之间的变换,然后将所找到的变换矩阵与 warpPerspective 函数一起应用以映射这些点。
获得一个与原始图片 result 大小相同的新图片 transformed_mask,采用 png 格式定义透明通道 alpha_mask,就能将两个图片合并到一起了。
4 安装依赖
先安装一下 yacs 依赖,用于读取网络结构定义文件。
pip install yacs
5 在树莓派上跑一下模型
python overlay_with_mask.py
  --cfg experiments/300w/face_alignment_300w_hrnet_w18.yaml
  --landmark_model HR18-300W.pth
  --mask_image masks/anti_covid.png
  --device cpu
参数说明一下:
cfg:HRNet 的网络配置文件
landmark:HRNet 权重文件
mask_image: 口罩图片
device:推理设备
速度比较慢,但还是能正常推理的,说明我们之前的 pytorch 环境都没什么问题。树莓派满负荷状态,要冒烟了。。
✎ Tip
这里 OpenVINO 有个 bug,主要是32位 OS 的移植性造成的。Replace nGraph's i64 to i32 for size_t,修改nGraph的源码,然后重新编译一下就能解决问题,或者切换到我们之前自己编译的 OpenCV 4.4 的版本。
https://github.com/openvinotoolkit/openvino/issues/1503
6 用GPU跑一下模型
python overlay_with_mask.py
  --cfg experiments/300w/face_alignment_300w_hrnet_w18.yaml
  --landmark_model HR18-300W.pth
  --mask_image masks/anti_covid.png
  --device cuda
推理速度稍微快了点,笔记本显卡 GTX 1060,基本可以玩玩了。不过里面模型剪裁,读取口罩图片,标注文件 IO 操作也很冗余,两个神经网络也可以分布跑在不同的推理设备上等等,还有很多的优化空间,有兴趣可以进一步提高推理速度。
源码下载
公众号后台回复:“rpi12”,可获取下载链接。
这篇被口罩遮了脸,
下一篇
我们将同样用 AI,
脑补出你的盛世容颜,
敬请期待...
![]()
用树莓派4b构建深度学习应用系列(连载中...)

