springboot项目通过nginx访问ftp服务器文件
前文
本来准备记录一下。项目中遇到的springboot项目访问ftp服务器图片、视频问题的,想在我自己服务器上重新部署一遍,然后发现,执行docker的时候报错了。具体报错原因如下:
原因是我重启了一下服务器
Cannot connect to the Docker daemon at unix:///var/run/docker.sock. Is the docker daemon running?
这个问题,解决方案自然很多了。百度一下解析的更全面,我这里只是因为docker没启动。
解决方案: 1、执行 systemctl status docker 查看docker状态。2、执行 service docker start 启动docker。3、然后docker ps即可。

项目场景
当前需求是,图片或者视频,保存到一个地方,然后通过本地项目在web上可以展示。基本这种场景都是把图片视频部署到文件服务器上,比如阿里云等。因需求没那么严格。从简,所以就决定把文件保存到ftp服务器上。
环境介绍:
1、springboot项目。前后分离。
2、ftp部署在linux系统。
3、docker管理ftp。
环境安装
docker安装,可自行百度
docker安装ftp
1) docker拉取ftp镜像
docker pull fauria/vsftpd
2) 启动ftp镜像
docker run -p 20:20 -p 21:21 -p 2000:2000 --name vsftpd --restart=always -v /home/app/ftp/:/home/vsftpd -v /home/app/ftp/log/:/var/log/vsftpd -e FTP_USER=ftpuser -e FTP_PASS=ftpuser -e PASV_MIN_PORT=20000 -e PASV_MAX_PORT=20000 -e PASV_ADDRESS=你的ip -e LOG_STDOUT=1 -d fauria/vsftpd
启动之后发现21端口被占用。因为是之前在宝塔里面创建了一个ftp。
![]()
解决:使用 netstat -ant|grep 21、或者 lsof -i :21查看21端口使用情况,kill -9 843 关闭进程。重新启动运行ftp。
验证:
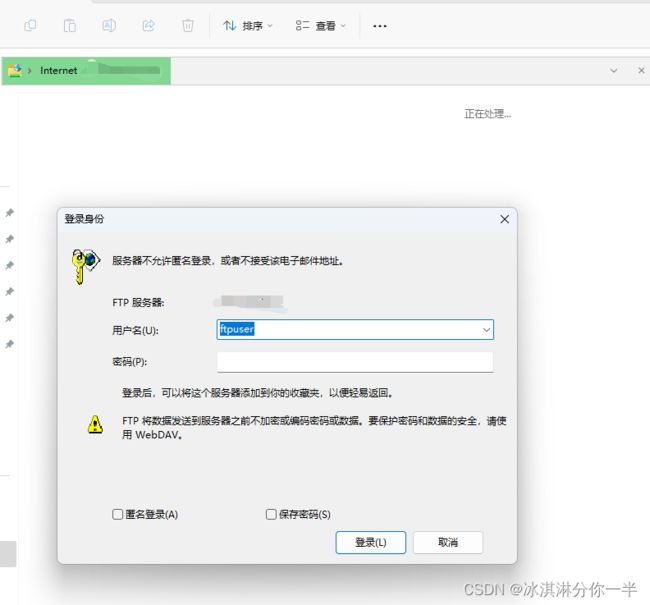
打开我的电脑在文件栏输入:ftp://你的ip/,输入密码就可以登录linux服务器的ftp

上传下载图片
ftp maven引入pom
<!-- https://mvnrepository.com/artifact/commons-net/commons-net -->
        <dependency>
            <groupId>commons-net</groupId>
            <artifactId>commons-net</artifactId>
            <version>3.8.0</version>
        </dependency>
FtpUtil
import lombok.extern.slf4j.Slf4j;
import org.apache.commons.net.ftp.FTP;
import org.apache.commons.net.ftp.FTPClient;
import org.apache.commons.net.ftp.FTPFile;
import org.apache.commons.net.ftp.FTPReply;

import java.io.*;

/**
 * ftp工具类
 */
@Slf4j
public class FtpUtil {


    /**
     * Description: 向FTP服务器上传文件
     *
     * @param host     FTP服务器hostname
     * @param port     FTP服务器端口
     * @param username FTP登录账号
     * @param password FTP登录密码
     * @param basePath FTP服务器基础目录
     * @param filePath FTP服务器文件存放路径。文件的路径为basePath+filePath
     * @param filename 上传到FTP服务器上的文件名
     * @param input    输入流
     * @return 成功返回true,否则返回false
     */
    public static boolean uploadFile(String host, int port, String username, String password, String basePath,
                                     String filePath, String filename, InputStream input) {
        FTPClient ftp = new FTPClient();
        try {
            int reply;
            ftp.connect(host, port);// 连接FTP服务器
            // 如果采用默认端口,可以使用ftp.connect(host)的方式直接连接FTP服务器
            ftp.login(username, password);// 登录
            reply = ftp.getReplyCode();
            if (!FTPReply.isPositiveCompletion(reply)) {
                ftp.disconnect();
                log.error("ftp connect failed");
                return false;
            }
            //切换到上传目录
            if (!ftp.changeWorkingDirectory(basePath + filePath)) {
                //如果目录不存在创建目录
                String[] dirs = filePath.split("/");
                String tempPath = basePath;
                for (String dir : dirs) {
                    if (null == dir || "".equals(dir)) continue;
                    tempPath += "/" + dir;
                    if (!ftp.changeWorkingDirectory(tempPath)) {  //进不去目录,说明该目录不存在
                        if (!ftp.makeDirectory(tempPath)) { //创建目录
                            //如果创建文件目录失败,则返回
                            log.error("创建文件目录" + tempPath + "失败");
                            log.error("dir creat failed");
                            return false;
                        } else {
                            //目录存在,则直接进入该目录
                            ftp.changeWorkingDirectory(tempPath);
                        }
                    }
                }
            }
            //设置上传文件的类型为二进制类型
            ftp.setFileType(FTP.BINARY_FILE_TYPE);
            // 设置被动模式
//            ftp.enterLocalPassiveMode();
            // 设置主动模式
            ftp.enterLocalActiveMode();
            ftp.setRemoteVerificationEnabled(false);

            //上传文件
            if (!ftp.storeFile(filename, input)) {
                log.error("upload failed");
                return false;
            } else {
                log.info("文件:" + filename + " 上传成功");
            }
            input.close();
            ftp.logout();
        } catch (IOException e) {
            log.error("失败,服务器返回:" + ftp.getReplyString());//获取上传失败的原因
            e.printStackTrace();
        } finally {
            if (ftp.isConnected()) {
                try {
                    ftp.disconnect();
                } catch (IOException ioe) {
                    log.error("ftp.isConnected() fail!");
                    ioe.printStackTrace();
                }
            }
        }
        return true;
    }


    /**
     * Description: 从FTP服务器下载文件
     *
     * @param host       FTP服务器hostname
     * @param port       FTP服务器端口
     * @param username   FTP登录账号
     * @param password   FTP登录密码
     * @param remotePath FTP服务器上的相对路径
     * @param fileName   要下载的文件名
     * @param localPath  下载后保存到本地的路径
     * @return
     */
    public static boolean downloadFile(String host, int port, String username, String password, String remotePath,
                                       String fileName, String localPath) {
        boolean result = false;
        FTPClient ftp = new FTPClient();
        try {
            int reply;
            ftp.connect(host, port);
            // 如果采用默认端口,可以使用ftp.connect(host)的方式直接连接FTP服务器
            ftp.login(username, password);// 登录
            reply = ftp.getReplyCode();
            if (!FTPReply.isPositiveCompletion(reply)) {
                ftp.disconnect();
                return result;
            }
            ftp.changeWorkingDirectory(remotePath);// 转移到FTP服务器目录
            FTPFile[] fs = ftp.listFiles();
            for (FTPFile ff : fs) {
                if (ff.getName().equals(fileName)) {
                    File localFile = new File(localPath + "/" + ff.getName());

                    OutputStream is = new FileOutputStream(localFile);
                    ftp.retrieveFile(ff.getName(), is);
                    is.close();
                }
            }
            ftp.logout();
            result = true;
        } catch (IOException e) {
            e.printStackTrace();
        } finally {
            if (ftp.isConnected()) {
                try {
                    ftp.disconnect();
                } catch (IOException ioe) {
                }
            }
        }
        return result;
    }

    /**
     * 连接ftp服务器
     * @param hostName ip
     * @param port 端口
     * @param userName 用户名
     * @param password 密码
     * @return
     * @throws IOException
     */
    public static FTPClient connectFtp(String hostName, int port, String userName, String password) throws IOException {
        FTPClient ftpClient = new FTPClient();
        //设置编码格式,FTP Server 协议里规定文件名编码是iso-8859-1
        ftpClient.setControlEncoding("GBK");
        //设置传输命令的超时
        ftpClient.setDefaultTimeout(20000);//毫秒
        //设置两个服务连接超时时间
        ftpClient.setConnectTimeout(10000);//毫秒
        //被动模式下设置数据传输的超时时间
        ftpClient.setDataTimeout(15000);//毫秒
        //连接FTP
        ftpClient.connect(hostName, port);
        //更加账户密码登录服务
        ftpClient.login(userName, password);
        //被动模式
        ftpClient.enterLocalPassiveMode();

        return ftpClient;
    }

    /**
     * 关闭ftp
     */
    public static void close(FTPClient ftpClient) {
        try {
            if (ftpClient != null && ftpClient.isConnected()) {
                ftpClient.disconnect();
            }
        } catch (IOException e) {
            e.printStackTrace();
        }
    }
}
nginx访问ftp服务文件
springboot项目部署到linux服务器上运行之后。前端需要通过nginx转发到ftp服务,直接访问图片视频文件。
docker安装nginx。
之前装过了,所以改一下nginx配置重启一下就行了。修改配置如下。
user  root;
worker_processes  auto;

error_log  /var/log/nginx/error.log notice;
pid        /var/run/nginx.pid;


events {
    worker_connections  1024;
}


http {
    include       /etc/nginx/mime.types;
    default_type  application/octet-stream;

    log_format  main  '$remote_addr - $remote_user [$time_local] "$request" '
                      '$status $body_bytes_sent "$http_referer" '
                      '"$http_user_agent" "$http_x_forwarded_for"';

    access_log  /var/log/nginx/access.log  main;

    sendfile        on;
    #tcp_nopush     on;

    keepalive_timeout  65;

    #gzip  on;

    #include /etc/nginx/conf.d/*.conf;
    server {
	listen 80;
	server_name xxx.xx.x.xx;
	location / {
		root   /usr/share/nginx/html/dist;
		index  index.html index.htm;
		try_files $uri $uri/ /index.html;
	}
	location /prod-api/ {
            proxy_set_header Host $http_host;
            proxy_set_header X-Real-IP $remote_addr;
            proxy_set_header REMOTE-HOST $remote_addr;
            proxy_set_header X-Forwarded-For $proxy_add_x_forwarded_for;
            proxy_pass http://xxx.xx.x.xx:8080/;
        }
    }
   server {
   	listen 81;
	server_name xxx.xx.x.xx;
	location / {
                root /usr/share/nginx/ftproot/testftpuser;
        }
    }

}
docker 启动nginx指令:
docker run -p 80:80 -p 81:81 --name nginx -v /home/app-data/nginx/conf/nginx.conf:/etc/nginx/nginx.conf -v /app-data/ftp_home:/usr/share/nginx/ftproot -v /home/app-data/nginx/conf/conf.d:/etc/nginx/conf.d -v /home/app-data/nginx/log:/var/log/nginx -v /home/app-data/nginx/html:/usr/share/nginx/html -d nginx:latest
注意: -v /app-data/ftp_home:/usr/share/nginx/ftproot 这个就是挂载ftp服务地方。
然后启动nginx之后,直接访问:你的ip + ftp文件路径,就可以访问了。