快速上手 vue3
快速上手 vue3
文章目录
- 1. 组合式 api
- 2. 路由
- 3. 定义全局方法和变量
- 4. 父子组件调用 --> 自定义事件
- 5. 生命周期函数
- 6. 状态管理 vuex
1. 组合式 api
- setup
- ref
- reactive
- computed
- 生命周期钩子 , onMounted …
2. 路由
安装路由: npm install vue-router
创建一个 router.js
import {createRouter, createWebHistory} from "vue-router";

const routes = [
    {
        path: '/',
        component: import("@/App.vue")
    }
]


const router = createRouter({
    // createWebHistory() 省略 * 号
    history: createWebHistory(),
    routes
})


export default router;
将 router 注册到 vue 应用中并使用
import './assets/main.css'

import {createApp} from 'vue'
import App from './App.vue'

// 引入 router
import router from "@/router/router";

// createApp(App).mount('#app')

const app = createApp(App);

// 使用路由
app.use(router);
app.mount('#app')
使用 路由:
创建两个组件 home 和 login
home
<script setup>
// 使用路由 --> 需要引入两个对象
import {useRouter, useRoute} from "vue-router";
const router = useRouter();
const route = useRoute();
// 初始化
const init = () => {
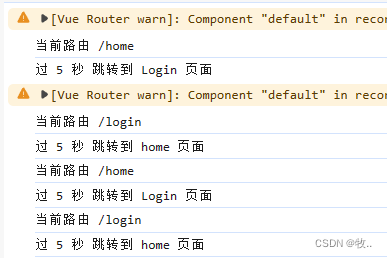
console.log("当前路由", route.path)
console.log("过 5 秒 跳转到 Login 页面")
setTimeout(() => {
router.push("/login")
}, 5000)
}
init();
</script>
<template>
<div>我是头页面</div>
</template>
<style scoped>
</style>
login
<script setup>
// 使用路由 --> 需要引入两个对象
import {useRouter, useRoute} from "vue-router";

const router = useRouter();
const route = useRoute();

// 初始化
const init = () => {
  console.log("当前路由", route.path)

  console.log("过 5 秒 跳转到 home 页面")

  setTimeout(() => {
    router.push("/home")
  }, 5000)
}

init();
</script>

<template>
  <div>我是登陆页面</div>
</template>

<style scoped>

</style>
效果:
3. 定义全局方法和变量
定义一个 全局的方法 Utils
import './assets/main.css'

import {createApp} from 'vue'
import App from './App.vue'

// 引入 router
import router from "@/router/router";


const Utils = {
    isEmpty: (value) => {
        if (value === null || value === undefined || value.trim() === '') {
            return true;
        }

        return false;
    }
}


// createApp(App).mount('#app')

const app = createApp(App);

// 通过 globalProperties 定义一个全局方法  , 这里就定义了一个 Utils
app.config.globalProperties.Utils = Utils;

// 使用路由
app.use(router);
app.mount('#app')
在 App 组件中使用 , 这里需要通过 getCurrentInstance 获取一个 proxy 的代理对象,然后才能拿到 全局定义的方法.
getCurrentInstance 方法是 Vue 3 中的一个全局 API,它用于获取当前正在执行的组件实例。该方法可以用在任何 Vue 3 组件的方法中,
<script setup>
import {getCurrentInstance, onMounted} from "vue";
const {proxy} = getCurrentInstance();
onMounted(() => {
let test = "no Null";
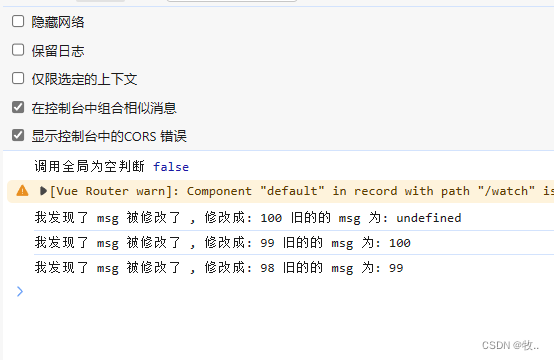
console.log("调用全局为空判断", proxy.Utils.isEmpty(test));
})
</script>
<template>
<div>
<router-view></router-view>
</div>
</template>
<style scoped>
</style>
效果:

watch 的使用
<script setup>

import {ref, watch} from "vue";

const msg = ref(100);

let updateMsg = () => {
  msg.value = msg.value - 1;
}

// 使用 watch 函数监视 msg 改变
watch(
    msg,
    (newValue, oldValue) => {
      console.log("我发现了 msg 被修改了 , 修改成: " + newValue + " 旧的的 msg 为: " + oldValue)
    },
    // immediate 在页面渲染之前执行一下 watch , deep 开启深度监视
    {immediate: true, deep: false}
)

</script>

<template>
  <div>用来展示 watch 的使用</div>
  <br/>
  <div>当前 msg 的值为: {{ msg }}</div>
  <button @click="updateMsg">点击改变 msg</button>
</template>

<style scoped>

</style>
页面效果:
4. 父子组件调用 --> 自定义事件
父组件通过 ref 对象调用子组件方法
子组件通过 emit 方法调用父组件方法
演示:创建两个 组件 一个是 son 一个是 parent

父组件往子组件传递参数
这里需要使用到 : defineProps 方法 用来接受父组件传递来的属性
parent 组件
<script setup>

import Son from "@/views/Son.vue";
import {ref} from "vue";

const parentMsg = ref("我是父组件传递过来的参数");

</script>

<template>

  <div>
    <Son :parentMsg="parentMsg"></Son>
  </div>

</template>

<style scoped>

</style>
son 组件
<script setup>

// 使用 defineProps 接受父组件传递过来的属性
const props = defineProps({
  parentMsg: {
    type: String,
    default: ""
  }
})


</script>

<template>

  <div id="son">
    <div>
      我是父组件传入的参数: {{ parentMsg }}
    </div>

  </div>

</template>

<style scoped>

#son {
  border: 1px solid red;
  text-align: center;
}

</style>
父组件调用子组件的方法
子组件定义的方法需要通过 defineExpose 显示的暴露给 父组件 ,才能让父组件调用到.
son 组件
<script setup>

import {ref} from "vue";

const props = defineProps({
  parentMsg: {
    type: String,
    default: ""
  }
})

const parentMsgMethod = ref("");

const ParentOpSon = (msg) => {
  parentMsgMethod.value = msg;
}

// 想要让父组件调用 子组件的方法需要将 子组件提供的方法暴露出去
defineExpose({
  ParentOpSon
})

</script>

<template>

  <div id="son">
    <div>
      我是父组件传入的参数: {{ parentMsg }}
    </div>
    <br/>
    <hr/>
    <div>
      父组件调用子组件的方法传递的参数
    </div>
    <div>
      {{ parentMsgMethod }}
    </div>

  </div>

</template>

<style scoped>

#son {
  border: 1px solid red;
  text-align: center;
}

</style>
parent 组件
<script setup>

import Son from "@/views/Son.vue";
import {ref} from "vue";

const parentMsg = ref("我是父组件传递过来的参数");


// 定义一个 sonRef 引用对象去调用 子组件的方法
const sonRef = ref();
const opSon = () => {
  sonRef.value.ParentOpSon(parentMsg);
}

</script>

<template>

  <div>
    <Son :parentMsg="parentMsg" ref="sonRef"></Son>
    <button @click="opSon">调用子组件并传递参数</button>
  </div>

</template>

<style scoped>

</style>
效果:

子组件调用父组件的方法 : 使用场景 : 比如 通过 子组件新增加了一条数据,父组件展示的数据 就需要刷新 ,比如重新获取列表 , 在 子组件新增完数据 就需要 调用父组件的方法 , 或者说是通知 父组件更新列表(调用更新列表的方法).
使用到的方法: defineEmits , 因为 vue3 是没有 this 对象的 我们想要通过 emit 触发 自定义事件 就需要 通过 defineEmits 来获取到 emit 对象。
parent 组件:
<script setup>

import Son from "@/views/Son.vue";
import {ref} from "vue";

const parentMsg = ref("我是父组件传递过来的参数");


// 定义一个 sonRef 引用对象去调用 子组件的方法
const sonRef = ref();
const opSon = () => {
  sonRef.value.ParentOpSon(parentMsg);
}

// 提供给子组件调用的方法
const sonMsg = ref();
const ParentMethod = (e) => {
  console.log(e);
  sonMsg.value = e;
}

</script>

<template>

  <div>
   // @opParent 监听自定义事件 ,如果触发了自定义事件 就调用 parentMethod 函数
    <Son :parentMsg="parentMsg"
         @opParent="ParentMethod"
         ref="sonRef"></Son>
    <button @click="opSon">调用子组件并传递参数</button>
    <hr/>
    <br/>
    <div>子组件调用父组件的方法传递过来的参数: {{ sonMsg }}</div>
  </div>

</template>

<style scoped>

</style>
son组件
<script setup>

import {ref} from "vue";

const props = defineProps({
  parentMsg: {
    type: String,
    default: ""
  }
})

const parentMsgMethod = ref("");

const ParentOpSon = (msg) => {
  parentMsgMethod.value = msg;
}

// 想要让父组件调用 子组件的方法需要将 子组件提供的方法暴露出去
defineExpose({
  ParentOpSon
})


// 子组件调用父组件的方法

// 引入 emit
const emit = defineEmits();
const opParent = () => {
  emit("opParent", "我是子组件传给父组件的参数")
}

</script>

<template>

  <div id="son">
    <div>
      我是父组件传入的参数: {{ parentMsg }}
    </div>
    <br/>
    <hr/>
    <div>
      父组件调用子组件的方法传递的参数
    </div>
    <div>
      {{ parentMsgMethod }}
    </div>
    <br/>
    <hr/>
    <button @click="opParent">点击我调用父组件的方法</button>

  </div>

</template>

<style scoped>

#son {
  border: 1px solid red;
  text-align: center;
}

</style>
关于 自定义事件 ,vue3 和 vue2 写法差不多,只不过 vue2 可以直接通过 this 来调用 , 而 vue3 需要通过 几个方法来 获取 emit 对象 和 暴露方法等 .
5. 生命周期函数
在 vue3 生命周期函数 删除了 beforeCreate 和 create . beforeDestroy 和 destroyed 新增了 onBeforeUnmount 和 onUnmounted.
引用:
onBeforeMount: 在挂载开始之前被调用。在此钩子函数中,模板已经编译完成,但尚未渲染到真实的 DOM 中。onMounted: 在挂载完成后被调用。此时,实例已经挂载到 DOM 上,可以进行 DOM 操作。onBeforeUpdate: 在响应式数据更新之前被调用。在这个阶段,虚拟 DOM 中的数据已经和实际 DOM 同步,但尚未应用到 DOM 上。onUpdated: 在响应式数据更新并应用到 DOM 后被调用。onBeforeUnmount: 在实例销毁之前被调用。在这个钩子函数内部,实例仍然完全可用。onUnmounted: 在实例销毁后被调用。此时,实例和其相关的指令、事件监听器等都被解绑,组件将不再被使用。
5 和 6 就类似与 vue2 的 beforeDestroy 和 destroyed
虽然 vue3 删除了 beforeCreate 和 created 生命周期 函数 ,但是我们可以自己 写一个 初始化方法 比如 init() 调用 ,效果就类似于 beforeCreate 和 create 函数
<script setup>

import {onBeforeMount, onMounted} from "vue";

const init = () => {
  console.log("我是 init 方法")
}

init();


onBeforeMount(() => {
  console.log("我是 onBeforeMount")
})
onMounted(() => {
  console.log("我是 onMounted")
})

</script>

<template>

</template>

<style scoped>

</style>

6. 状态管理 vuex
安装 vuex: npm install vuex --save
创建一个 stroe 目录 在 stroe 目录下 创建一个 index.js 或者 自己命名 , 在 main.js 中 引入时 正确引入即可.
main.js
import './assets/main.css'

import {createApp} from 'vue'
import App from './App.vue'

// 引入 router
import router from "@/router/router";

// 引入 store
import store from "@/store";

const Utils = {
    isEmpty: (value) => {
        if (value === null || value === undefined || value.trim() === '') {
            return true;
        }

        return false;
    }
}


// createApp(App).mount('#app')

const app = createApp(App);

// 通过 globalProperties 定义一个全局变量 , 这里就定义了一个 Utils
app.config.globalProperties.Utils = Utils;

// 使用路由
app.use(router);
app.use(store);
app.mount('#app')
引用:
- State(状态):
- 在 Vuex 中,State 用于存储应用程序的状态数据。它是仓库中的单一数据源。
- State 对象通常包含多个属性,每个属性都代表一个特定的状态值。
- Getters(获取器):
- Getters 类似于组件中的计算属性。它们允许你从仓库中派生出新的状态。
- Getters 可以用于对仓库中的状态进行过滤、排序、映射等操作,返回衍生的值。
- Mutations(变化):
- Mutations 是用于修改仓库中状态的函数。
- Mutations 是同步的操作,用于响应并更新仓库中的状态。
- 每个 Mutation 函数都会接收一个参数,即 state 对象,用于对状态进行修改。
- Actions(动作):
- Actions 类似于 Mutations,但是 Actions 可以处理异步操作。
- Actions 用于提交 Mutations,进而修改状态。
- 在 Actions 中可以执行异步任务、调用 API、提交多个 Mutations 等操作。
- Actions 不直接修改状态,而是通过调用 Mutations 来修改。
import {createStore} from "vuex";

const store = createStore({
    state: {},
    getters: {},
    mutations: {},
    actions: {},

});

export default store;
定义完 我们来使用一下 store
使用 store 和 使用路由很相识 都需要 通过一个方法引入 , store 需要使用 useStore 方法.
Stroe 组件
<script setup>

import {useStore} from "vuex";

const store = useStore();

const numIncrement = () => {
  // 通过 commit 调用 mutations 里定义的 increment 方法 改变 num 的值
  store.commit("increment", 1);
}

const asyncButton = () => {
  store.dispatch("testAsync");
}

</script>

<template>
  <div>获取 store 中的 state 的属性num: {{ store.state.num }}</div>
  <button @click="numIncrement">num++</button>
  <br/>
  <hr/>
  <div>获取 store 中的 getters 计算出全新的num: {{ store.getters.resetNum }}</div>
  <br/>
  <hr/>
  <div>通过 actions 方法 异步增加 num:{{store.state.num}}</div>
  <button @click="asyncButton">点击触发异步增加 num</button>
</template>

<style scoped>

</style>
store 目录下的 index.js
import {createStore} from "vuex";

const store = createStore({
    state: {
        num: 0,
    },
    getters: {
        resetNum: (state) => {
            return state.num * 5;
        }
    },
    mutations: {
        increment(state, value) {
            state.num += value;
        }
    },
    actions: {
        testAsync(context) {
            new Promise((resolve, reject) => {
                setTimeout(() => {
                    console.log("开启定时器")
                    resolve();
                }, 2000)
            }).then(res => {
                context.state.num += 1;
            })
        }
    },

});

export default store;
页面效果:
