android新架构模式
If you are already aware of basic principles of architecture patterns and MVVM and MVI patterns in detail then skip the basics and jump to MVI + LiveData + ViewModel (or second) section of the article.
如果您已经详细了解了架构模式以及MVVM和MVI模式的基本原理,请跳过基础知识,然后跳至 MVI + LiveData + ViewModel (或第二步) 文章部分。
Architecture patterns are blueprint with a set of rules to follow. These patterns evolved through the mistakes done while coding over years. Below are the few architecture patterns widely used in Android.
体系结构模式是具有一系列规则的蓝图。 这些模式是由于多年来编码时所犯的错误而演变而来的。 以下是Android中广泛使用的几种架构模式。
Model View Controller(MVC)
模型视图控制器(MVC)
Model View Presenter(MVP)
模型视图演示者(MVP)
Model View View Model(MVVM)
模型视图视图模型(MVVM)
The latest addition to these patterns is Model View Intent(MVI). To understand MVI, you should know how other patterns work.
这些模式的最新功能是模型视图意图(MVI)。 要了解MVI,您应该知道其他模式是如何工作的。
MVI的简要工作流程: (Brief workflow of MVI:)
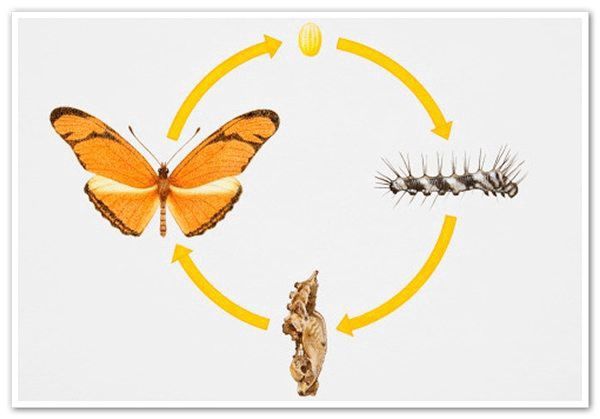
User interaction with the UI is processed by business logic which brings change in the state. This new state is rendered on view and this newly updated view is shown to the user. This leads to a Unidirectional and Circular Data Flow.
用户与UI的交互由业务逻辑处理,业务逻辑带来状态的变化。 在视图上呈现此新状态,并向用户显示此新更新的视图。 这导致单向和循环数据流。
MVI快速入门 (A Quick Introduction to MVI)
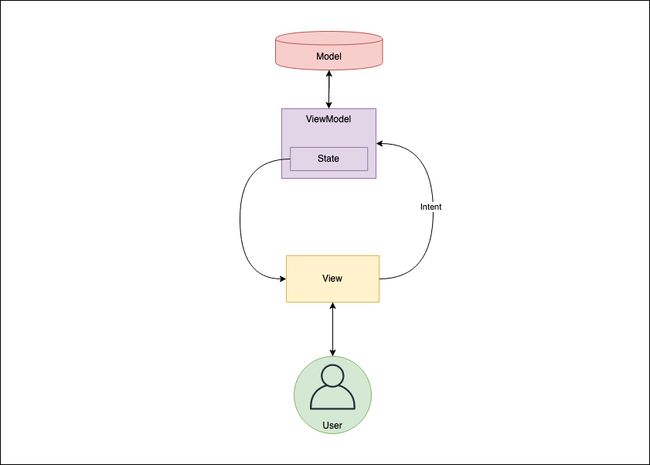
MVI is short for “Model, View, Intent”. Over the last year this architecture pattern received more and more attention among Android developers. It’s similar to other commonly known patterns like MVP or MVVM, but it introduces two new concepts: the intent and the state.The intent is an event sent to the ViewModel by the View in order to perform a particular task. It can be triggered by the user or by other parts of your app. As a result of that, a new state is set on the ViewModel which in turn updates the user interface. In the MVI architecture, the View listens to the state. Every time the state changes, the View is notified.
MVI是“模型,视图,意图”的缩写。 去年,这种架构模式越来越受到Android开发人员的关注。 它类似于MVP或MVVM等其他众所周知的模式,但是引入了两个新概念: 意图和状态 。意图是由View发送到ViewModel以便执行特定任务的事件。 它可以由用户或应用程序的其他部分触发。 结果,在ViewModel上设置了新状态,这又更新了用户界面。 在MVI体系结构中,视图侦听状态。 每次状态更改时,都会通知视图。
So what is Model-View-Intent? Yet another architecture for user interfaces? Well, I recommend you to watch the following video about cycle.js presented by the inventor André Medeiros (Staltz) at JSConf Budapest in May 2015 (at least the first 10 minutes) to get a better understanding of the motivation behind MVI:
那么什么是Model-View-Intent? 用户界面的另一种体系结构? 好吧,我建议您观看以下由发明人AndréMedeiros(Staltz)于2015年5月在布达佩斯JSConf上提交的有关cycle.js的视频(至少前10分钟),以更好地了解MVI的动机:
演示地址
I know it’s javascript but the key fundamentals are the same for all UI based platforms, incl. android (just replace DOM with android layouts, UI widgets, …).
我知道这是javascript,但是所有基于UI的平台的关键基础都是相同的,包括。 android(只需将DOM替换为android布局,UI小部件等等)。
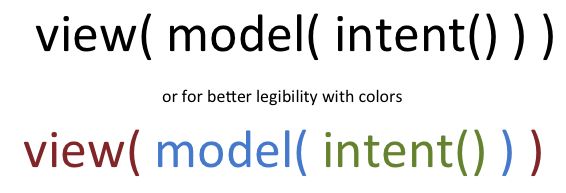
intent(): This function takes the input from the user (i.e. UI events, like click events) and translates it to “something” that will be passed as a parameter to model() function. This could be a simple string to set a value of the model to or more complex data structure like an Actions or Commands. Here in this blog post, we will stick with the word Action.
intent() :此函数从用户那里获取输入(即,UI事件,如click事件),并将其转换为“某物”,并将其作为参数传递给model()函数。 这可以是将模型的值设置为简单的字符串,也可以是更复杂的数据结构(如Actions或Commands) 。 在此博客文章中,我们将继续使用Action一词。
model(): The model function takes the output from intent() as input to manipulate the model. The output of this function is a new model (state changed). So it should not update an already existing model. We want immutability! We don’t change an already existing one. We copy the existing one and change the state (and afterward it can not be changed anymore). This function is the only piece of your code that is allowed to change a Model object. Then this new immutable Model is the output of this function.
model() :模型函数将来自intent()的输出作为输入来操纵模型。 该函数的输出是一个新模型(状态更改)。 因此,它不应更新现有模型。 我们要一成不变! 我们不会更改现有的。 我们复制现有状态并更改状态(此后不能再更改)。 此函数是代码中唯一允许更改Model对象的部分。 然后,这个新的不可变模型就是该函数的输出。
view(): This method takes the model returned from model() function and gives it as input to the view() function. Then the view simply displays this model somehow.
view() :此方法采用从model()函数返回的模型 ,并将其作为对view()函数的输入。 然后,视图仅以某种方式显示此模型。
But what about the cycle, one might ask? This is where reactive programming (RxJava, observer pattern) comes in.
但是周期可能会怎样呢? 这就是React式编程(RxJava,观察者模式)出现的地方。

So the view will generate “events” (observer pattern) that are passed to the intent() function again.
因此,视图将生成“事件”(观察者模式),并再次传递给intent()函数。
Sounds quite complex, I know, but once you are into it it’s not that hard anymore. Let’s say we want to build a simple android app to search github (rest api) for repositories matching a certain name. Something like this:
听起来很复杂,我知道,但是一旦您沉迷其中,它就不再那么难了。 假设我们要构建一个简单的android应用,以搜索github(rest api)以查找与某个名称匹配的存储库。 像这样:
演示地址
演示地址
为什么选择MVI? (Why MVI?)
As I mentioned above, patterns evolved through the mistakes done while coding over the years. Let us have a look at what are all the absolute advantages of MVI over other patterns, which gives us the answer to the question Why MVI?
如前所述,模式是由于多年来编码过程中所犯的错误而演变而来的。 让我们看一下MVI相对于其他模式的绝对优势是什么,这为我们解答了为什么MVI提供了答案。
Model as State: UI might have different states — Loading State, Data State, Error State, User Scroll Position etc. In MVI, models are formalized as the container of states which is not the case with other patterns. Every time a new immutable model is created which is then observed by the view. This way of creating an immutable model will ensure thread safety.
中号 奥德尔为国:UI可能有不同的状态- 荷状态,数据状态,错误状态,用户滚动位置等 。在MVI,模型形式化为国家的容器,不与其他模式的情况。 每次创建新的不可变模型时,视图都会对其进行观察。 这种创建不可变模型的方法将确保线程安全。
data class MviState(
     val isPageLoading: Boolean = false,
     val isPullToRefresh: Boolean = false,
     val isMoreRestaurantsLoading: Boolean = false,
     val restaurantsObject: RestaurantsObject? = null,
     val error: Throwable? = null)
     {
         ...
}Single Source Of Truth: Each component might have its own state. View and Presenter/ViewModel are meant as the component here. Maintaining states separately at different levels might cause state conflicts. So to avoid these kinds of issues, the state is created at one level (Presenter/ViewModel) and passed to another level (View) in MVI. The only way to change the state is by firing an Interaction by the user. This kind of approach restricts any change to the State of the system only via a defined set of actions. An undefined action by a user cannot cause any undesired change to our System.
小号 英格尔来源真相:每个组件可以有自己的状态。 View和Presenter / ViewModel在这里是作为组件。 分别维持不同级别的状态可能会导致状态冲突。 因此,为避免此类问题,请在MVI中的一个级别(Presenter / ViewModel)创建状态并将其传递到另一级别(View) 。 更改状态的唯一方法是通过触发用户交互。 这种方法仅通过一组定义的操作就可以限制对系统状态的任何更改。 用户的未定义操作不会对我们的系统造成任何不希望的更改。
NoCallbacks: Usually views are updated via callbacks after the asynchronous call. The view might be detached when the asynchronous call brings the result. So to avoid the crash or improper behavior of the application, we would check whether the instance of the view is available and it is attached. This will pave way for some boilerplate code like below.
N o 回调:通常,视图在异步调用之后通过回调进行更新。 当异步调用带来结果时,视图可能会分离。 因此,为避免应用程序崩溃或行为不当,我们将检查视图实例是否可用并已附加。 这将为下面的一些样板代码铺平道路。
These checks and callbacks are handled automatically in MVI using reactive programming that supports observer paradigm.
这些检查和回调在MVI中使用支持观察者范例的React式编程自动处理。
Hunt the crash: You might be faced situations when it is very difficult to trace and reproduce the crash even though if you have the crash report. The crash report might have the trace of the code flow but does not contain the trace of the view’s state flow before crashing. In MVI tracing the crash becomes easy with the State(Model). In the below code snippet if you see inside the doOnNext closure, logs are registered with the respective action and with the State. Any developer can reproduce the crash with state trace and fix it easily.
^ h UNT崩溃:您可能遇到的情况时,这是非常难以追踪和重现崩溃,即使如果你有崩溃报告。 崩溃报告可能具有代码流的痕迹,但不包含崩溃前视图状态流的痕迹。 在MVI中,使用State(Model)可以使崩溃变得容易。 在下面的代码段中(如果您在doOnNext闭包内部看到),日志将分别通过各自的操作和State进行注册。 任何开发人员都可以使用状态跟踪重现崩溃并轻松修复它。
Brings back the state: A good app should work without any glitch even in unpredictable circumstances. Suppose orientation change or the activity process gets killed during a phone call, the android activity gets recreated. Restoring the state back was a big task at such situations. MVI library from Mosby maintains the current state and restore the state when the view gets recreated.
B 响起状态:即使在无法预测的情况下,一个好的应用程序也应该可以正常工作。 假设方向改变或活动过程在电话中被杀死,则将重新创建android活动。 在这种情况下,恢复状态是一项艰巨的任务。 Mosby的 MVI库维护当前状态,并在重新创建视图时恢复该状态。
Independent UI Components: Every architectural pattern preach to us how the components should be built with no dependencies. The View/Presenter should not be coupled with one another. The responsibility of the View and Presenter is just to render the content and map the data to view respectively.
我 ndependent UI组件:每建筑格局宣讲对我们有多么的组件应该没有依赖性建造。 视图/演示器不应相互耦合。 View和Presenter的职责只是渲染内容并将数据映射到视图。
Multi-platform standard: Reactive programming is a multi-platform standard, so whether it’s a Web or Android or IOS, you might end up joining a multi-platform discussion on Rx. Reactive Codes written in Android(Kotlin) can be shared with IOS(Swift) and vice-versa which makes the code review task easy.
中号 ULTI平台标准:无编程是一个多平台的标准,所以无论是在Web或Android或IOS,你可能最终加盟的Rx上一个多平台的讨论。 用Android(Kotlin)编写的React性代码可以与IOS(Swift)共享,反之亦然,这使代码审查任务变得容易。
MVI如何工作? (How does the MVI work?)
User does an action which will be an Intent → Intent is a state which is an input to model → Model stores state and send the requested state to the View → View Loads the state from Model → Displays to the user. If we observe, the data will always flow from the user and end with the user through intent. It cannot be the other way, Hence its called Unidirectional architecture. If the user does one more action the same cycle is repeated, hence it is Cyclic.
用户执行一个将成为意图的动作→意图是作为模型输入的状态→模型存储状态并将请求的状态发送到视图→视图从模型→显示中加载状态给用户。 如果我们观察到,数据将始终从用户那里流出,并通过意图最终与用户并存。 它不可能是其他方式,因此称为单向架构。 如果用户再执行一个动作,则重复相同的循环,因此是循环的。
MVI的优缺点 (Advantages and Disadvantages of MVI)
Let’s see what are the advantages and disadvantages of MVI
让我们看看MVI的优点和缺点
Advantages of MVI
MVI的优势
- Maintaining state is no more a challenge with this architecture, As it focuses mainly on states. 维护状态不再是此体系结构的挑战,因为它主要关注状态。
- As it is unidirectional, Data flow can be tracked and predicted easily. 由于它是单向的,因此可以轻松跟踪和预测数据流。
- It ensures thread safety as the state objects are immutable. 由于状态对象是不可变的,因此可以确保线程安全。
- Easy to debug, As we know the state of the object when the error occurred. 易于调试,我们知道错误发生时对象的状态。
- It’s more decoupled as each component fulfills its own responsibility. 由于每个组件都履行自己的职责,因此更加分离。
- Testing the app also will be easier as we can map the business logic for each state. 测试应用程序也将更加容易,因为我们可以映射每个州的业务逻辑。
Disadvantages of MVI
MVI的缺点
- It leads to lots of boilerplate code as we have to maintain a state for each user action. 由于我们必须为每个用户操作维护一个状态,因此会导致很多样板代码。
- As we know it has to create lots of objects for all the states. This makes it too costly for app memory management. 众所周知,必须为所有状态创建很多对象。 这对于应用程序内存管理来说太昂贵了。
- Handling alert states might be challenging while we handle configuration changes. For example, if there is no internet we will show the snackbar, On configuration change, it shows the snackbar again as its the state of the intent. In terms of usability, this has to be handled. 在我们处理配置更改时,处理警报状态可能具有挑战性。 例如,如果没有互联网,我们将显示小吃店。在配置更改时,它将再次显示小吃店作为其意图状态。 就可用性而言,这必须加以处理。
使用MVI架构创建项目 (Creating a Project with MVI architecture)
Let’s start by setting up the Android project.
让我们从设置Android项目开始。
We are trying to achieve this in our Android project
我们正在尝试在Android项目中实现这一目标

Create a Project
创建一个项目
- Start a new Android project 开始一个新的Android项目
- Select Empty Activity and Next 选择清空活动,然后单击下一步
- Name: MVI-Architecture-Android-Beginners 名称:MVI-Architecture-Android-Beginners
- Package name: com.mindorks.framework.mvi 程序包名称:com.mindorks.framework.mvi
- Language: Kotlin 语言:Kotlin
- Finish 完
- Your starting project is ready now 您的开始项目现在准备就绪
Add dependencies
添加依赖项
// Added Dependencies
implementation "androidx.recyclerview:recyclerview:1.1.0"
implementation 'android.arch.lifecycle:extensions:1.1.1'
implementation 'androidx.lifecycle:lifecycle-viewmodel-ktx:2.2.0'
implementation 'androidx.lifecycle:lifecycle-runtime-ktx:2.2.0'
implementation 'com.github.bumptech.glide:glide:4.11.0'//retrofit
implementation 'com.squareup.retrofit2:retrofit:2.8.1'
implementation "com.squareup.retrofit2:converter-moshi:2.6.2"//Coroutine
implementation "org.jetbrains.kotlinx:kotlinx-coroutines-android:1.3.6"
implementation "org.jetbrains.kotlinx:kotlinx-coroutines-core:1.3.6"
Project Structure
项目结构
For the project, We are going to follow a beginner version of MVI. Our package in the project will look like below.
对于该项目,我们将遵循MVI的初学者版本。 我们在项目中的软件包如下所示。
Setup Data Layer
设置数据层
Now, in this section, we will set up the data layer.Under the data package, we will have api, model, and repository packages. We will create these packages and let’s concentrate on adding classes to each package one by one.
现在,在本节中,我们将设置数据层,在数据包下,我们将拥有api,模型和存储库包。 我们将创建这些包,让我们集中精力将类逐个添加到每个包中。
Let’s add classes supporting API.
让我们添加支持API的类。
We need a model to which the response will be transformed. Create User.kt data class as shown below.
我们需要一个可以将响应转换为的模型。 创建User.kt数据类,如下所示。
import com.squareup.moshi.Json data class User( @Json(name = “id”) val id: Int = 0, @Json(name = “name”) val name: String = “”, @Json(name = “email”) val email: String = “”,@Json(name = “avatar”) val avatar: String = “” )Create ApiHelper.kt interface
创建ApiHelper.kt界面
interface ApiHelper {
                 suspend fun getUsers(): List
                 }
Note: We have used suspend keyword to support Coroutines so that we can call it from a Coroutine or another suspend function.
注意:我们已经使用了suspend关键字来支持协程,因此我们可以从协程或其他暂停函数中调用它。
Kotlin-Coroutines and Flow API are used in this project. You can learn from the following:
此项目使用Kotlin-协程和Flow API。 您可以从以下内容中学到:
Kotlin-Coroutines
Kotlin-协程
Kotlin Flow API
Kotlin Flow API
Create a class ApiService.kt where we will specify HTTP methods to communicate to the API.
创建一个类ApiService.kt,在其中我们将指定用于与API进行通信的HTTP方法。
import retrofit2.http.GET  interface ApiService {     @GET("users")
                         suspend fun getUsers(): List
                     }
Now add retrofit builder which will build endpoint URL and consume REST services.
现在添加改造构建器,该构建器将构建端点URL并使用REST服务。
import retrofit2.Retrofit import retrofit2.converter.moshi.MoshiConverterFactory  object RetrofitBuilder
{      private const val BASE_URL = "https://test.mockapi.io/"      private fun getRetrofit() = Retrofit.Builder()
                               .baseUrl(BASE_URL)
               .addConverterFactory(MoshiConverterFactory.create())
               .build()       val apiService: ApiService =
                       getRetrofit().create(ApiService::class.java)
}
Now we need to implement this interface to fetch the List
现在我们需要实现此接口以获取List
class ApiHelperImpl(private val apiService: ApiService) : ApiHelper {
         override suspend fun getUsers(): List {  return apiService.getUsers()
          }
}
Now we are ready to communicate with restful services in our data layer.
现在,我们准备与数据层中的静态服务进行通信。
We will need a repository to requests data. In our case, we are calling the getUsers method from activity through ViewModel to get the user list. Create MainRepository.kt
我们将需要一个存储库来请求数据。 在我们的例子中,我们从活动通过ViewModel调用getUsers方法以获取用户列表。 创建MainRepository.kt
class MainRepository(private val apiHelper: ApiHelper)
 {
     suspend fun getUsers() = apiHelper.getUsers()
  }
So our data layer is ready. Coming to UI part now, we need an adapter to recyclerview, Intent for storing user actions, our main activity under view, MainViewModel under viewModel, View state where we have defined different states for which we need to load data to views.
这样我们的数据层就准备好了。 现在进入UI部分,我们需要一个适配器来recyclerview,用于存储用户动作的Intent,视图下的主要活动,viewModel下的MainViewModel,视图状态,其中我们定义了需要将数据加载到视图的不同状态。
Create MainAdapter in adapter package
在适配器包中创建MainAdapter
import android.view.LayoutInflater import android.view.View import android.view.ViewGroup import androidx.recyclerview.widget.RecyclerView import com.bumptech.glide.Glideimport kotlinx.android.synthetic.main.item_layout.view.*class MainAdapter(private val users: ArrayList<User> ) : RecyclerView.Adapter<MainAdapter.DataViewHolder>()
{      class DataViewHolder(itemView: View) : RecyclerView.ViewHolder(itemView)
   {
       fun bind(user: User)
         {
            itemView.textViewUserName.text = user.name
            itemView.textViewUserEmail.text = user.email
             Glide.with(itemView.imageViewAvatar.context)
                .load(user.avatar)
                 .into(itemView.imageViewAvatar)
            }
   }
  override fun onCreateViewHolder(parent: ViewGroup, viewType: Int)
        = DataViewHolder(
               LayoutInflater.from(parent.context).inflate(
                 R.layout.item_layout, parent,false))
         override fun getItemCount(): Int = users.size
         override fun onBindViewHolder(holder: DataViewHolder,
                position: Int) =
                 holder.bind(users[position])
                 fun addData(list: List)
                    {
                        users.addAll(list)
                      }
                 }
Create MainIntent.kt under the intent package
在intent包下创建MainIntent.kt
sealed class MainIntent
{
        object FetchUser : MainIntent()
 }
Now adding the MainState.kt under viewstate package. This is the most important part of MVI. In this class, we are defining the states Idle, loading, users, error. Each state can be loaded on to the view by the user intents.
现在在viewstate包下添加MainState.kt 。 这是MVI最重要的部分。 在此类中,我们定义了空闲,加载,用户,错误的状态。 每个状态都可以通过用户意图加载到视图上。
sealed class MainState {
    object Idle : MainState()
    object Loading : MainState()
    data class Users(val user: List) : MainState()
    data class Error(val error: String?) : MainState()
}
Create a ViewModel class — MainViewModel
创建一个ViewModel类— MainViewModel
import androidx.lifecycle.ViewModel import androidx.lifecycle.viewModelScopeimport kotlinx.coroutines.ExperimentalCoroutinesApi import kotlinx.coroutines.channels.Channel import kotlinx.coroutines.flow.MutableStateFlow import kotlinx.coroutines.flow.StateFlow import kotlinx.coroutines.flow.collect import kotlinx.coroutines.flow.consumeAsFlow import kotlinx.coroutines.launch@ExperimentalCoroutinesApi class MainViewModel(private val repository: MainRepository ) : ViewModel()
     {
      val userIntent = Channel(Channel.UNLIMITED)  private val _state = MutableStateFlow(MainState.Idle)
      val state: StateFlow get() = _state
       init {
              handleIntent()
           }             private fun handleIntent() {
                   viewModelScope.launch {
                       userIntent.consumeAsFlow().collect {
                       when (it) {
                           is MainIntent.FetchUser -> fetchUser()
                                  }
                                }
                             }
                           }             private fun fetchUser()
        {
            viewModelScope.launch
                {
                     _state.value = MainState.Loading
                      _state.value = try {
                            MainState.Users(repository.getUsers())
                          } catch (e: Exception) {
                              MainState.Error(e.localizedMessage)
                            }
                          }
                       }
                      }
Here in the ViewModel, we are observing on the userIntent to perform the action on it.
在ViewModel中,我们正在观察userIntent对其执行操作。
And based on the response from the data layer, we change the state inside the fetchUser method. And that state is being observed in the MainActivity.
然后根据数据层的响应,更改fetchUser方法内部的状态。 而且该状态正在MainActivity中观察到。
Let us set up ViewModelFactory under the util package.
让我们在util包下设置ViewModelFactory。
We are instantiating our viewModel in this class and we will return the instance of the ViewModel.
我们将在此类中实例化viewModel,并将返回ViewModel的实例。
import androidx.lifecycle.ViewModel import androidx.lifecycle.ViewModelProviderclass ViewModelFactory(private val apiHelper: ApiHelper) : ViewModelProvider.Factory
     {
     override fun  create(modelClass: Class): T
      {         if (modelClass.isAssignableFrom(MainViewModel::class.java))
        {             return MainViewModel(MainRepository(apiHelper)) as T
              }         throw IllegalArgumentException("Unknown class name")
           }
      }
Now, let’s set up the XML layout.
现在,让我们设置XML布局。
In the layout folder, update the activity_main.xml with the following code:
在布局文件夹中,使用以下代码更新activity_main.xml:
xmlns:android="http://schemas.android.com/apk/res/android"
xmlns:app="http://schemas.android.com/apk/res-auto"
xmlns:tools="http://schemas.android.com/tools"
android:layout_width="match_parent"
android:layout_height="match_parent"
tools:context=".ui.main.view.MainActivity">
android:id="@+id/recyclerView"
android:layout_width="match_parent"
android:layout_height="match_parent"
android:visibility="gone" />
android:id="@+id/progressBar"
android:layout_width="wrap_content"
android:layout_height="wrap_content"
app:layout_constraintBottom_toBottomOf="parent"
app:layout_constraintEnd_toEndOf="parent"
android:visibility="gone"
app:layout_constraintStart_toStartOf="parent"
app:layout_constraintTop_toTopOf="parent" />
Add item_layout.xml in the layout folder and add the following code:
在布局文件夹中添加item_layout.xml并添加以下代码:
      xmlns:android="http://schemas.android.com/apk/res/android"
     xmlns:app="http://schemas.android.com/apk/res-auto"
     xmlns:tools="http://schemas.android.com/tools"
     android:id="@+id/container"
     android:layout_width="match_parent"
     android:layout_height="60dp">                    android:id="@+id/imageViewAvatar"
         android:layout_width="60dp"
         android:layout_height="0dp"
         android:padding="4dp"
         app:layout_constraintBottom_toBottomOf="parent"
         app:layout_constraintStart_toStartOf="parent"
         app:layout_constraintTop_toTopOf="parent" />              android:id="@+id/textViewUserName"
        style="@style/TextAppearance.AppCompat.Large"
         android:layout_width="0dp"
         android:layout_height="wrap_content"
         android:layout_marginStart="8dp"
         android:layout_marginTop="4dp"
         app:layout_constraintEnd_toEndOf="parent"
         app:layout_constraintStart_toEndOf="@+id/imageViewAvatar"
         app:layout_constraintTop_toTopOf="parent"
         tools:text="MindOrks" />               android:id="@+id/textViewUserEmail"
         android:layout_width="0dp"
         android:layout_height="wrap_content"
         app:layout_constraintEnd_toEndOf="parent"
        app:layout_constraintStart_toStartOf="@+id/textViewUserName"
        app:layout_constraintTop_toBottomOf="@+id/textViewUserName"
        tools:text="MindOrks" />
Add the following in strings.xml.
在strings.xml中添加以下内容。
Fetch User Coming to our MainAcitvity.kt class, We will be adding this under view package. This is the user-facing activity that takes input from the user, based on this MVI checks for the states mentioned in viewModel and loads the particular state in the view.
来到我们的MainAcitvity.kt类中,我们将在视图包中添加它。 这是一个面向用户的活动,它根据MVI检查viewModel中提到的状态并从视图中加载特定状态,从而从用户那里获取输入。
Let’s see how MainActivity takes care of requesting data, handling states
让我们看看MainActivity如何处理请求数据,处理状态
import android.os.Bundle import android.view.View import android.widget.Toast import androidx.appcompat.app.AppCompatActivity import androidx.lifecycle.ViewModelProviders import androidx.lifecycle.lifecycleScope import androidx.recyclerview.widget.DividerItemDecoration import androidx.recyclerview.widget.LinearLayoutManagerimport com.mindorks.framework.mvi.ui.main.viewstate.MainState import kotlinx.android.synthetic.main.activity_main.* import kotlinx.coroutines.ExperimentalCoroutinesApi import kotlinx.coroutines.flow.collect import kotlinx.coroutines.launch@ExperimentalCoroutinesApi class MainActivity : AppCompatActivity()
{      private lateinit var mainViewModel: MainViewModel     private var adapter = MainAdapter(arrayListOf())
   override fun onCreate(savedInstanceState: Bundle?)
   {         super.onCreate(savedInstanceState)
       setContentView(R.layout.activity_main)
       setupUI()
       setupViewModel()
       observeViewModel()
        setupClicks()
      }         private fun setupClicks()
     {
       buttonFetchUser.setOnClickListener
       {
         lifecycleScope.launch
         {
               mainViewModel.userIntent.send(MainIntent.FetchUser)
              }
         }
      }            private fun setupUI()
      {
         recyclerView.layoutManager = LinearLayoutManager(this)
          recyclerView.run {
            addItemDecoration(DividerItemDecoration(
                     recyclerView.context,
                        (recyclerView.layoutManager as
                       LinearLayoutManager).orientation))
            }
        recyclerView.adapter = adapter
         }       private fun setupViewModel()
{
     mainViewModel = ViewModelProviders.of(this,                 ViewModelFactory(ApiHelperImpl(RetrofitBuilder.apiService                 ))).get(MainViewModel::class.java)
 }      private fun observeViewModel()
    {
       lifecycleScope.launch
        {
           mainViewModel.state.collect
          {
             when (it) {
                        is MainState.Idle -> {
                       }
                     is MainState.Loading -> {
                        buttonFetchUser.visibility = View.GONE
                       progressBar.visibility = View.VISIBLE
                    }
                is MainState.Users ->
                  {
                      progressBar.visibility = View.GONE
                        buttonFetchUser.visibility = View.GONE  renderList(it.user)
                    }
                 is MainState.Error ->
                   {
                      progressBar.visibility = View.GONE
                        buttonFetchUser.visibility = View.VISIBLE
                        Toast.makeText(this@MainActivity, it.error,
                         Toast.LENGTH_LONG).show()
                     }
                   }
                  }
                }
              }      private fun renderList(users: List)
 {
           recyclerView.visibility = View.VISIBLE
           users.let { listOfUsers -> listOfUsers.let
                         { adapter.addData(it)
                         }
                     }
                  adapter.notifyDataSetChanged()
 }
}
Here, we are sending the intent to fetch the data on button click(User Action).
在这里,我们发送的意图是在按钮click(User Action)上获取数据。
Also, we are observing on the ViewModel State for the state changes. And, using “when” condition we are comparing the response intent state and loading the respective states.
另外,我们在ViewModel State上观察状态变化。 并且,使用“ when”条件时,我们正在比较响应意图状态并加载相应状态。
Finally, add the Internet Permission in your project. Add the following in the AndroidManifest.xml:
最后,在您的项目中添加Internet权限。 在AndroidManifest.xml中添加以下内容:
Now, build the project and run the app on the device. It should load the data into the UI.
现在,构建项目并在设备上运行应用程序。 它应该将数据加载到UI中。
Thanks for reading…
谢谢阅读…
翻译自: https://medium.com/@abhiappmobiledeveloper/android-mvi-reactive-architecture-pattern-74e5f1300a87
android新架构模式