快速搭建SSM新手易上手(简易版,适合新手入门,非常详细)
快速搭建SSM框架
因为最近有很多朋友问我自己的项目搭建的不够完善,并且经常出现一些小问题,那么今天我又整理了一下文档教大家如何快速搭建SSM框架我是用 eclipse搭建的,如果想用idear的话我过段时间再出一个
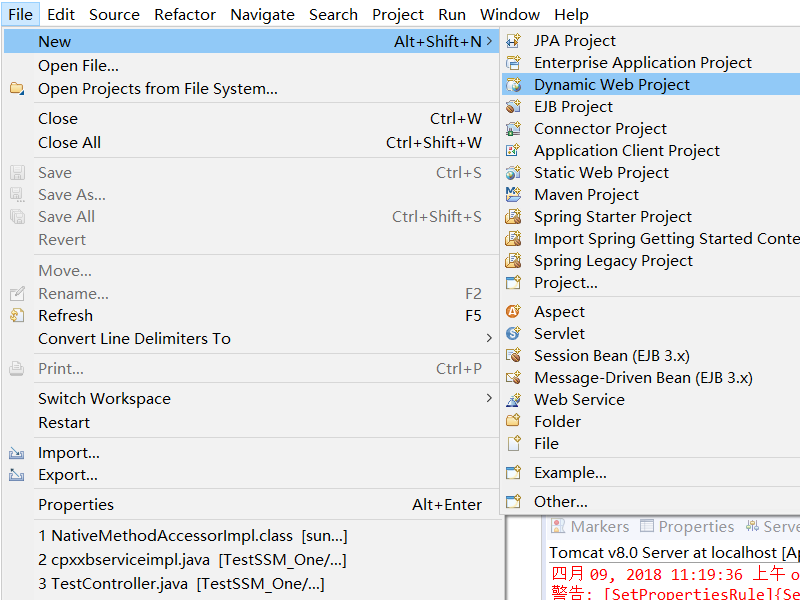
第一步:创建web项目
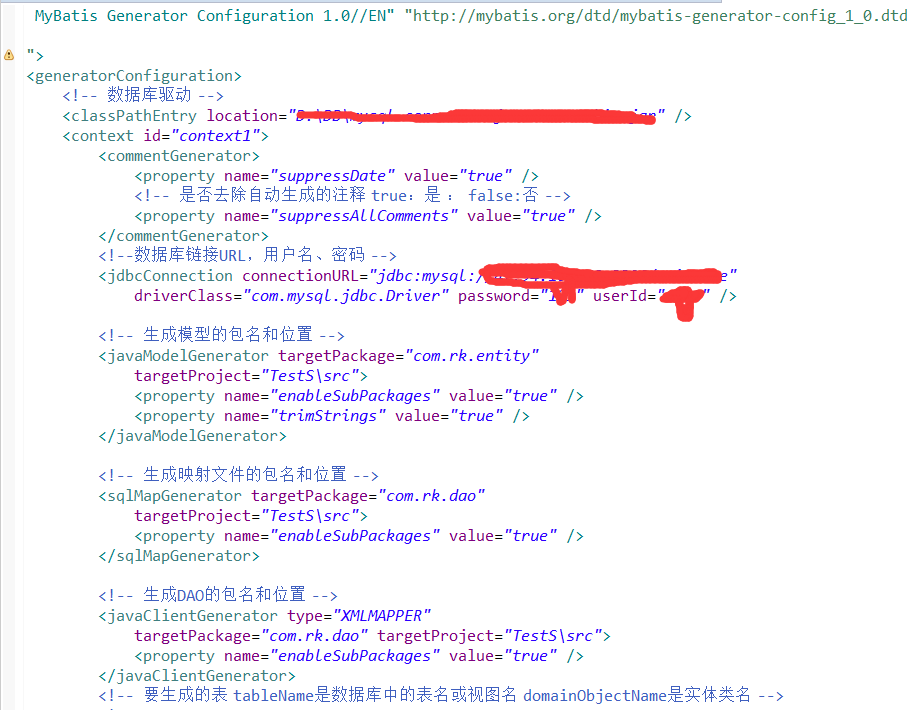
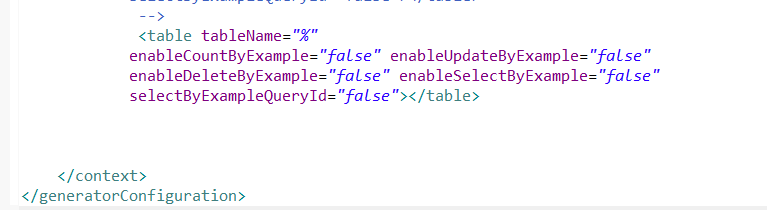
第二步:使用小黑鸟工具生成实体类,mapper接口,以及mapper.xml 不需要接口实现类(需要装插件)
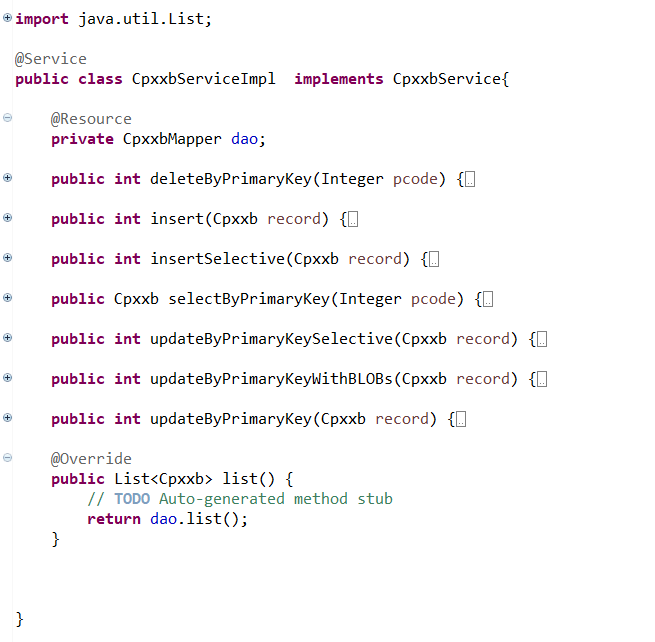
第三步:创建service接口,创建service接口实现类,在类上添加@Service(需要提前引入SSM所需lib架包)


然后:调用***mapper dao 并且需要添加@注解共有两种 1:@Autowried 2:@Resource 一种按类型一种按名称
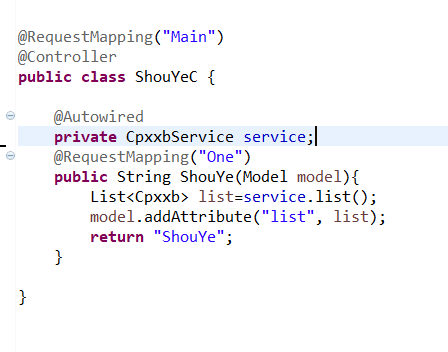
第四步:创建controller 类名上添加@Controller注解 声明这个是个控制器可以根据需求加@RequestMapping
第五步:添加配置文件 applicationContext database.propert mybatis-config springmvc-servlet
给大家附上我的配置文件,可能每个人和每个人的都不一样仅供参考哦
applicationContext.xml内容

 1 xml version="1.0" encoding="UTF-8"?>
 2 <beans xmlns="http://www.springframework.org/schema/beans"
 3     xmlns:xsi="http://www.w3.org/2001/XMLSchema-instance"
 4     xmlns:context="http://www.springframework.org/schema/context"
 5     xmlns:aop="http://www.springframework.org/schema/aop"
 6     xmlns:tx="http://www.springframework.org/schema/tx"
 7     xsi:schemaLocation="http://www.springframework.org/schema/beans
 8     http://www.springframework.org/schema/beans/spring-beans-3.0.xsd
 9     http://www.springframework.org/schema/aop
10     http://www.springframework.org/schema/aop/spring-aop-3.0.xsd
11     http://www.springframework.org/schema/tx
12     http://www.springframework.org/schema/tx/spring-tx-3.1.xsd
13     http://www.springframework.org/schema/context
14     http://www.springframework.org/schema/context/spring-context-3.2.xsd">
15
16     <context:component-scan base-package="com.mai.dao,com.mai.Service" />
17
18     <context:property-placeholder location="classpath:database.properties"/>
19
20
21     <bean id="dataSource" class="org.apache.commons.dbcp.BasicDataSource" destroy-method="close" scope="singleton">
22             <property name="driverClassName" value="${driver}" />
23             <property name="url" value="${url}" />
24             <property name="username" value="${name}" />
25             <property name="password" value="${pwd}" />
26     bean>
27
28     <bean id="sqlSessionFactory" class="org.mybatis.spring.SqlSessionFactoryBean">
29        <property name="dataSource" ref="dataSource">property>
30        <property name="configLocation" value="classpath:mybatis-config.xml">property>
31     bean>
32
33
34     <bean class="org.mybatis.spring.mapper.MapperScannerConfigurer">
35         <property name="basePackage" value="com.mai.dao">property>
36     bean>
37
38
39     <bean id="txManager"
40         class="org.springframework.jdbc.datasource.DataSourceTransactionManager">
41         <property name="dataSource" ref="dataSource">property>
42     bean>
43
44
45     <tx:advice id="txAdvice" transaction-manager="txManager">
46         <tx:attributes>
47             <tx:method name="delete*" propagation="REQUIRED" />
48             <tx:method name="add*" propagation="REQUIRED" />
49             <tx:method name="update*" propagation="REQUIRED" />
50             <tx:method name="get*" propagation="SUPPORTS" read-only="true"/>
51             <tx:method name="*" propagation="SUPPORTS" />
52         tx:attributes>
53     tx:advice>
54     <aop:config>
55
56         <aop:pointcut id="serviceMethods" expression="execution(* com.mai.Service..*(..))" />
57         <aop:advisor advice-ref="txAdvice" pointcut-ref="serviceMethods" />
58     aop:config>
59
60 beans>
mybatis-config.xmlneirong
xml version="1.0" encoding="UTF-8"?>
    DOCTYPE configuration
        PUBLIC "-//mybatis.org//DTD Config 3.0//EN"
        "http://mybatis.org/dtd/mybatis-3-config.dtd">
<configuration>
      <settings>

          <setting name="lazyLoadingEnabled" value="false" />
      settings>
     <typeAliases>

         <package name="com.mai.entity"/>
     typeAliases>
configuration>
springmvc-servlet.xml的内容
xml version="1.0" encoding="UTF-8"?>
<beans xmlns="http://www.springframework.org/schema/beans"
    xmlns:xsi="http://www.w3.org/2001/XMLSchema-instance"
    xmlns:mvc="http://www.springframework.org/schema/mvc"
    xmlns:p="http://www.springframework.org/schema/p"
    xmlns:context="http://www.springframework.org/schema/context"
    xsi:schemaLocation="
        http://www.springframework.org/schema/beans
        http://www.springframework.org/schema/beans/spring-beans.xsd
        http://www.springframework.org/schema/context
        http://www.springframework.org/schema/context/spring-context.xsd
        http://www.springframework.org/schema/mvc
        http://www.springframework.org/schema/mvc/spring-mvc.xsd">

    <context:component-scan base-package="com.mai.controller"/>

    <mvc:annotation-driven conversion-service="myConvertService">
        <mvc:message-converters>
            <bean class="org.springframework.http.converter.StringHttpMessageConverter">
                <property name="supportedMediaTypes">
                    <list>
                        <value>application/json;charset=UTF-8value>
                    list>
                property>
            bean>
            <bean class="com.alibaba.fastjson.support.spring.FastJsonHttpMessageConverter">
                <property name="supportedMediaTypes">
                    <list>
                        <value>text/html;charset=UTF-8value>
                        <value>application/jsonvalue>
                    list>
                property>
                <property name="features">
                    <list>

                      <value>WriteDateUseDateFormatvalue>
                    list>
                property>
            bean>
        mvc:message-converters>
    mvc:annotation-driven>


    bean>

    <mvc:resources mapping="/statics/**" location="/statics/" />


    <bean class="org.springframework.web.servlet.view.ContentNegotiatingViewResolver">
      <property name="favorParameter" value="true">property>
      <property name="mediaTypes">
         <map>
            <entry key="html" value="text/html;charset=UTF-8">entry>
            <entry key="json" value="application/json;charset=UTF-8">entry>
         map>
       property>
       <property name="viewResolvers">
         <list>
           <bean class="org.springframework.web.servlet.view.InternalResourceViewResolver" >
            <property name="prefix" value="/WEB-INF/jsp/"/>
             <property name="suffix" value=".jsp"/>
          bean>
         list>
       property>
    bean>


    <bean id="multipartResolver" class="org.springframework.web.multipart.commons.CommonsMultipartResolver">
            <property name="maxUploadSize" value="5000000"/>
            <property name="defaultEncoding" value="UTF-8"/>
    bean>
beans>
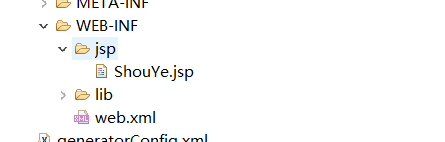
第六步:配置完成后在web-inf 下创建一个jsp文件夹 里面放我们的jsp页面
配置web.xml 告诉tomcat我们先扫描那个再扫描哪个 编码集什么的
第七部:web.xml内容
xml version="1.0" encoding="UTF-8"?>
<web-app xmlns:xsi="http://www.w3.org/2001/XMLSchema-instance" xmlns="http://java.sun.com/xml/ns/javaee" xsi:schemaLocation="http://java.sun.com/xml/ns/javaee http://java.sun.com/xml/ns/javaee/web-app_3_0.xsd" version="3.0">
  <display-name>TestSdisplay-name>
  <context-param>
  <param-name>contextConfigLocationparam-name>
  <param-value>classpath:applicationContext.xmlparam-value>
  context-param>

  <filter>
    <filter-name>encodingFilterfilter-name>
    <filter-class>
          org.springframework.web.filter.CharacterEncodingFilter
      filter-class>
    <init-param>
      <param-name>encodingparam-name>
      <param-value>UTF-8param-value>
    init-param>
    <init-param>
      <param-name>forceEncodingparam-name>
      <param-value>trueparam-value>
    init-param>
  filter>
  <filter-mapping>
    <filter-name>encodingFilterfilter-name>
    <url-pattern>/*url-pattern>
  filter-mapping>

   <servlet>
    <servlet-name>springservlet-name>
    <servlet-class>org.springframework.web.servlet.DispatcherServletservlet-class>
    <init-param>
      <param-name>contextConfigLocationparam-name>
      <param-value>classpath:springmvc-servlet.xmlparam-value>
    init-param>
    <load-on-startup>1load-on-startup>
  servlet>
  <servlet-mapping>
    <servlet-name>springservlet-name>
    <url-pattern>/url-pattern>
  servlet-mapping>

  <listener>
     <listener-class>org.springframework.web.context.ContextLoaderListenerlistener-class>
  listener>

  <welcome-file-list>
    <welcome-file>index.htmlwelcome-file>
    <welcome-file>index.htmwelcome-file>
    <welcome-file>index.jspwelcome-file>
    <welcome-file>default.htmlwelcome-file>
    <welcome-file>default.htmwelcome-file>
    <welcome-file>default.jspwelcome-file>
  welcome-file-list>
web-app>
然后 taomcat debug运行 然后 ping路径 localhost:端口/项目名/哪个控制器的/那个方法。buling~页面出来了 也就是配置成功了
可以试试看