Unity笔记之xLua热更新
需求:实现热更新全流程。(代码热更、物体热更)
本篇文章使用的是xlua来开发的。学习的是这位老哥的
步骤:
1:导入xlua
(1)首先xlua直接去hub上下过来(XLua)。
![]()
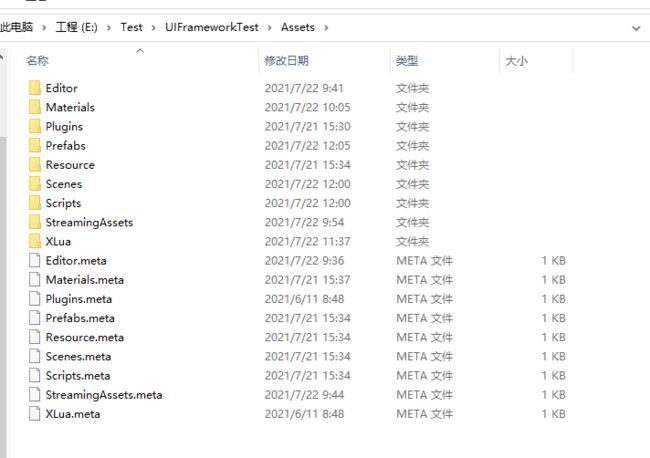
(2)解压压缩包。打开文件夹,把Assets里面的东西全部复制到自己工程的Assets文件夹下。


这里面的其他文件夹是我自己创建的。
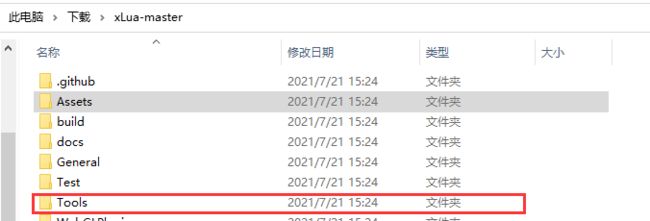
然后再把tools也拖到工程目录里面跟Assets同级。

到这里,xlua环境就算弄好了(不学习、运行案例的话)。
下面就是官方案例运行了:
案例都在XLua下的Examples文件夹里面。
运行案例之前需要打开场景之后;
在菜单面板找到并点击XLua——Generate Code(生成);
然后点击Hotfix Inject In Editor(注入unity编辑器,这样才能在unity编辑器里面运行成功);
最后就是点击运行就可以了。
2:搭建自己的游戏场景并写入逻辑
(1)新建一个场景取名Game并放到Scenes文件夹下。
(2)在Game场景里面创建一个Plane作为地板,创建一个Cube作为游戏物体。
(3)给Cube添加刚体组件(Rigidbody)和脚本控制(Cube.cs)
using System.Collections;
using System.Collections.Generic;
using UnityEngine;
using XLua;

[Hotfix]//标识
public class Cube : MonoBehaviour
{
    private Rigidbody _rigidbody;//定义组件

    void Start()
    {
        _rigidbody = GetComponent<Rigidbody>();//获取组件
    }

   [LuaCallCSharp]//标识
    void Update()
    {
        if (Input.GetKeyDown(KeyCode.W))//控制
        {
            _rigidbody.AddForce(Vector3.up * 500);
        }
    }
}
(4)在工程文件的同一层级创建一个Lua文件夹,并在Lua文件夹下创建两个文本文件(取名Test.lua.txt和LuaDispose.lua.txt)
输入内容
Test.lua.txt 的内容
local UnityEngine=CS.UnityEngine
xlua.hotfix(CS.Cube,'Update',function(self)
    if(UnityEngine.Input.GetKeyDown(UnityEngine.KeyCode.S))then
    self._rigidbody:AddForce(UnityEngine.Vector3.up*500)
    end

end)
LuaDispose.lua.txt 的内容
xlua.hotfix(CS.Cube,'Update',nil)
(5)创建一个热更脚本(HotfixScript.cs)并在场景中创建一个空物体取名HotfixScript,把脚本拖到空物体上。
using System.Collections;
using System.Collections.Generic;
using System.IO;
using System.Text;
using UnityEngine;
using UnityEngine.Networking;
using XLua;

public class HotFixScript : MonoBehaviour
{
    private LuaEnv _luaEnv;//创建lua运行环境

    private void Awake()
    {
        _luaEnv = new LuaEnv(); //实例lua运行环境
        _luaEnv.AddLoader(MyLoader); //必须要有的
        _luaEnv.DoString("require'Test'"); //loader进行加载Test.lua.txt  从"E:\Test\Lua\" + filePath + ".lua.txt"文件中进行加载 (注:require是固定不变的,调用完才能取得里面的变量)
    }

    private byte[] MyLoader(ref string filePath)
    {
        string absPath = @"F:\XLua\Lua\" + filePath + ".lua.txt";
        return Encoding.UTF8.GetBytes(File.ReadAllText(absPath));
    }

    void Start()
    {
    }

    void Update()
    {
    }

    private void OnDisable()
    {
        _luaEnv.DoString("require'LuaDispose'"); //执行LuaDispose里面的关闭方法
    }

    private void OnDestroy()
    {
        _luaEnv.Dispose(); //释放lua环境
    }
}
然后就可以生成——注入——运行了。(到这里第一个补丁就完成了)
3:创建热更资源并打出AB包
打ab包我之前的一篇博客里面有三种方法,随便选一种即可。
这里我用的是AssetBundle Browser打包的。
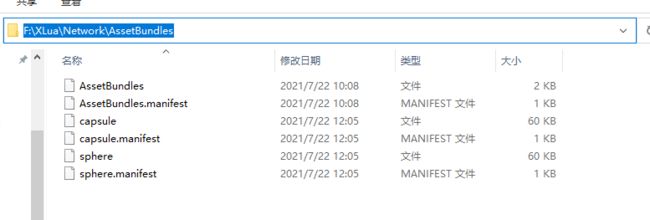
打出ab包之后全选复制到服务器文件夹下的AssetBundles文件夹里面(我打的有两个物体)

4:搭建一个简单的本地服务器
本地服务器我有一篇博客也写到过。
这里我用的是NetBox2的方法。
5:从服务器上下载AssetBundles,并加载出来
HotFixScript.cs脚本内容更新一下从服务器上下载AssetBundles,并加载出来的内容。
using System.Collections;
using System.Collections.Generic;
using System.IO;
using System.Text;
using UnityEngine;
using UnityEngine.Networking;
using XLua;

public class HotFixScript : MonoBehaviour
{
    private LuaEnv _luaEnv;//创建lua运行环境

    private void Awake()
    {
        _luaEnv = new LuaEnv(); //实例lua运行环境
        _luaEnv.AddLoader(MyLoader); //必须要有的
        _luaEnv.DoString("require'Test'"); //loader进行加载Test.lua.txt  从"E:\Test\Lua\" + filePath + ".lua.txt"文件中进行加载 (注:require是固定不变的,调用完才能取得里面的变量)
    }

    private byte[] MyLoader(ref string filePath)
    {
        string absPath = @"F:\XLua\Lua\" + filePath + ".lua.txt";
        return Encoding.UTF8.GetBytes(File.ReadAllText(absPath));
    }

    void Start()
    {
    }

    void Update()
    {
    }

    private void OnDisable()
    {
        _luaEnv.DoString("require'LuaDispose'"); //执行LuaDispose里面的关闭方法
    }

    private void OnDestroy()
    {
        _luaEnv.Dispose(); //释放lua环境
    }

    [LuaCallCSharp]//需要热更脚本里面调用的方法必须加上这个标签
    public void LoadResource(string resName, string filePath) //开启加载assetbundle里面的资源的协程
    {
        StartCoroutine(Load(resName, filePath));
    }

    private Dictionary<string, GameObject> _objectsAssetBundleDic = new Dictionary<string, GameObject>();//把加载出来的AssetBundle物体存起来,方便使用的时候调用
    private string serverPath = @"http://localhost/AssetBundles"; //服务器AssetBundles存放地址

    IEnumerator Load(string resName, string filePath)//加载assetbundle里面的资源
    {
        UnityWebRequest request = UnityWebRequestAssetBundle.GetAssetBundle(serverPath + filePath);
        yield return request.SendWebRequest();
        AssetBundle ab = (request.downloadHandler as DownloadHandlerAssetBundle).assetBundle;
        GameObject go = ab.LoadAsset<GameObject>(resName);
        Debug.Log(go.name);
        _objectsAssetBundleDic.Add(resName, go);
    }

    [LuaCallCSharp]//需要热更脚本里面调用的方法必须加上这个标签
    public GameObject GetAssetBundlePrefab(string resName)//获取到AssetBundle物体
    {
        return _objectsAssetBundleDic[resName];
    }
}
创建一个热更加载代码(Load.cs),以便通过lua调用C#里面的方法。
using System;
using UnityEngine;
using XLua;

[Hotfix]
public class Load : MonoBehaviour
{
    public HotFixScript hot;//定义HotFixScript脚本

    private void Start()
    {
    }

    private void Update()
    {

    }
}
然后更新一下Test.lua.txt 和 LuaDispose.lua.txt 的内容
Test.lua.txt
local UnityEngine=CS.UnityEngine
xlua.hotfix(CS.Cube,'Update',function(self)
    if(UnityEngine.Input.GetKeyDown(UnityEngine.KeyCode.S))then
    self._rigidbody:AddForce(UnityEngine.Vector3.up*500)--(Lua里面调用静态方法直接”.“就可以了,非静态方法得用”:“)
    end

end)

xlua.hotfix(CS.Load,'Start',function(self)--重写Load代码里面的Start方法
    self.hot:LoadResource('capsule','\\capsule')--加载ab包里面的capsule
self.hot:LoadResource('sphere','\\sphere')--加载ab包里面的sphere
end)

xlua.hotfix(CS.Load,'Update',function(self)--重写Load代码里面的Update方法

    if(UnityEngine.Input.GetKeyDown(UnityEngine.KeyCode.G))then
        UnityEngine.Object.Instantiate( self.hot:GetAssetBundlePrefab('capsule'))--生成capsule
        UnityEngine.Object.Instantiate( self.hot:GetAssetBundlePrefab('sphere'))--生成sphere
end
end)
LuaDispose.lua.txt
xlua.hotfix(CS.Cube,'Update',nil)

xlua.hotfix(CS.Load,'Update',nil)
xlua.hotfix(CS.Load,'Start',nil)
然后开启服务器,运行就可以了。
6:下载Lua并加载
(1)创建一个Init场景作为加下载Lua文件、配置文件的过渡场景。
(2)创建一个脚本实现Lua文件下载(LoadLua.cs)
using System.Collections;
using System.Collections.Generic;
using System.IO;
using UnityEngine;
using UnityEngine.Networking;
using UnityEngine.SceneManagement;

public class LoadLua : MonoBehaviour
{
    void Start()
    {
        StartCoroutine(Load());
    }

    public List<string> luaName = new List<string>(); //所有需要热更的lua的名字
    private string severPath = @"http://localhost/"; //服务器地址
    private string clientPath = @"F:\XLua\Lua\"; //客户端lua保存地址

    IEnumerator Load()//从服务器上下载热更脚本(如果有变则下载新的,没变则不下载)
    {
        for (int i = 0; i < luaName.Count; i++)
        {
            UnityWebRequest requset = UnityWebRequest.Get(severPath + luaName[i] + ".lua.txt");
            yield return requset.SendWebRequest();
            string str = requset.downloadHandler.text;//获取lua的内容
            Debug.Log(str);

            File.WriteAllText(clientPath + luaName[i] + ".lua.txt", str);//写入并存入本地
        }
        SceneManager.LoadScene(1);//下载完跳转到游戏场景(Game)
    }
}
以上就是xLua热更新的整个流程了。
本文仅作为个人纪录,如有问题请自行去bilibili上看教程。