详解spring cloud Eureka集群并在idea启动
1.创建服务注册中心Eureka-Server
new->project

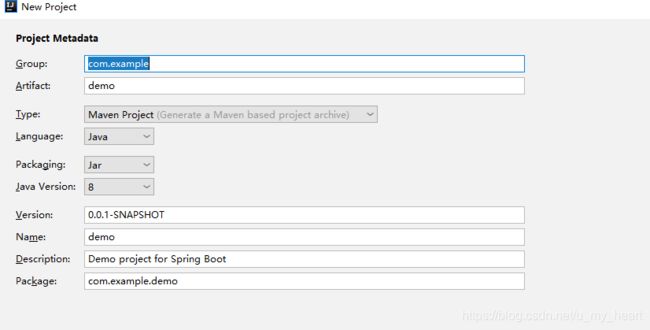
next->填写信息
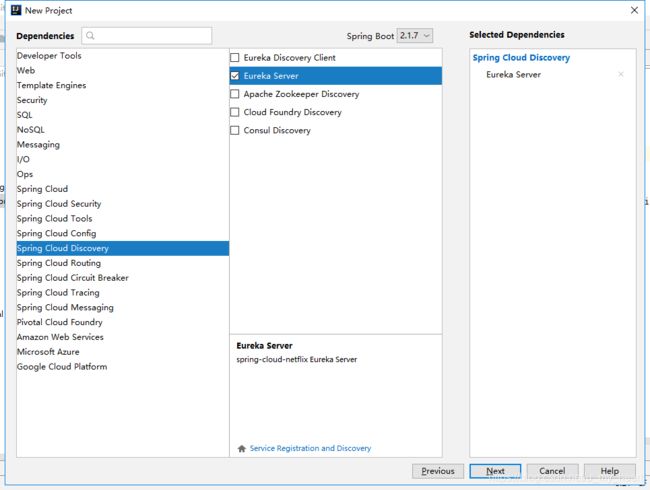
next->选择导入的依赖(不选手动导入也可以)
next->finish
生成的pom文件:
    4.0.0


        org.springframework.boot
        spring-boot-starter-parent
        2.1.7.RELEASE


    com.wxz
    springcloud-demo2
    0.0.1-SNAPSHOT
    springcloud-demo2
    Demo project for Spring Boot


        1.8
        Greenwich.SR2


            org.springframework.cloud
            spring-cloud-starter-netflix-eureka-server


            org.springframework.boot
            spring-boot-starter-test
            test


                org.springframework.cloud
                spring-cloud-dependencies
                ${spring-cloud.version}
                pom
                import


                org.springframework.boot

                spring-boot-maven-plugin
在启动类开启EurekaServer功能:
package com.wxz.springclouddemo2;

import org.springframework.boot.SpringApplication;
import org.springframework.boot.autoconfigure.SpringBootApplication;
import org.springframework.cloud.netflix.eureka.server.EnableEurekaServer;

/**
 * 服务启动类,应该和其他的类的上一级包处于同级目录
 */
@SpringBootApplication
@EnableEurekaServer  //开启EurekaServer功能
public class SpringcloudDemo2Application {

    public static void main(String[] args) {
        SpringApplication.run(SpringcloudDemo2Application.class, args);
    }

}
配置(创建的是.yml文件):
server:
  port: 8761  #服务端口
eureka:
  instance:
    hostname: localhost #ip
  client:
    register-with-eureka: false  #是否将自己注册到Eureka服务器
    fetch-registry: false  #
    serviceUrl:
      defaultZone: http://${eureka.instance.hostname}:${server.port}/eureka/ #eureka 完整配置地址
启动启动类的main方法,访问http://localhost/8761
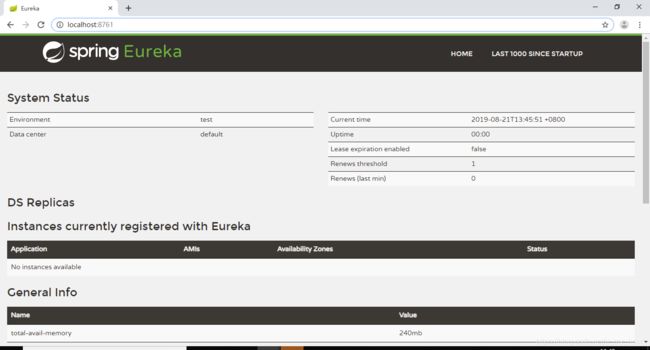
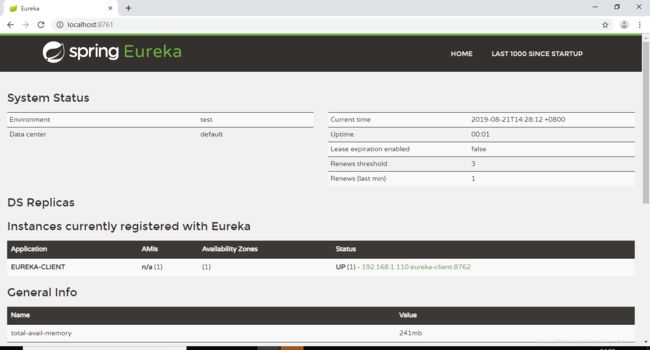
Instances currently registered with Eureka:下面可以看出目前还没有服务注册到上面
建议上面一开始建一个父的maven工程,里面引入 和spring boot的两个起步依赖,注册中心单独创建一个模块实现,这样的话项目结构会更清晰,功能效果一样啦
2.编写Eureka Client
在服务Eureka Server下创建Moudule 的spring boot项目
pom文件中引入父项目的pom.和Eureka-client所需要的依赖和web功能起步依赖
单元测试的依赖从父项目pom中引入了
    4.0.0


        com.wxz
        springcloud-demo2
        0.0.1-SNAPSHOT


    wxz
    eureka-client
    0.0.1-SNAPSHOT
    eureka-client
    Demo project for Spring Boot


        1.8
        Greenwich.SR2


            org.springframework.cloud
            spring-cloud-starter-eureka


            org.springframework.boot
            spring-boot-starter-web


                org.springframework.cloud
                spring-cloud-dependencies
                ${spring-cloud.version}
                pom
                import


                org.springframework.boot
                spring-boot-maven-plugin
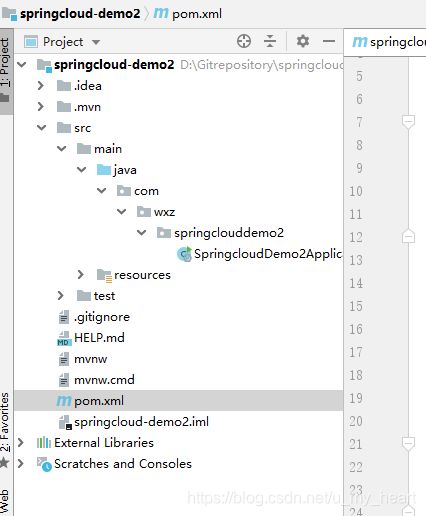
目录:
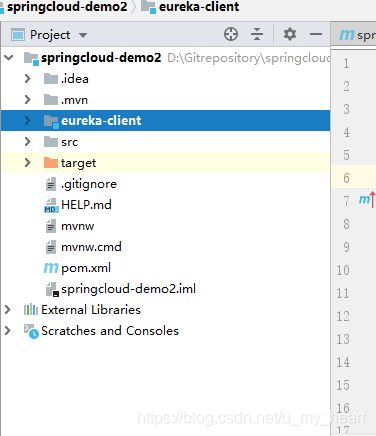
在该工程创建bootstrap.yml进行配置

在启动类加上@EnableEurekaClient功能注解
先启动服务注册中心的项目(父项目),再启动该消费者项目(Eureka-client)
访问http://localhost:8761
再消费者项目创建controller包,里面创建类Hcontroller
package wxz.eurekaclient.controller;

import org.springframework.beans.factory.annotation.Value;
import org.springframework.web.bind.annotation.GetMapping;
import org.springframework.web.bind.annotation.RequestParam;
import org.springframework.web.bind.annotation.RestController;

/**
 * @author Wangxingze
 * @date 2019-08-21 14:37
 */
@RestController
public class HController {

    @Value("${server.port}")
    private String port;

    @GetMapping(value = "/sayHello")
    public String sayHello(@RequestParam("name") String name){
        return "hello1"+name+port;
    }
}
启动,访问子项目地址
3.创建Eureka-server集群
修改上面server(以后用于指代上面的父项目,服务注册中心Eureka-server)的yml文件。采用多profiles文件
---   #多profiles分割符,文件1
spring:
  profiles: peer2
server:
  port: 8761  #自己的服务端口
eureka:
  instance:
    hostname: peer1 #ip
  client:
    #register-with-eureka: false  #是否将自己注册到Eureka服务器
    #fetch-registry: false  #
    serviceUrl:
      defaultZone: http://peer2:8762/eureka/ #eureka 完整配置地址
      #defaultZone: http://${eureka.instance.hostname}:${server.port}/eureka/ #eureka 完整配置地址

---   #多profiles分割符,文件2
spring:
  profiles: peer2
server:
  port: 8762  #自己的服务端口
eureka:
  instance:
    hostname: peer2 #ip
  client:
    #register-with-eureka: false  #是否将自己注册到Eureka服务器
    #fetch-registry: false  #
    serviceUrl:
      defaultZone: http://peer1:8761/eureka/ #eureka 完整配置地址
      #defaultZone: http://${eureka.instance.hostname}:${server.port}/eureka/ #eureka 完整配置地址
修改本地的hosts文件:C:system32//drivers//etc/hosts
添加:
127.0.0.1  peer1
127.0.0.1  peer2
接着分别启动两个server,启动第一个的时候会报错,因为是集群,需要把自己注册到其他节点,而此时其他节点还没启动,所以会报错,其实项目是没有问题的,等待第二个启动就没有问题了
启动方法
1.可以通过编译成jar文件运行,但是我失败了。。。
我直接用idea启动:
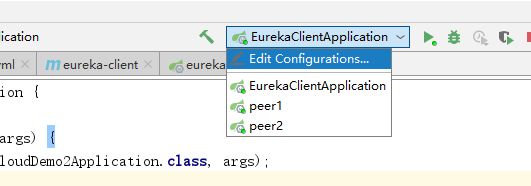
选择+

选择spring boot到

修改unnamed名称,比如我的peer1,我这里已经设置好了,注意参数
–spring.profiles.active=peer1这个参数应该和配置文件对应
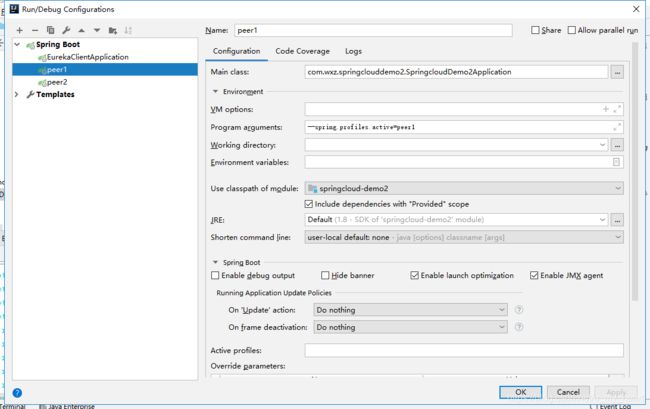
apply->ok
这样配置两次,注意–spring.profiles.active参数不一样哦
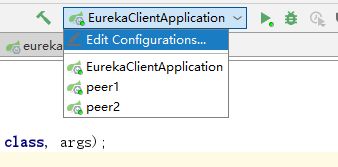
在这里就可以分别启动每个节点了。
启动Eureka-client,访问http:peer1:8761

可见上面出现了peer2和Eureka-client服务
这样集群就启动好了。
