案例1——手写数字识别
一. MNIST数据集
如图3-24,MNIST手写数字图像集是由0到9的数字图像构成。训练图像有6万张(用于学习),测试图像有1万张(用于推理)。
MNIST的图像数据是28像素X28像素的灰度图像,各像素的取值在0到255之间。每个图像数据都相应标有“7”,“2”,“1”等标签

1、读入MNIST数据集
书中提供的mnist.py脚本(dataset目录下),提供了从下载MNIST数据集到将这些数据转换乘NumPy数组等处理。通过mnist.py中的load_mnist函数来读入MNIST数据集。
"""
为了导入父目录中文件而进行的设定——dataset/mnist.py中的load_mnist函数
load_mnist函数: 读入MNIST数据集
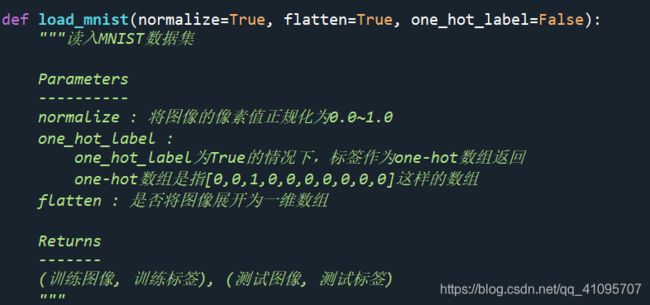
def load_mnist(normalize=True, flatten=True, one_hot_label=False):
Parameters
----------
normalize : 将图像的像素值正规化为0.0~1.0
one_hot_label :
one_hot_label为True的情况下,标签作为one-hot数组返回
one-hot数组是指[0,0,1,0,0,0,0,0,0,0]这样的数组
flatten : 是否将图像展开为一维数组
Returns
-------
(训练图像, 训练标签), (测试图像, 测试标签)
"""
import sys, os
sys.path.append(os.pardir)
from dataset.mnist import load_mnist
(x_train, t_train), (x_test, t_test) = load_mnist(flatten = True, normalize = False)
#输出各个数据的形状
print(x_train.shape) #(60000, 784)
print(t_train.shape) #(60000,)
print(x_test.shape) #(10000, 784)
print(t_test.shape) #(10000,)x_train:训练图像集,共60000张图片。每张28像素X28像素的灰度图像转换为大小=784的一维数组形式输入,像素取值0~255。
t_train:训练标签集,共对应60000个标签值,标签取值0~9。
x_test:测试图像集,共10000张图片。
t_test:测试标签集,共对应10000个标签值。
相关知识点:
1)sys、os模块
Deep Learning from Scratch----python学习_qq_41095707的博客-CSDN博客
2)load_mnist()函数
以"(训练图像, 训练标签), (测试图像, 测试标签)"形式返回读入的MNIST数据
3)normalize 正则化
https://blog.csdn.net/qq_41095707/article/details/119522679
4)one hot
https://blog.csdn.net/qq_41095707/article/details/119518296
5)flatten 多维数据的一维化
https://blog.csdn.net/qq_41095707/article/details/119522693
2、mnist_show.py——显示MNIST图像
利用PIL模块来处理并显示图像。
import sys, os
sys.path.append(os.pardir)
import numpy as np
from dataset.mnist import load_mnist
from PIL import Image
def img_show(img):
"""
Parameters
----------
img : 图像数据类型为Numpy数组形式
Returns
-------
"""
pil_img = Image.fromarray(np.uint8(img))
pil_img.show()
#加载MNIST数据集
(x_train, t_train), (x_test, t_test) = load_mnist(flatten = True, normalize = False)
#显示训练集的第一张图片及标签
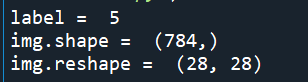
img = x_train[0]
label = t_train[0]
print('label = ', label) #5
print('img.shape = ', img.shape) #(784,)
img = img.reshape(28, 28) #把图像尺寸变成原来尺寸
print('img.reshape = ', img.shape) #(28,28)
img_show(img) #展示img图像训练集的第一张图片:

相关知识点:
1)PIL模块
PIL模块——python常用模块_HavingAFish的博客-CSDN博客