Android开发---在RecyclerView列表中添加自定义的列表头部与尾部视图
在RecyclerView列表中添加自定义的列表头部与尾部视图
- 参考资料
- 前言
- 加入头部与尾部
参考资料
- android–使用RecyclerView及相关架构组件实现列表数据展示
前言
基本思路:
首先,头部和尾部也是列表的一部分,它们的添加方式应该和列表中显示数据的主体部分没有太多区别。除了其本身使用了新的布局视图片段。
RecyclerView中管理的视图项应该与数据列表中的数据保持一一对应的关系。
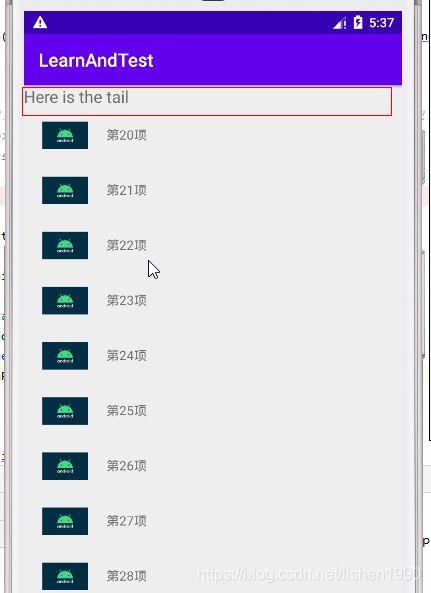
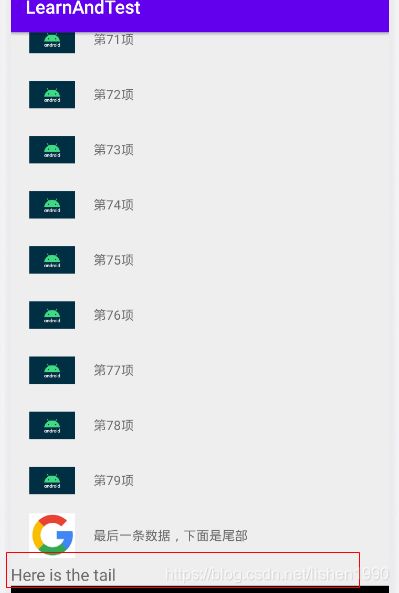
基于以上两点,可以找到一种实现方式,即:通过增加两条数据,让视图可以多创建两个视图项;将多出的两个视图项分别采用头部与尾部视图的布局来生成。这就可以得到一个带有自定义头部与尾部的列表视图。
以下的例子基于以上思路,需要修改与RecyclerView相关的框架代码,主要是适配器adapter代码,数据源DataSource代码。
实现RecyclerView展示列表(没有头部与尾部)的基本代码来自于上方参考资料 android–使用RecyclerView及相关架构组件实现列表数据展示 ,头部与尾部的实现在此代码基础之上修改。
加入头部与尾部
先创建好用于显示头部与尾部的layout布局文件。
接下来,分别调整相关的功能框架代码。
首先需要调整一下列表项的字段,在列表项中增加一个字段标记该对象是正常数据项,或是作为占位用的头部/尾部的空数据项。如下所示,新增了字段pos,用于标记。
public class ItemInfo {
    //字符串,用于在textView中显示
    public String str;
    //图片链接,用于显示图片
    public String imgUrl;
    //一个唯一标识,可以作为列表项的键
    public String key;
    //头-"head",尾-"tail",正常数据-null
    public String pos;
}
然后,需要修改数据源DataSource代码。需要实现的效果是,确保第一条数据是头部的占位数据。在翻页加载数据直到所有数据加载完成之后,再传一条尾部的占位数据。
public class MyDataSource extends ItemKeyedDataSource {

    private int pageIndex=1;
    private boolean addTail=false;//是否已经加入尾部

    private boolean addHead=false;//是否已经加入头部
    @Override
    public void loadInitial(@NonNull LoadInitialParams params, @NonNull LoadInitialCallback callback) {
        fetchItems(params.requestedInitialKey,params.requestedLoadSize,pageIndex,callback);
    }

    private void fetchItems(String requestedInitialKey, int requestedLoadSize,int pageIndex,LoadCallback callback)
    {
        try
        {
            //在此处写入获取当前页列表数据的代码,可以从数据库中获取,或者从后端服务器API获取
            //List itemInfoList=*******
            //callback.onResult(itemInfoList);//通过回调返回列表数据

            if (!addHead)
            {
                ArrayList headList=new ArrayList();

                ItemInfo tail=new ItemInfo();

                tail.pos="tail";
                headList.add(tail);
                addHead=true;
                callback.onResult(headList);
                return;
            }

            List itemInfoList=new ArrayList();
            RetrofitSigleton retrofitSigleton=new RetrofitSigleton();
            Response> response= retrofitSigleton.getService().ImgAndTextList(String.valueOf(pageIndex)).execute();
            itemInfoList=response.body();

            if (itemInfoList.size()==0)//没有数据返回,已经可以加入尾部数据
            {
                if (!addTail)//还没有返回尾部数据,该代码块仅执行一次
                {

                    ArrayList tailList=new ArrayList();

                    ItemInfo tail=new ItemInfo();

                    tail.pos="tail";
                    tailList.add(tail);
                    addTail=true;
                    callback.onResult(tailList);
                    return;
                }
            }

            pageIndex=pageIndex+1;
            callback.onResult(itemInfoList);
        }
        catch (Exception e)
        {
            e.printStackTrace();
        }
    }

    @Override
    public void loadAfter(@NonNull LoadParams params, @NonNull LoadCallback callback) {
        try {
            pageIndex=pageIndex+1;
            fetchItems(params.key, params.requestedLoadSize,pageIndex,callback);
        } catch (Exception e) {
            e.printStackTrace();
        }
    }

    @Override
    public void loadBefore(@NonNull LoadParams params, @NonNull LoadCallback callback) {

    }

    @NonNull
    @Override
    public String getKey(@NonNull ItemInfo item) {
        return item.key;
    }
}
最后,需要修改列表的适配器代码。需要重写getItemViewType()方法,对头部,尾部返回不同的值,用于区分视图类型。然后生成列表项视图的时候根据viewType来加载不同的视图布局。
public class MyListAdapter extends PagedListAdapter {
    public MyListAdapter()
    {
        super(DIFF_CALLBACK);
    }

    private final int bodyItemViewType=0;
    private final int tailItemViewType=1;
    private final int headItemViewType=2;

    private static DiffUtil.ItemCallback DIFF_CALLBACK =
            new DiffUtil.ItemCallback() {

                @Override
                public boolean areItemsTheSame(@NonNull ItemInfo oldItem, @NonNull ItemInfo newItem) {
                    // The ID property identifies when items are the same.
                    return oldItem.key == newItem.key;
                }

                @Override
                public boolean areContentsTheSame(@NonNull ItemInfo oldItem, @NonNull ItemInfo newItem) {
                    // Don't use the "==" operator here. Either implement and use .equals(),
                    // or write custom data comparison logic here.
                    return oldItem.key.equals(newItem.key);
                }
            };

    @NonNull
    @Override
    public MyListAdapter.ViewHolder onCreateViewHolder(@NonNull ViewGroup parent, int viewType) {
        View view;

        if (viewType==this.headItemViewType)
        {
            view= LayoutInflater.from(parent.getContext()).inflate(R.layout.fragment_header_of_list,parent,false);
        }
        else if(viewType==this.tailItemViewType)
        {
            view= LayoutInflater.from(parent.getContext()).inflate(R.layout.fragment_tail_of_list,parent,false);
        }
        else {
            view= LayoutInflater.from(parent.getContext()).inflate(R.layout.fragment_list_item,parent,false);
        }

        return new ViewHolder(view);
    }

    @Override
    public void onBindViewHolder(@NonNull MyListAdapter.ViewHolder holder, int position) {
        try {
            ItemInfo _itemInfo=getItem(position);
            if (_itemInfo.pos==null)
            {
                holder._textView.setText(_itemInfo.str);
                Glide.with(holder.mView).load(_itemInfo.imgUrl).into(holder._imageView);
            }
        }
        catch (Exception e)
        {
            e.printStackTrace();
        }
    }

    @Override
    public int getItemViewType(int position) {
        if (getItem(position).pos=="head")
        {
            return this.headItemViewType;
        }
        else if(getItem(position).pos=="tail")
        {
            return this.tailItemViewType;
        }
        else {
            return this.bodyItemViewType;
        }
    }

    public class ViewHolder extends RecyclerView.ViewHolder
    {
        public final ImageView _imageView;
        public final TextView _textView;


        public final View mView;
        public ViewHolder(@NonNull View itemView)
        {
            super(itemView);
            _textView=(TextView)itemView.findViewById(R.id.idOfTextView);
            _imageView=(ImageView)itemView.findViewById(R.id.idOfImageView);

            mView=itemView;
        }
    }
}

