{{item.title}}
{{item.description}}
Vue3 + vite + Ts + pinia + 实战 + 源码 +electron
仓库地址:https://gitee.com/szxio/vue3-vite-ts-pinia
视频地址:小满Vue3(课程导读)_哔哩哔哩_bilibili
课件地址:Vue3_小满zs的博客-CSDN博客
npm init vite@latest
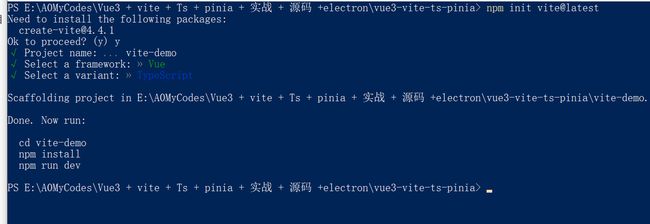
生成的目录结构
vite-demo
├── .vscode
│   └── extensions.json
├── public
│   └── vite.svg
├── src
│   ├── assets
│   │   └── vue.svg
│   ├── components
│   │   └── HelloWorld.vue
│   ├── App.vue
│   ├── main.ts
│   ├── style.css
│   └── vite-env.d.ts
├── README.md
├── index.html
├── package.json
├── tsconfig.json
├── tsconfig.node.json
└── vite.config.ts
启动
npm run dev

npm init vue@latest

生成的目录结构
vue-demo
├── .vscode
│   └── extensions.json
├── public
│   └── favicon.ico
├── src
│   ├── assets
│   │   ├── base.css
│   │   ├── logo.svg
│   │   └── main.css
│   ├── components
│   │   ├── __tests__
│   │   ├── icons
│   │   ├── HelloWorld.vue
│   │   ├── TheWelcome.vue
│   │   └── WelcomeItem.vue
│   ├── router
│   │   └── index.ts
│   ├── stores
│   │   └── counter.ts
│   ├── views
│   │   ├── AboutView.vue
│   │   └── HomeView.vue
│   ├── App.vue
│   └── main.ts
├── .eslintrc.cjs
├── .prettierrc.json
├── README.md
├── env.d.ts
├── index.html
├── package.json
├── tsconfig.app.json
├── tsconfig.json
├── tsconfig.node.json
├── tsconfig.vitest.json
├── vite.config.ts
└── vitest.config.ts
用这种方式生成的项目会全一点
启动
npm run dev

添加 gen-router.js 文件
var fs = require('fs');
const readline = require('readline');
const os = require('os');

const vueDir = './src/views/';

fs.readdir(vueDir, function (err, files) {
    if (err) {
        console.log(err);
        return;
    }
    let routers = ``;

    // 对文件进行排序
    let sortFiles = files.sort((a,b)=>{
        return a.split("_")[0] - b.split("_")[0]
    });

    for (const filename of sortFiles) {
        if (filename.indexOf('.') < 0) {
            continue;
        }
        var [name, ext] = filename.split('.');
        if (ext != 'vue') {
            continue;
        }
        let routerName = null

        const contentFull = fs.readFileSync( `${vueDir}${filename}`, 'utf-8' );
        var match = /\<\!\-\-\s*(.*)\s*\-\-\>/g.exec(contentFull.split(os.EOL)[0]);
        if (match) {
            routerName = match[1];
        }


        routers += `  {path: '/${name === 'root' ? '' : encodeURIComponent(name)}',name:'${name}', component: ()=> import(/* webpackChunkName: "${name}" */ "@/views/${filename}") ${ routerName ? ',name: "' + routerName + '"' : ''} },\n`;
    }

const result = `
import { createRouter, createWebHistory } from 'vue-router'
import Layout from '@/layout/index.vue'

const router = createRouter({
  history: createWebHistory(import.meta.env.BASE_URL),
  routes: [
    {
      path: '/',
      name: 'index',
      component: Layout,
      redirect: '/index',
      children:[
        ${routers}
      ]
    },

  ]
})

export default router
`


    // console.log(result);
    fs.writeFile('./src/router/index.ts',result, 'utf-8',
        (err) => {
            if (err) throw err;
        });
});
修改 package.json 中的启动命令
"scripts": {
  "dev": "node gen-router.js &&  vite",
},
这样每次新建完一个文件后需要重启一下服务,然后会自动生成路由文件,配置菜单动态显示即可
接受一个内部值并返回一个可变响应式的 ref 对象。ref 对象仅有一个 .value property,指向该内部值。
{{ product }}
调试小技巧
我们打印 ref 对象时需要点开两层才能看到信息,如下
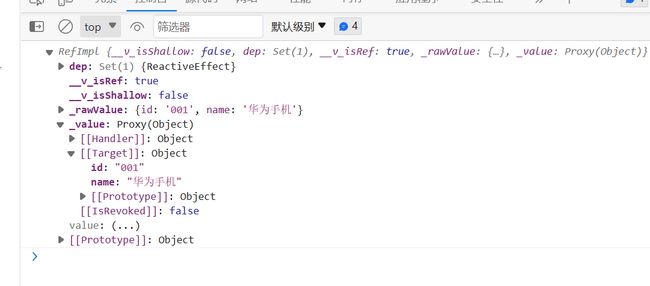
可以打开 启用自定义格式化程序
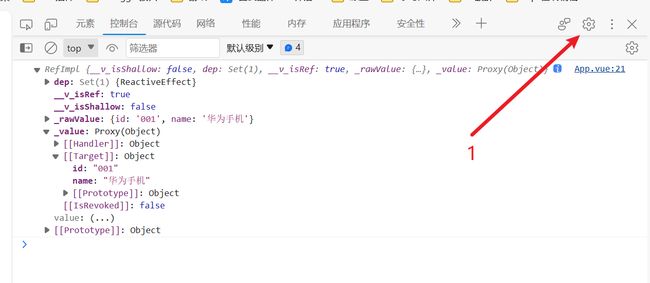
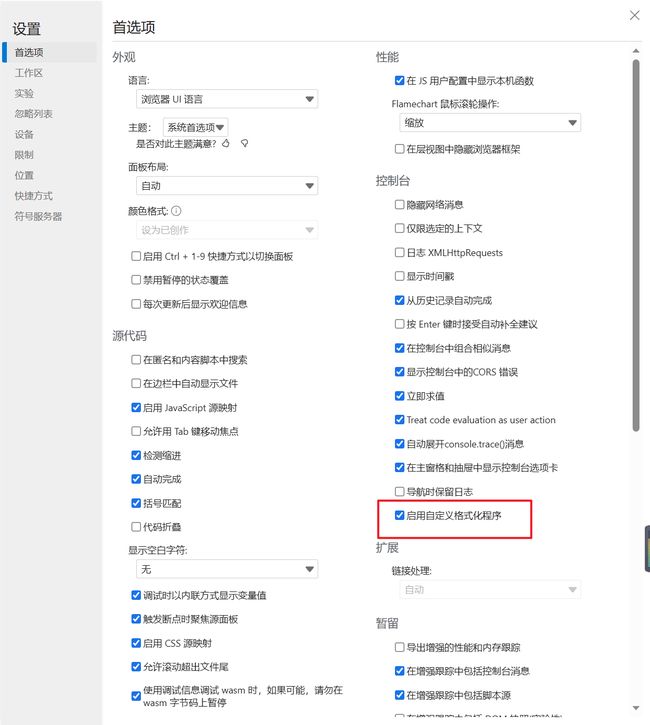
之后打印就会直接展示具体的信息

判断一个对象是否是响应式对象
import { ref, isRef } from "vue";

const product = ref({
  id: "001",
  name: "小米手机"
})

const change = () => {
  product.value.name = "华为手机"
  // isRef判断一个对象是否是响应式对象
  console.log(isRef(product)) // true
}
创建一个跟踪自身 .value 变化的 ref,但不会使其值也变成响应式的
import { ref, isRef, shallowRef } from "vue";

const shaRef = shallowRef({
  price: 100
})

const change = () => {
  // product.value.name = "华为手机"
  // isRef判断一个对象是否是响应式对象
  console.log(isRef(product)) // true

  shaRef.value.price = 200

  console.log(shaRef.value);
}
上面的例子中页面不会发生变化
强制更新页面
import { ref, isRef, shallowRef, triggerRef } from "vue";

const product = ref({
  id: "001",
  name: "小米手机"
})

const shaRef = shallowRef({
  price: 100
})

const change = () => {
  // product.value.name = "华为手机"
  // isRef判断一个对象是否是响应式对象
  console.log(isRef(product)) // true

  shaRef.value.price = 200

  console.log(shaRef.value);

  triggerRef(shaRef)
}
需要传入一个要更新的对象
自定义一个ref响应式数据
import { customRef } from "vue";

function myRef<T>(value: T) {
  return customRef((track, trigger) => {
    return {
      get() {
        track()
        return value
      },
      set(newVal) {
        value = newVal
        trigger()
      },
    }
  })
}

const song1 = myRef("123")

const change = () => {
  song1.value = "456"

}
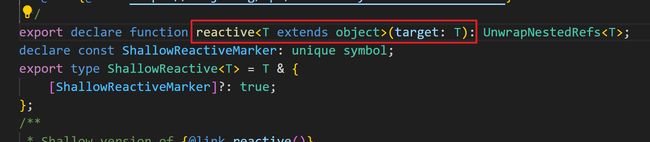
用来绑定复杂的数据类型 例如 对象 数组
源码中限定只能传入类型是Object的数据
{{ form }}
- {{ item }}
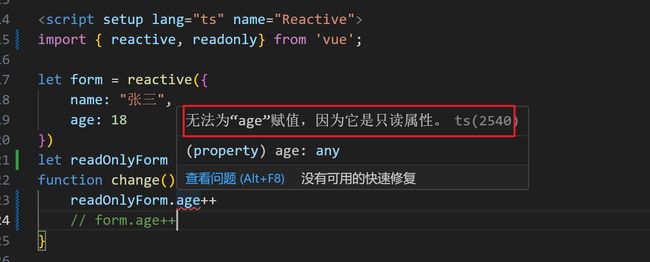
将一个对象设置为只读
import { reactive, readonly } from 'vue';

let form = reactive({
    name: "张三",
    age: 18
})
let readOnlyForm = readonly(form)
function change() {
    readOnlyForm.age++
}
浅层的响应式
import { shallowReactive } from 'vue';

let shaReactive = shallowReactive({
    a: {
        b: 123
    }
})
function chageSha() {
    shaReactive.a.b = 456 // 页面不会发生改变
    console.log(shaReactive); // 打印的数据发生改变
}
将对象中的某个属性变成响应式的
如果原始数据是非响应式的,则经过 toRef 之后也不会更新视图,但是数据会发生变化
{{ student }}
likeRef:{{ likeRef }}
如果源数据就是响应式的,则会触发页面更新
{{ student }}
likeRef:{{ likeRef }}
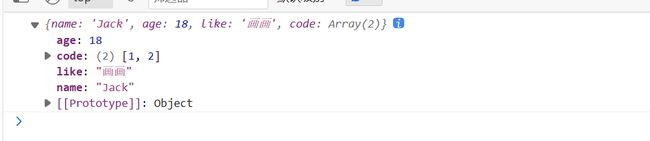
将对象的所有数据都变成响应式数据
import { toRef, toRefs, toRaw, ref, reactive } from "vue"

const student = reactive({
    name: "Jack",
    age: 18,
    like: "画画",
    code: [1, 2]
})

// 自实现toRefs
function myToRefs<T extends Object>(object: T) {
    let map: any = {}
    for (const key in object) {
        map[key] = toRef(object, key)
    }
    return map
}
function refs() {
    console.log(myToRefs(student)); // 打印结果如下图
}

// 使用场景:对象解构
let { name, age, code } = toRefs(student)
function fun1() {
    name.value = "Tim"
    age.value = 16
    code.value.push(3)
}
myToRefs 打印结果

返回对象的原始信息
function fun2() {
    console.log(toRaw(student));
}
打印
vue-proxy
├── effect.js
├── effect.ts
├── index.html
├── index.js
├── package.json
├── reactive.js
├── reactive.ts
└── webpack.config.js
import { track, trigger } from "./effect"

// 判断是否是对象
const isObject = (target) => target !== null && typeof target === "object"

// 泛型约束只能传入Object类型
export const reactive = <T extends object>(target: T) => {

    return new Proxy(target, {
        get(target, key, receiver) {
            console.log(target);
            console.log(key);
            console.log(receiver);

            let res = Reflect.get(target, key, receiver)

            track(target, key)

            if (isObject(res)) {
                return reactive(res)
            }

            return res
        },
        set(target, key, value, receiver) {
            let res = Reflect.set(target, key, value, receiver)
            console.log(target, key, value);

            trigger(target, key)
            return res
        }
    })

}
// 更新视图的方法
let activeEffect;
export const effect = (fn: Function) => {
    const _effect = function () {
        activeEffect = _effect;
        fn()
    }
    _effect()
}

// 收集依赖
const targetMap = new WeakMap()
export const track = (target, key) => {
    let depsMap = targetMap.get(target)
    if (!depsMap) {
        depsMap = new Map()
        targetMap.set(target, depsMap)
    }
    let deps = depsMap.get(key)
    if (!deps) {
        deps = new Set()
        depsMap.set(key, deps)
    }
    deps.add(activeEffect)
}

// 触发更新
export const trigger = (target, key) => {
    const depsMap = targetMap.get(target)
    const deps = depsMap.get(key)
    deps.forEach(effect => effect())
}
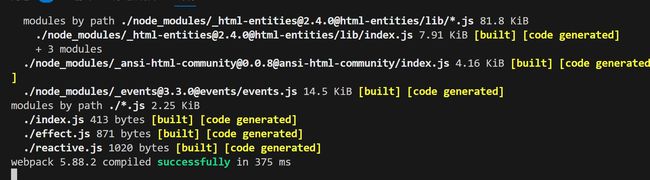
执行 tsc 转成 js 代码,没有 tsc 的全局安装 typescript
npm install typescript -g
新建 index.js,分别引入 effect.js 和 reactive.js
import { effect } from "./effect.js";
import { reactive } from "./reactive.js";
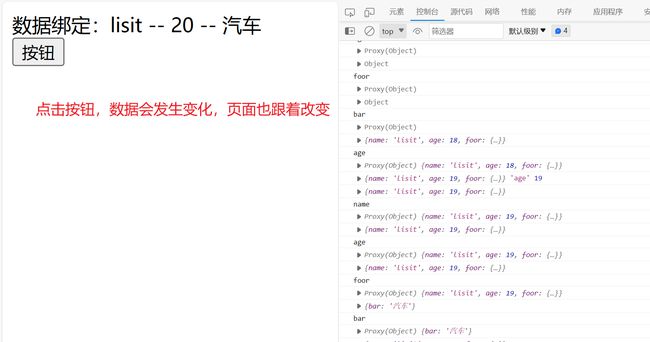
let data = reactive({
name: "lisit",
age: 18,
foor: {
bar: "汽车"
}
})
effect(() => {
document.getElementById("app").innerText = `数据绑定:${data.name} -- ${data.age} -- ${data.foor.bar}`
})
document.getElementById("btn").addEventListener("click", () => {
data.age++
})
新建index.html
DOCTYPE html>
<html lang="en">

<head>
    <meta charset="UTF-8">
    <meta name="viewport" content="width=device-width, initial-scale=1.0">
    <title>Documenttitle>
head>

<body>
    <div id="app">div>
    <button id="btn">按钮button>
body>
然后再根目录执行
npm init -y
安装依赖
npm install webpack webpack-cli webpack-dev-server html-webpack-plugin -D
然后新建 webpack.config.js
const path = require("path")
const HtmlWebpakcPlugin = require("html-webpack-plugin")

module.exports = {
    entry: "./index.js",
    output: {
        path: path.resolve(__dirname, "dist")
    },

    plugins: [
        new HtmlWebpakcPlugin({
            template: path.resolve(__dirname, "./index.html")
        })
    ],
    mode: "development",
    // 开发服务器
    devServer: {
        host: "localhost", // 启动服务器域名
        port: "3000", // 启动服务器端口号
        open: true, // 是否自动打开浏览器
    },
}
执行命令启动项目
npx webpack serve
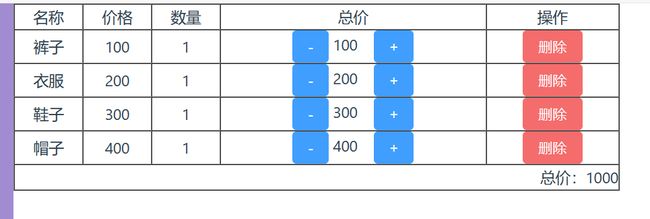
名称
价格
数量
总价
操作
{{ item.name }}
{{ item.price }}
{{ item.count }}
-
{{ item.price * item.count }}
+
删除
总价:{{total}}
effect.ts
// 更新视图方法
let activeEffect
export const effect = (fn:Function,options) => {
    console.log("effect触发")
    const _effect = function () {
        activeEffect = _effect
        return fn()
    }
    _effect.options = options
    _effect()
    return _effect
}

// 依赖收集
const targetMap = new WeakMap()
export const track = (target, key) => {
    let depsMap = targetMap.get(key)
    if (!depsMap) {
        depsMap = new Map()
        targetMap.set(target, depsMap)
    }
    let deps = depsMap.get(key)
    if (!deps) {
        deps = new Set()
        depsMap.set(key, deps)
    }
    deps.add(activeEffect)
}


// 触发更新
export const trigger = (target, key) => {
    const depsMap = targetMap.get(target)
    const deps = depsMap.get(key)
    deps.forEach(effect => {
        if (effect.options.scheduler){
            effect.options.scheduler()
        }else{
            effect()
        }
    })
}
reactive.ts
import {track, trigger} from "./effect"
// 判断是否是对象类型
const isObject = (target) => typeof target === 'object' && target !== null

export const reactive = (target) => {
    return new Proxy(target, {
        get(target, key, receiver) {
            console.log("reactive.get-",key)
            const res = Reflect.get(target, key, receiver)
            // 收集依赖
            track(target, key)
            // 递归
            return isObject(res) ? reactive(res) : res
        },
        set(target, key, value, receiver) {
            console.log("reactive.set-",key)
            const res = Reflect.set(target, key, value, receiver)
            // 触发依赖
            trigger(target, key)
            return res
        }
    })
}
computed.ts
import {effect} from  "./effect"

export const myComputed = (getter:Function)=>{
    let _value = effect(getter,{
        scheduler:()=>{
            _dirty = true
        }
    })
    // 判断是否需要重新计算结果
    let _dirty = true
    // 缓存结果
    let catchValue

    class ComputedRefImpl{
        get value(){
            if(_dirty){
                console.log("依赖发生变化时执行")
                catchValue = _value()
                _dirty = false
            }
            return catchValue
        }
    }
    return new ComputedRefImpl()
}
let name = ref("李四")

watch(name,(newValue,oldValue)=>{
  console.log(newValue,oldValue)
})
let name = ref("李四")
let age = ref(20)

watch([name,age],(newValue,oldValue)=>{
  console.log(newValue,oldValue)
})

let obj = ref({
  foo:{
    bar:{
      name:"张三"
    }
  }
})

watch(obj,(newValue,oldValue)=>{
  console.log(obj.value.foo.bar.name)
},{
  deep:true, //  深度监听
  immediate:true, // 立即执行
})
let obj = ref({
  foo:{
    bar:{
      name:"张三",
      age:18
    }
  }
})

// 监听某个属性是要传入一个函数来返回要监听的属性值
watch(()=>obj.value.foo.bar.age,(newValue,oldValue)=>{
  console.log(obj.value.foo.bar.age)
},{
  immediate:true
})
watchEffect不需要传入任何参数,它是一个函数,当依赖变化时,这个函数就会执行,它内部会根据响应式数据的依赖关系,自动执行监听函数
停止监听
Layout目录结构
layout
├── Content
│   └── index.vue
├── Header
│   └── index.vue
├── Menu
│   └── index.vue
├── css
│   └── bem.scss
└── index.vue
新建 bem.scss
$namespace: "zx" !default;
$block-sel:"-" !default;
$element-sel:"__" !default;
$modifier-sel:"--" !default;

@mixin bfc{
  height:100%;
  overflow: hidden;
}

@mixin b($block){
  // 拼接的结果为:zx-xxx
  $B:$namespace + $block-sel + $block;
  .#{$B}{
    @content;
  }
}

@mixin e($element){
  // 拼接的结果为:zx-xxx__xxx
  $selector:&;
  @at-root {
    $E:$selector + $element-sel + $element;
    #{$E}{
      @content;
    }
  }
}

@mixin m($modifier){
  // 拼接的结果为:zx-xxx--xxx
  $selector:&;
  @at-root {
    $M:$selector + $modifier-sel + $modifier;
    #{$M}{
      @content;
    }
  }
}
配置全局生效
import { fileURLToPath, URL } from 'node:url'

import { defineConfig } from 'vite'
import vue from '@vitejs/plugin-vue'
import vueJsx from '@vitejs/plugin-vue-jsx'
import AutoImport from 'unplugin-auto-import/vite'
import Components from 'unplugin-vue-components/vite'
import { ElementPlusResolver } from 'unplugin-vue-components/resolvers'

// https://vitejs.dev/config/
export default defineConfig({
  plugins: [
    vue(),
    vueJsx(),
    AutoImport({
      resolvers: [ElementPlusResolver()],
    }),
    Components({
      resolvers: [ElementPlusResolver()],
    }),
  ],
  resolve: {
    alias: {
      '@': fileURLToPath(new URL('./src', import.meta.url))
    }
  },
  css: {
    preprocessorOptions: {
      // 配置全局CSS
      scss: {
        additionalData: "@import './src/layout_v2/css/bem.scss';"
      }
    }
  }
})
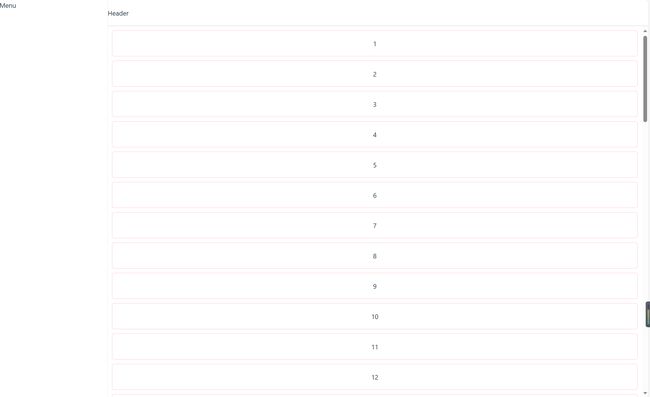
index.vue
Menu/index
Menu
Header/index.vue
Header
Content/index.vue
{{item}}
布局效果
定义父组件
父组件
子组件传过来的值:{{count}}
子组件
父组件传递的值: {{ value }}
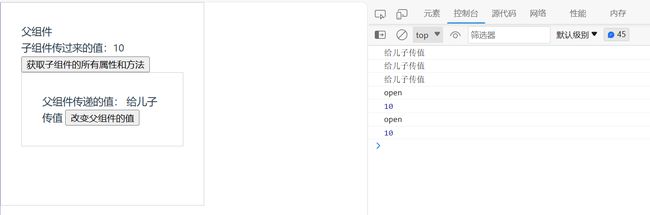
父组件
子组件
效果展示

实现一个如下的东西
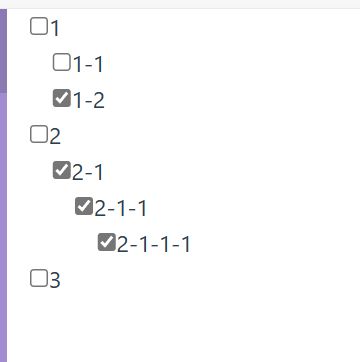
父组件
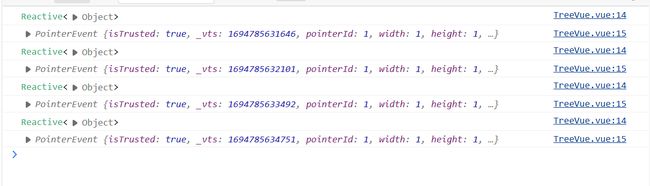
TreeVue.vue
{{item.label}}
控制台打印的东西
{{item.tab}}
定义子组件
定义父组件
效果

Skeleton.vue
效果是这个样子

添加新闻数据,在 public 文件夹中添加 newinfo.json
[
  {
    "title": "秋粮陆续成熟 多措并举保粮食丰收",
    "description": "眼下,从南到北,各地秋粮陆续成熟。人们全力以赴抓好秋粮生产,多措并举保粮食丰收。\n\n金秋时节,安徽水稻主产区无为市85万亩水稻进入收割期,当地组织机械作业服务队,帮助农民机耕机收,颗粒归仓。今年,安徽计划投入各类农机具240万台套,力争玉米、大豆、中晚稻机收水平达八成以上。",
    "url": "https://baijiahao.baidu.com/s?id=1777244368223895628",
    "image": "https://szx-bucket1.oss-cn-hangzhou.aliyuncs.com/picgo/img.png"
  }
]
引入 axios,请求这个文件
src/api/index.js
import axios from 'axios'

export function getNewDataFun(){
    return axios("../public/newinfo.json")
}
编写组件 NewCar.vue
![]() {{item.title}}
{{item.description}}
{{item.title}}
{{item.description}}
效果展示

Suspense 是vue内置的一个组件,有两个插槽
异步组件必须使用 defineAsyncComponent 函数来导入,接收一个回调函数
父组件使用这个组件
打开Dialog
弹框内容
关闭
效果

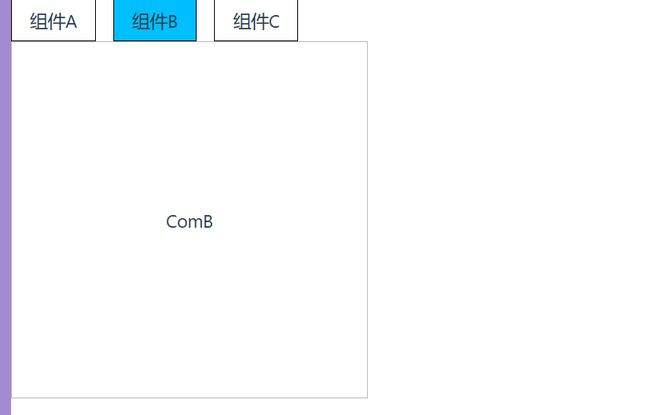
可以缓存组件内容
切换组件显示后,组件内容不会丢失
切换组件
只缓存AliveA组件
不缓存AliveA组件
最多缓存的组件个数
<script lang="ts" setup>
import { ref,onMounted,onActivated,onDeactivated,onUnmounted, } from 'vue'

// 组件显示时只会触发一次
onMounted(()=>{
  console.log('mounted')
})

// 组件显示时触发
onActivated(()=>{
  console.log('activated')
})
// 组件隐藏时触发
onDeactivated(()=>{
  console.log('deactivated')
})
// 被keepalive包裹时,组件销毁不会触发unmounted
onUnmounted(()=>{
  console.log('unmounted')
})
在进入/离开的过渡中,会有 6 个 class 切换。
v-enter-from:定义进入过渡的开始状态。在元素被插入之前生效,在元素被插入之后的下一帧移除。
v-enter-active:定义进入过渡生效时的状态。在整个进入过渡的阶段中应用,在元素被插入之前生效,在过渡/动画完成之后移除。这个类可以被用来定义进入过渡的过程时间,延迟和曲线函数。
v-enter-to:定义进入过渡的结束状态。在元素被插入之后下一帧生效 (与此同时 v-enter-from 被移除),在过渡/动画完成之后移除。
v-leave-from:定义离开过渡的开始状态。在离开过渡被触发时立刻生效,下一帧被移除。
v-leave-active:定义离开过渡生效时的状态。在整个离开过渡的阶段中应用,在离开过渡被触发时立刻生效,在过渡/动画完成之后移除。这个类可以被用来定义离开过渡的过程时间,延迟和曲线函数。
v-leave-to:离开过渡的结束状态。在离开过渡被触发之后下一帧生效 (与此同时 v-leave-from 被移除),在过渡/动画完成之后移除。
切换
安装
npm install animate.css -D
官网中有很多动画示例 Animate.css | A cross-browser library of CSS animations.
 @before-enter="beforeEnter" //对应enter-from
 @enter="enter"//对应enter-active
 @after-enter="afterEnter"//对应enter-to
 @enter-cancelled="enterCancelled"//显示过度打断
 @before-leave="beforeLeave"//对应leave-from
 @leave="leave"//对应enter-active
 @after-leave="afterLeave"//对应leave-to
 @leave-cancelled="leaveCancelled"//离开过度打断
安装,官网:https://greensock.com/
npm install gsap
使用
html
切换
js
<script setup>
import gsap from "gsap";
import {ref} from "vue";

let gsapFlag = ref(true)

const beforeEnter = (el) => {
  console.log("显示之前")
  gsap.set(el,{
    width:0,
    height:0,
    background:"green"
  })
}
const enter = (el,done) => {
  gsap.to(el,{
    width:"200px",
    height:"200px",
    background:"red",
    rotate:"360dge",
    duration:1, // 动画时长,单位是秒
    onComplete:done, // 动画完成后的回调函数
  })
}
const leave = (el,done) => {
  gsap.to(el,{
    width:0,
    height:0,
    background:"green",
    rotate:"-360dge",
    duration:1, // 动画时长,单位是秒
    onComplete:done
  })
}
效果

在 transtion 组件中添加 appear 可以在进入页面时就触发对应的样式代码
结合animate__animated实现一个进入页面就执行的一个动画效果
在遍历数组的时候可以给每一个元素添加过度动画,生命周期和transition一致,我们结合animate来实现一个列表的动画效果
    add
    pop


        {{item}}
import {ref,reactive} from "vue";
import "animate.css"

const groupList = reactive([1,2,3,4,5])

const add = () => {
  groupList.push(groupList.length + 1)
}
const pop = () => {
  groupList.pop()
}
动画效果

安装lodash库 Lodash 简介 | Lodash中文文档 | Lodash中文网 (lodashjs.com)
npm i --save lodash
实现代码
平面动画过度效果
动画


      {{item.value}}
import {ref,reactive} from "vue";
import _ from "lodash"

let numList = ref(Array.apply(null, {length: 81}).map((_,index)=>{
  return {
    id:index,
    value:(index % 9) + 1
  }
}))

const shuffle = () => {
  // shuffle 用来创建一个被打乱值的集合
  numList.value = _.shuffle(numList.value)
}
$numWidth:60px;

.move-class{
  transition: all 1s ease;
}
.num-wrap{
  display: flex;
  flex-wrap: wrap;
  width: calc(#{$numWidth} * 9 + 5px * 8);
  gap: 5px;
  .num-item{
    width: $numWidth;
    height: $numWidth;
    line-height: $numWidth;
    text-align: center;
    border: 1px solid #ccc;
  }
}
实现效果
使用gsap实现数字滚动


  {{rolling.numRul.toFixed(0)}}
import gsap from "gsap";
import {ref,reactive,watch} from "vue";

let rolling = reactive({
  num:10,
  numRul:10
})
watch(()=>rolling.num,(newVal)=>{
  gsap.to(rolling,{
    numRul:newVal,
    duration:1,
  })
})
爷爷组件
爷爷组件
红色
蓝色
粉色
ProvideA
爸爸组件
ProvideB
孙子组件
实现效果
安装
npm install mitt
添加一个JS文件导出
utils/mitt.js
import mitt from "mitt"
export default mitt()
使用,分别定义 A B两个组件
BusA
我是A组件
改变
BusB
我是B组件
{{flag}}
在父组件引入
效果

main文件添加
import './assets/main.css'
import { createApp } from 'vue'
import { createPinia } from 'pinia'
import ElementPlus from 'element-plus'
import App from './App.vue'
import router from './router'
import 'element-plus/dist/index.css'
import zhCn from 'element-plus/dist/locale/zh-cn.min.js'
import 'dayjs/locale/zh-cn'

+ import mitt from "mitt"
+ const Mitt = mitt()

const app = createApp(App)
app.use(createPinia())
app.use(router)
app.use(ElementPlus, { locale: zhCn })
app.mount('#app')

+ declare module 'vue'{
+   export interface ComponentCustomProperties {
+       $Bus: typeof Mitt
+   }
+ }
+ app.config.globalProperties.$bus = Mitt
文件内部通过从 vue 中导出 getCurrentInstance 方法获取当前实例获取定义的全局变量使用
BusA
我是A组件
改变
BusB
我是B组件
{{flag}}
class MyBus{
    constructor() {
        this.list = {}
    }
    emit(event, ...args){
        let funs = this.list[event]
        funs.forEach((fun) =>{
            fun.apply(this,args)
        })
    }
    on(event, callback){
        let funs = this.list[event]
        if(funs){
            funs.push(callback)
        }else{
            funs = [callback]
        }
        this.list[event] = funs
    }
    off(event){
        delete this.list[event]
    }
}
export default new MyBus()
安装
npm in stall @vitejs/plugin-vue-jsx -D
在 vite.config.js 中使用
import { fileURLToPath, URL } from 'node:url'

import { defineConfig } from 'vite'
import vue from '@vitejs/plugin-vue'
import vueJsx from '@vitejs/plugin-vue-jsx'
import AutoImport from 'unplugin-auto-import/vite'
import Components from 'unplugin-vue-components/vite'
import { ElementPlusResolver } from 'unplugin-vue-components/resolvers'

// https://vitejs.dev/config/
export default defineConfig({
  module:"es2022",
  plugins: [
    vue(),
    vueJsx(),
    AutoImport({
      resolvers: [ElementPlusResolver()],
    }),
    Components({
      resolvers: [ElementPlusResolver()],
    }),
  ],
  resolve: {
    alias: {
      '@': fileURLToPath(new URL('./src', import.meta.url))
    }
  },
  css: {
    preprocessorOptions: {
      scss: {
        additionalData: "@import './src/layout_v2/css/bem.scss';"
      }
    }
  }
})
新建 JsxCom.tsx
import {defineComponent, reactive, ref} from "vue"
import {ElButton} from "element-plus"
interface propType {
msg?:string
}
export default defineComponent({
props:{
msg:String,
},
emits:[],
setup(prop:propType,{emit,attrs,slots,expose}){
let flag = ref(false)
const chagneFlag = () => {
flag.value = true
}
let list = reactive([1,2,3,4,5])
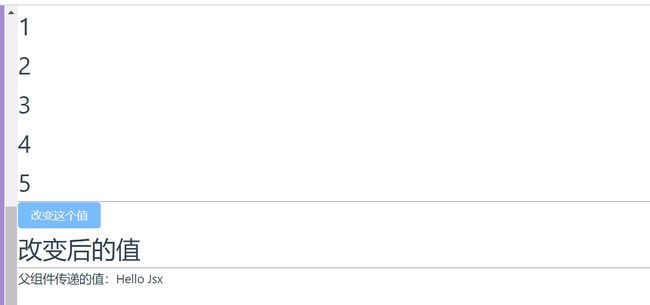
return ()=> <>
{/*遍历循环*/}
{list.map(item => {item}
)}
{/*按钮事件,使用οnclick={()=>chagneFlag()}*/}
chagneFlag()}>改变这个值
{flag.value && 改变后的值
}
父组件传递的值:{prop.msg}
},
})
在vue中可以把这个当成普通的组件使用
页面效果
安装
npm istall unplugin-auto-import/vite
配置
import AutoImport from 'unplugin-auto-import/vite'

export default defineConfig({
  module:"es2022",
  plugins: [
    vue(),
    vueJsx(),
    AutoImport({
      resolvers: [ElementPlusResolver()],
      imports: ['vue', 'vue-router'], // 自动引入vue,和vue-router相关
      dts: 'src/auto-imports.d.ts' // 自动生成的依赖文件
    }),
    Components({
      resolvers: [ElementPlusResolver()],
    }),
  ],

})
保存后查看 src/auto-imports.d.ts 内容
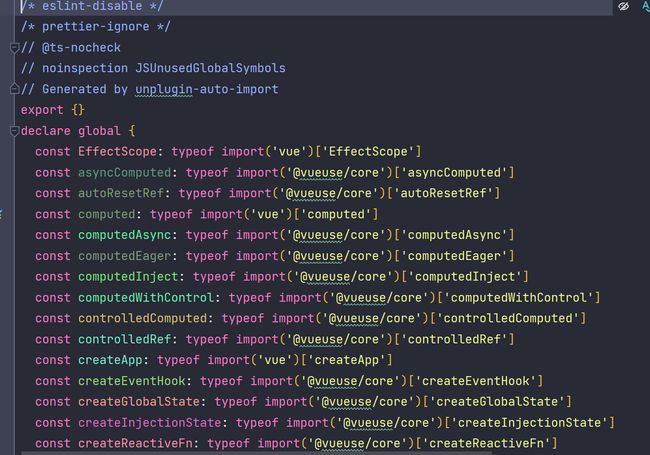
里面自动的帮我们了引入
然后再组件中不需要手动的导入 vue,就可以使用vue中的各种声明
buttonCont
{{flag}}
vue3中在组件上绑定v-model时,默认的prop变成了modelValue
子组件 Vmodel
关闭
父组件
父组件的值:{{value}}
父组件
父组件的值:{{value}}
切换显示
子组件
关闭
在任意一个钩子函数头能拿到自定义指令绑定的参数,我们通过打印 arg 看看参数有什么
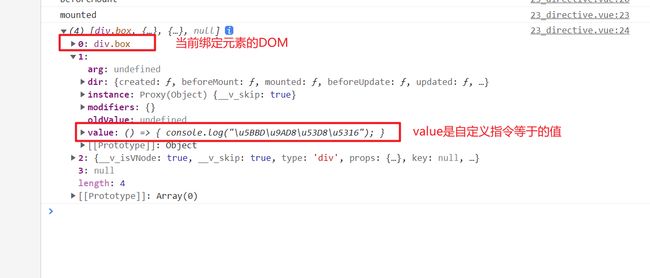
我们利用这两个参数实现监听元素宽高变化的指令,当元素宽高发生变化时调用绑定的函数
mounted(el,bindings){
  console.log("mounted")
  // 监听元素宽高变化
  const resizeObserver = new ResizeObserver(entries => {
    let width = entries[0].contentRect.width;
    let height = entries[0].contentRect.height;
    console.log(`元素宽度:${width},元素高度:${height}`)
    bindings.value()
  });
  resizeObserver.observe(el);
},
修改 mounted 钩子的内容,通过observe 观察 el,然后调用 bindings.value
我们也可以通过函数的方式来自定义指令
新增
修改
删除
上面的例子是一个按钮级别权限的demo
![]()
vueuse
npm i @vueuse/core
网址:Get Started | VueUse — 开始使用 |Vueuse
新建 useImgToBase64.ts
import {onMounted} from 'vue'

type optionsType = {
    el:String
}

export default function (options:optionsType):Promise<string>{
    return new Promise((resolve, reject) =>{
        onMounted(()=>{
            let img:HTMLImageElement = document.querySelector(options.el)
            img.onload = ()=>{
                resolve(toBase64(img))
            }
            const toBase64 = (img:HTMLImageElement) => {
                let canvas:HTMLCanvasElement = document.createElement('canvas')
                let ctx:CanvasRenderingContext2D = canvas.getContext('2d')
                canvas.width = img.width
                canvas.height = img.height
                ctx.drawImage(img, 0, 0, canvas.width, canvas.height)
                return canvas.toDataURL("image/jpeg")
            }
        })
    })
}
使用


用于监听绑定元素的宽高变化,当元素宽高发生变化时触发回调并获取最新的宽高
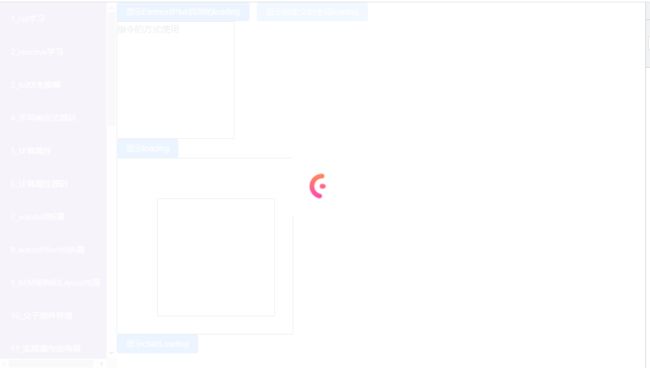
结合上面学到的 Hook 和 自定义指令封装一个监听元素宽高变化的指令,并发布到 npm
项目结构
useResize
├── src
│   └── index.ts
├── README.md
├── index.d.ts
├── package-lock.json
├── package.json
├── tsconfig.json
└── vite.config.ts
src/index.ts
import type {App} from "vue";

/**
 * 自定义Hook
 * @param el
 * @param callback
 */
const weakMap = new WeakMap<HTMLElement, Function>();
const resizeObserver = new ResizeObserver((entries) => {
    for (const entry of entries) {
        const handle = weakMap.get(entry.target as HTMLElement);
        handle && handle(entry)
    }
})

function useResize(el: HTMLElement, callback: Function) {
    if (weakMap.get(el)) {
        return
    }
    weakMap.set(el, callback)
    resizeObserver.observe(el)
}

/**
 * 定义vite插件时,vue会在底层调用插件的install方法
 * @param app
 */
function install(app: App) {
    app.directive('resize', {
        mounted(el: HTMLElement, binding: { value: Function }) {
            useResize(el, binding.value)
        }
    })
}

useResize.install = install

export default useResize
vite.config.ts
import {defineConfig} from "vite"

export default defineConfig({
    build:{
        lib:{
            // 打包入口文件
            entry:"src/index.ts",
            // name
            name:"useResize"
        },
        rollupOptions:{
            // 忽略打包的文件
            external:['vue'],
            output:{
                globals:{
                    useResize:"useResize"
                }
            }
        }
    }
})
index.d.ts
declare const useResize:{
    (element:HTMLElement, callback:Function):void
    install:(app:any) => void
}

export default useResize
package.json
{
  "name": "v-resize-songzx",
  "version": "1.0.0",
  "description": "",
  "main": "dist/v-resize-songzx.umd.js",
  "module": "dist/v-resize-songzx.mjs",
  "scripts": {
    "test": "echo \"Error: no test specified\" && exit 1",
    "build": "vite build"
  },
  "keywords": [],
  "author": "songzx",
  "files": [
    "dist",
    "index.d.ts"
  ],
  "license": "ISC",
  "devDependencies": {
    "vue": "^3.3.4"
  },
  "dependencies": {
    "vite": "^4.4.9"
  }
}
pachage.json 文件属性说明:
npm run build
npm login
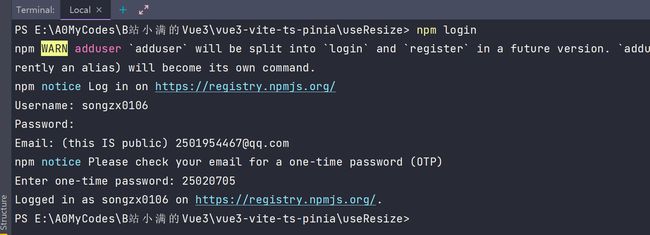
npm publish
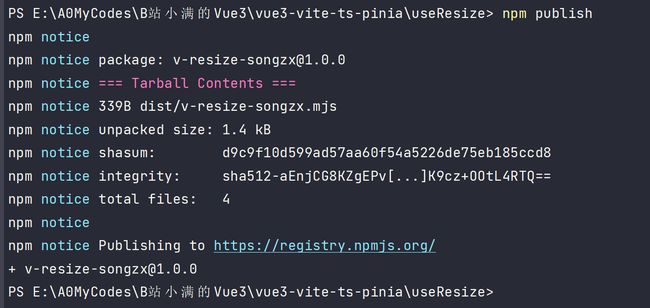
打开 npm 网站,搜索查看是否发布成功
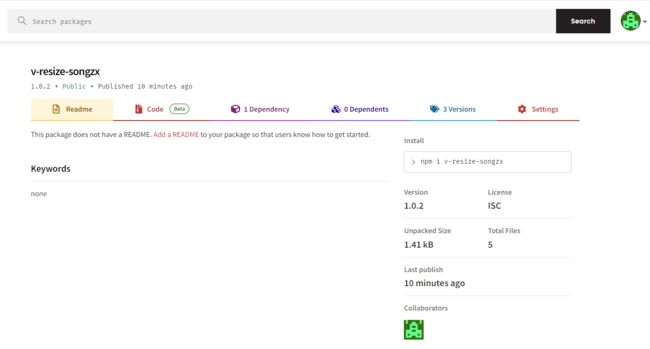
npm i v-resize-songzx
全局注册 v-resze 指令
main.ts 引入
import useResize from "v-resize-songzx";

const app = createApp(App)

app.use(useResize)
app.mount('#app')
使用Hook的方式
在 main.ts 中添加
import dayjs from "dayjs"
import mitt from "mitt"

const Mitt = mitt()

// 定义全局变量
app.config.globalProperties.$bus = Mitt
app.config.globalProperties.$BaseUrl = 'http://localhost'
app.config.globalProperties.$formatDate = (date: Date) => dayjs(date).format('YYYY-MM-DD HH:mm:ss')

// 定义声明文件
declare module 'vue' {
    export interface ComponentCustomProperties {
        $bus: typeof Mitt,
        $BaseUrl: string,
        $formatDate: Date
    }
}
在任何组件中都可以使用
{{ $BaseUrl }}
如果完整引入了 Element Plus,那么 app.config.globalProperties 上会有一个全局方法$loading,同样会返回一个 Loading 实例。
| 名称 | 说明 | 类型 | 默认 |
|---|---|---|---|
| target | Loading 需要覆盖的 DOM 节点。 可传入一个 DOM 对象或字符串; 若传入字符串,则会将其作为参数传入 document.querySelector以获取到对应 DOM 节点 |
string / HTMLElement |
document.body |
| body | 同 v-loading 指令中的 body 修饰符 |
boolean |
false |
| fullscreen | 同 v-loading 指令中的 fullscreen 修饰符 |
boolean |
true |
| lock | 同 v-loading 指令中的 lock 修饰符 |
boolean |
false |
| text | 显示在加载图标下方的加载文案 | string |
— |
| spinner | 自定义加载图标类名 | string |
— |
| background | 遮罩背景色 | string |
— |
| customClass | Loading 的自定义类名 | string |
— |
content
显示loading
showLoading
我们自己动手来实现一个和ElementPlus的Loading,同时支持函数调用和指令调用

import type {App, VNode,} from "vue"
import {createVNode, render, cloneVNode} from "vue"
import MyLoading from "@/components/MyLoading.vue"

export default {
    install(app: App) {
        // 使用vue底层的createVNode方法将组件渲染为虚拟节点
        const VNode: VNode = createVNode(MyLoading)
        // 使用render函数将组件挂载到body中
        render(VNode, document.body)
        // 定义全局方法设置组件的显示和隐藏
        app.config.globalProperties.$showLoading = VNode.component?.exposed.showLoading
        app.config.globalProperties.$hideLoading = VNode.component?.exposed.hideLoading

        const weakMap = new WeakMap()

        // 自定义Loading指令
        app.directive("zx-loading", {
            mounted(el) {
                if (weakMap.get(el)) return
                //  记录当前绑定元素的position
                weakMap.set(el, window.getComputedStyle(el).position)
            },
            updated(el: HTMLElement, binding: { value: Boolean }) {
                const oldPosition = weakMap.get(el);
                // 如果不是position: relative或者absolute,就设置为relative
                // 这里的目的是确保loading组件正确覆盖当前绑定的元素
                if (oldPosition !== 'absolute' && oldPosition !== 'relative') {
                    el.style.position = 'relative'
                }
                // 克隆一份loading元素,
                // 作用是当页面上有多个zx-loading时,每个dom都维护一份属于自己的loading,不会冲突
                const newVNode = cloneVNode(VNode)
                // 挂载当前节点
                render(newVNode, el)
                // 判断绑定的值
                if (binding.value) {
                    newVNode.component?.exposed.showLoading()
                } else {
                    newVNode.component?.exposed.hideLoading(() => {
                        // 还原布局方式
                        el.style.position = oldPosition
                    })
                }
            }
        })
    }
}
在上面的文件中定义了两个全局函数和一个自定义指令
在 main.ts 中去挂载我们自定义的 Loading
import {createApp} from 'vue'
import MyLoading from "@/utils/MyLoading";

const app = createApp(App)
// 引入自定义的全局Loading
app.use(MyLoading)

app.mount('#app')
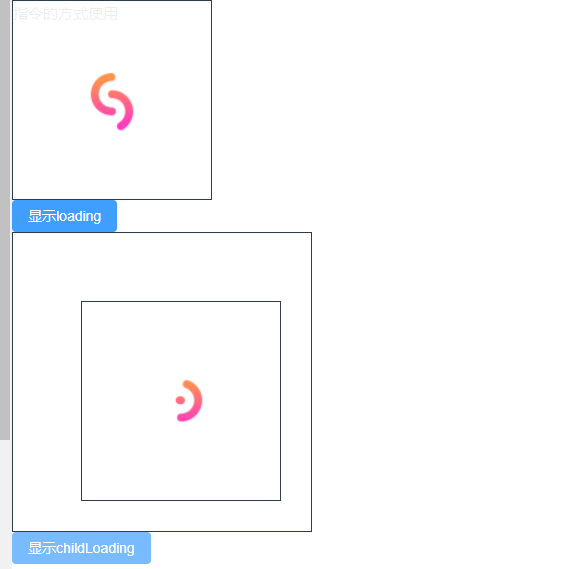
调用全局方法弹出Loading
显示自定义的全局loading
指令的方式使用
显示loading
显示childLoading
添加 MyUse.ts
import type {App} from "vue"
import {app} from "@/main"

// 定义一个接口,声明install方法必传
interface Use {
    install: (app: App, ...options: any[]) => void
}

const installList = new Set()

export default function myUse<T extends Use>(plugin: T, ...options: any[]) {
    // 判断这个插件是否已经注册过了,如果注册过了则报错
    if (installList.has(plugin)) {
        console.error("Plugin already installed")
        return
    }
    // 调用插件身上的install方法,并传入main.ts导出的app
    plugin.install(app, ...options)
    installList.add(plugin)
}
使用自定义的myUse方法注册我们自定义的Loading
import {createApp} from 'vue'

// 自定义全局Loading
import MyLoading from "@/utils/MyLoading";
// 自定义app.use方法
import myUse from "@/utils/MyUse";


export const app = createApp(App)
// 引入自定义的全局Loading
myUse(MyLoading)

app.mount('#app')
使用 :deep() 将选择器包裹起来可以将第三方库的样式进行修改

使用 :slotted() 将插槽中的类名包裹起来,可以修改插槽中的元素样式
SlotTestCom.vue
父组件
私人订制DIV

使用 :global() 用于设置全局样式
:global(div){
  font-size: 17px;
  color: #222222;
}
全局设置div的样式
let color = ref("pink")
// 随机一个颜色
const randomColor = () => {
  color.value = `rgb(${Math.random() * 255},${Math.random() * 255},${Math.random() * 255})`
}
使用 v-bind() 将JS中变量包裹起来即可使用
.el-input {
  width: 300px;

  :deep(.el-input__inner) {
    background-color: v-bind(color);

  }
}
官网地址Tailwind CSS 中文文档 - 无需离开您的HTML,即可快速建立现代网站。
npm install -D tailwindcss@latest postcss@latest autoprefixer@latest
生成配置文件
npx tailwindcss init -p
修改配置文件 tailwind.config.js
2.6版本
module.exports = {
  purge: ['./index.html', './src/**/*.{vue,js,ts,jsx,tsx}'],
  theme: {
    extend: {},
  },
  plugins: [],
}
3.0版本
module.exports = {
  content: ['./index.html', './src/**/*.{vue,js,ts,jsx,tsx}'],
  theme: {
    extend: {},
  },
  plugins: [],
}
新建 index.css 并在 main.ts 中引入
@tailwind base;
@tailwind components;
@tailwind utilities;

详细类名见文档:https://www.tailwindcss.cn/docs/font-family
Hello Word

vue 中更新DOM操作是异步的,但是JS程序是同步的,所以当遇到操作DOM时可能会出现延迟更新的情况,vue 也给了一个解决方案,就是可以将操作 DOM 的代码放在 nextTick 中执行,nextTick 会执行一个 Promise 函数去更新DOM,来实现同步更新DOM的操作
这样做的好处是可以提高程序性能,例如执行一个for循环,每次循环会改变变量的值,然后吧这个变量输出到页面上。用一个watch去监听这个变量,watch函数并不会触发多次,而是只会执行一次
下面是一个小案例
{{ item.msg }}
发送
参照博客:https://xiaoman.blog.csdn.net/article/details/131507483
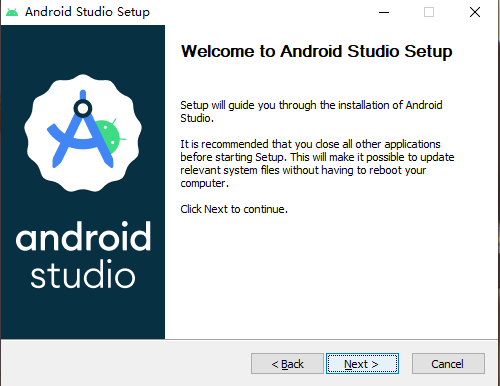
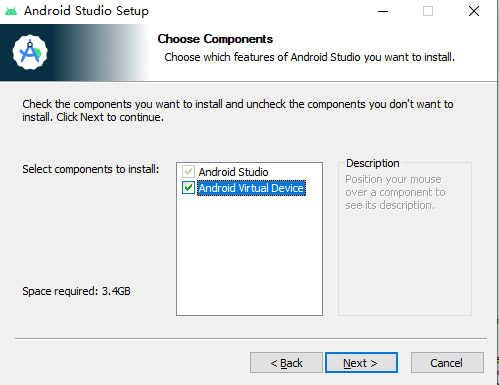
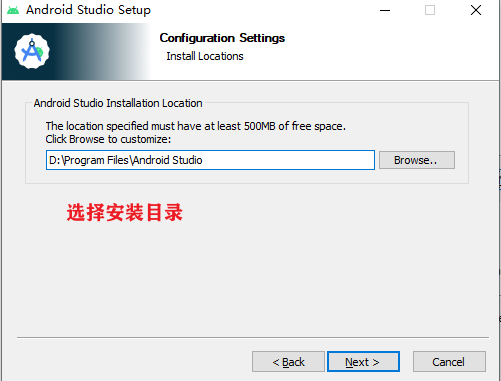
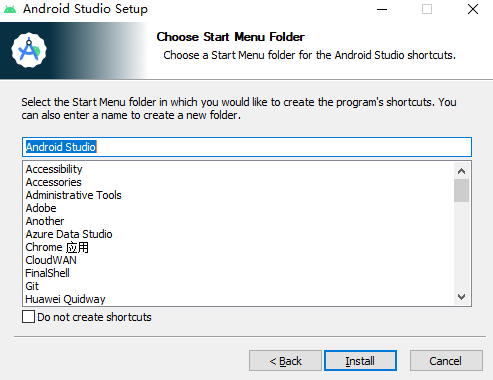

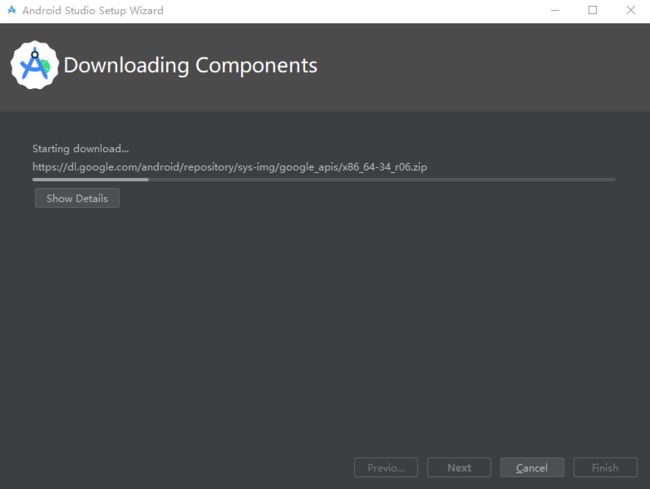
安装完成后打开
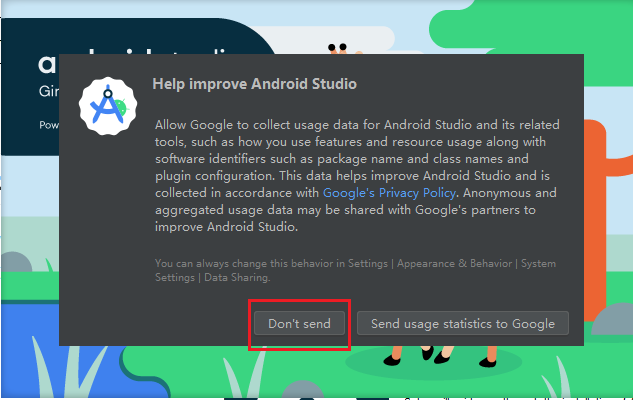
首次运行需要安装一些SDK
npm install -g @ionic/cli
ionic start app tabs --type vue
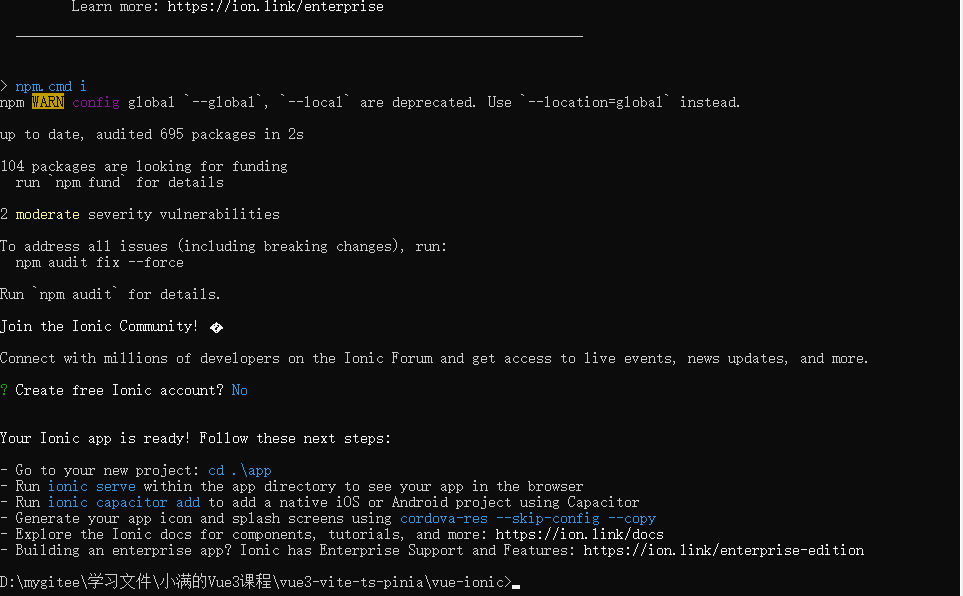
启动项目
npm run dev

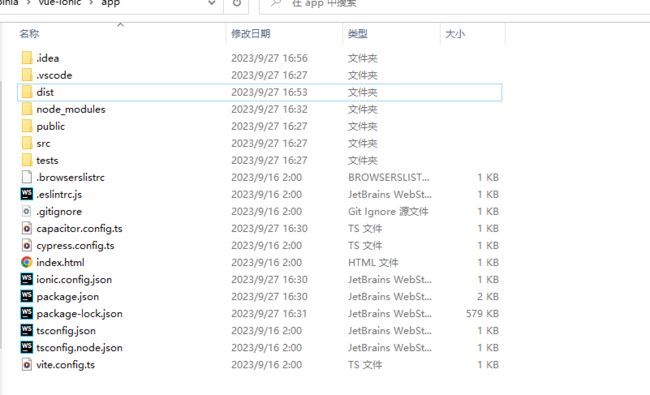
先执行打包命令
npm run build
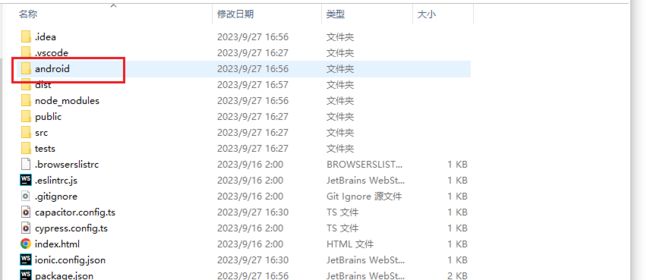
再执行构建命令,将程序打包成Android包
ionic capacitor copy android
运行成功后会自动多一个android文件夹
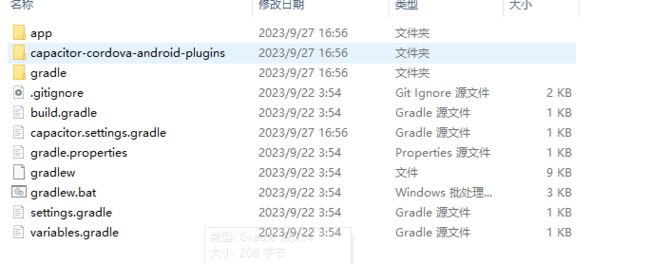
然后运行下面命令进行预览
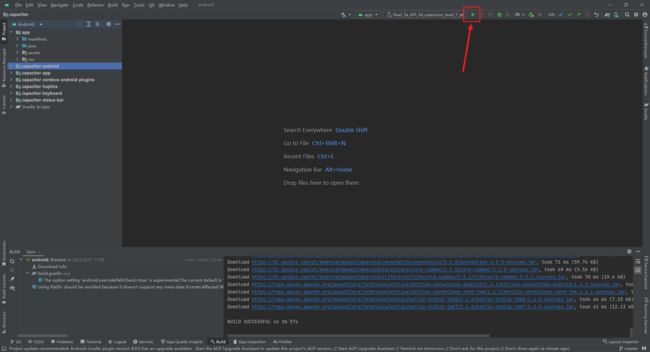
ionic capacitor open android
会自动打开安卓编辑器
等待项目加载完成后,点击绿色的箭头即可启动
<meta name="viewport" content="width=device-width, initial-scale=1.0">
<style>
  html,body,#app{
      height: 100%;
      overflow: hidden;
  }
  *{
      padding: 0;
      margin: 0;
  }
style>
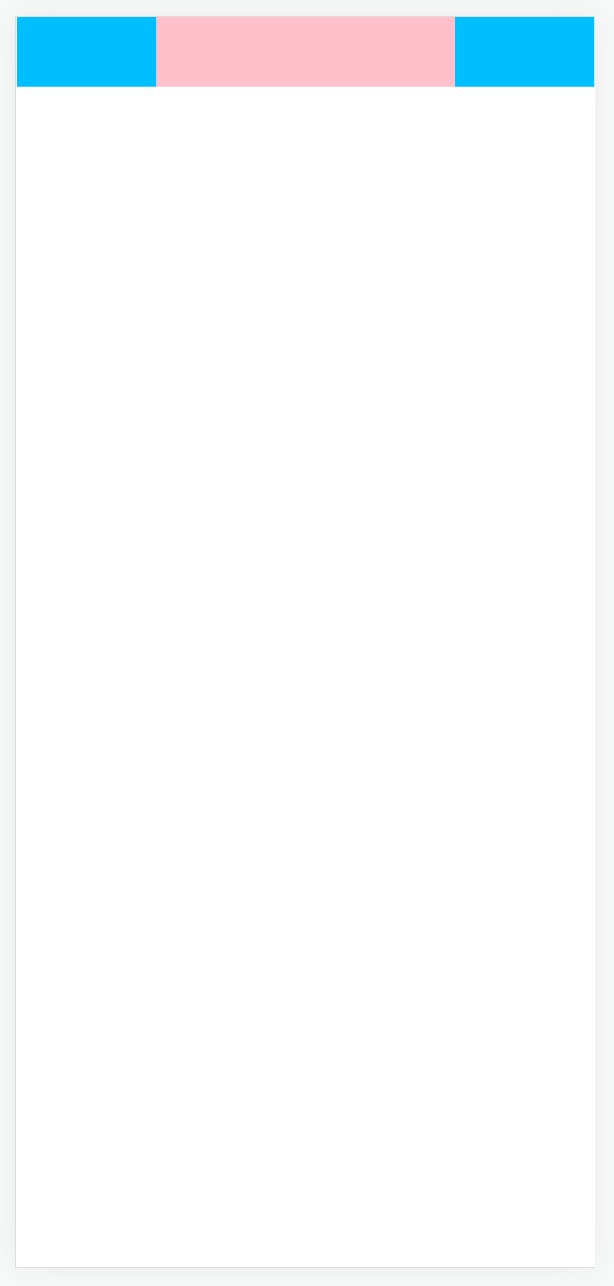
<template>
  <div class="header">
    <div>div>
    <div>div>
    <div>div>
  div>
template>

<style scoped lang="scss">
.header{
  width: 100%;
  height: 50px;
  line-height: 50px;
  display: flex;
  div:nth-child(1),div:nth-child(3){
    width: 100px;
    background-color: deepskyblue;
  }
  div:nth-child(2){
    flex: 1;
    background-color: pink;
  }
}
style>
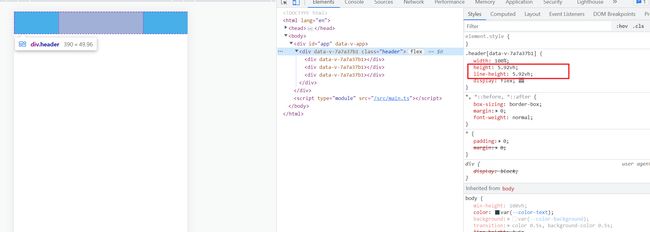
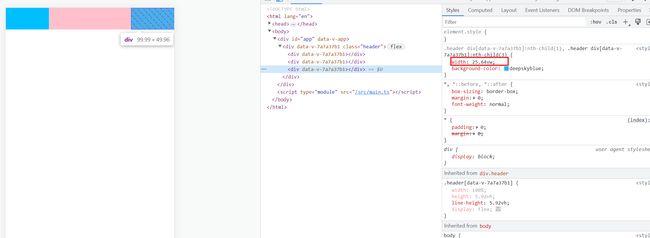
使用postCSS将px单位转成vh和vw
百分比是相对于父元素
vw和vh相对于视口
新建 plugins/PxToVwVh.ts
import {Plugin} from "postcss"

let Options = {
    defaultWidth: 390,
    defaultHeight: 844,
}
interface OptionsTypes {
    defaultWidth?:number,
    defaultHeight?:number,
}

export function PxToVwVh(options:OptionsTypes=Options):Plugin{
    let opt = Object.assign({}, options)
    return {
        postcssPlugin:"px-to-vw-vh",
        // 钩子函数
        Declaration(node){
            if(node.value.includes("px")){
                const num = parseFloat(node.value)
                if(node.prop.includes("width")){
                    node.value = `${((num / opt.defaultWidth) * 100).toFixed(2)}vw`
                }else if(node.prop.includes("height")){
                    node.value = `${((num / opt.defaultHeight) * 100).toFixed(2)}vh`
                }
            }
        }
    }
}
在 tsconfig.node.json 中引入
{
  "extends": "@tsconfig/node18/tsconfig.json",
  "include": [
    "vite.config.*",
    "vitest.config.*",
    "cypress.config.*",
    "nightwatch.conf.*",
    "playwright.config.*",
    "plugins/**/*"
  ],
  "compilerOptions": {
    "composite": true,
    "module": "ESNext",
    "moduleResolution": "Bundler",
    "types": ["node"],
    "noImplicitAny": false
  }
}
plugins/**/*在 vite.config.ts 中使用
import { fileURLToPath, URL } from 'node:url'

import { defineConfig } from 'vite'
import vue from '@vitejs/plugin-vue'
import {PxToVwVh} from "./plugins/PxToVwVh";

// https://vitejs.dev/config/
export default defineConfig({
  plugins: [
    vue(),
  ],
  css: {
    postcss: {
      plugins: [
        PxToVwVh()
      ]
    },
  },
  resolve: {
    alias: {
      '@': fileURLToPath(new URL('./src', import.meta.url))
    }
  }
})
我们通过编写插件,实现了将PX单位转换成相对于视口,这样保证了在不同尺寸的屏幕上都会有一个相同的展示布局
设置全局CSS变量
:root{
    --font-size:16px;
}
然后全局可以通过 var(–font-size) 使用
返回
H5适配
取消
点击按钮可以实现字体大小切换

官网:https://unocss.dev/
CSS原子化的优缺点
1.减少了css体积,提高了css复用
2.减少起名的复杂度
3.增加了记忆成本 将css拆分为原子之后,你势必要记住一些class才能书写,哪怕tailwindcss提供了完善的工具链,你写background,也要记住开头是bg
npm i -D unocss
配置插件
// vite.config.ts
import UnoCSS from 'unocss/vite'
import { defineConfig } from 'vite'

export default defineConfig({
  plugins: [
    UnoCSS(),
  ],
})
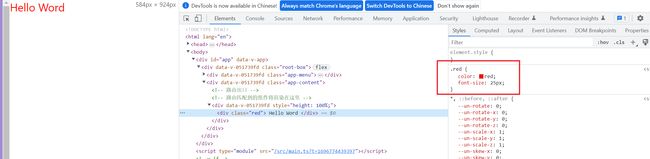
创建一个 uno.config.js 文件
// uno.config.js
import { defineConfig } from 'unocss'

export default defineConfig({
    // 自定义规则
    rules:[
        ["red",{ color:"red",'font-size':"25px" }]
    ]
})
在 main.ts 文件中添加
// main.ts
import 'virtual:uno.css'
直接在页面中使用类名即可
<div class="red">
  Hello Word
div>
rules: [
  [/^m-(\d+)$/, ([, d]) => ({ margin: `${Number(d) * 10}px` })],
  ['flex', { display: "flex" }]
]
使用
<div class="red m-10">
  Hello Word
div>

修改 uno.config.js
// uno.config.js
import { defineConfig,presetIcons,presetAttributify,presetUno } from 'unocss'

export default defineConfig({
    // 自定义规则
    rules:[
        [/^m-(\d+)$/, ([, d]) => ({ margin: `${Number(d) * 10}px` })],
        ["red",{ color:"red",'font-size':"25px" }],
    ],
    // 使用预设
    presets:[presetIcons(),presetAttributify(),presetUno()]
})
presetIcons 这个是图标
presetAttributify 这个是美化CSS
presetUno 预设(实验阶段)是一系列流行的原子化框架的 通用超集,包括了 Tailwind CSS,Windi CSS,Bootstrap,Tachyons 等。
例如,ml-3(Tailwind),ms-2(Bootstrap),ma4(Tachyons),mt-10px(Windi CSS)均会生效。
在官网中找到自己需要的图标:https://icones.js.org/
然后选中后安装

查看页面路径上的单词,然后安装
npm i -D @iconify-json/svg-spinners
点击某个要使用的图标,复制类名即可
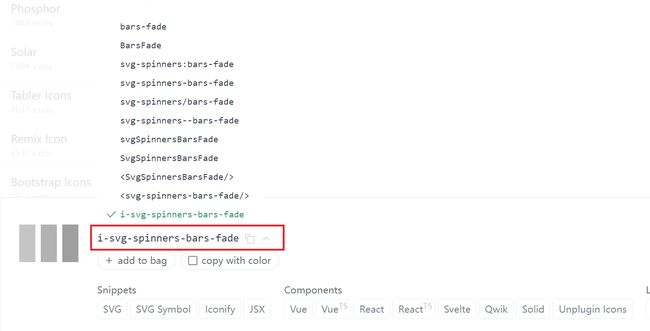
<div class="i-svg-spinners-bars-fade font-size-50px color-pink">div>

首先vue版本必须是3.3及以上版本
子组件
添加
-
{{item}}
父组件
| 函数名称 | 含义 |
|---|---|
| defineProps | 接收父组件传递过来的参数 |
| defineEmits | 定义事件名称 |
| defineOptions | 配置组件名称和其他信息 |
在项目根目录新建两个文件,分别表示开发环境配置、生成环境配置
注意:设置环境变量时必须以 VITE_ 开头,否则不生效
.env.development
# .env.development
VITE_API=http://localhost:8080
.env.production
# .env.production
VITE_API=/prod-api
修改 package.json 中的运行命令,在启动dev是设置mode是development,表示读取开发环境配置,名称可以自定义,但是要和上面新建的配置文件后缀名保持一致
"scripts": {
  "dev": "vite --mode development",
},
然后在 vue 文件中通过下面方式获取配置项
console.log(import.meta.env)
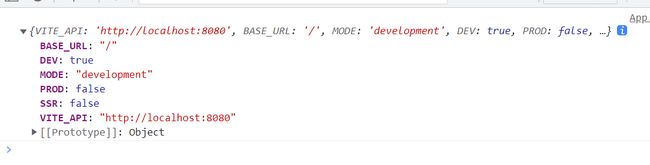
这里是开发环境,读取到的 VITE_API 是 http://localhost:8080
然后打包项目,再看一下打印结果

在 vite.config.ts 中获取环境变量时通过如下方式获取
import { defineConfig,loadEnv } from 'vite'


let {VITE_API} = loadEnv(process.env.NODE_ENV,process.cwd())

console.log(VITE_API)
控制台会打印出定义的环境变量

项目结构
webpack-vue
├── config
│   ├── webpack.dev.js
│   └── webpack.prod.js
├── src
│   ├── App.vue
│   └── Child.vue
├── index.html
├── main.js
├── package.json
└── pnpm-lock.yaml
package.json
{
  "name": "webpack-vue",
  "version": "1.0.0",
  "description": "",
  "main": "index.js",
  "scripts": {
    "test": "echo \"Error: no test specified\" && exit 1",
    "build": "webpack --config config/webpack.prod.js",
    "dev": "webpack serve --config config/webpack.dev.js"
  },
  "keywords": [],
  "author": "",
  "license": "ISC",
  "dependencies": {
    "@vue/compiler-sfc": "^3.3.4",
    "clean-webpack-plugin": "^4.0.0",
    "css-loader": "^6.8.1",
    "friendly-errors-webpack-plugin": "^1.7.0",
    "html-webpack-plugin": "^5.5.3",
    "less": "^4.2.0",
    "less-loader": "^11.1.3",
    "style-loader": "^3.3.3",
    "typescript": "^5.2.2",
    "vue": "^3.3.4",
    "vue-loader": "^17.3.0",
    "webpack": "^5.89.0",
    "webpack-cli": "^5.1.4",
    "webpack-dev-server": "^4.15.1"
  }
}
webpack.dev.js
const path = require("path")
const HtmlWebpackPlugin =  require("html-webpack-plugin");
const {CleanWebpackPlugin} = require("clean-webpack-plugin");
const {VueLoaderPlugin} = require("vue-loader");

module.exports = {
    mode:"development",
    entry: "./main.js",
    output: {
        filename: "js/[name].[contenthash:10].js",
        path: path.resolve(__dirname, "dist")
    },
    module: {
        rules: [
            {
                test:/\.vue$/,
                use: "vue-loader"
            },
            {
                test: /\.css$/, //解析css
                use: ["style-loader", "css-loader"],
            },
            {
                test:/\.less/,
                use: ["style-loader","css-loader", "less-loader"],
            }
        ]
    },
    resolve: {
        alias: {
            "@/": path.resolve(__dirname, './src') // 别名
        },
        extensions: ['.js', '.json', '.vue', '.ts', '.tsx'] //识别后缀
    },
    plugins: [
        new CleanWebpackPlugin(),
        new VueLoaderPlugin(),
       new HtmlWebpackPlugin({
           template: "./index.html",
       }),
    ],
    devServer: {
        port: 8088,
        open: true,
        host: "localhost",
        historyApiFallback: true, // 解决vue-router刷新404问题
        proxy: {
            "/api": {
                changeOrigin: true,
                pathRewrite: {
                    "^/api": ""
                }
            }
        }
    }
}
webpack.prod.js
const path = require("path")
const HtmlWebpackPlugin =  require("html-webpack-plugin");
const {CleanWebpackPlugin} = require("clean-webpack-plugin");
const {VueLoaderPlugin} = require("vue-loader");

module.exports = {
    mode:"production",
    entry: "./main.js",
    output: {
        filename: "js/[name].[contenthash:10].js",
        path: path.resolve(__dirname, "../dist")
    },
    module: {
        rules: [
            {
                test:/\.vue$/,
                use: "vue-loader"
            },
            {
                test: /\.css$/, //解析css
                use: ["style-loader", "css-loader"],
            },
            {
                test:/\.less/,
                use: ["style-loader","css-loader", "less-loader"],
            }
        ]
    },
    resolve: {
        alias: {
            "@": path.resolve(__dirname, './src') // 别名
        },
        extensions: ['.js', '.json', '.vue', '.ts', '.tsx'] //识别后缀
    },
    plugins: [
        new CleanWebpackPlugin(),
        new VueLoaderPlugin(),
       new HtmlWebpackPlugin({
           template: "./index.html",
       }),
    ],
}
vite.config.js 添加 build 配置项
import { fileURLToPath, URL } from 'node:url'

import { defineConfig,loadEnv } from 'vite'
import vue from '@vitejs/plugin-vue'
import vueJsx from '@vitejs/plugin-vue-jsx'
import AutoImport from 'unplugin-auto-import/vite'
import Components from 'unplugin-vue-components/vite'
import { ElementPlusResolver } from 'unplugin-vue-components/resolvers'
import unocss from 'unocss/vite'


let {VITE_API} = loadEnv(process.env.NODE_ENV,process.cwd())

console.log(VITE_API)

// https://vitejs.dev/config/
export default defineConfig({
  module:"es2022",
  plugins: [
    vue(),
    vueJsx(),
    AutoImport({
      resolvers: [ElementPlusResolver()],
      imports: ['vue', 'vue-router'],
      dts: 'src/auto-imports.d.ts'
    }),
    Components({
      resolvers: [ElementPlusResolver()],
    }),
    unocss(),
  ],
  resolve: {
    alias: {
      '@': fileURLToPath(new URL('./src', import.meta.url))
    }
  },
  css: {
    preprocessorOptions: {
      scss: {
        additionalData: "@import './src/layout_v2/css/bem.scss';"
      }
    }
  },
  build:{
    minify:"esbuild", // esbuild打包速度最快,terser 打包体积最小
    cssCodeSplit:true,// 拆分CSS文件
    chunkSizeWarningLimit:2000, // 单文件超过2000kb警告
    assetsInlineLimit:1024*10, // 静态资源文件低于10KB时自动转Base64
  }
})
npm install pinia
在 main.ts 中引入
import {createApp} from 'vue'
import {createPinia} from 'pinia'

export const app = createApp(App)
app.use(createPinia())

app.mount('#app')
userInfoStore.js
import {defineStore} from 'pinia'

export const useUserInfoStore = defineStore('userInfo', {
  state: () => {
    return {
      name: "李斯特",
      age: 18
    }
  },
  getters: {
    userMsg() {
      return this.name + '---' + this.age
    }
  },
  actions: {
    setName(newName) {
      console.log(this.name)
      this.name = newName
    }
  }
})
actions 中的函数也是支持异步的,this 指向指向的是 state 中返回的对象地址,所以可以通过this来获取到 state 中的属性值
vue文件中使用方法
- {{ userInfoStore.name }}
- {{ userInfoStore.age }}
- {{ userInfoStore.userMsg }}
change
import {useUserInfoStore} from "@/stores/userInfoStore";

const userInfoStore = useUserInfoStore()

const change = () => {
  userInfoStore.setName("张三丰")
}

// $reset 重置数据
const reset = () => {
  userInfoStore.$reset()
}

// $subscribe 监听数据变化
userInfoStore.$subscribe((mutation, state) =>{
  console.log(mutation, state)
})

// $onAction 监听 action 数据变化
userInfoStore.$onAction((action, state) =>{
  console.log(action, state)
})
安装
npm install pinia-plugin-persistedstate
配置
import {createApp} from 'vue'
import {createPinia} from 'pinia'
import PiniaPluginPersistedstate from "pinia-plugin-persistedstate"

export const app = createApp(App)
// 配置Pinia并设置持久化缓存
const Pinia = createPinia()
Pinia.use(PiniaPluginPersistedstate)

app.use(Pinia)
app.mount('#app')
然后在需要设置持久化缓存的pinia文件中开启persist配置
import {defineStore} from 'pinia'

export const useUserInfoStore = defineStore('userInfo', {
  state: () => {
    return {
      name: "李斯特",
      age: 18
    }
  },
  getters: {
    userMsg() {
      return this.name + '---' + this.age
    }
  },
  actions: {
    setName(newName) {
      console.log(this.name)
      this.name = newName
    }
  },
  // 开启数据持久化
  persist: true
})
效果展示
它原理是将pinia数据保存到 localStorage 缓存中,刷新页面后优先从缓存中读取,如果缓存中没有则再从代码中读取

npm install echarts
默认安装的是 5.x 版本
在这个版本中的引入方式必须是下面这种方法
import * as echarts from 'echarts'
首先要下载好地图数据 china.js
下载地址:https://szx-bucket1.oss-cn-hangzhou.aliyuncs.com/picgo/china.js,下载到本地使用即可
地图实现源码
cityPostion.js 文件代码,这个文件主要是通过省份名称获取经纬度
const positionArr = [
  { name: '北京', value: ['116.3979471', '39.9081726'] },
  { name: '上海', value: ['121.4692688', '31.2381763'] },
  { name: '天津', value: ['117.2523808', '39.1038561'] },
  { name: '重庆', value: ['106.548425', '29.5549144'] },
  { name: '河北', value: ['114.4897766', '38.0451279'] },
  { name: '山西', value: ['112.5223053', '37.8357424'] },
  { name: '辽宁', value: ['123.4116821', '41.7966156'] },
  { name: '吉林', value: ['125.3154297', '43.8925629'] },
  { name: '黑龙江', value: ['126.6433411', '45.7414932'] },
  { name: '浙江', value: ['120.1592484', '30.265995'] },
  { name: '福建', value: ['119.2978134', '26.0785904'] },
  { name: '山东', value: ['117.0056', '36.6670723'] },
  { name: '河南', value: ['113.6500473', '34.7570343'] },
  { name: '湖北', value: ['114.2919388', '30.5675144'] },
  { name: '湖南', value: ['112.9812698', '28.2008247'] },
  { name: '广东', value: ['113.2614288', '23.1189117'] },
  { name: '海南', value: ['110.3465118', '20.0317936'] },
  { name: '四川', value: ['104.0817566', '30.6610565'] },
  { name: '贵州', value: ['106.7113724', '26.5768738'] },
  { name: '云南', value: ['102.704567', '25.0438442'] },
  { name: '江西', value: ['115.8999176', '28.6759911'] },
  { name: '陕西', value: ['108.949028', '34.2616844'] },
  { name: '青海', value: ['101.7874527', '36.6094475'] },
  { name: '甘肃', value: ['103.7500534', '36.0680389'] },
  { name: '广西', value: ['108.3117676', '22.8065434'] },
  { name: '新疆', value: ['87.6061172', '43.7909393'] },
  { name: '内蒙古', value: ['111.6632996', '40.8209419'] },
  { name: '西藏', value: ['91.1320496', '29.657589'] },
  { name: '宁夏', value: ['106.2719421', '38.4680099'] },
  { name: '台湾', value: ['120.9581316', '23.8516062'] },
  { name: '香港', value: ['114.139452', '22.391577'] },
  { name: '澳门', value: ['113.5678411', '22.167654'] },
  { name: '安徽', value: ['117.2757034', '31.8632545'] },
  { name: '江苏', value: ['118.7727814', '32.0476151'] },
]

export function getCityPositionByName(name) {
  return positionArr.find(item => item.name === name)
}
npm install vue-router
安装完成后检查一下安装的版本是否是 4.x 版本,确保在 vue3 中可以使用
![]()
新建 router/index.js
import {createRouter,createWebHashHistory} from "vue-router"

const router = createRouter({
    // 定义路由模式:哈希模式
    history:createWebHashHistory(),
    routes:[
        {
            path:"/",
            component:()=>import("../views/home.vue")
        },
        {
            path:"/about",
            component:()=>import("../views/about.vue")
        },
        // 匹配404页面,当所有路径都匹配不到时,就跳转到404
        {
            path: "/:pathMatch(.*)",
            component: ()=>import("../views/404.vue"),
        },
    ]
})

// 导出路由
export default router
注册路由
main.js
import { createApp } from 'vue'
import App from './App.vue'
import router from "./router"

const app = createApp(App)

app.use(router)

app.mount('#app')
定义路由出口
App.vue
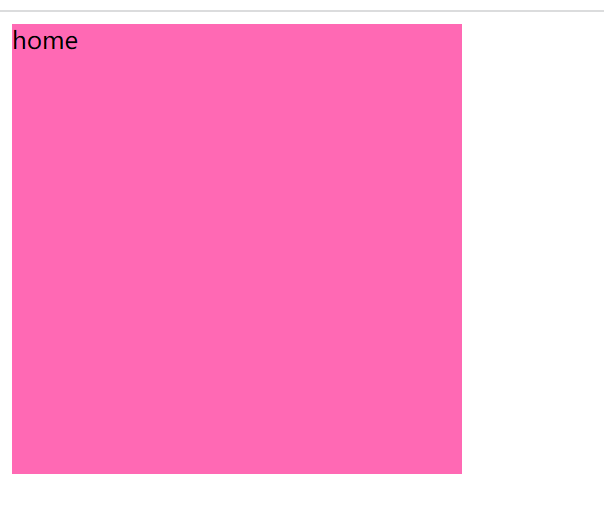
方式一:router-link
home
about
router-link是vue-router内置的组件,通过to属性定义要跳转的地址,属性值要和路由中的 path 相对应
方式二:通过js的方式跳转
定义两个按钮,点击按钮实现跳转
js方法
import {useRouter} from "vue-router"

const router = useRouter()

const toPath = (url) => {
  router.push({
    path:url
  })
}
定义两个按钮分别实现返回和前进
实现两个方法
const back = () => {
  // 方式一
  // router.go(-1)

  // 方式二
  router.back()
}

const advance = () => {
  router.go(1)
}
默认通过 push 的方式跳转会留下历史记录。如果不想留下历史记录,可以通过 replace 这种方法跳转。
例如在登录成功后就可以使用 replace 来跳转
在 router-link 标签上添加 replace 属性
<router-link replace class="mr-10" to="/">homerouter-link>
<router-link replace class="mr-10" to="/about">aboutrouter-link>
或者通过 router.replace
const toPath = (url) => {
  router.replace({
    path:url
  })
}
这种跳转方式不会留下历史记录
通过添加 query 参数来实现传参
const toPath = (url) => {
  router.push({
    path:url,
    query:{
      id:1,
      name:"李四",
    }
  })
}
通过如下方法接收路由参数
<template>
  我是详情页,接收到的路由参数是:{{route.query}}
template>

<script setup>
import {useRoute} from "vue-router";

const route = useRoute()

console.log(route.query)

script>
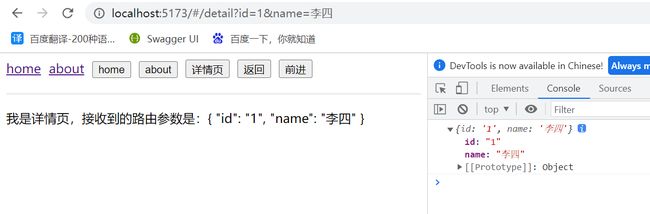
接收到到的是一个对象
我们也可以将参数作为页面URL的一部分
首先定义路由
注意:
这里要多定义一个参数:name,动态路由跳转时,需要通过 name 来跳转
使用 /dyDetail/:xxx/:xxx 这种方式定义动态参数名称
{
    path:"/dyDetail/:id/:name",
    name:"DyDetail",
    component:()=>import("../views/dyDetail.vue")
},
添加跳转方法
const toDyDetail = () => {
  router.push({
    // 这里使用name来跳转,name名称也要和路由中定义的name一致
    name:"DyDetail",
    // 这里传递的属性名必须和路由中定义的参数名一致
    params:{
      id:"1",
      name:"张三"
    }
  })
}
获取动态路由参数方法,通过 route.params 方法获取
<template>
  <div>id:{{route.params.id}}div>
  <div>name:{{route.params.name}}div>
template>

<script setup>
import {useRoute} from "vue-router";

const route = useRoute()

console.log(route.params)

script>
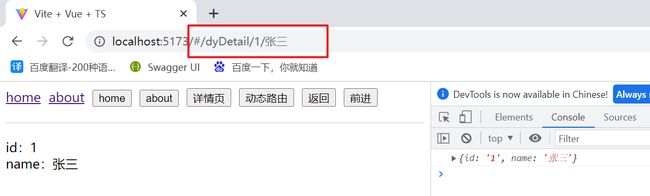
这里观察地址栏中的显示方式,直接将参数获取url的一部分来显示
定义路由
{
    path:"/system",
    component:()=>import("../views/system/index.vue"),
    children:[
        {
            path:"menu",
            component:()=>import("../views/system/menu.vue")
        },
        {
            path:"role",
            component:()=>import("../views/system/role.vue")
        },
    ]
}
system/index.vue
跳转到子路由时,需要加上父路由地址

{
    path:"/system",
    // 重定向到第一个子菜单
    redirect:"/system/menu",
    component:()=>import("../views/system/index.vue"),
    children:[
        {
            path:"menu",
            component:()=>import("../views/system/menu.vue")
        },
        {
            path:"role",
            component:()=>import("../views/system/role.vue")
        },
    ]
}
全局前置路由守卫
// 全局前置路由守卫
router.beforeResolve((to,from,next)=>{
    console.log(to) // 去哪个页面
    console.log(from) // 从哪个页面来
    next() // 下一步,必须要写,否则无法跳转
})
全局后置路由守卫
// 全局后置路由守卫
router.afterEach((to,from)=>{
    console.log(to) // 去哪个页面
    console.log(from) // 从哪个页面来
})
局部路由守卫
{
    path:"menu",
    component:()=>import("../views/system/menu.vue"),
    // 局部前置路由守卫
    beforeEnter:((to,from,next)=>{
        console.log(to,'局部前置路由守卫')
        console.log(from,'局部前置路由守卫')
        next()
    })
},
import {createRouter,createWebHashHistory} from "vue-router"

const router = createRouter({
    // 定义路由模式:哈希模式
    history:createWebHashHistory(),
    // 滚动模式
    scrollBehavior:(to,from,savedPosition)=>{
        if(savedPosition){
            // 如果有滚动的位置,则重新回到之前滚动的位置
            return savedPosition
        }else{
            // 否则页面滚动到顶部
            return {x:0,y:0}
        }
    },
    routes:[
        {
            path:"/",
            component:()=>import("../views/home.vue")
        },
        {
            path:"/about",
            component:()=>import("../views/about.vue")
        },
        {
            path:"/detail",
            component:()=>import("../views/detail.vue")
        },
    ]
})

// 导出路由
export default router
在后台管理系统中常见的场景,根据不同的角色,显示不同的菜单
编写方法,根据不同的账号名,返回不同的菜单
export function getDynamicRouting(name){
    return new Promise((resolve,reject)=>{
        // root角色登录
        if(name === "admin"){
            resolve([
                {
                    path:"/about",
                    component:"about.vue"
                },
                {
                    path:"/detail",
                    component:"detail.vue"
                },
                {
                    path:"/system",
                    redirect:"/system/menu",
                    component:"system/index.vue",
                    children:[
                        {
                            path:"menu",
                            component:"system/menu.vue",
                        },
                        {
                            path:"role",
                            component:"system/role.vue"
                        },
                    ],
                },
            ])
        }
        // 普通人员登录
        if(name === "tome"){
            resolve([
                {
                    path:"/about",
                    component:"about.vue"
                },
                {
                    path:"/detail",
                    component:"detail.vue"
                },
            ])
        }
    })
}
login.vue
登录成功后根据返回的路由信息,添加路由
<template>
  <div>
    <input placeholder="请输入账号" v-model="name"/>
    <input placeholder="请输入密码" type="password" v-model="pwd"/>
    <button @click="login">登录button>
  div>
template>

<script setup>
import {ref} from "vue";
import router from "../router"
import {getDynamicRouting} from "../../mock/mockRouter.js";

let name = ref("")
let pwd = ref("")

const login = () => {
  getDynamicRouting(name.value).then(routers=>{
     let dyRouter = setDyRouter(routers)
     // 只需要添加一级路由信息即可
     dyRouter.forEach(rootRouter=>{
       router.addRoute(rootRouter)
     })
  })
}

const setDyRouter = (routers,parentPath) => {
  routers.forEach(item=>{
    item.component = import(`../views/${item.component}`)
    if(!item.path.startsWith("/")){
      item.path = `${parentPath}/${item.path}`
    }
    if(item.children){
      setDyRouter(item.children,item.path)
    }
  })
  return routers
}
script>
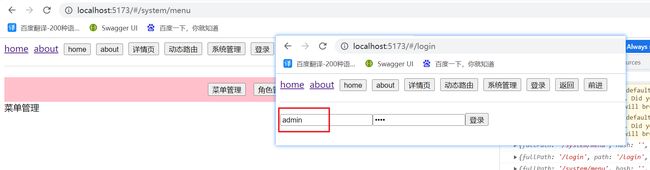
测试
首先用admin登录,然后点击菜单管理可以正常返回
然后刷新页面,使用tome登录,然后点击菜单管理发现是404
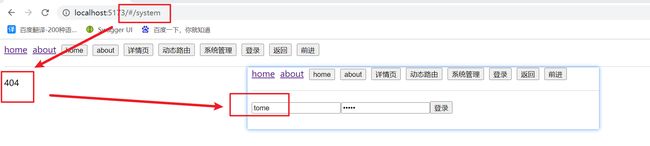
上面的例子只是简单的实现了一个动态路由,实际开发中,我们会根据接口返回的路由数据渲染不同的菜单来显示
npm install marked highlight.js --save
or
pnpm add marked highlight.js --save
import './assets/main.css'
import { createApp } from 'vue'
import { createPinia } from 'pinia'
import App from './App.vue'
import router from './router'
import highlight from 'highlight.js'
import "highlight.js/styles/atom-one-dark.css"

const app = createApp(App)

app.use(createPinia())
app.use(router)

app.directive("highlight",function(el){
  let blocks = el.querySelectorAll('pre code');
  blocks.forEach((block)=>{
    highlight.highlightBlock(block);
  })
})

app.mount('#app')
<div v-highlight v-html='content'>div>

<script>
import { marked } from 'marked'
const content = ref("")
// 需要使用marked方法吧语法转成html页面
content = marked(content)
script>